Device Portal User Guide
DEPRECATED FUNCTIONALITY
This functionality and solution template has been deprecated. Please contact Exosite support for information on alternative methods for attaining the features and functionality of the EveryCloud solution on Murano.
Device owners have access to the EveryCloud Device Portal which enables device registration, management, and managing the linkage connections to applications.
Claiming Devices
With the newly acquired IoT device, a digital ownership claiming registration needs to happen.
The OEM or hardware provider will provide one or all of the following:
- A QR code to the registration portal to claim the specific device
- The registration portal web address and the device claim code
- One or more specific applications that natively support these devices for claiming along with the claim code.
Note:
- A single
Claim Codecan potentially link many devices depending on the Manufacturer setup. - A Device can only be claimed once. To be claimed again it has to be
resetfirst.
ExoSense Claim Experience
If you are an ExoSense user, you can make the claim from the ExoSense user interface directly.
1. Add the PDaaS IoT Connector to the ExoSense instance
First make sure your ExoSense instance enables the owned Device IoT Connector. This steps requires to be the instance administrator with access to the Exosite account. If you don't know about it, contact your instance administrator.
2. Claim Device from ExoSense
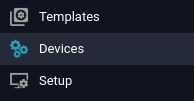
Navigate to the ExoSense devices management page from the left menu.
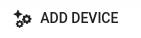
On the right side of the panel, you will find an ADD DEVICE button.
Which brings you to the claiming page.
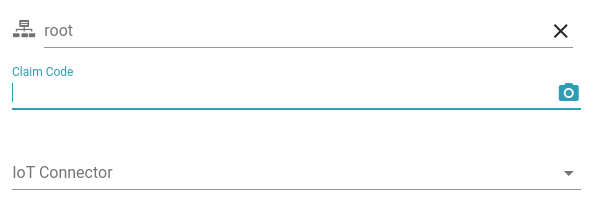
Enter the Claim Code or scan the QR Code. The device will then be added and ready to use.
For further information on next steps, use the ExoSense User Guide.
PDaaS Device Portal Claiming
Using a QR Code
If a QR Code is provided with your device, use your mobile device to scan the QR Code \(You might need to install a [QR code reader](https://play.google.com/store/apps/details?id=tw.mobileapp.qrcode.banner&hl=en)\) and the PDaaS device portal will prompt you to authenticate yourself via a login.
Once authenticated you will see the Device Claim form automatically filled up. If you already have an Applications setup you can assign the device to it at this stage. Click on CLAIM and you should see the device on owned devices list.
If the device doesn't appear or an error occur:
- Confirm the claim code is correct.
- Contact support from the link in the PDaaS device portal.
Using a Raw Code
With a Claim Code, you will need to navigate to the provided PDaaS Device Portal Url.
If a link is not provided with the Claim Code, you might need to find the link on the related item on the Exchange IoT-Marketplace.
Once logged-in on the portal, you will find the device management page with a CLAIM DEVICE button. Enter your code and press CLAIM. The device will show on your owned devices list.
If the device doesn't appear or an error occur:
- Confirm the claim code is correct.
- Contact support from the portal's support link.
Managing Devices
The Devices page of the PDaaS Device Portal displays all claimed devices. As well you can find information such as the last seen IpAddress and connection time.
Device Details
Clicking on one device will display the device details along with the current reported raw values.
Link Device to App
While you can assign the device to an App when claiming the device you can also re-assign the device to a different app or multiple apps from the Device details page using the ADD TO APP button.
If you don't have any application configured see the Managing Applications section.
Resetting Ownership
As well, the device details page provides a way to reset the device Ownership & linked applications. The claim code remains the same so you can use the same Claim Code once again later on. This also allows you to give ownership of the Device to another user.
Managing Applications
Compatible IoT Application can be linked to the owned Devices providing high level feature, reporting and control. IoT Connectors-as-a-Service provides different options to get your Device data on a dashboard.
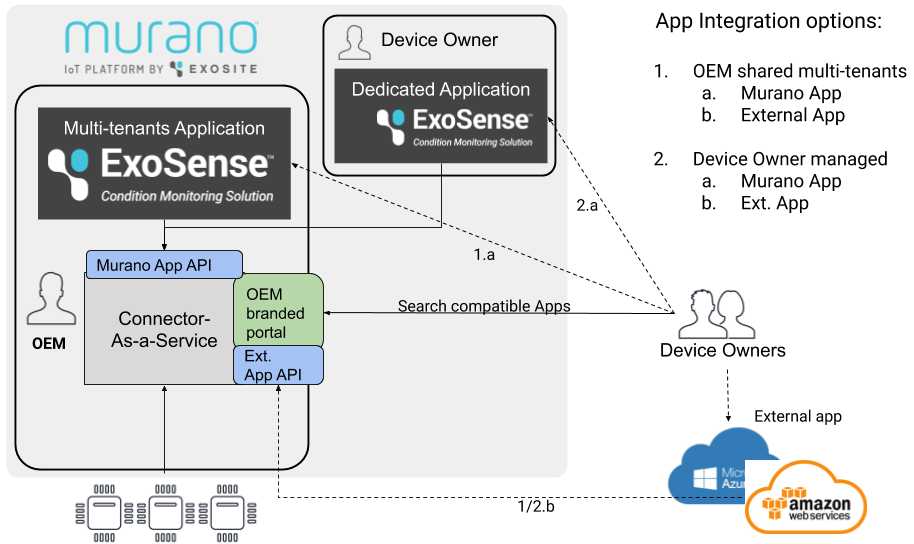
Managed Applications
PDaaS OEM providers have the opportunity to integrate multi-tenants applications to provide a plug-&-play experience to the Device Owners.
If enabled the device owners will see the provided application registration link from the PDaaS Device Portal under the Apps page. As application provider to promote an application as "managed" you will need to provide your application Id with the PDaaS publisher. See the PDaaS Management guide for more info.
Murano Application
Applications hosted on the Murano platform benefit for privileged performance and security as all traffic from the device connectivity to the Application is made internal to the platform.
Link IoT-Connector to the Application
To use a Murano Application \(Including ExoSense\) with your devices, you need to link the IoT-Connector to the ExoSense instance.
- Navigate to the Exchange IoT Marketplace, IoT Connector section.
- Find your product's connector
- On the detail page, click on the
ADD TO APPLICATIONbutton. - Select your Application instance and apply.
Now your application is eligible to connect to any Devices from this IoT-Connector.
Authenticate the Application
You now need to authenticate your App to the PDaaS Device Portal account.
- Navigate to the Murano Application management page. If you don't have access, contact your administrator.
- Under
Servicesfind theIoT-Connector - On the settings page, a link to the
IoT-Connector Portalis available with an authentication token - Follow the link, if not already: login
- The Murano App will display on your App list
Build Compatible Murano Application
If you want to develop your IoT user experience from scratch, please use the Murano development documentation.
Any custom Murano Application is able to interact with Device claimed in the PDaaS Device Portal.
External Applications
The Device Portal exposes an Application API enabling the integration of any HTTP compatible application on the Internet.
Forward Device Data
To forward device Data to External application an HTTPS callback URL needs to be defined in the Apps settings.
Note: The application still need to be able to process the provided data structure as documented on the Device Portal API Documentation.
Once a device is sending data, the Apps Details page will display the success for failure of the callback.
Tips: An easy way to trouble-shoot your Application connectivity is to use an account on https://requestbin.com and setup your Endpoint as follow.
``HTTPS Callback URL: https://
Authentication
To authenticate request to the callback endpoint callback request will fill a 'Secret' string in the standard Authorization header. The 'Secret' is generated automatically and you will be prompted to copy it during App creation. IMPORTANT: You cannot access the 'Secret' value any so save it in a safe place.
You can also input your own 'Secret' value in the App details page instead of using the generated value.
Following options for the header formatting are supported to pass the 'Secret':
Basic- Format:Basic <Base64(<App Id>:<Secret>)>Token- Format:[<prefix> ]<secret>
Device Portal API
External applications can also actively interact with Devices such as listing devices, fetching values and sending commands.
For this purpose a default secure Application API is available. While the standard API is common to all Connector-as-a-Service each connector can extent the API. So refer to the API menu tab from the PDaaS Device Portal which provides an API documentation for the details of the endpoints. Which is typically available under https://<Iot portal sub domain>.apps.exosite.io/docs.
Authentication
The Device API supports a Basic authentication as follow:
Authorization: Basic <Base64(<App Id>:<Secret>)>
AWS Integration Example
To go further, see a full example to Connect an AWS Lambda Application.