ExoEdge Overview
ExoEdge is a python client developed and maintained to be used with [ExoSense][exosense], Exosite's Industrial IoT Solution . ExoSense provides configuration objects that conform to data schemas. ExoEdge interprets these schema-driven objects and configures industrial IoT gateways to give their data to ExoSense according to schema. ExoEdge runs on most linux-based platforms.
ExoEdge can be installed using Pip and is hosted at: https://pypi.org/project/exoedge/
Requirements
ExoEdge is a python client developed to run on an industrial computer. Sometimes referred to as 'Gateway' or Edge devices.
Hardware
| Minimum | Recommended | |
|---|---|---|
| CPU | 400MHz Processor | 1GHz Processor |
| RAM | 256MB RAM | 1GB RAM |
Software
Hint
In most cases, having a linux edge computer (gateway) is enough as long as the Python requirements are met. ExoEdge is pure-python, which means there is no need for gcc or python-dev in order to install and run it.
| OS | Linux, (Windows - Contact Support) |
| Python | Python 3.5, 3.6, 3.7 |
Exosite Murano IoT Connector
ExoEdge is built to communicate to the Murano IoT Platform using Murano's IoT Connector device API (both HTTP and MQTT protocols are supported). ExoEdge also is designed to use the ExoSense device interface schema and data type schema. You must have access to an Exosite account with an IoT Connector. By default ExoEdge will use HTTP device API protocol.
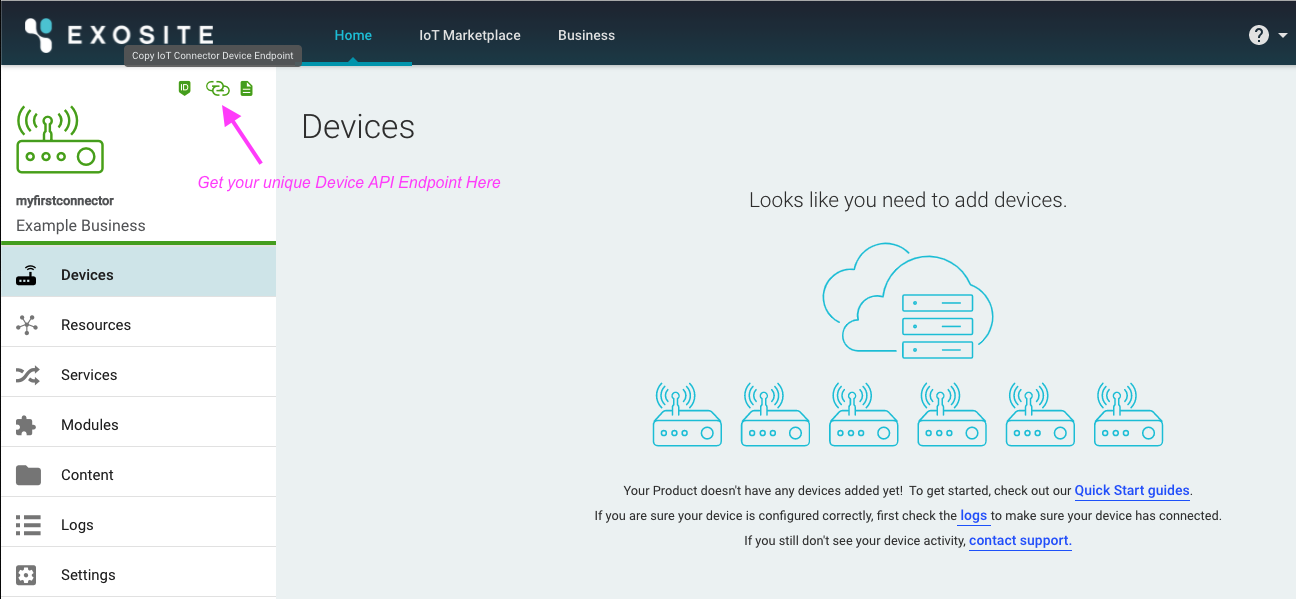
Unique IoT Connector FQDN (Device API Endpoint)
In the steps below, you will need your unique IoT Connector domain, which can be found back in the IoT Connector management view. Make sure to not include any following / characters. IoT Connectors are designed to support many devices (a product line). This unique IoT Connector product host endpoint can therefore be used by each device, which themselves have a unique device identifier.
Format:
https://<iot_connector_fqdn>
Getting Started
ExoEdge can be run on any computer meeting the requirements above. Many off-the-shelf industrial computers and gateways can run ExoEdge - see Exosite's documentation section for documented Hardware integrations. A Raspberry Pi tutorial that covers all steps in detil to install, connect, and use with ExoSense is available for proof of concepts and learning.
Install ExoEdge
Make sure the computer / gateway is connected to the internet before installing ExoEdge.
python3
ExoEdge requires python3. Installation and commands noted below should assume the use of python3 and pip3 (Python3 package manager).
Recommendations / Troubleshooting
The following commands can be used to update your system, and ensure python3 and pip3 are installed and updated. Experience with shell commands and Python is assumed to use ExoEdge.
sudo apt-get update
sudo apt-get upgrade
sudo apt-get install build-essential python-dev
sudo apt install python3-pip
Installing ExoEdge uses pip3, run the following command. (Installing source applications for ExoEdge follows the same process)
pip3 install exoedge
Start Reporting
Once ExoEdge is installed, it must be started with some variant of the following edged command (pronounced edge-dee, as in 'edge daemon').
The ExoEdge INI file holds the unique device identifier and host endpoint url for the Murano IoT Connector.
# edged.ini
[device]
murano_host = <MURANO_IOT_CONNECTOR_HOST_ENDPOINT>
murano_id = <DEVICE_UNIQUE_ID>
edged -i edged.ini go
Simplified start command
An alternative way to get started without having to precreate the .ini file is to include the host URL in the edged go command as follows:
On your Pi, run the following command to start ExoEdge up, where:
<DEVICE_ID>is a unique identifier for the device. By default in Settings for your IoT Connector the "Allow devices to register their own identity" setting is enabled. If it is disabled, you will need to add (whitelist) the device identifier first.<ENDPOINT>is your unique IoT Connector FQDN (Device API Endpiont) (e.g. https://12345abcd1234.m2.exosite.io)
edged -s <DEVICE_ID> -H <ENDPOINT> -i <DEVICE_ID>.ini go
edged -s 0001 -H https://u4t4w6izz5es0320.m2.exosite.io -i 0001.ini go
Your device is now provisioned and connected to the IoT Connector. You should see it now in the IoT Connector's devices list.
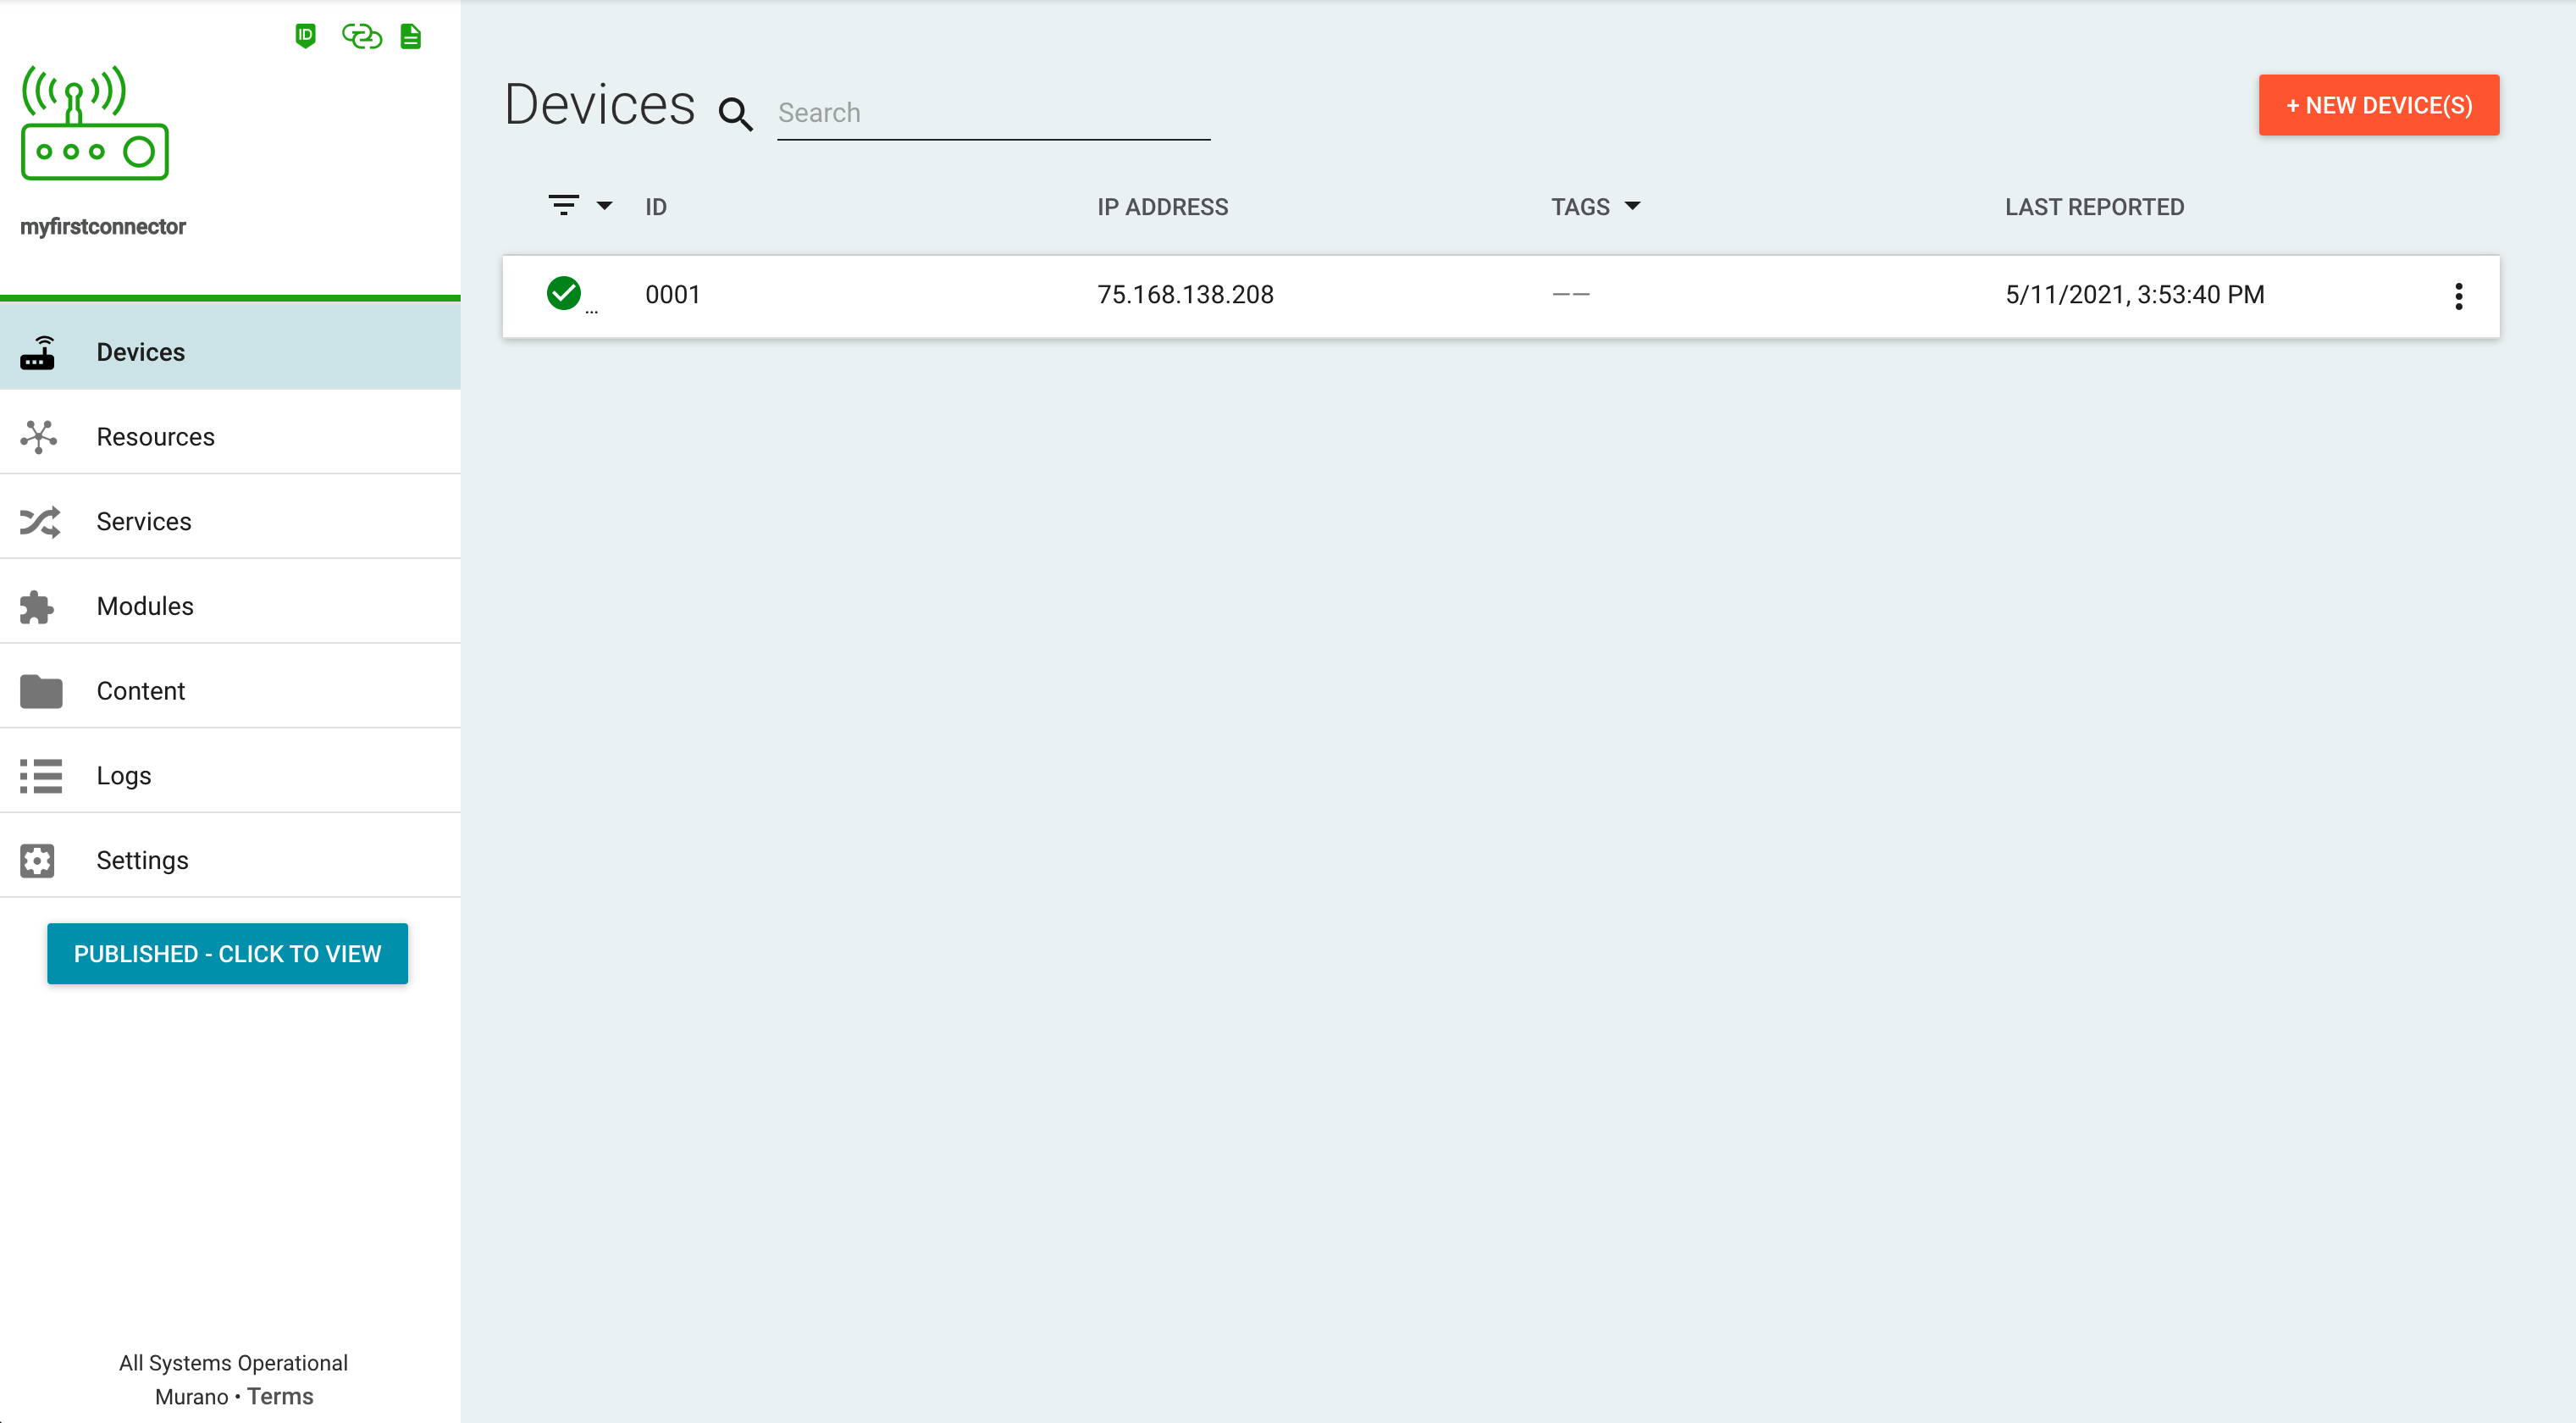
The edged command has many options (run edged --help for more information), but must be running in order for data to be reported to ExoSense.
Upgrades
To upgrade ExoEdge, the following command should be used:
pip install exoedge --upgrade
Terminology
Terms specific to ExoEdge.
| Term | Description |
|---|---|
| source | ExoEdge has two primary functions, one is to communicate data to the IoT Platform in the proper data schema. The second is to interface with sources, such as a Modbus RTU source, that properly interacts with the hardware interface / protocol. ExoEdge handles routing this data from the source up to the platform. Sources |
| watch | The term "watch" was coined so that a edged can specify a set of Murano resources (e.g. config_io, data_out, etc.) and be notified of any cloud-side changes to the resource. The reason the term "publish" or "poll" or "read" isn't used in edged is because edged is agnostic with respect to the transport protocol with Murano \(i.e. HTTPS or MQTT\). |
| tell | Similar to the term "watch", the term "tell" is coined so that edged can put data into an outbound queue and not care the transport protocol in use. |