Raspberry Pi and ExoSense
This tutorial will walk through the steps to set up a Raspberry Pi with ExoEdge, connect it to an IoT Connector on Exosite's Murano Platform, and use this data with the ExoSense condition monitoring application.
Prerequisites
An Exosite account If you do not have an Exosite account already, you will need access to an account that has ExoSense deployed. Getting Started: Sign-up and Deploy ExoSense
A Raspberry Pi This guide will walk through the basic steps to install ExoEdge and set up configuration of the Raspberry Pi. Users are expected to have some background and experience with the Raspberry Pi and Python programming.
Set-up an IoT Connector
For the Raspberry Pi to send data to Exosite's platform (as with any IoT connected device), an IoT Connector in your Exosite account is required, which provides the ability for devices to send data to your unique API URL using the Device API. Data flows from IoT Connector's to the ExoSense application.
IoT Connectors
The use of an IoT Connector is a requirememnt no matter if you are using a Raspberry Pi or any other connected hardware. The IoT Connector provides a unique domain (API Endpoint) for the device to provision and communicate with. This IoT data is then available for the ExoSense condition monitoring application.
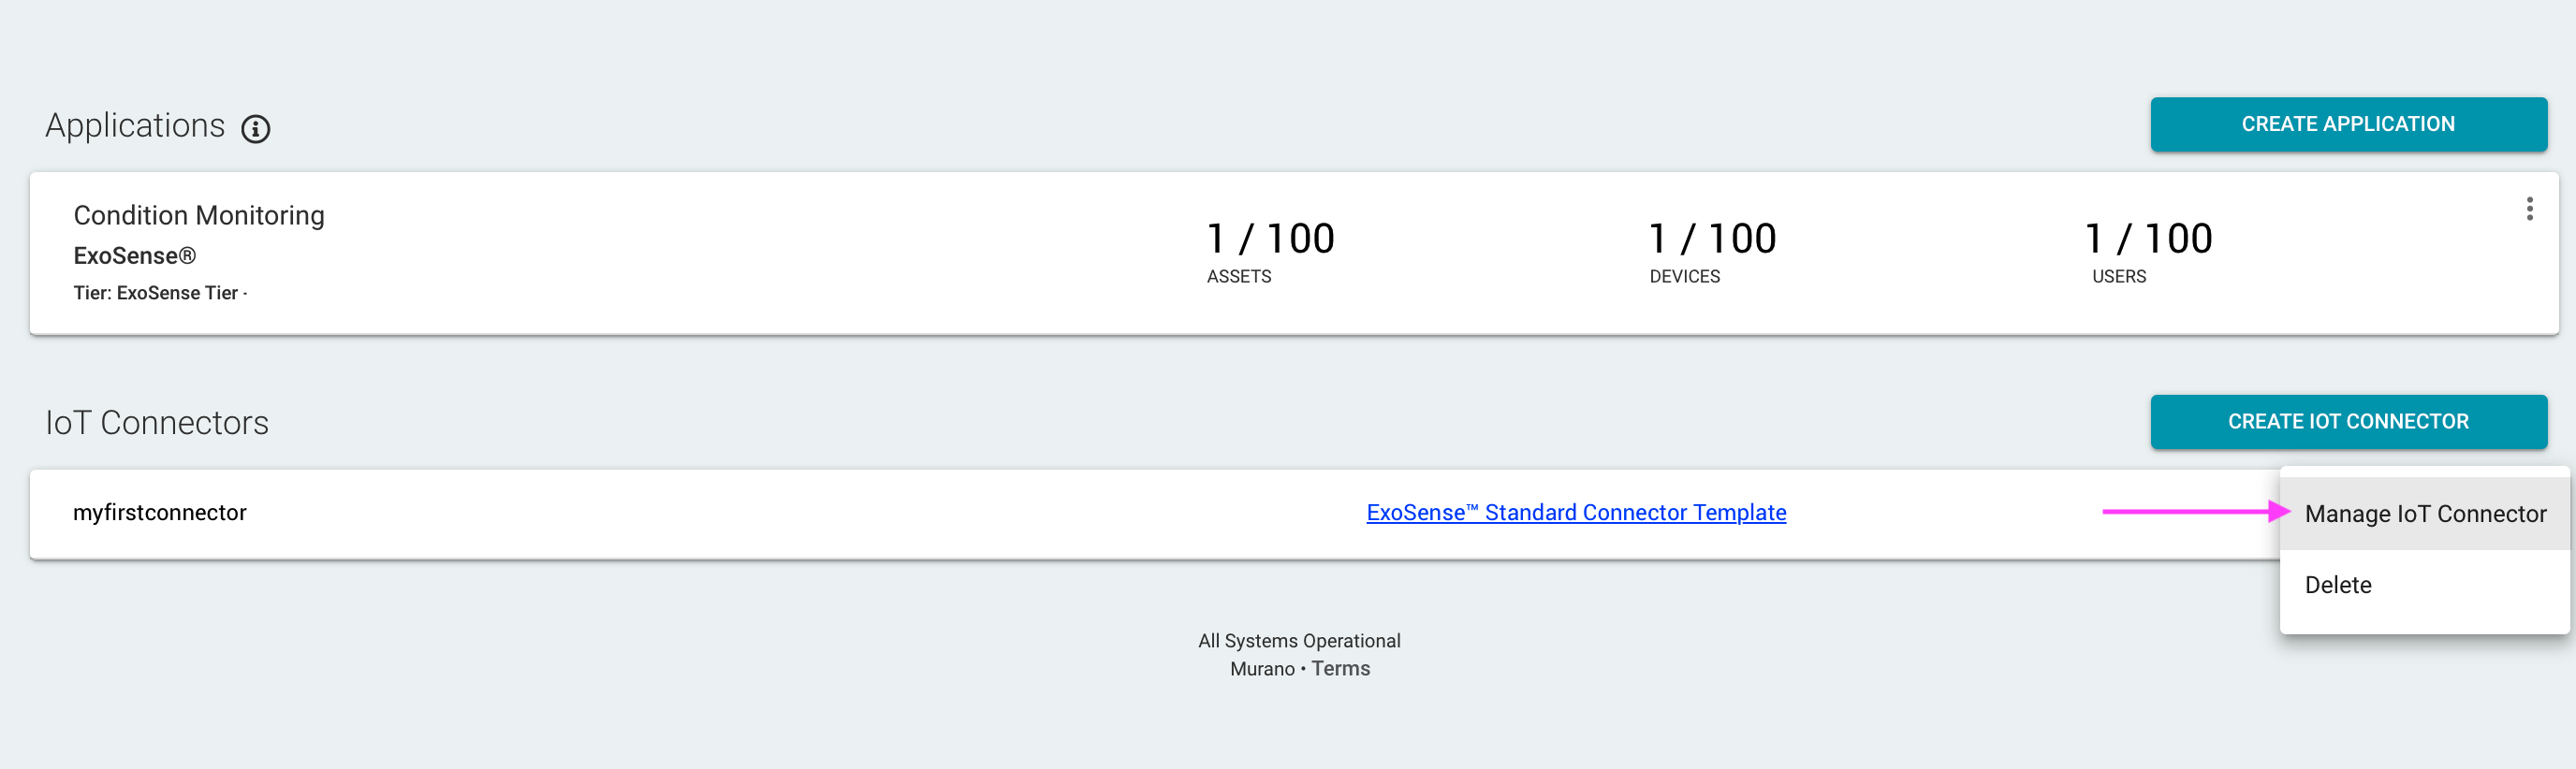
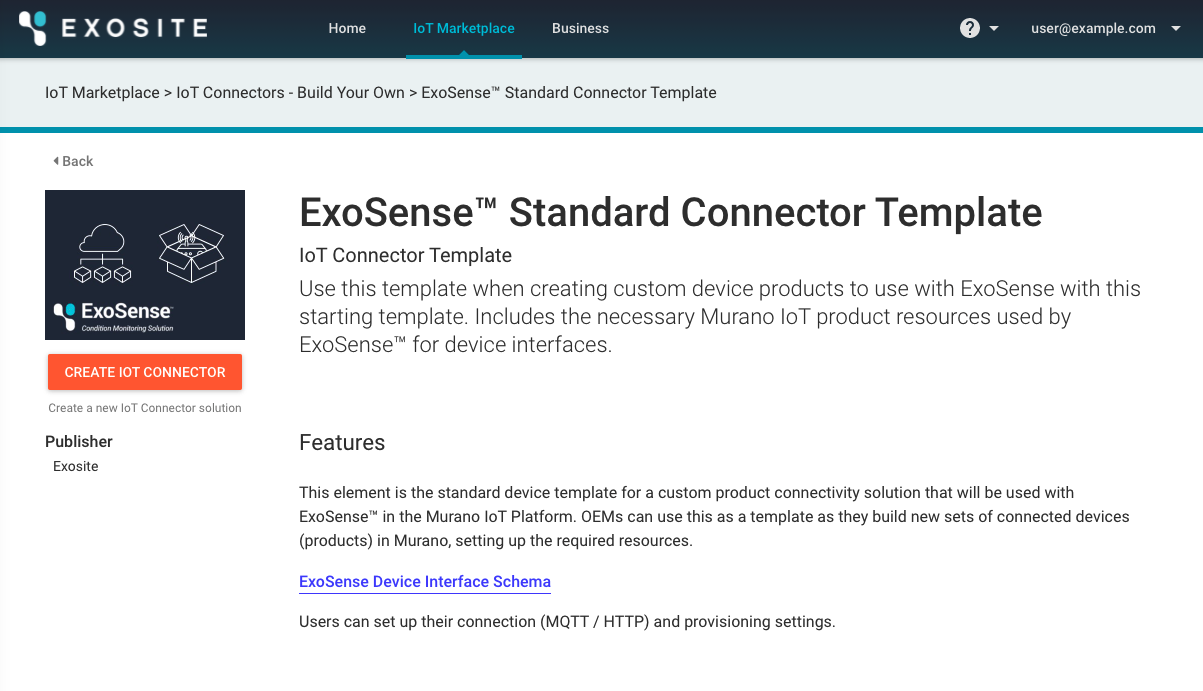
If your account does not yet have a standard IoT Connector added, you can add one from the marketplace. Click Add IoT Connector or go to the marketplace directly and locate the ExoSense™️ Standard Connector Template element. Use the CREATE IOT CONNECTOR button from that elementand pick a name - for example 'myfirstconnector'.
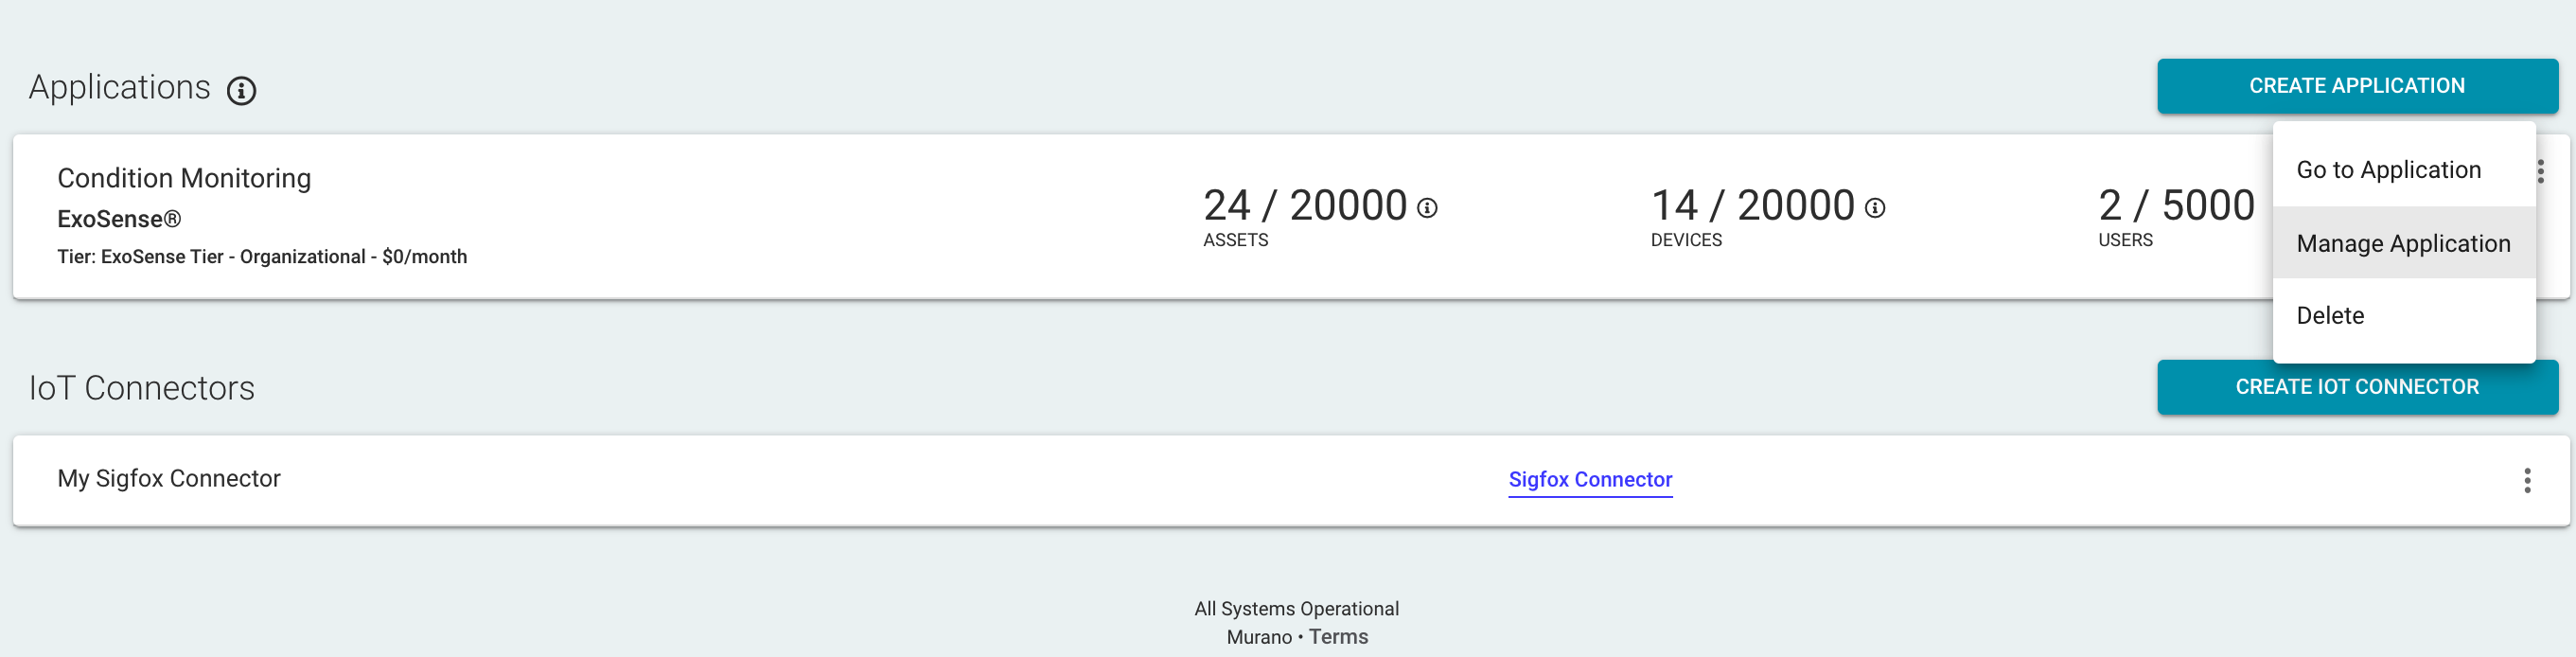
This will create a new IoT Connector in your account. Use the menu on the right to manage your new IoT Connector
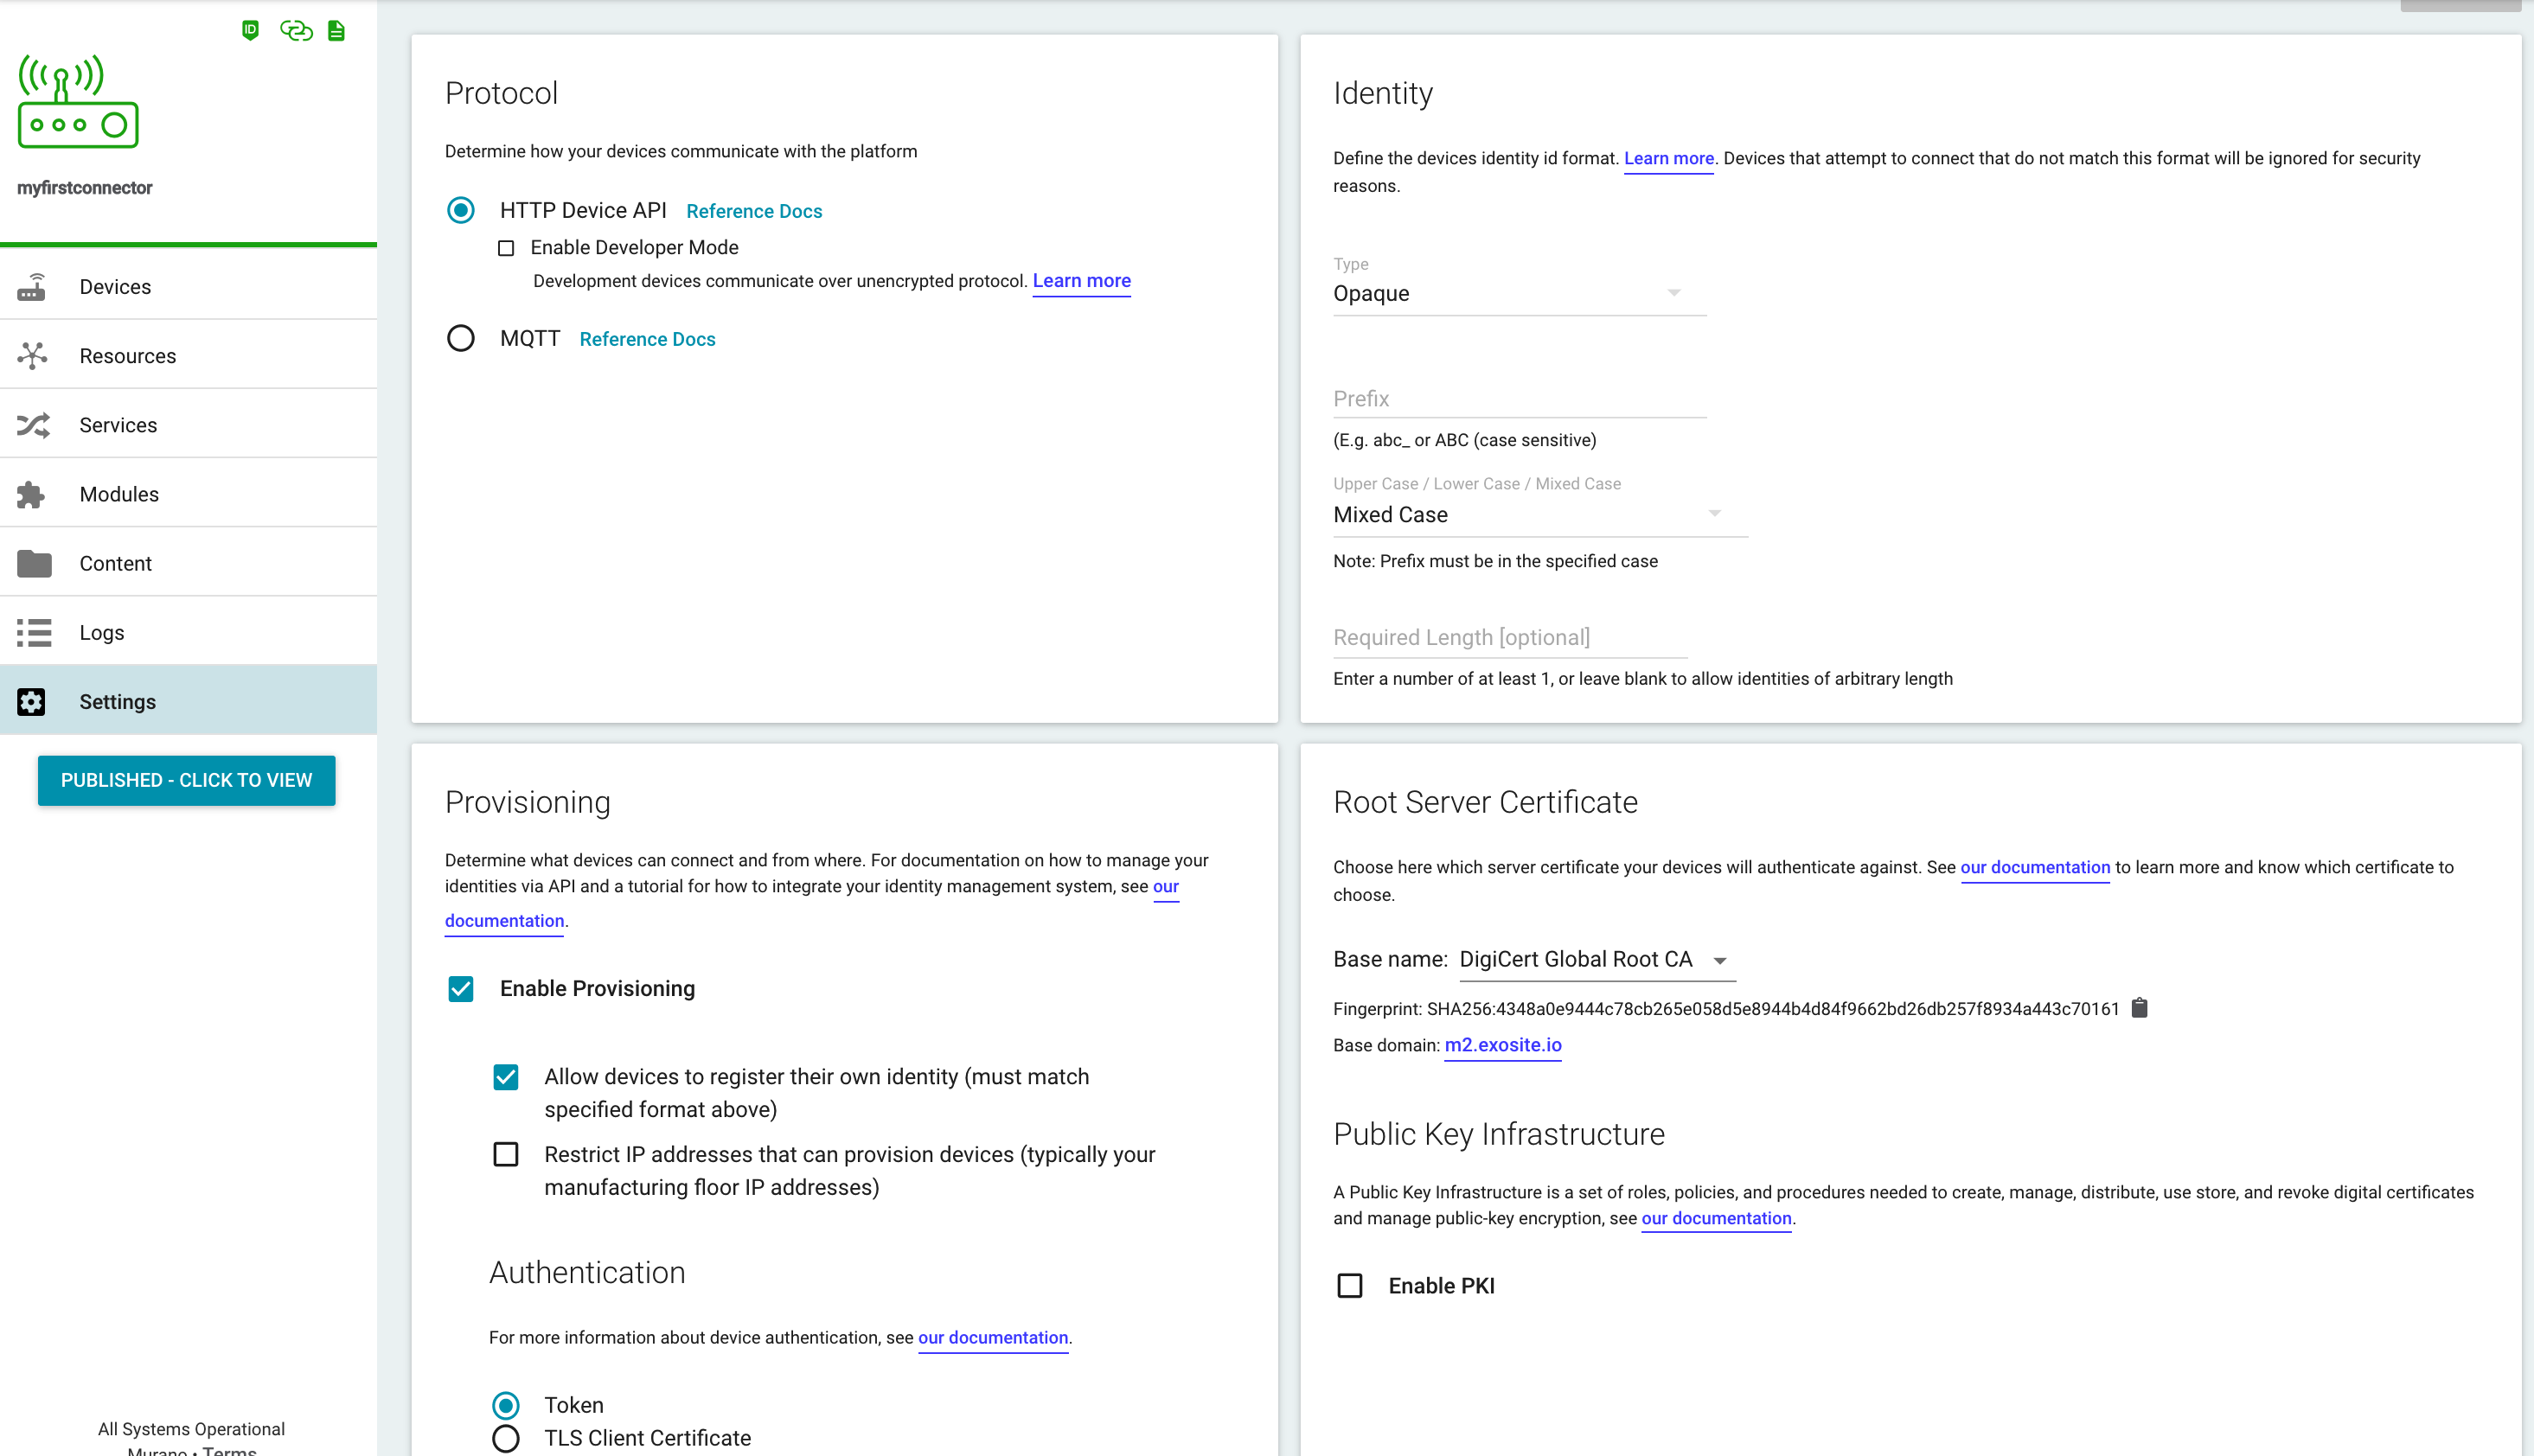
IoT Connector Settings
ExoEdge as documented in this guide will work with the default setting for HTTP protocol (although ExoEdge can also be configured to use MQTT) and to provision with a token. Any changes to the default setting are not covered within this guide. Check out the IoT Connector section of our documnetation.
Link the IoT Connector to ExoSense
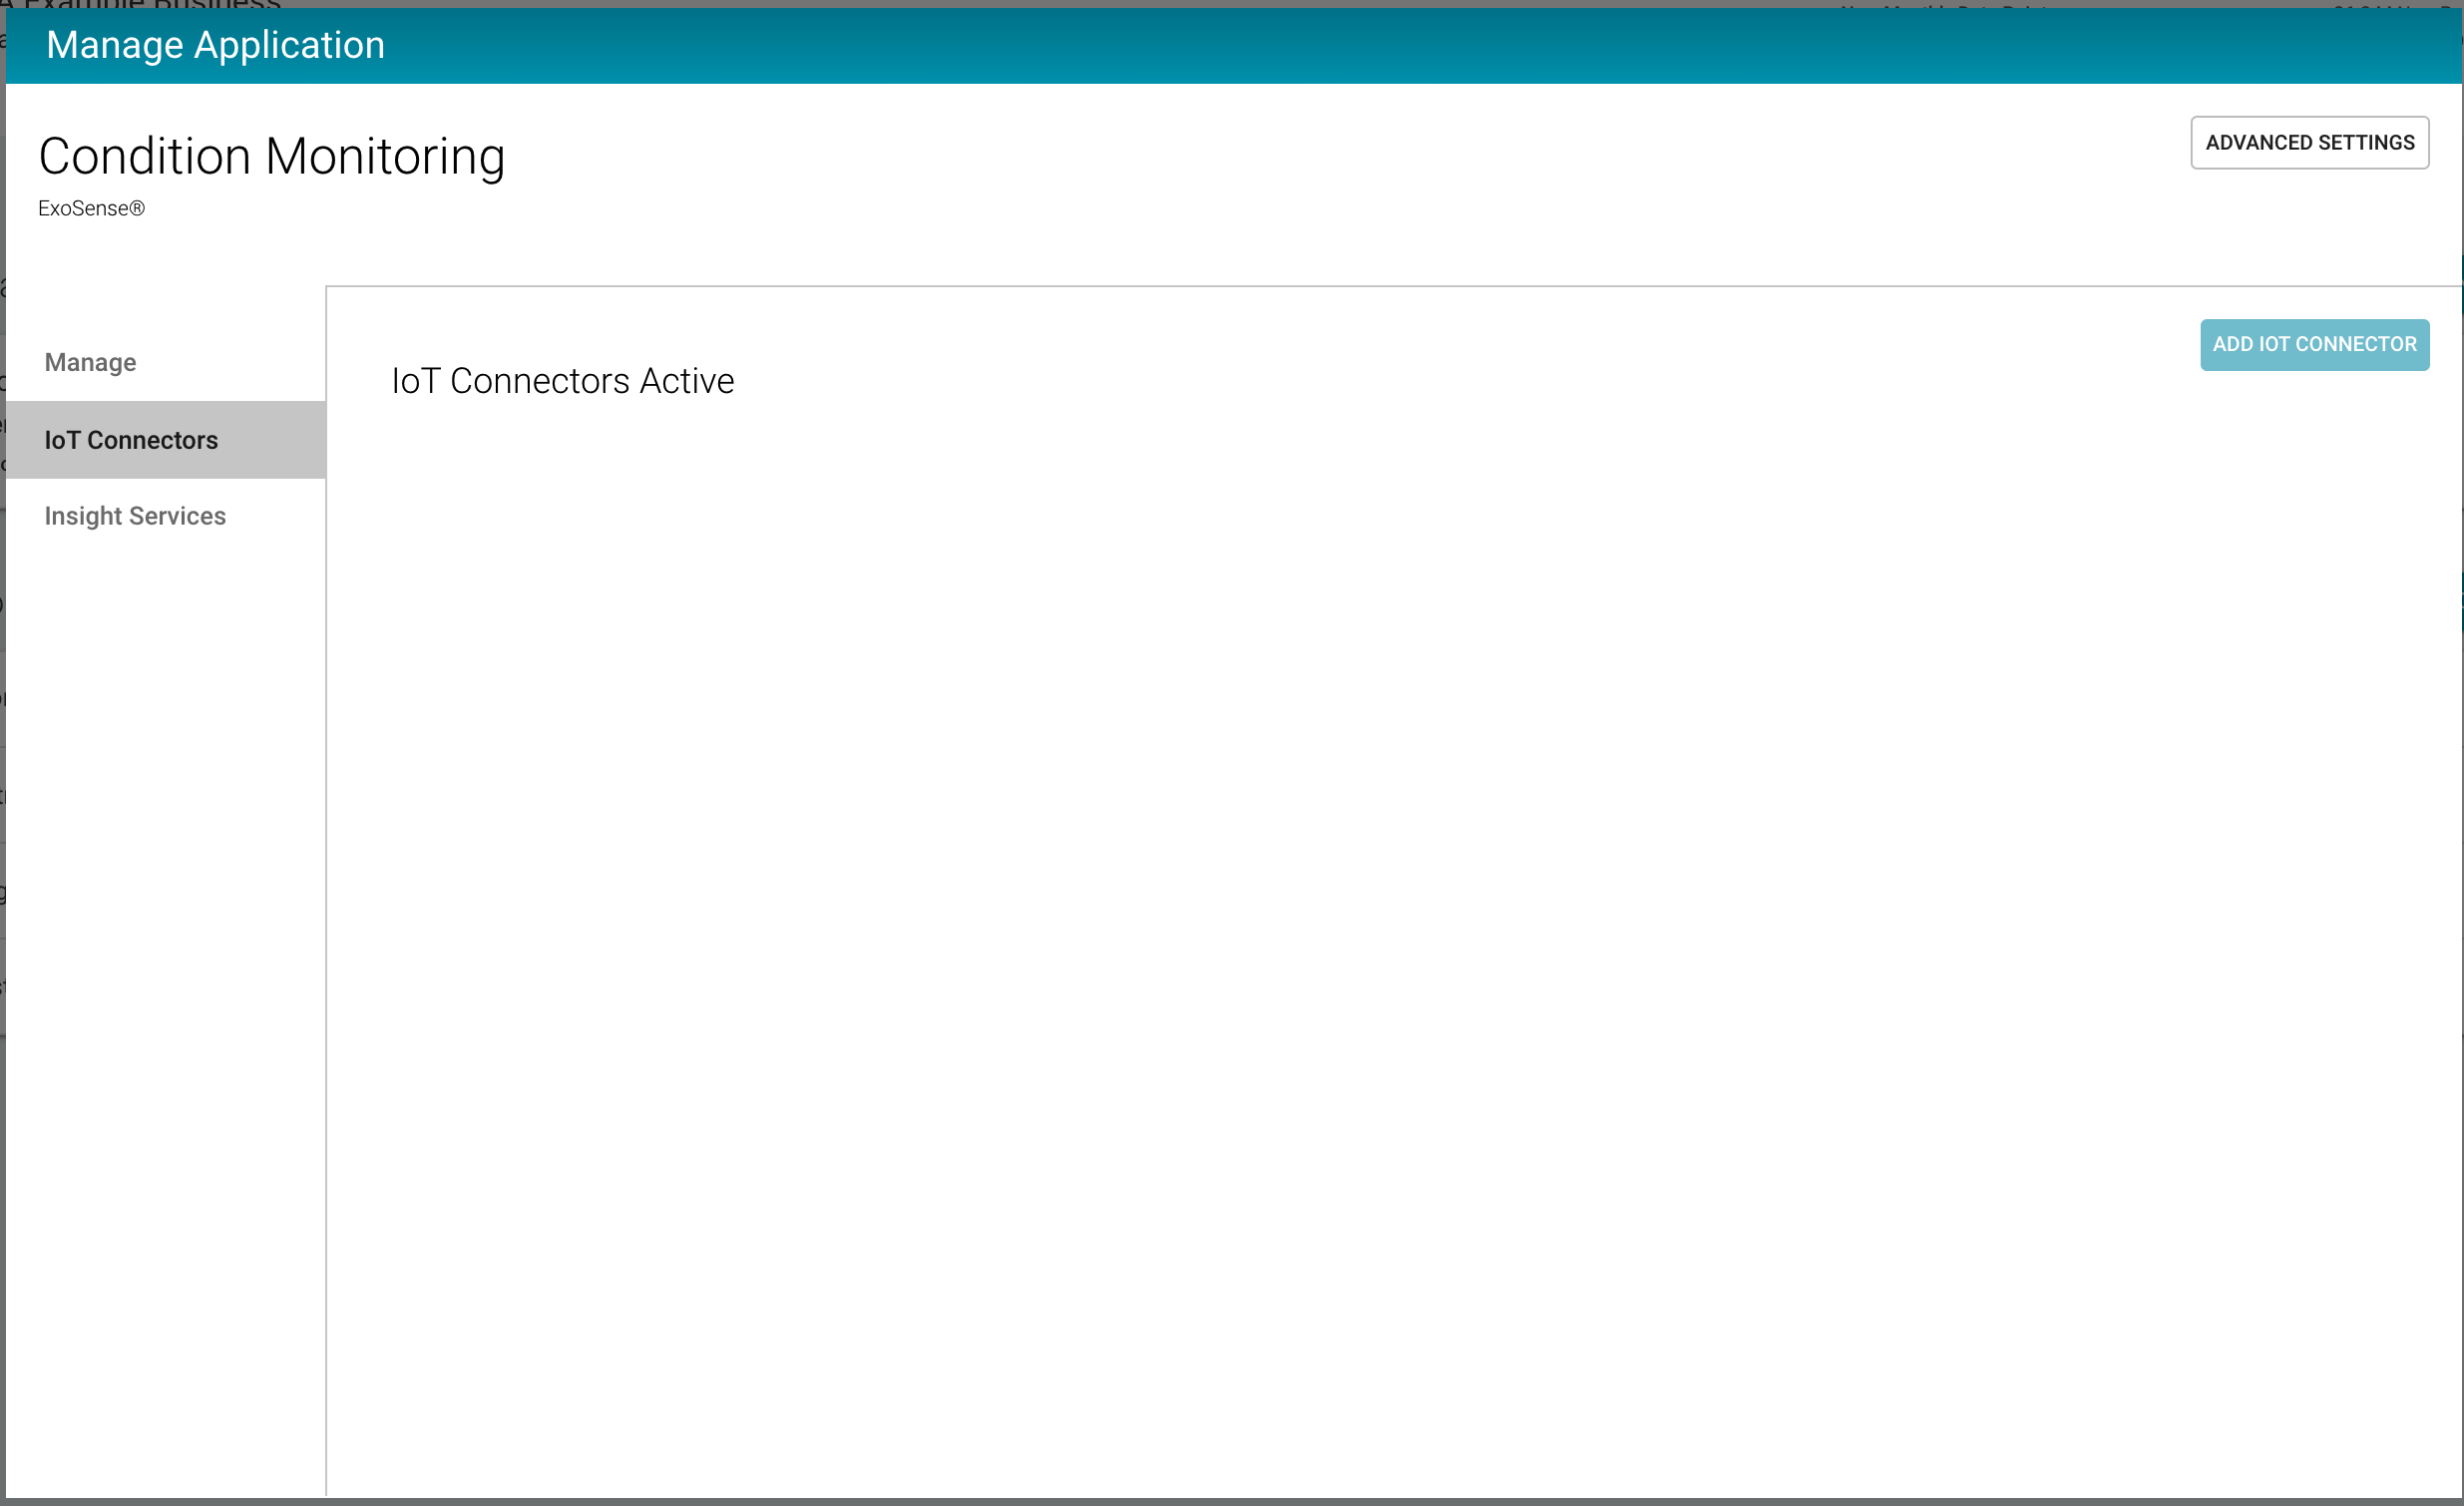
When creating a new IoT Connector, it needs to be linked to your ExoSense application. Use the Manage Application option from the more menu for your ExoSense instance in your account.
Using the IoT Connectors tab, click on ADD IOT CONNECTOR and add your specific connector.
Setup ExoEdge on your Pi
Configure the Raspberry Pi
- When using Raspberry Pi, the recommended OS is Raspbian LITE
- Make sure your Raspberry Pi is on and connected to the Internet
- Make sure your Raspberry Pi will allow for SSH connection
SSH connection configuration
If it is not enabled, or you are unsure, configure using raspi-config
sudo raspi-config
- Select 'Interfacing Options'
- Select 'SSH'
- Enable SSH
Update the system and install pip
python3
ExoEdge requires python3. Installation and commands noted below should assume the use of python3.
Run the following commands to update your Pi and install pip3. Note: Python3 and Pip3 may be installed already
sudo apt-get update
sudo apt-get upgrade
sudo apt install python3-pip
Install ExoEdge
Use the following commands to install ExoEdge and the ExoEdge's simulator source.
pip3 install exoedge
pip3 install exoedge_simulator
Troubleshooting
While installing ExoEdge, you may need to add the install directory to your path.
export PATH="$HOME/.local/bin:$PATH"
if these commands don't work, try running with sudo or --user flag although running with sudo is generally not recommended
if there is an error regarding psutil, run:
sudo apt-get install build-essential python-dev
Starting up ExoEdge
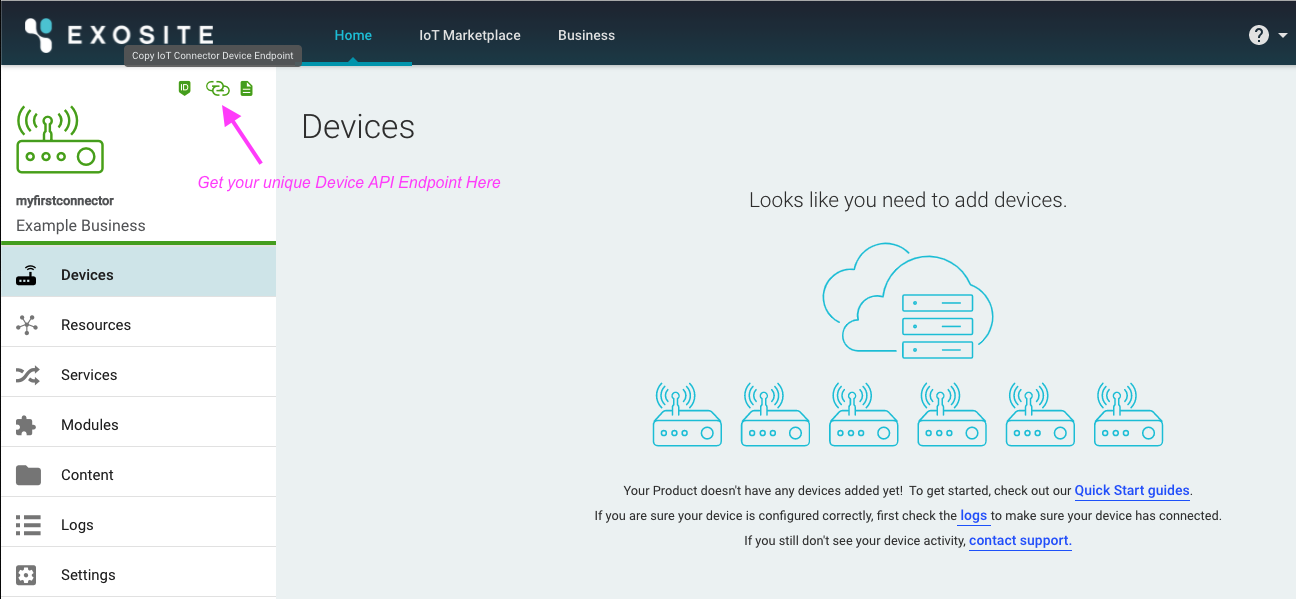
Unique Device FQDN (API Endpiont)
In the steps below, you will need your unique IoT Connector domain, which can be found back in the IoT Connector management view. Make sure to not include any following / characters. Format:
https://<iot_connector_fqdn>
On your Pi, run the following command to start ExoEdge up, where:
<DEVICE_ID>is a unique identifier for the device. By default in Settings for your IoT Connector the "Allow devices to register their own identity" setting is enabled. If it is disabled, you will need to add (whitelist) the device identifier first.<ENDPOINT>is your unique IoT Connector FQDN (Device API Endpiont) (e.g. https://12345abcd1234.m2.exosite.io)
edged -s <DEVICE_ID> -H <ENDPOINT> -i <DEVICE_ID>.ini go
Example
edged -s 0001 -H https://u4t4w6izz5es0320.m2.exosite.io -i 0001.ini go
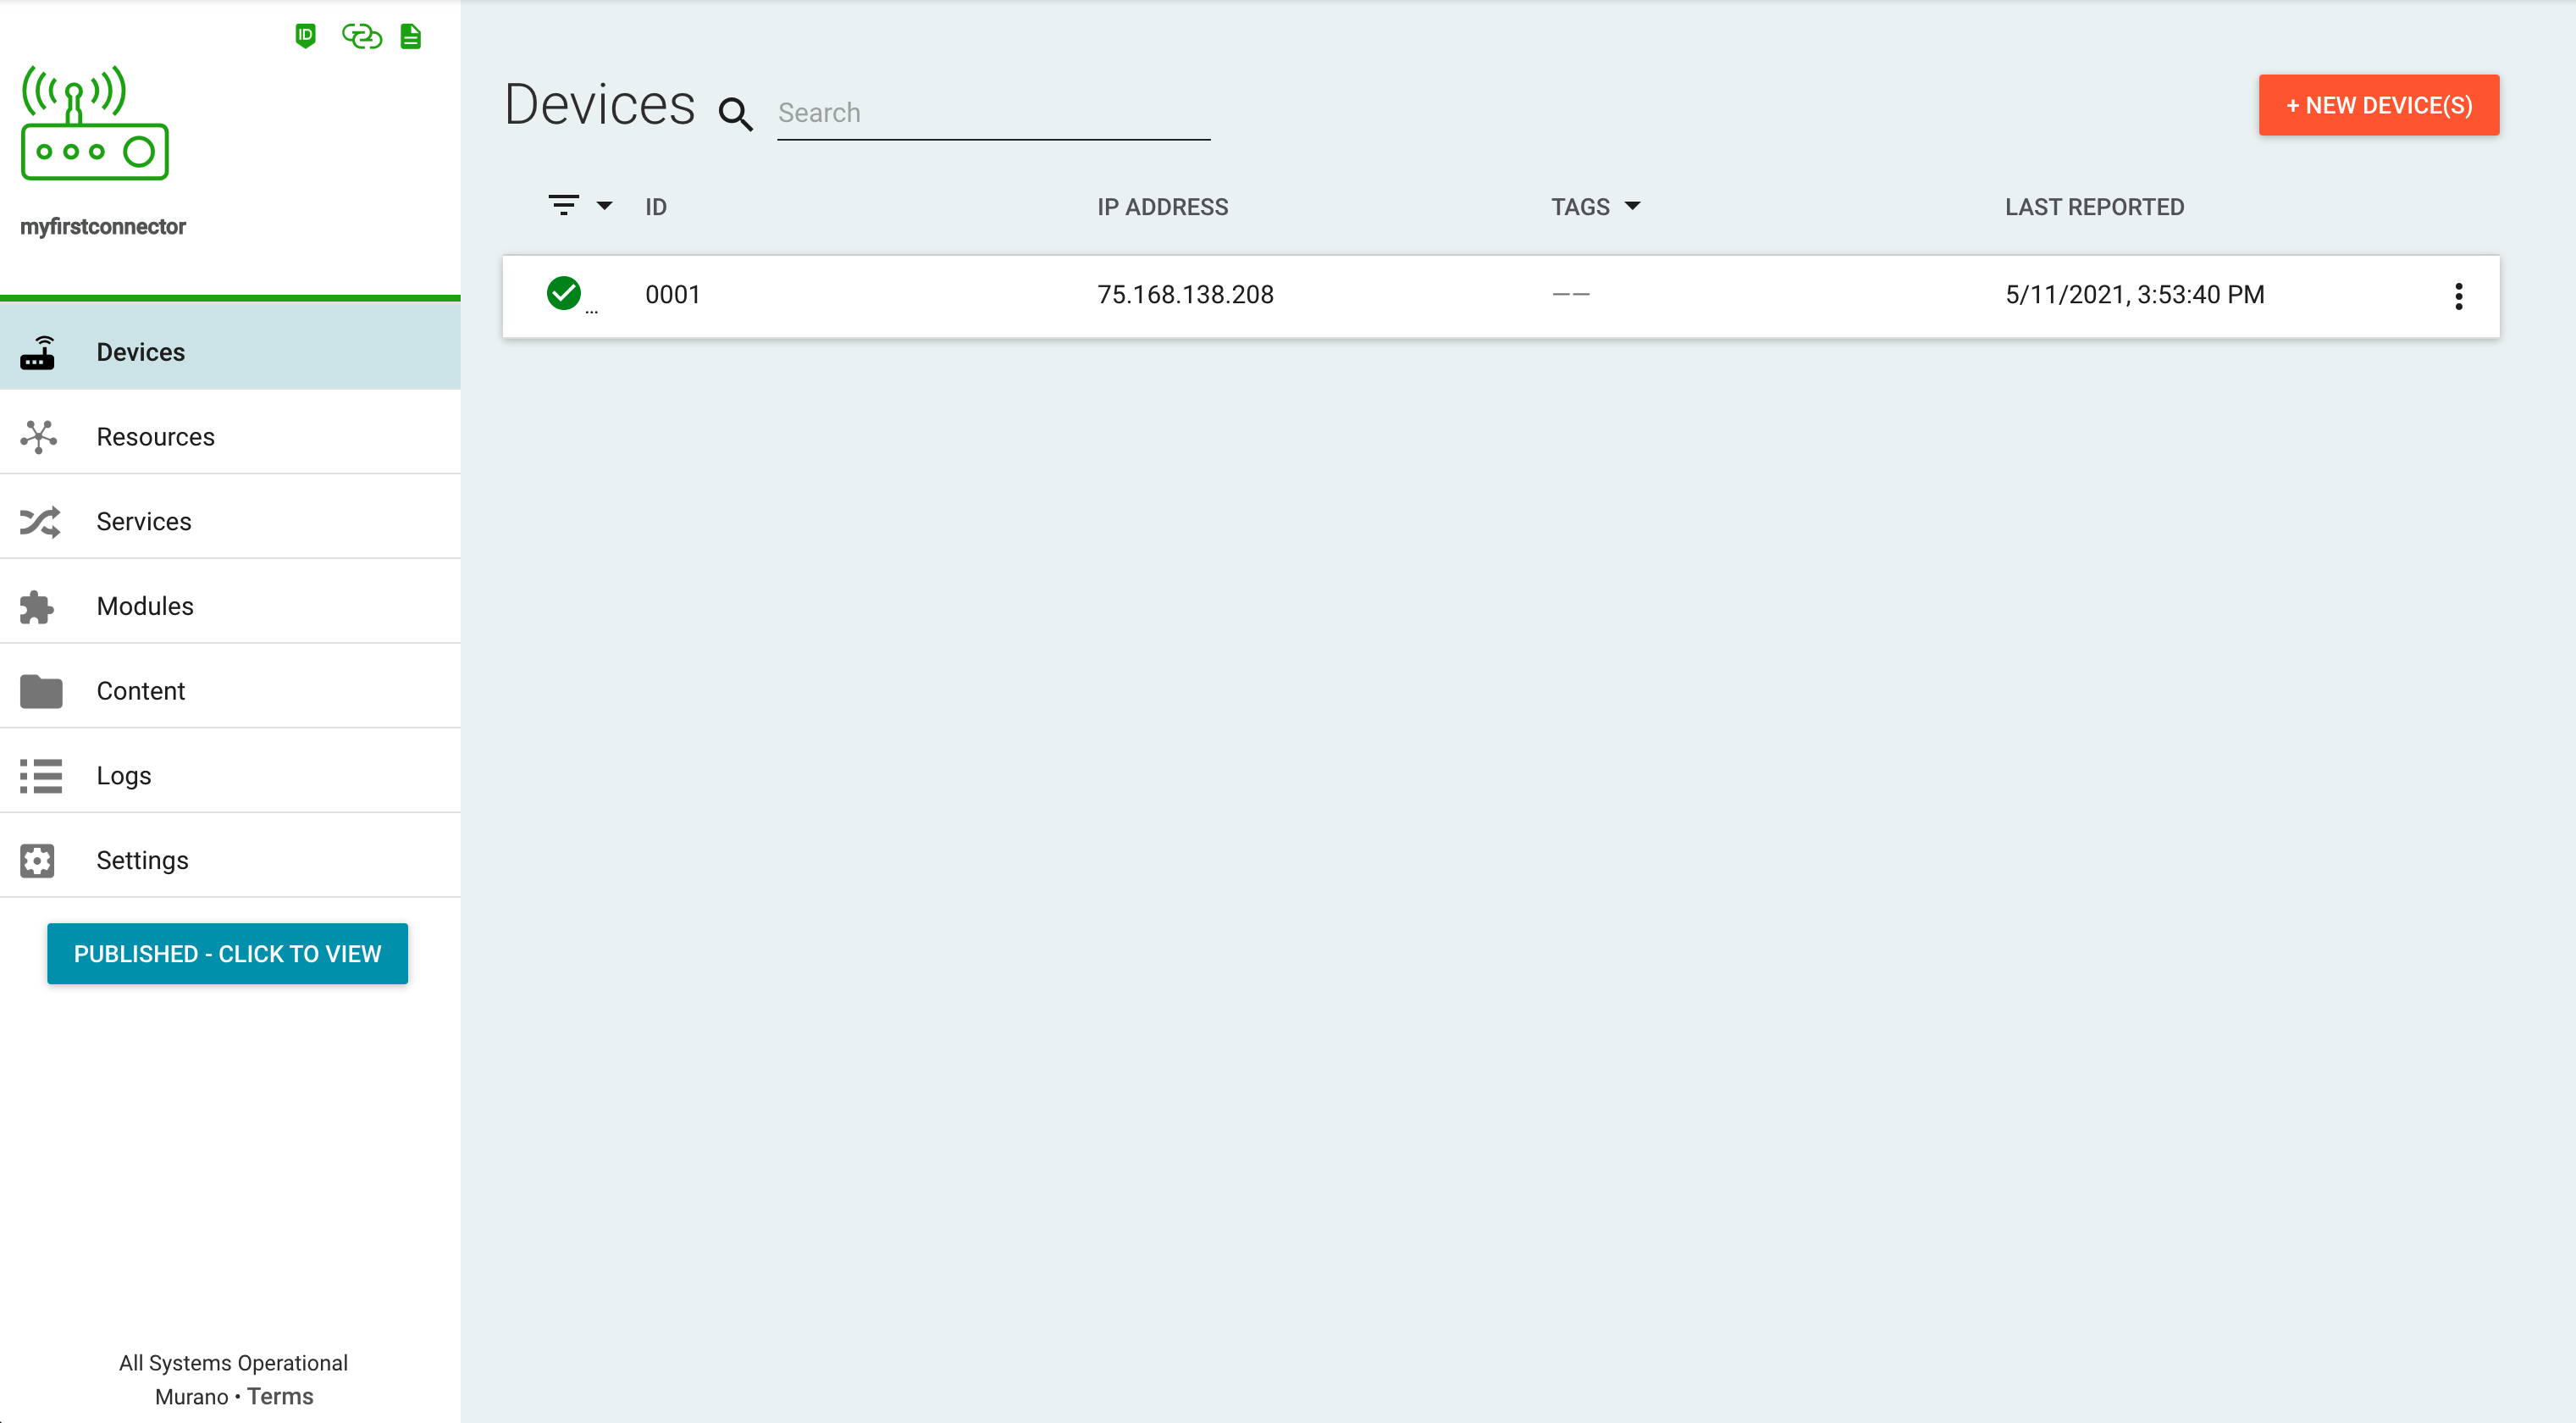
Your device is now provisioned and connected to the IoT Connector. You should see it now in the IoT Connector's devices list.
Claim and Assign your Device in ExoSense
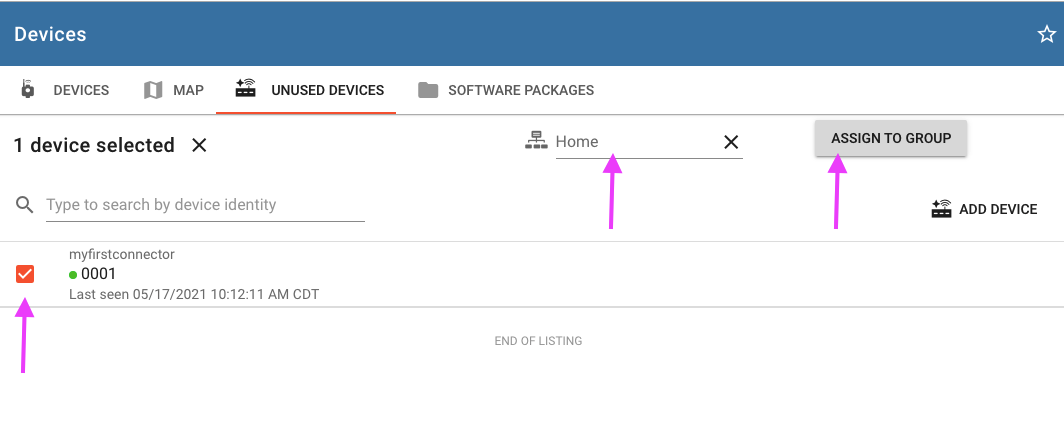
- Navigate to the 'Devices' page from the Navigation Panel.
- Locate your device in the "Unused Devices" tab
- Select the device and a group to add the device too
- Press the "ASSIGN TO GROUP" button
Configure ExoEdge from ExoSense
For the purposes of this guide, we'll first use the Simulator source for ExoEdge to begin generating data. Moving forward you can use Exosite's additional sources or build your own for your sensors and interfaces.
Configure Simulator Device Channels
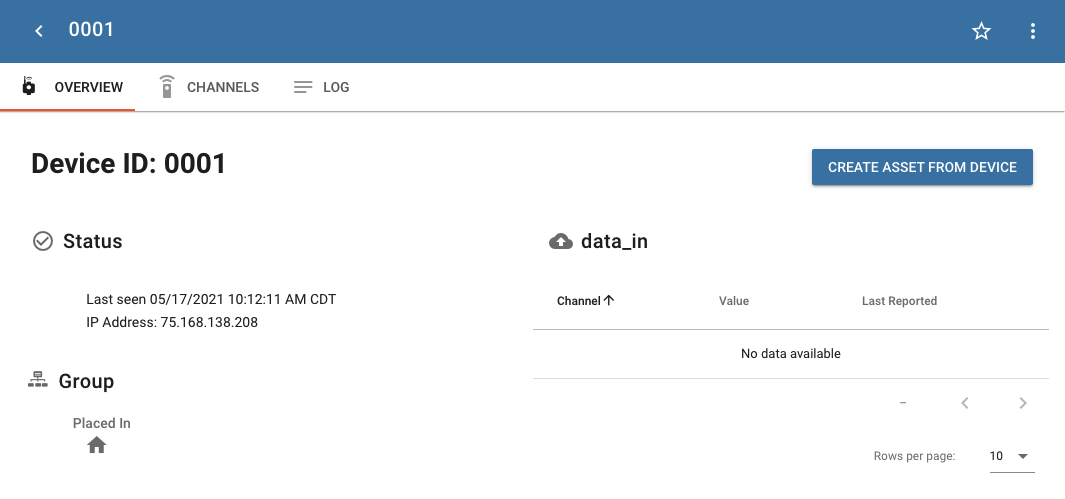
Locate and select your device in the devices tab. You'll see that it has no channels yet. Go to the Channels tab.
Add a new channel by selecting the button in the top-right corner of the channels tab.

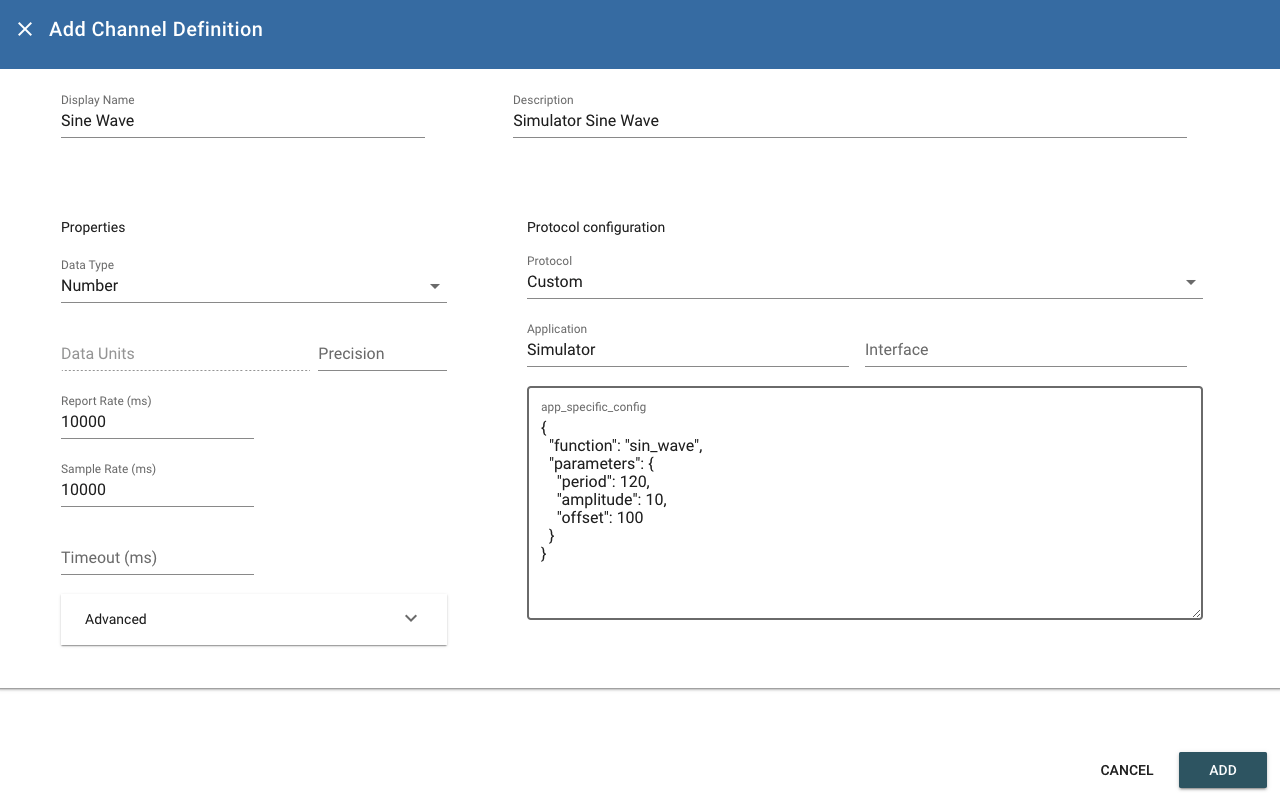
Below is an example configuration to instruct ExoEdge to create a Sin Wave using the Simulator source you installed with ExoEdge above.
Reminder about usage metrics for data points / storage
The biggest factor in the number of data points per month and dynamic storage is based on report rates of device channels. If you start to calculate # channels x (86400 / report rate in seconds) x # of devices you will quickly see how report rate can greatly affect the number of data points per month.
Recommend 10000 ms (10 seconds) or higher to keep usage metrics down for purposes of early prototyping/getting started.
| parameter | value | description |
|---|---|---|
| Dipslay Name | e.g. "Sine Wave" | Can be anything you want, must be unique to other channels |
| Description | e.g. "Simulator Sine Wave" | Meta description field |
| Data Type | e.g. Number | Choose Number or a unit based type like Temperature for demo purposes |
| Data Units | e.g. nothing or a unit | If type 'Number' is used, not used, if any other type, pick an appropriate unit |
| Report Rate | 10000 | Simulator will generate and report values based on this |
| Sample Rate | Same as Report Rate | For this guide, just set to same as Report Rate |
| Timout | Optional e.g. 60000 | Must be larger than report rate, recommend 3 times greater or more |
| Protocol | Custom | Other sources protocols are documented for ExoEdge. |
| Application | Simulator | |
| Interface | Not used | |
| app_specific_config | see below | Specific details for the Simulator source for ExoEdge |
Copy the value for app_specific_config into that field, give it a channel name, description, data type (Number or anything you want), Application (Simulator in this case) and set the report rate and sample rate to 10000 for example for 10 second new value generation.
{
    "function": "sin_wave",
    "parameters": {
        "period": 120,
        "amplitude": 10,
        "offset": 100
    }
}
After clicking ADD for the new channel, make sure to SAVE the new configuration update. This new configuration will be pushed to ExoEdge via the config_io resource and ExoEdge will start reporting data back in a sin wave.
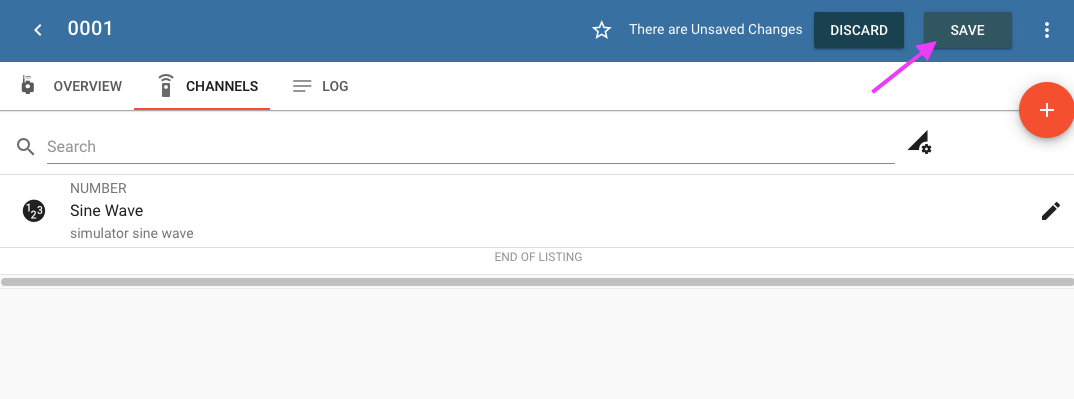
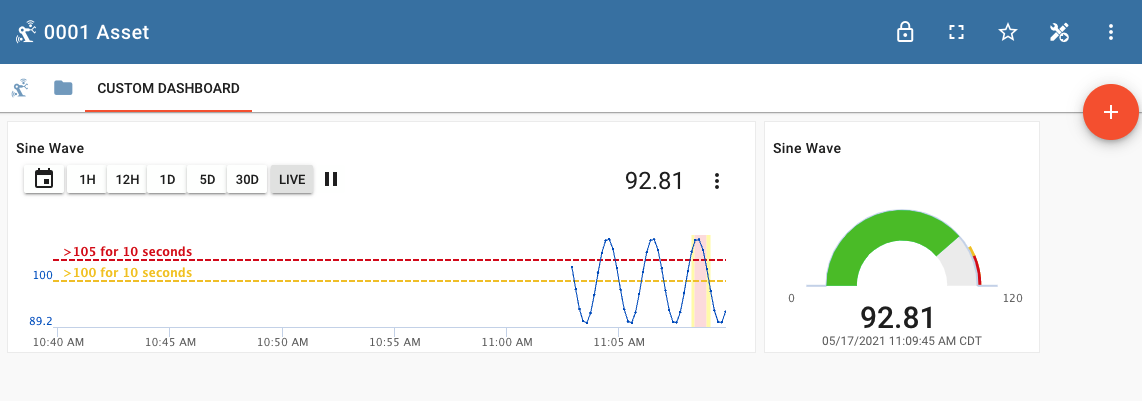
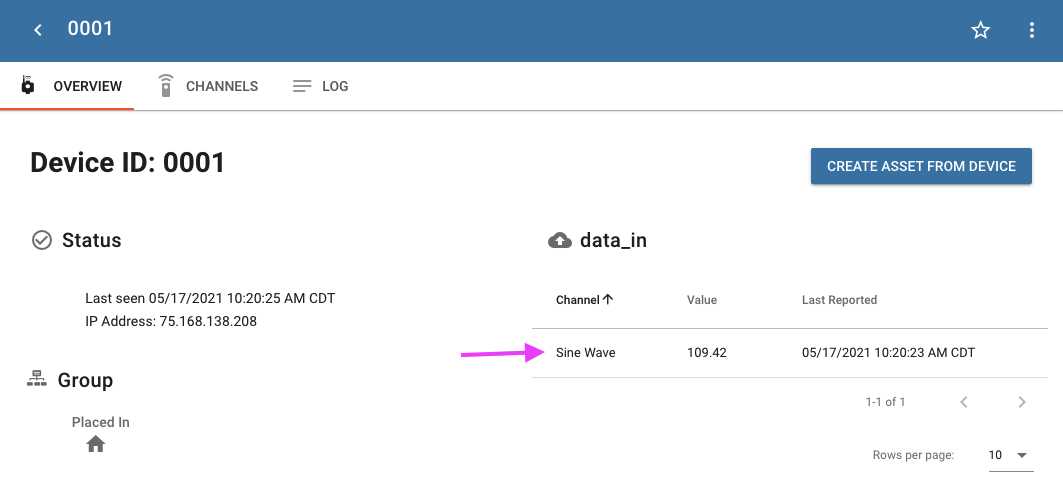
You should now see a new channel with live value updates.
Next Steps
Use the ExoSense guides and reference to create assets with signals sourced from your ExoEdge device channels, add signal rules, and build dashboards. Then move on to utilizating the ExoEdge Modbus Source or build your own sensor / IO interface on the Pi for ExoEdge
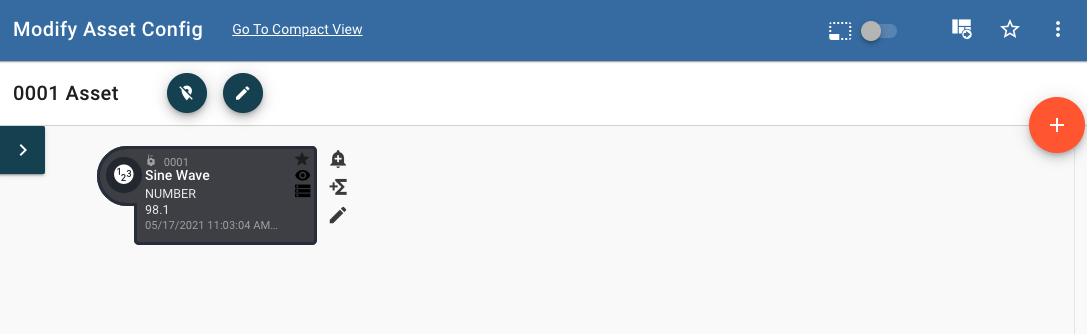
Create an Asset from your simulated device 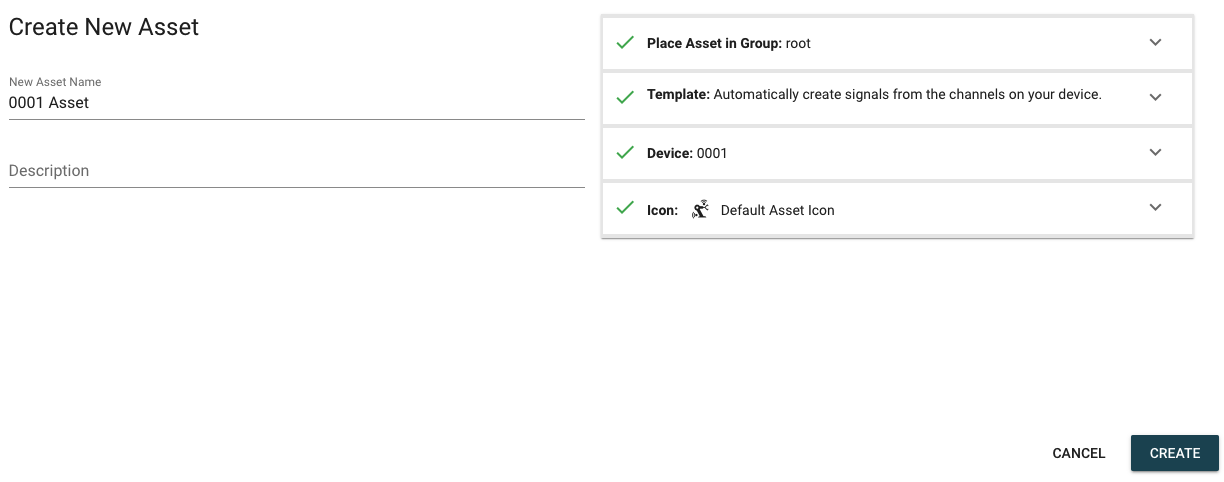
Hint
By default your first channel (any channels available) will be converted to a signal when you create an asset from the device. You can add other channels as signals to your asset in the future manually.
Add a threshold rule 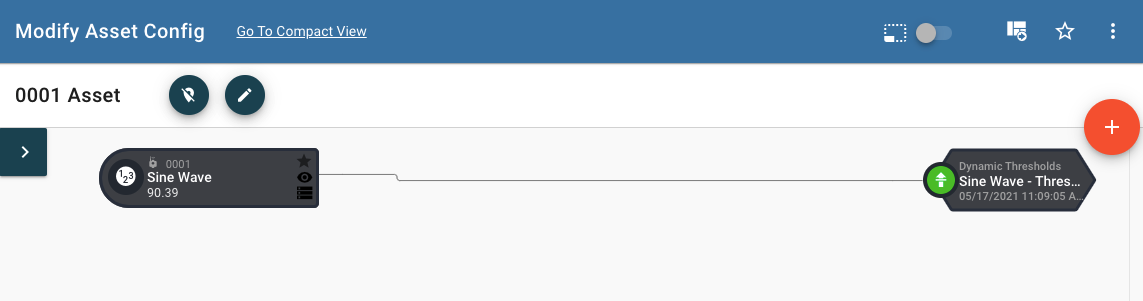
Build an asset dashboard