MQTT Spy Tool Demo
In this quick-start, you will use MQTT Spy, a GUI-based tool to simulate a connected IoT device. MQTT Spy is an open source utility intended to help you interact with cloud services using MQTT protocol.
This example is based on the Murano MQTT Device API and we invite you to have a look to the reference page along with this guide.
Setup
Create a Murano IoT-Connector product using the ExoSense IoT Connector Template from the IoT Marketplace. This will include the necessary resources used by ExoSense.
You will use the MQTT Spy in this guide. The purpose is to quickly show you how to connect to our cloud without any single line of coding. If you want to try with scripting language or even lower level hardware \(embedded system level\), check out the device APIs page..
Download the latest version from MQTT Spy Release page and follow the instructions on MQTT Spy Getting Started Guide.
Configure the IoT-Connector
In this section, you will configure your Murano IoT-Connector in MQTT protocol in order to connect with your MQTT Spy, which acts as a simulated device.
We assume here you already have a Murano Iot-Connector created \(if not, please go back and check the setup\).
In your web-browser, navigate to your IoT-Connector on the Murano 'Home' solution list page and click on it.

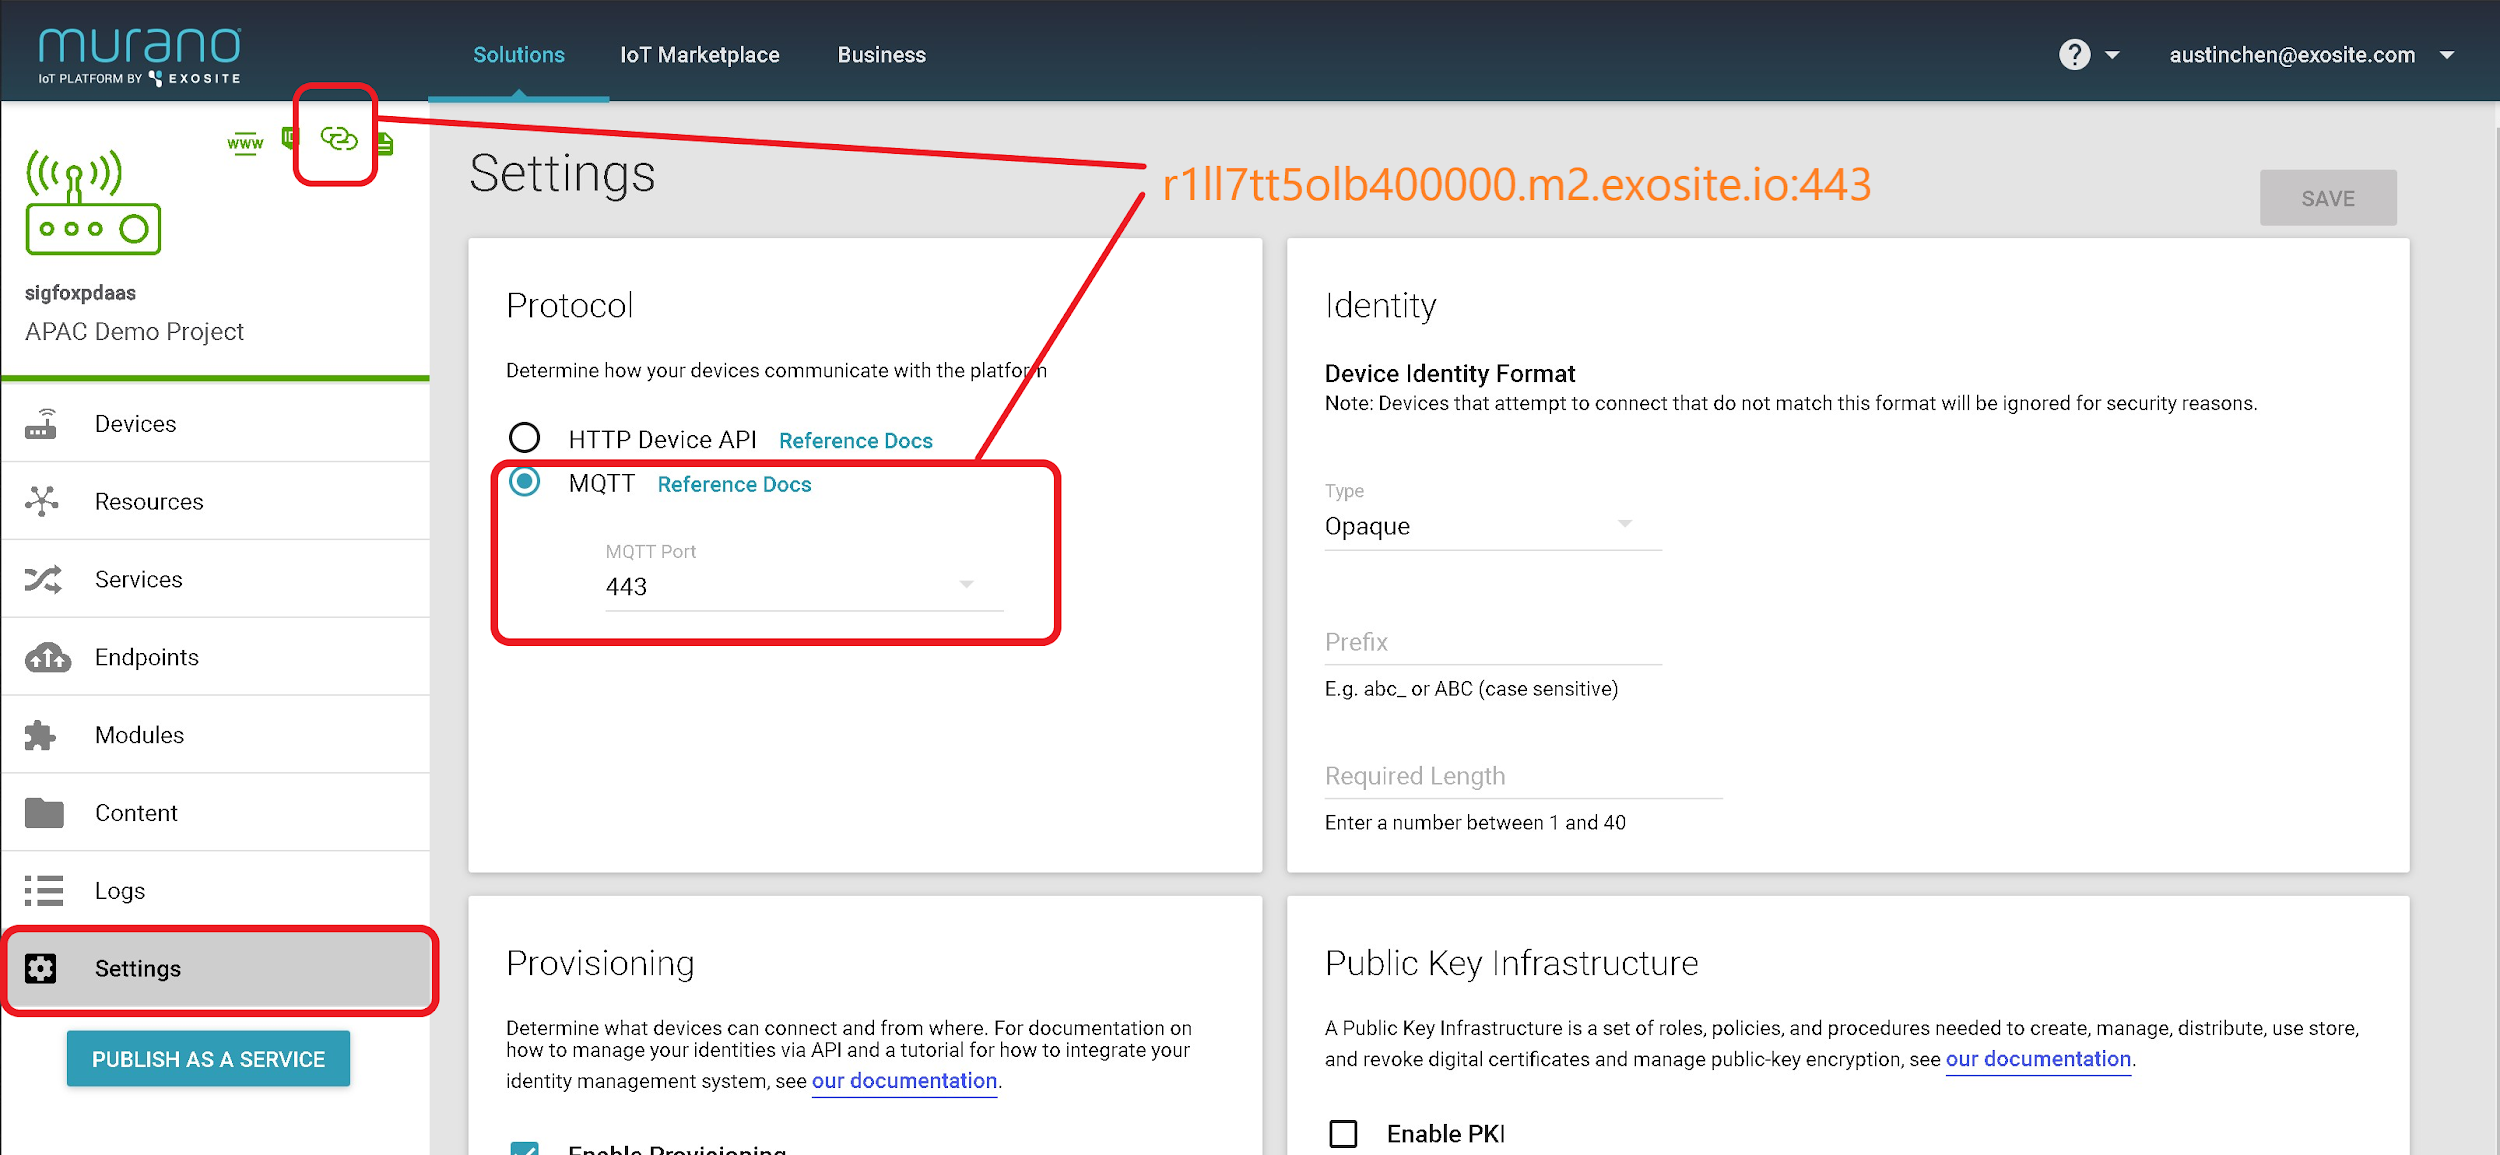
Configure Protocol 
Go to Settings -> Protocol and set 443 as your MQTT Port
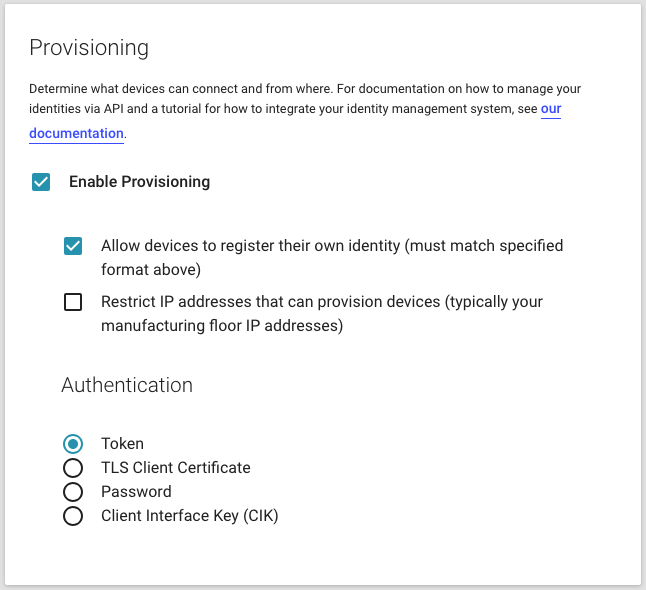
Configure Auth Method 
Go to Settings -> Provisioning -> Authentication and select Token as your Authentication.
Get the Connector Domain
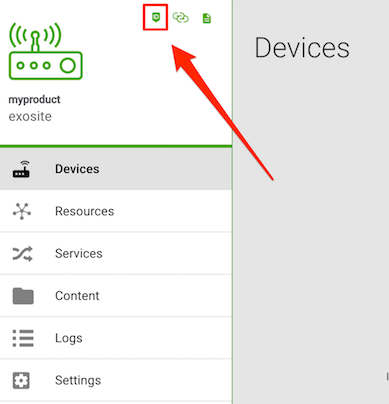
Click the top left icon to copy the domain, i.e. murano:v1/mqtt://r1ll7tt5olb400000.m2.exosite.io and then remove the prefix murano:v1/mqtt:// and append with the port number :443, resulting as i.e. r1ll7tt5olb400000.m2.exosite.io:443.
Your Device Resources
If you created your IoT Connector using the standard ExoSense IoT Connector template, the resources will be set up properly for you. You can also find more details on ExoSense data and interface schema here
ExoSense® uses a dedicated data structure allowing different data model per device. For the purpose of this tutorial, three resources are used which are all of type String:
data_ina JSON structure of data sent by the devicedata_outa JSON structure of data to send to the deviceconfig_ioa JSON structure defining the data model, called channels, of the data_in payload.
So you would define the temperature in config_io resource as follow:
{
  "channels": {
    "temperature": {
      "display_name": "Temperature",
      "description": "Value sent by the sensor",
      "properties": {
        "data_type": "TEMPERATURE"
      }
    }
  }
}
And the device would need to send the defined channels to the data_in resource as:
data_in={"temperature":42}
The write operations to the above resources could be done through either HTTP or MQTT device APIs.
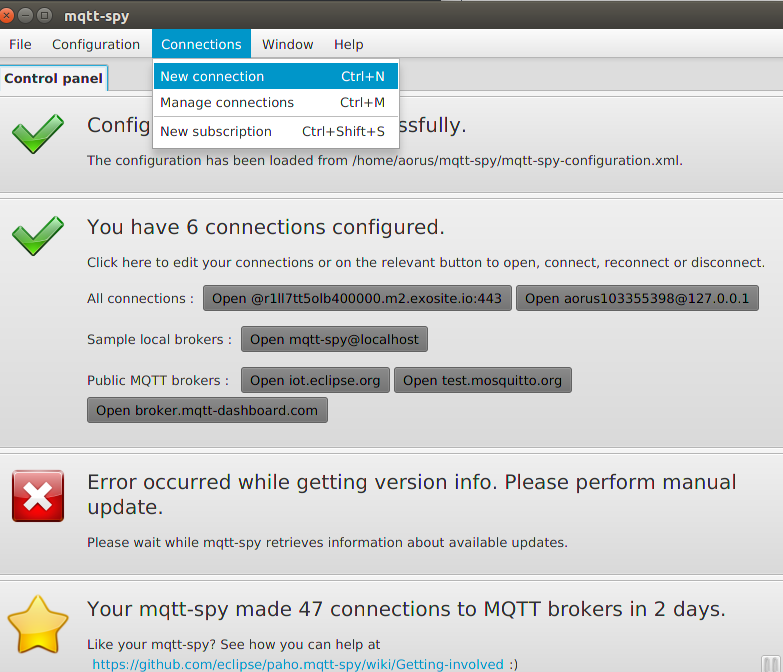
Configure MQTT Spy
In this section, you will create an MQTT simulated device using MQTT Spy.
Create a New Connection.
Configure using the Connectivity Tab
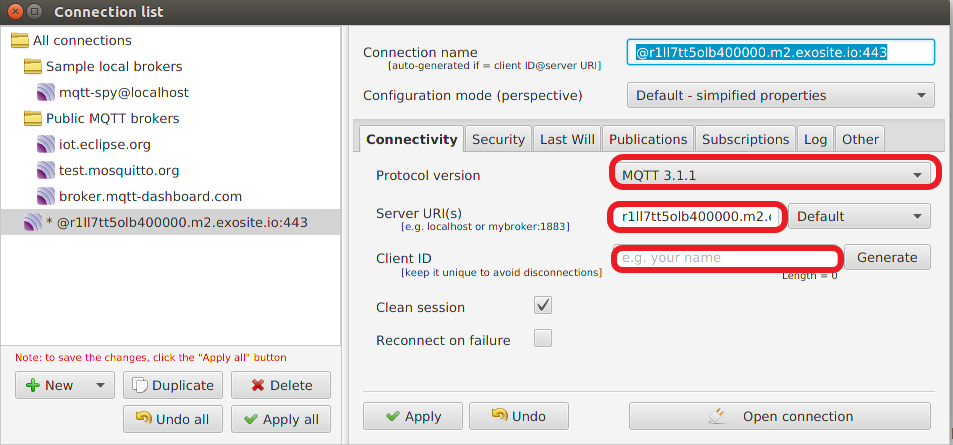
Please fill out the fields in the picture with the configurations shown in the following table
| Field | Value |
|---|---|
| Protocol Version | MQTT 3.1.1 |
| Server URI\(s\) | i3b4kppfef8k00000.m2.exosite.io:443 |
| Client ID | [Empty] |
Configure the Security Tab
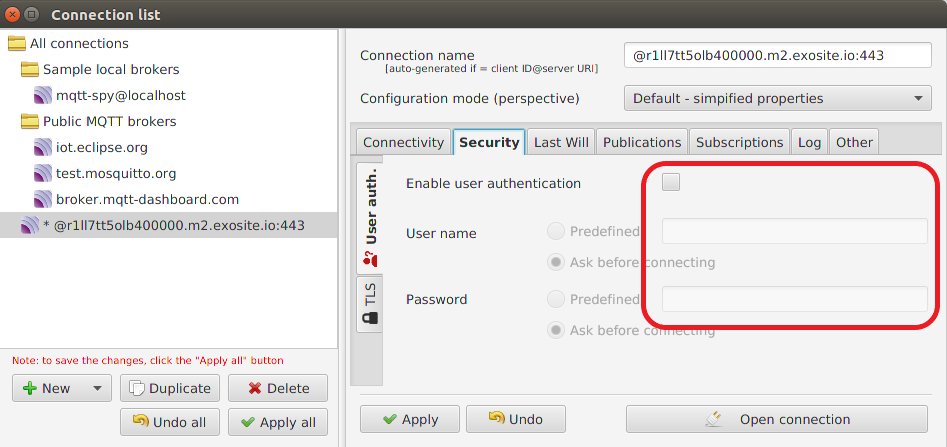
Please be noted that there is no need to fill out the fields in the picture at this moment, before an MQTT device is being provisioning.
| Field | Value |
|---|---|
| User name | [Empty] |
| Client ID | [Empty] |
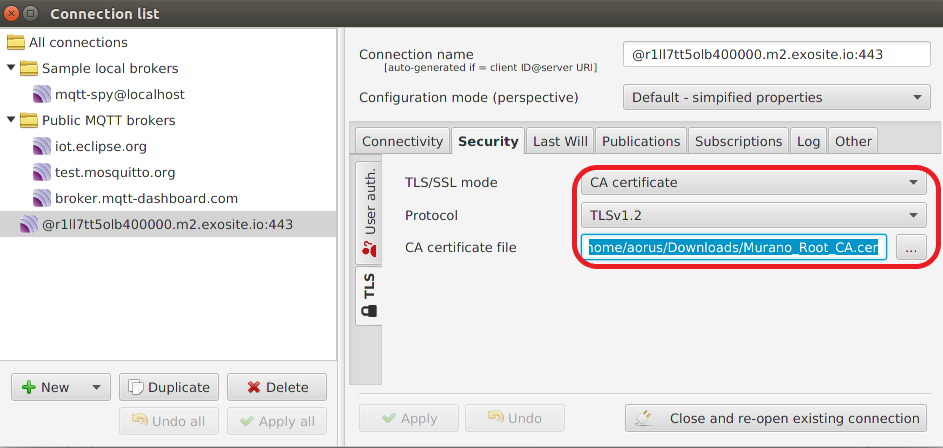
| Field | Value |
|---|---|
| TLS/SSL mode | CA certificate |
| Protocol | TLSv1 |
| CA certificate file | Download From the main Exosite Docs Site |
Configure the Publications Tab
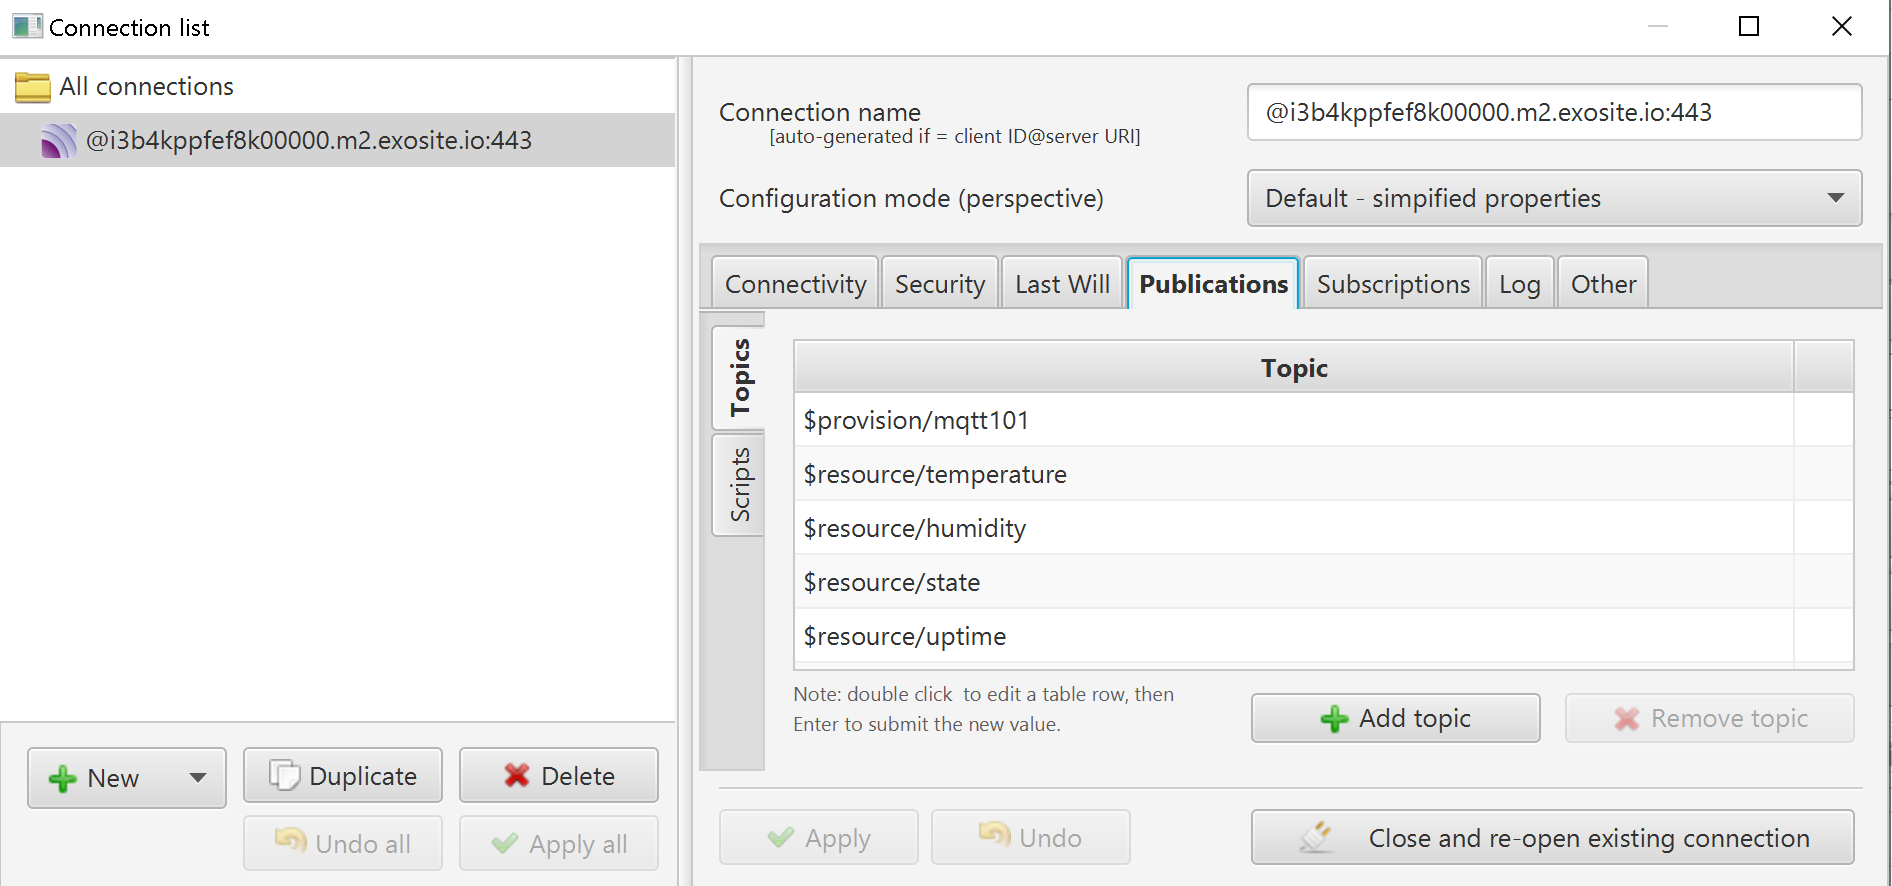
Create MQTT topics for provisioning and publishing. Take an use case for an example, we are going to provision your MQTT device ID named mqtt101, and your device is designed to report humidity/temperature/state/uptime, so you will need topics named humidity, temperature, state and uptime for later use for publishing.
Note that the device ID should be a globally unique identifier for your device, usually it could be the MAC address of your device’s network interface, or a serial number from the manufacturer.
| Topic Name | Use |
|---|---|
$provision/mqtt101 | for provisioning an MQTT device with name mqtt101 |
$resource/humidity | for publishing to humidity topic |
$resource/temperature | for publishing to temperature topic |
$resource/state | for publishing to state topic |
$resource/uptime | for publishing to uptime topic |
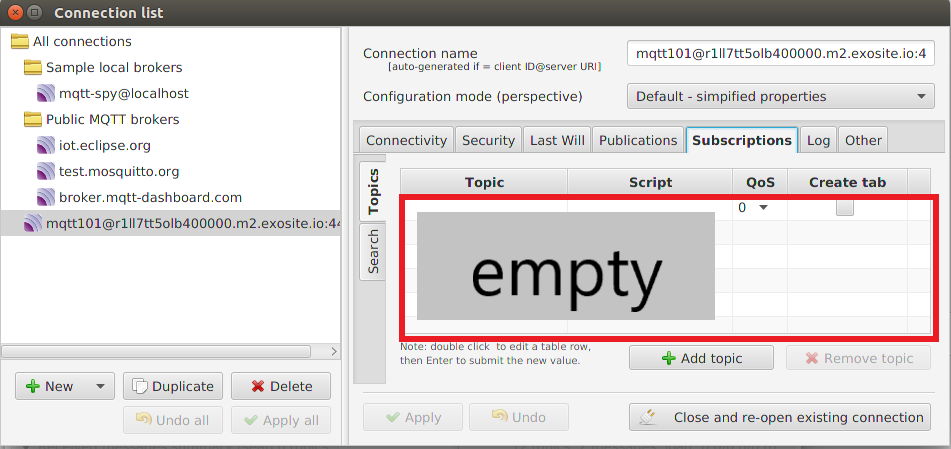
Configure Subscriptions Tab
Please be noted that in Murano, device resource subscriptions are managed centrally. This means an MQTT device is not allowed to use the subscribe command; instead, it will automatically receive updates for resources according to the IoT-Connector configuration.
Trying it out
Up to this point, you have already have everything you need to connect to our cloud. In this section, you will learn go through the three main operations of our cloud service over MQTT: provision, publish and receive data.
MQTT Operations
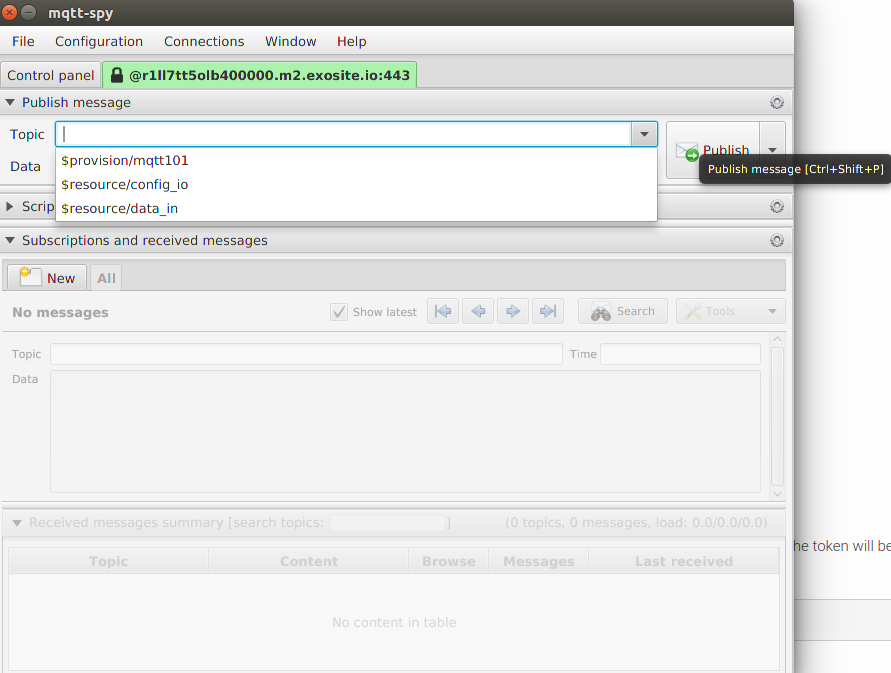
Provision
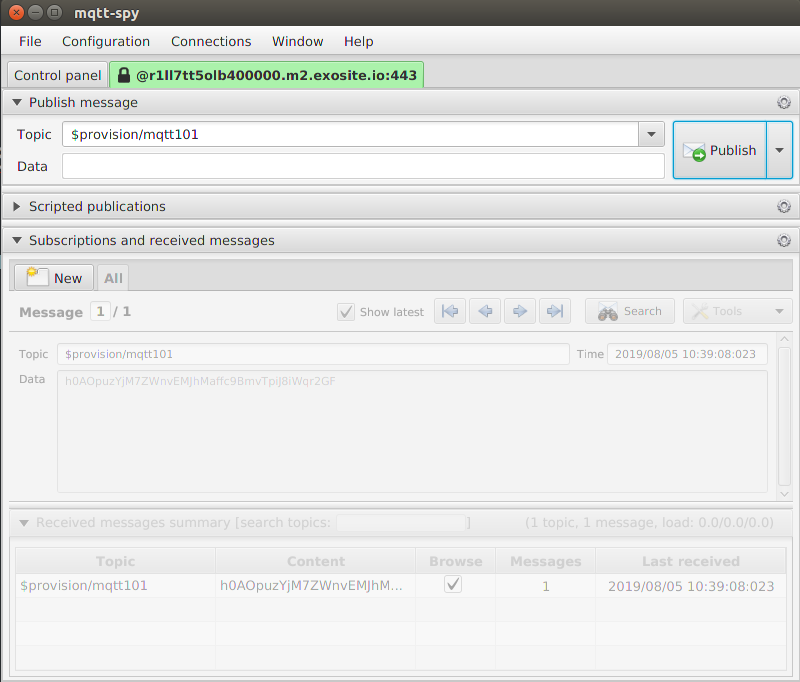
Select $provision/mqtt101 and click publish
If the device provisioning succeeds, it will return with a token.
Left click on the tab and select Show broker's statistics to make the token copy-able.
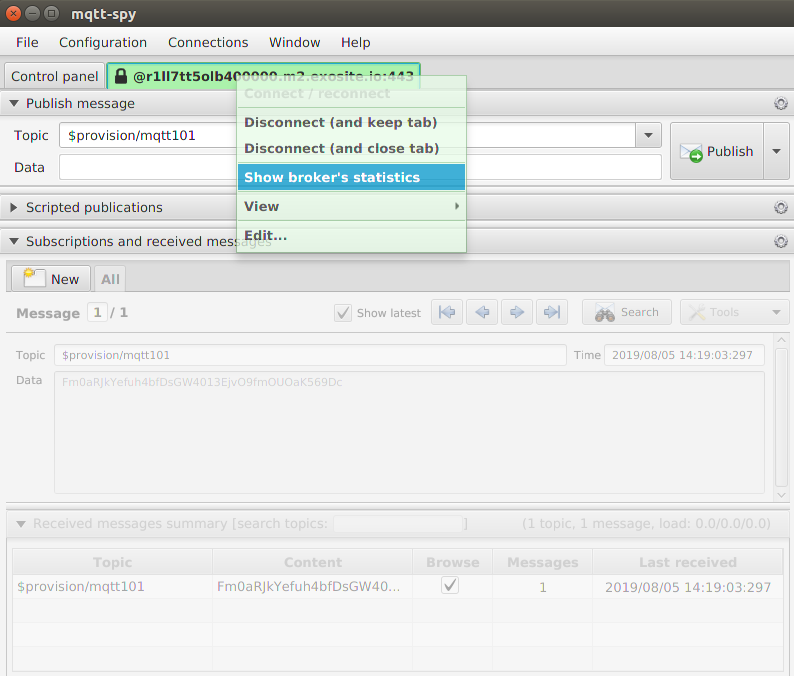
Copy the token and make sure you back it up in somewhere.

Again, launch to your IoT-Connector Page. Click on the device tab to see the device you just provisioned and click on the device to check if its Resources are shown as you defined previously.

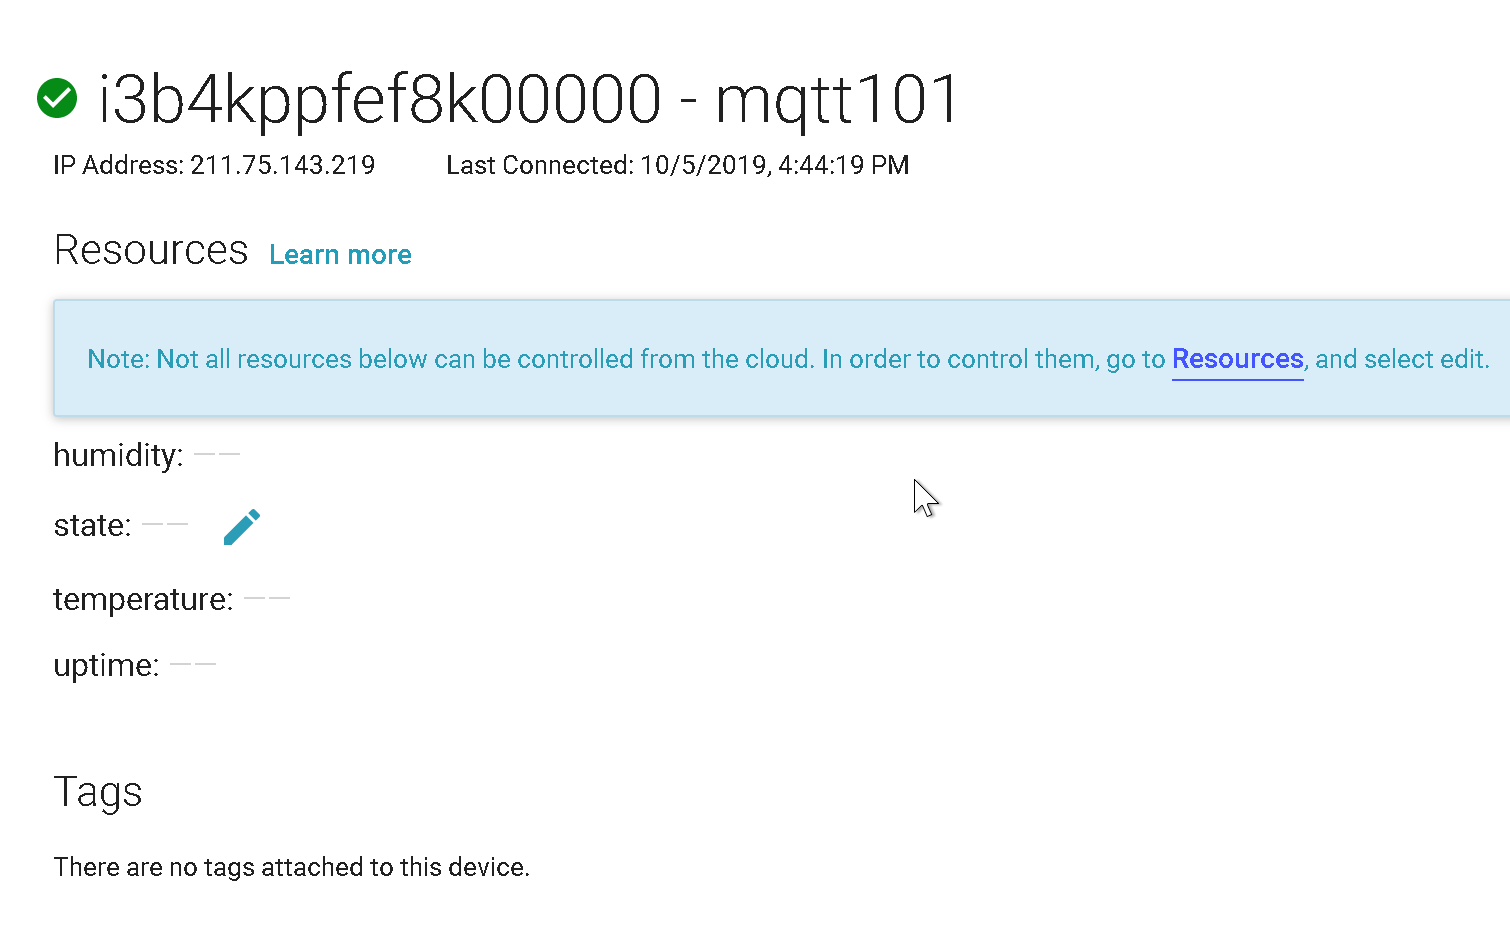
You now have a simulated IoT-Connector device created on Murano.
Publish
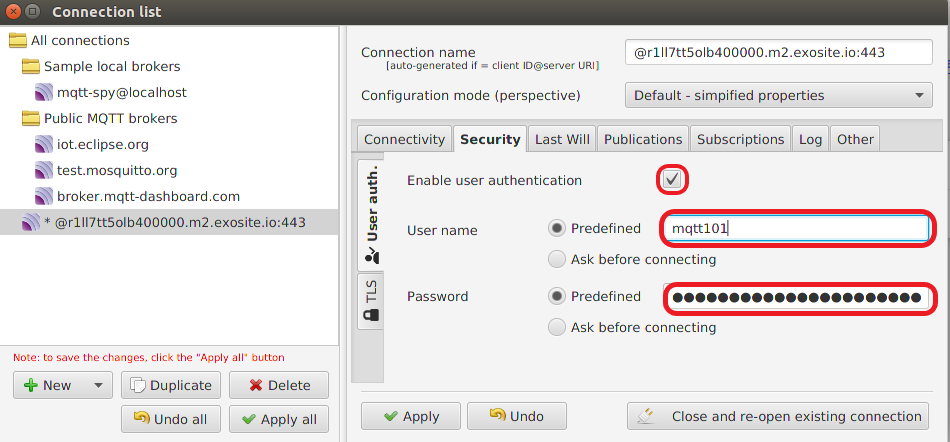
Go back to MQTT Spy configuration, in Security Tab, set mqtt101 in User name and the token you copied at provisioning success in Password. And then click on close and re-open existing connection to reconnect with the latest configurations you just made.
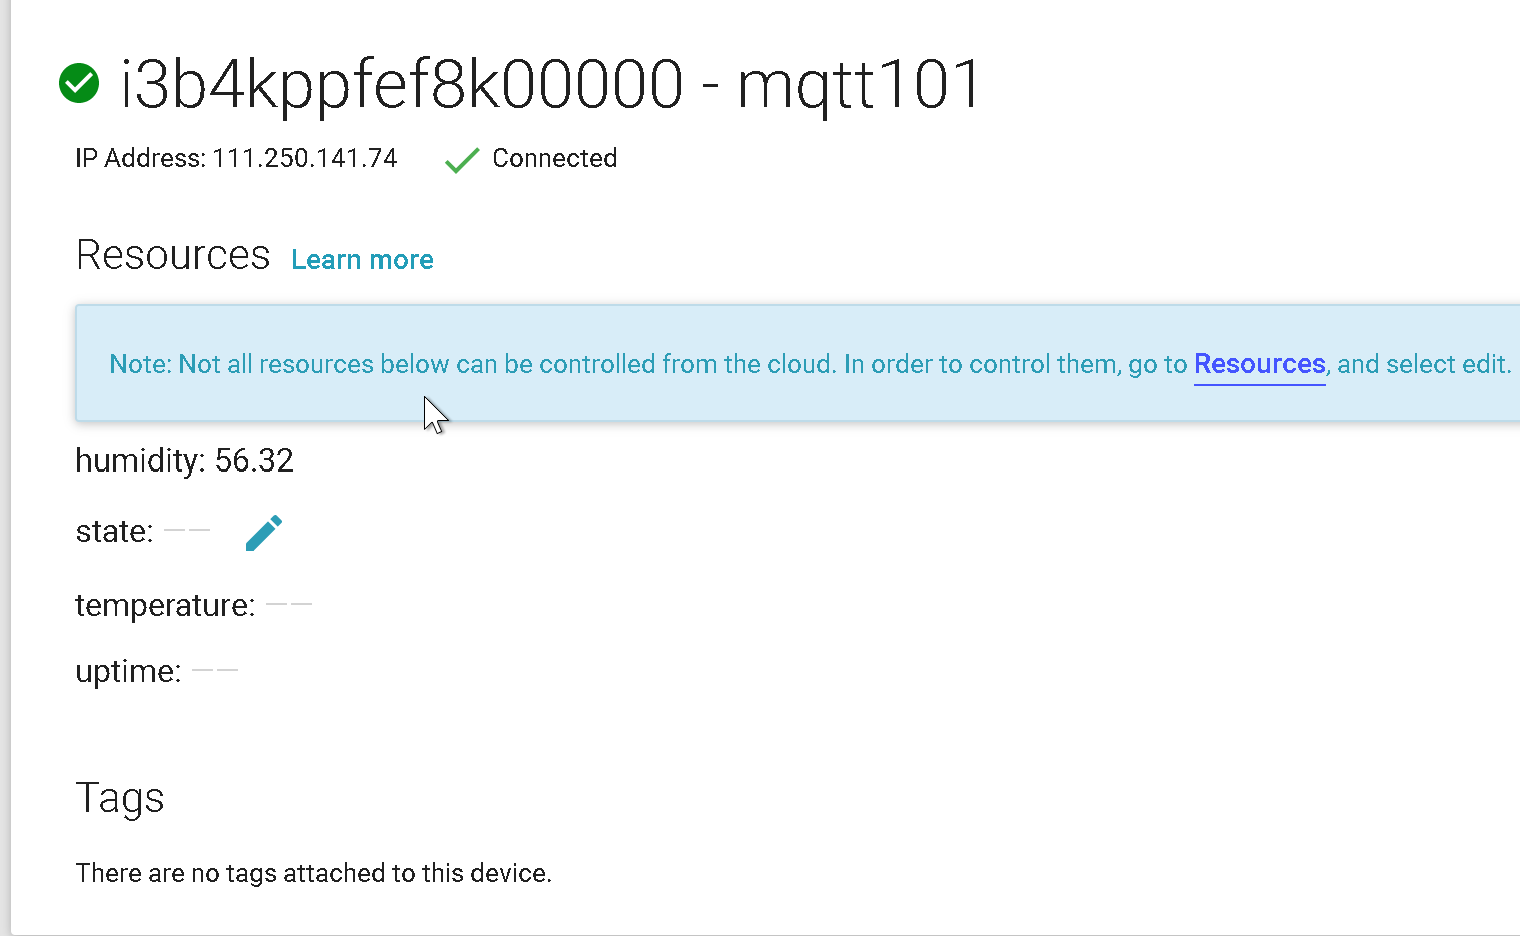
Publish 56.32 to humidity topic
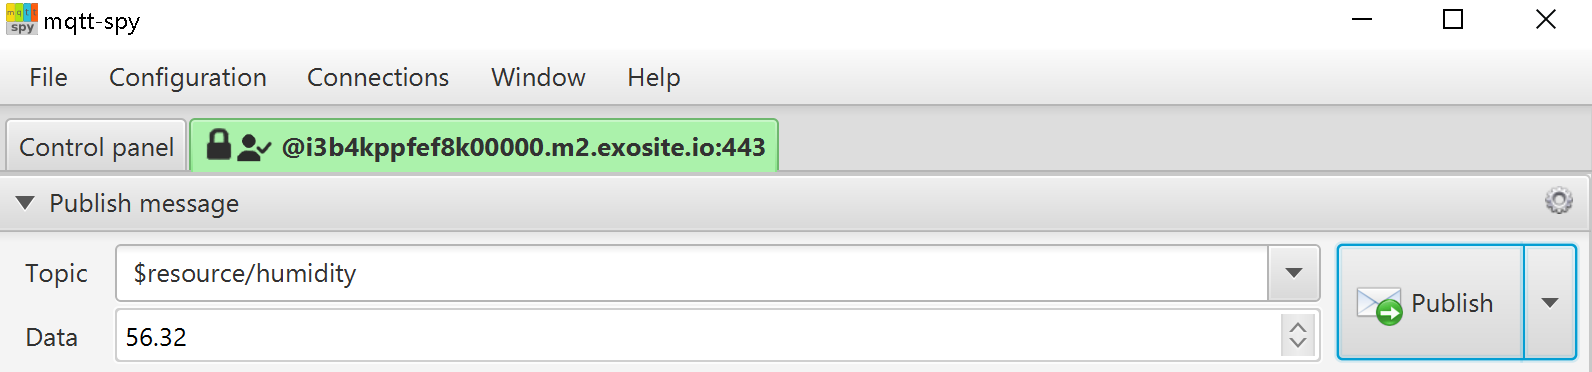
Check if the resource humidity changes accordingly.
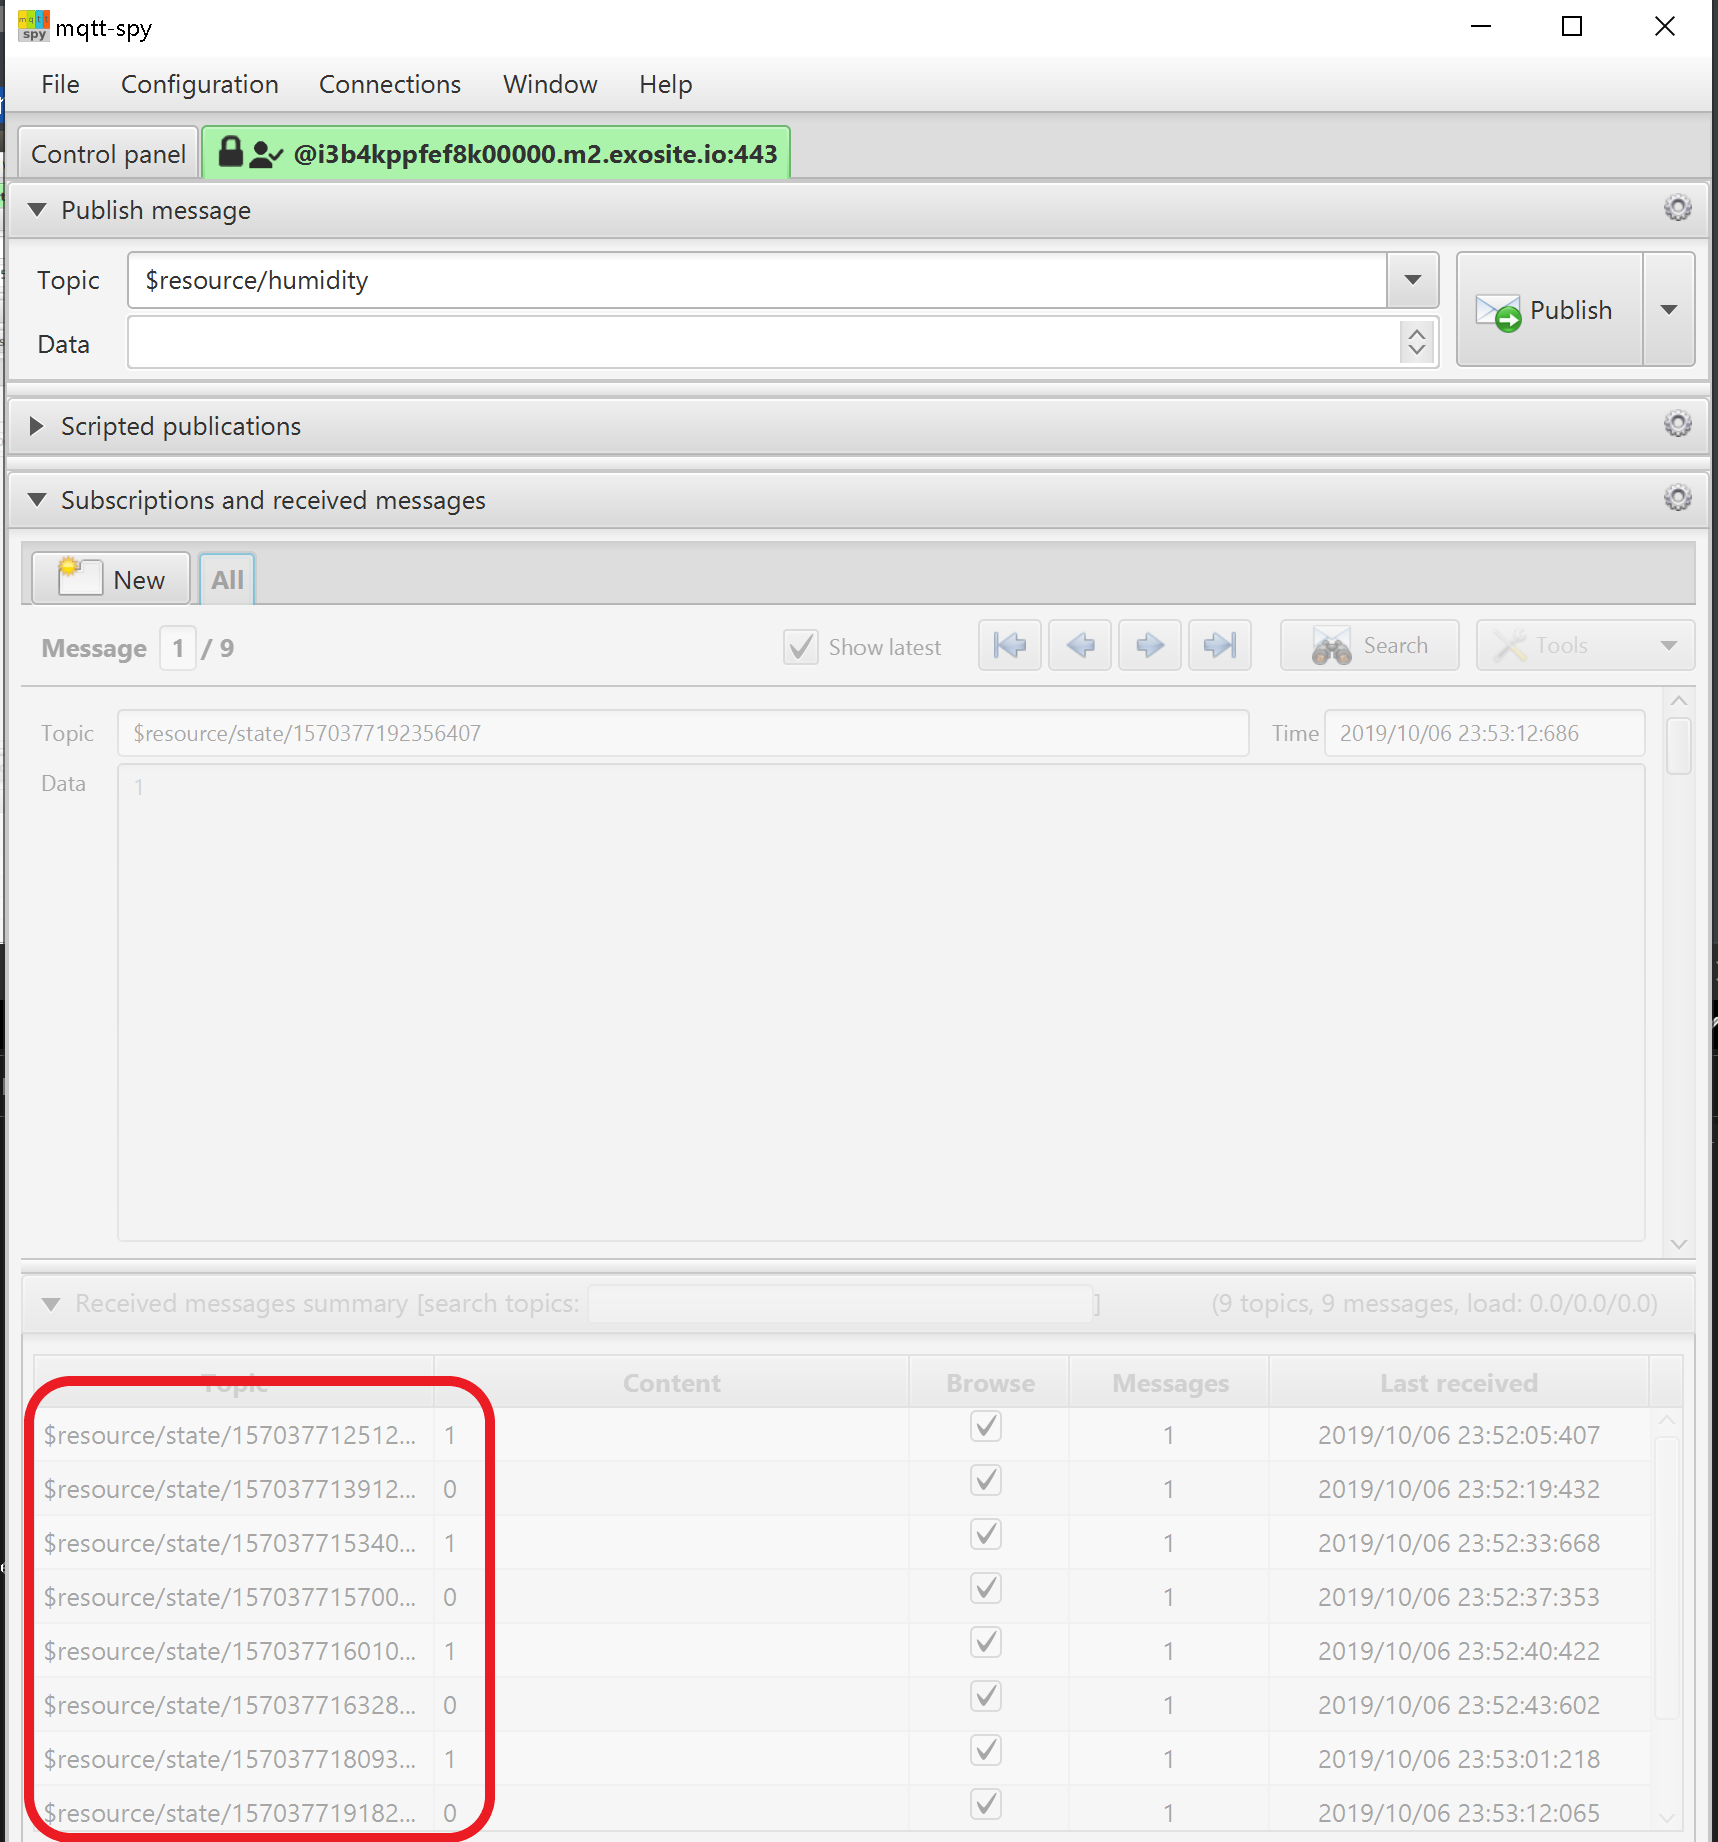
Receive data
Since MQTT supports bi-directional communication, try to set the state resource manually and see how it shows up on the MQTT Spy. Let's try to set \(0, 1, 0, 1, 0, 1, 0, 1\).
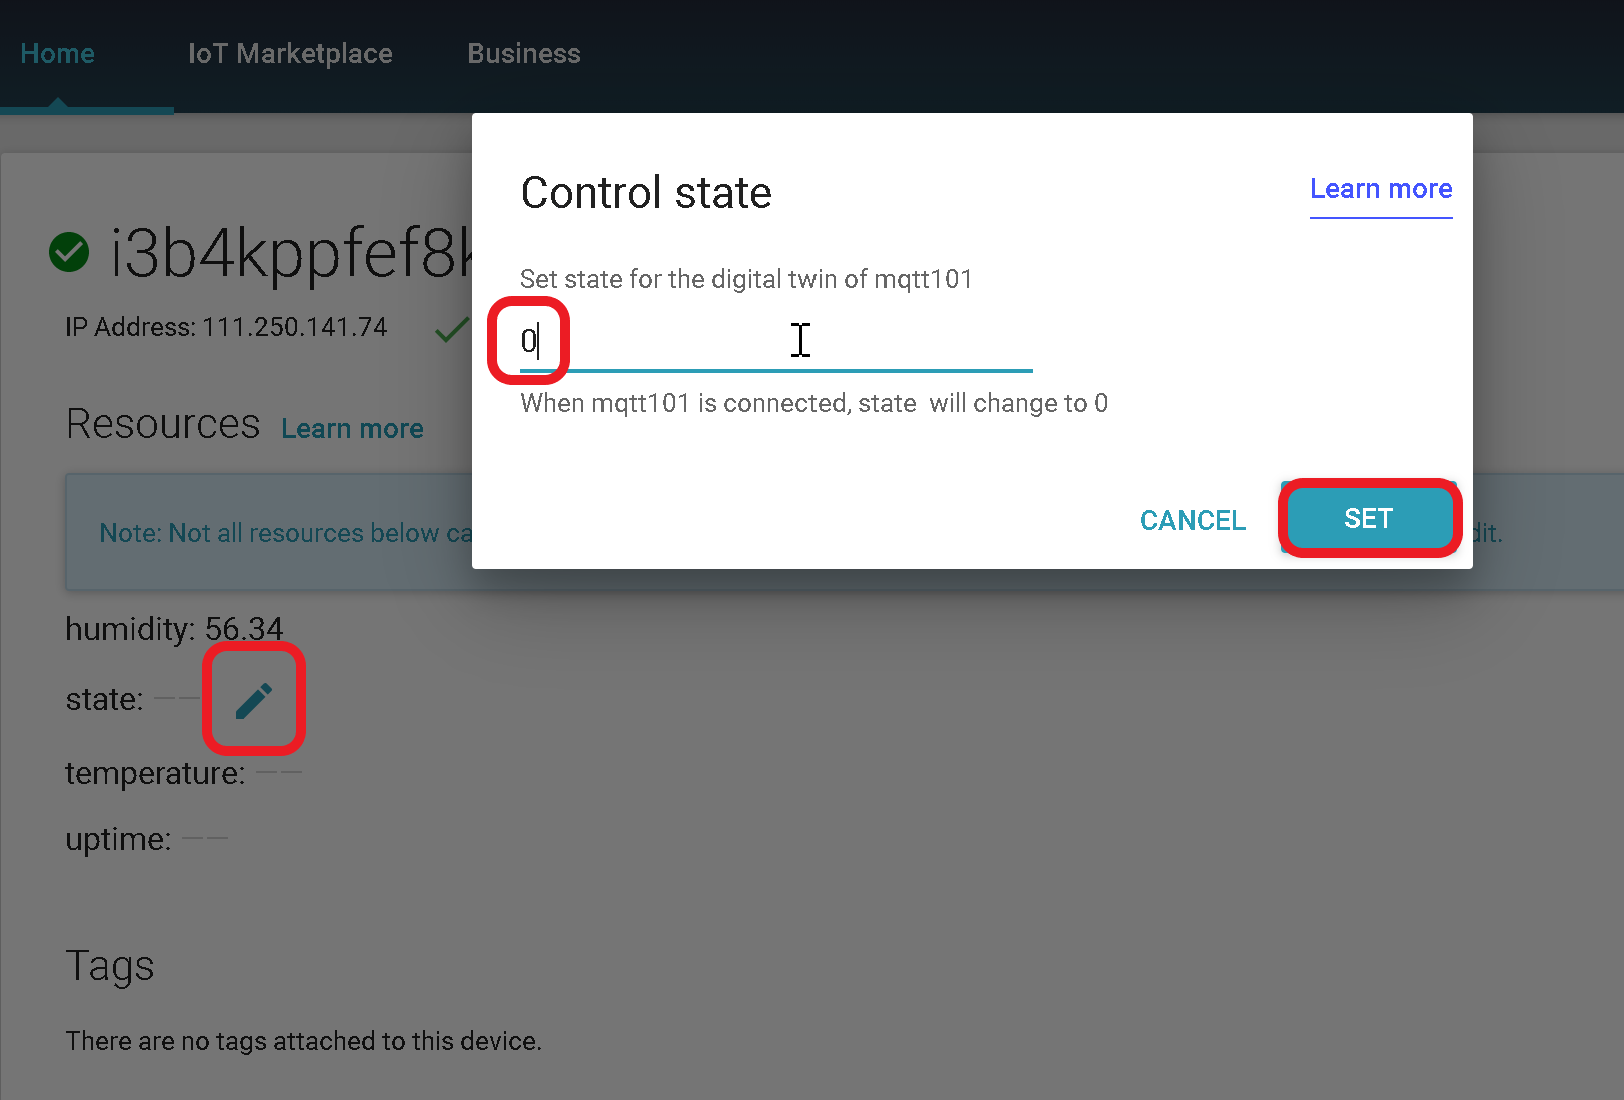
Check the result on MQTT-Spy and see if it changes as expected.
Congratulations, you just remotely turned a simulated device sensor on and off!