TI EK-TM4C1294XL LaunchPad
Overview
Abstract
This guide will walk through how to connect the Texas Instruments EK-TM4C1294XL Micro-controller and port the Out-Of-Box experience to Murano. The EK-TM4C can be purchased via the Texas Instruments website. While this process does require extra development work to update the code, this easy-to-follow guide does not require the user to have any coding/development experience.
http://www.ti.com/tool/EK-TM4C1294XL
Legacy Development Kit Support Information
TI partnered with Exosite on a number of development kits from 2013 to 2018 where Exosite would provide free community accounts for use with the development kits, such as the EK-TM4C1294XL and EK-TM4C129EXL Crypto Launchpads, CC3200-LAUNCHXL Wi-Fi Connected Launchpad, and MSP430 FRAM + CC3000 Wi-Fi Kit with SmartConfig™. In 2020, Exosite ended the community devlopment kit support. Free accounts are no longer available. Many of Exosite's customers have used Texas Instrument silicon in their connected products. Exosite's platform is well suited for TI's silicon when used in IoT and condition monitoring applications, please contact sales for more information about your project.
Requirements:
HW / SW Requirements
- Texas Instruments EK-TM4C1294XL - https://www.ti.com/store/ti/en/p/product/?p=EK-TM4C1294XL
- TivaWare for TM-EK4C1294XL - http://software-dl.ti.com/tiva-c/SW-TM4C/latest/index_FDS.html
- Code Composer Studio - http://software-dl.ti.com/ccs/esd/documents/ccs_downloads.html
- NOTE: If your Windows machine is a 32bit System, use v8.3.1 or earlier
Versions / Date Tested:
- Last tested on: 2020-04-17
- OS: Microsoft Windows 10
- CCStudio: 9.3.0
- TivaWare: SW-TM4C-2.1.4.178
Walkthrough
Sign Up For Exosite Business Account
Navigate to https://exosite.io/start and sign-up for a new business account. You can follow the steps for signing up and deploying ExoSense here.
After completing the registration form, navigate to your new business account.
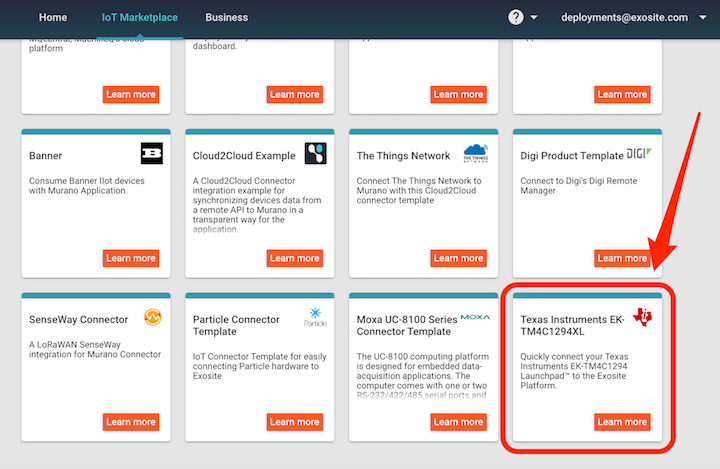
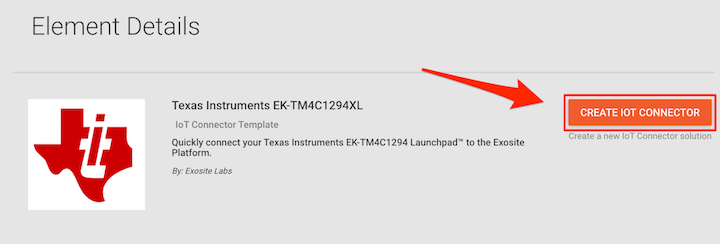
Click on the CREATE IOT CONNECTOR button, and find the Texas Instruments EK-TM4C1294XL Exchange Card.
Once the Connector has been deployed, navigate to the HOME link at the top of the page. You will see your IoT Connector is now available, so go ahead and click on it the 'Manage' link in the IoT Connector's menu.
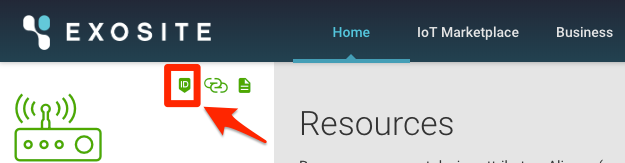
Copy the Product ID to your clipboard by clicking on the small ID icon located at the top left of the screen. You will need this ID for a future step.
Install Code Composer Studio
Use the Link under the Requirements section to download CCS. (Scroll down the CCS download page to find Code Composer Studio Version 9 Downloads)
Un-zip the file and double-click on ccs_setup_9.3.000012.exe to install CCS onto your system. \(CCS version may vary\)
Install and Configure TivaWare for the TM-EK4C1294XL
Download the TivaWare installer listed under Requirements
In order to download the Installer, you will need to register for an account with TI if you have not yet done so. Once you are logged in, you will be required to fill out a short TI Request U.S. Government Export approval form. Once submitted, you should be emailed a link to the TivaWare Download within 2 minutes.
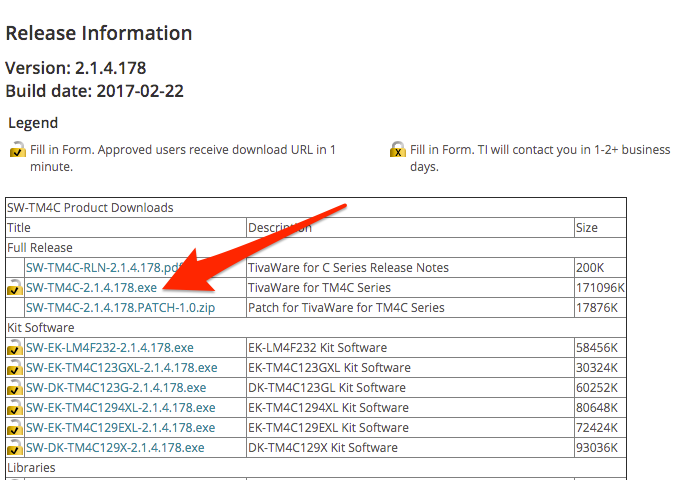
Click on SW-TM4C-2.1.4.178.exe to install. For the purposes of this guide, we will be installing to C:/ti. Keep this in mind for future steps if you choose to install in another location.
Exosite Library Update
Download the updated exosite.c and exosite.h files.
In your system's file explorer, navigate to the C:/ti/TivaWare_C_Series-2.1.4.178/third_party/exosite folder. Replace the exosite.c and exosite.h files with the updated versions.
Update Firmware for TM4C1294XL
Open Code Composer Studio. Choose the directory where you would like to build your Workspace and click Launch
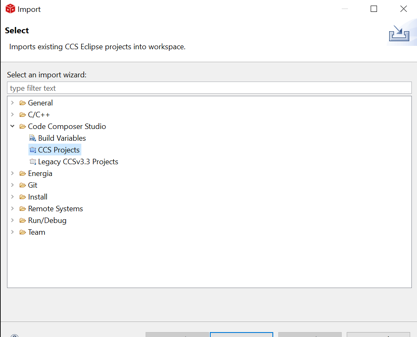
Click on File >> Import. On the Import selection screen, choose Code Composer Studio >> CCS Projects and hit Next
Click on Browse.. located next to Select search-directory. Navigate to C:/ti/TivaWare_C_Series-2.1.4.178/examples/boards/ek-tm4c1294xl/qs_iot/ccs and click on Select Folder.
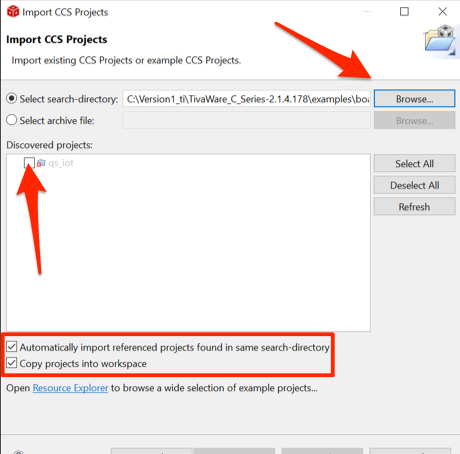
Make sure to check the box next to the following:
- qs_iot \(Under "Discovered Projects"\)
- Automatically import referenced projects found in same serach-directory
- Copy projects into workspace
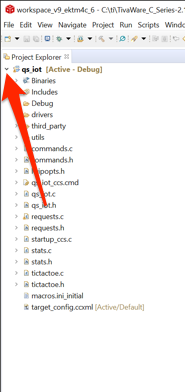
Once the project is loaded, click on qs_iot to expand the file directory
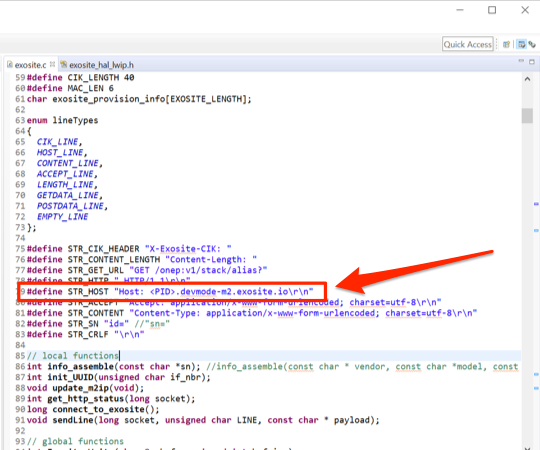
In third_party >> exosite Click on exosite.c to open the script editor. . Scroll down to line 79, and you will see the HOST definition. Note that the URL is prepended with <PID>. You will need to replace <PID> with the Product ID you copied in Step 13 of Sign up for Exosite Business Account.
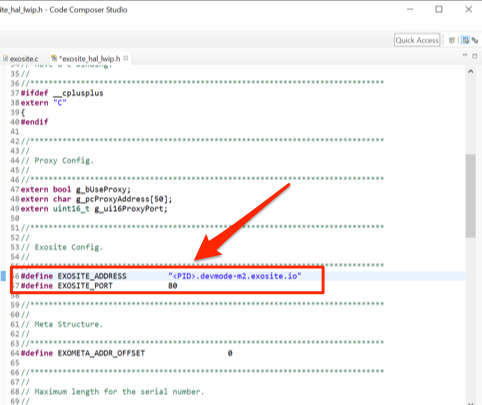
Click on exosite_hal_lwip.h in the script editor and find line 56. Replace m2.exosite.com with <PID>.devmode-m2.exosite.io, making sure to use your Product ID instead of <PID>. Lastly, change the host to Port 80 if necessary.
Tip
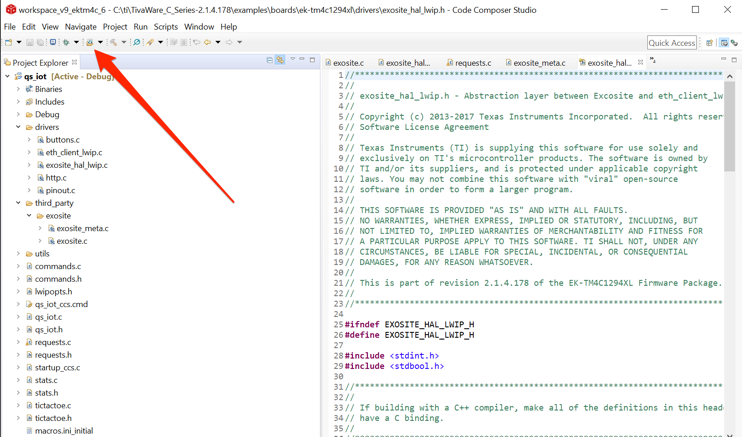
If you are unable to locate exosite_hal_lwip.h, Follow Includes >> C:/ti/TivaWare_C_Series-2.1.4.178/examples/boards/ek-tm4c1294xl >> drivers in the Project Explorer. You will find the exosite_hal_lwip.h file listed here.
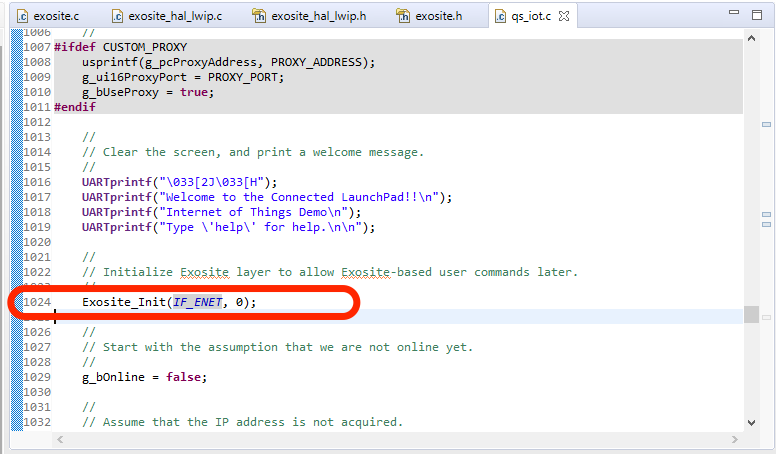
Open qs_iot.c and find line 1024. Replace this line with Exosite_Init(IF_ENET, 0); as shown in the image below.
Flash Updated Firmware to the Board
Plug the provided ethernet cable into your EK-TM4C1294XL's ethernet port.
Connect the your local machine to the debug port on the EK-TM4C1294XL using the provided USB cable.
Click on the small flash icon in Code Composer Studio to download the new code to your board. Once this is complete, the EK-TM4C1294XL will immediately begin running the new code and connect with your Exosite Account.
Control the Board Via Your Exosite Account
Navigate back to your Exosite Business Account and click on your IoT Connector. You will see the device listed under the Device List. The ID will be the MAC address of your particular board.
Click on the device to see the values being updated from your EK-TM4C1294XL
Change the value of ledd1 and ledd2 to 0 or 1 in order to toggle the LEDs located on the board on/off.
Next with your EK-TM4C1294XL
This concludes the port of the EK-TM4C1294XL Out-Of-Box experience to Murano. Now that your device is communicating with the Exosite Platform, we encourage you to check out ExoSense™ - Exosite's Remote Condition Monitoring Application! ExoSense™ gives you the ability to take your EK-TM4C1294 monitoring to the next level with easy-to-build Dashboards, alert condition configuration, user management and much more!
If you have any questions, please do not hesitate to contact support@exosite.com for assistance, or visit community.exosite.com for additional help.