Arduino Opta PLC
Arduino Pro is Arduino's professional and industrial product line, bringing the simplicity of the Arduino ecosystem to demanding industrial applications.
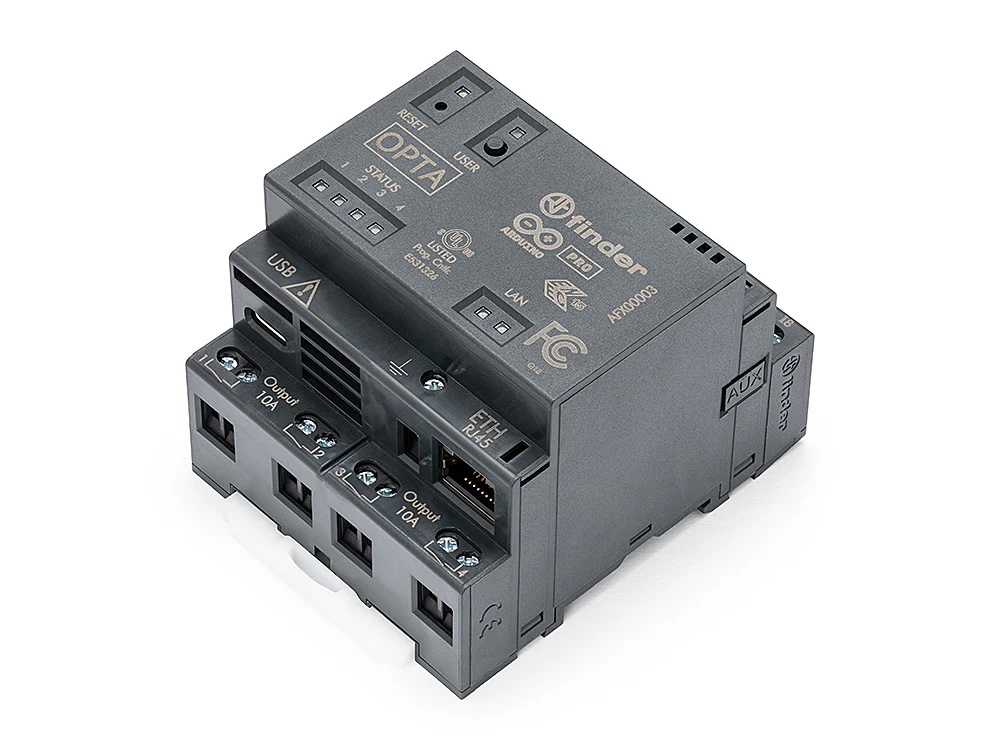
The Arduino Opta is a secure, easy-to-use micro PLC with Industrial IoT capabilities. It supports standard IEC 61131-3 programming languages as well as the Arduino programming language, making it a flexible choice for industrial automation and monitoring. The Opta features onboard Ethernet, Wi-Fi, and Bluetooth connectivity, digital and analog I/O, relay outputs, and a robust DIN-rail form factor.
This guide walks through connecting an Arduino Opta to ExoSense using the arduino_exosite_http Arduino library, which provides secure HTTPS communication with the Exosite IoT platform.
Prerequisites
Device Setup
Before proceeding, ensure your Arduino Opta is properly set up:
- An Arduino Opta with an Ethernet connection to the internet
- Arduino IDE (version 2.x recommended) installed on your development machine
- The Opta board support package installed via the Arduino IDE Board Manager (search for "Arduino Mbed OS Opta Boards")
Refer to the Arduino Opta Getting Started guide for initial hardware setup.
ExoSense Account
Sign up for an Exosite account with an active ExoSense instance. If you already have ExoSense deployed, proceed to the IoT Connector setup section below.
ExoSense Setup
Create an IoT Connector
Use an existing IoT Connector or create a new one in your Exosite account. Important: This connector must be set up from the ExoSense Standard Connector Template and be using the HTTP protocol.
Add this IoT Connector to your ExoSense instance. This connector will serve as the endpoint where your Opta device sends data.
Refer to the Connect a Device guide for more specific details of using IoT Connectors.

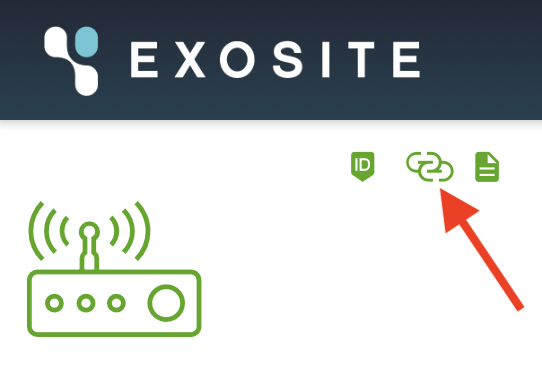
After creating the connector, copy the connector domain from the endpoint URL shown in the upper left. The full endpoint will look like https://<connector-domain>.m2.exosite.io — you need only the domain portion (e.g., a5c9szkndm4g00000.m2.exosite.io) for use in your Arduino sketch.
Add a Device to the Connector
From within the IoT Connector's management interface, add a new device. Use your Opta's MAC address as the device identifier (e.g., A8:61:0A:00:11:22). Note this identifier — you will need it when configuring your sketch and when claiming the device in ExoSense.
Arduino IDE Setup
Install the Library
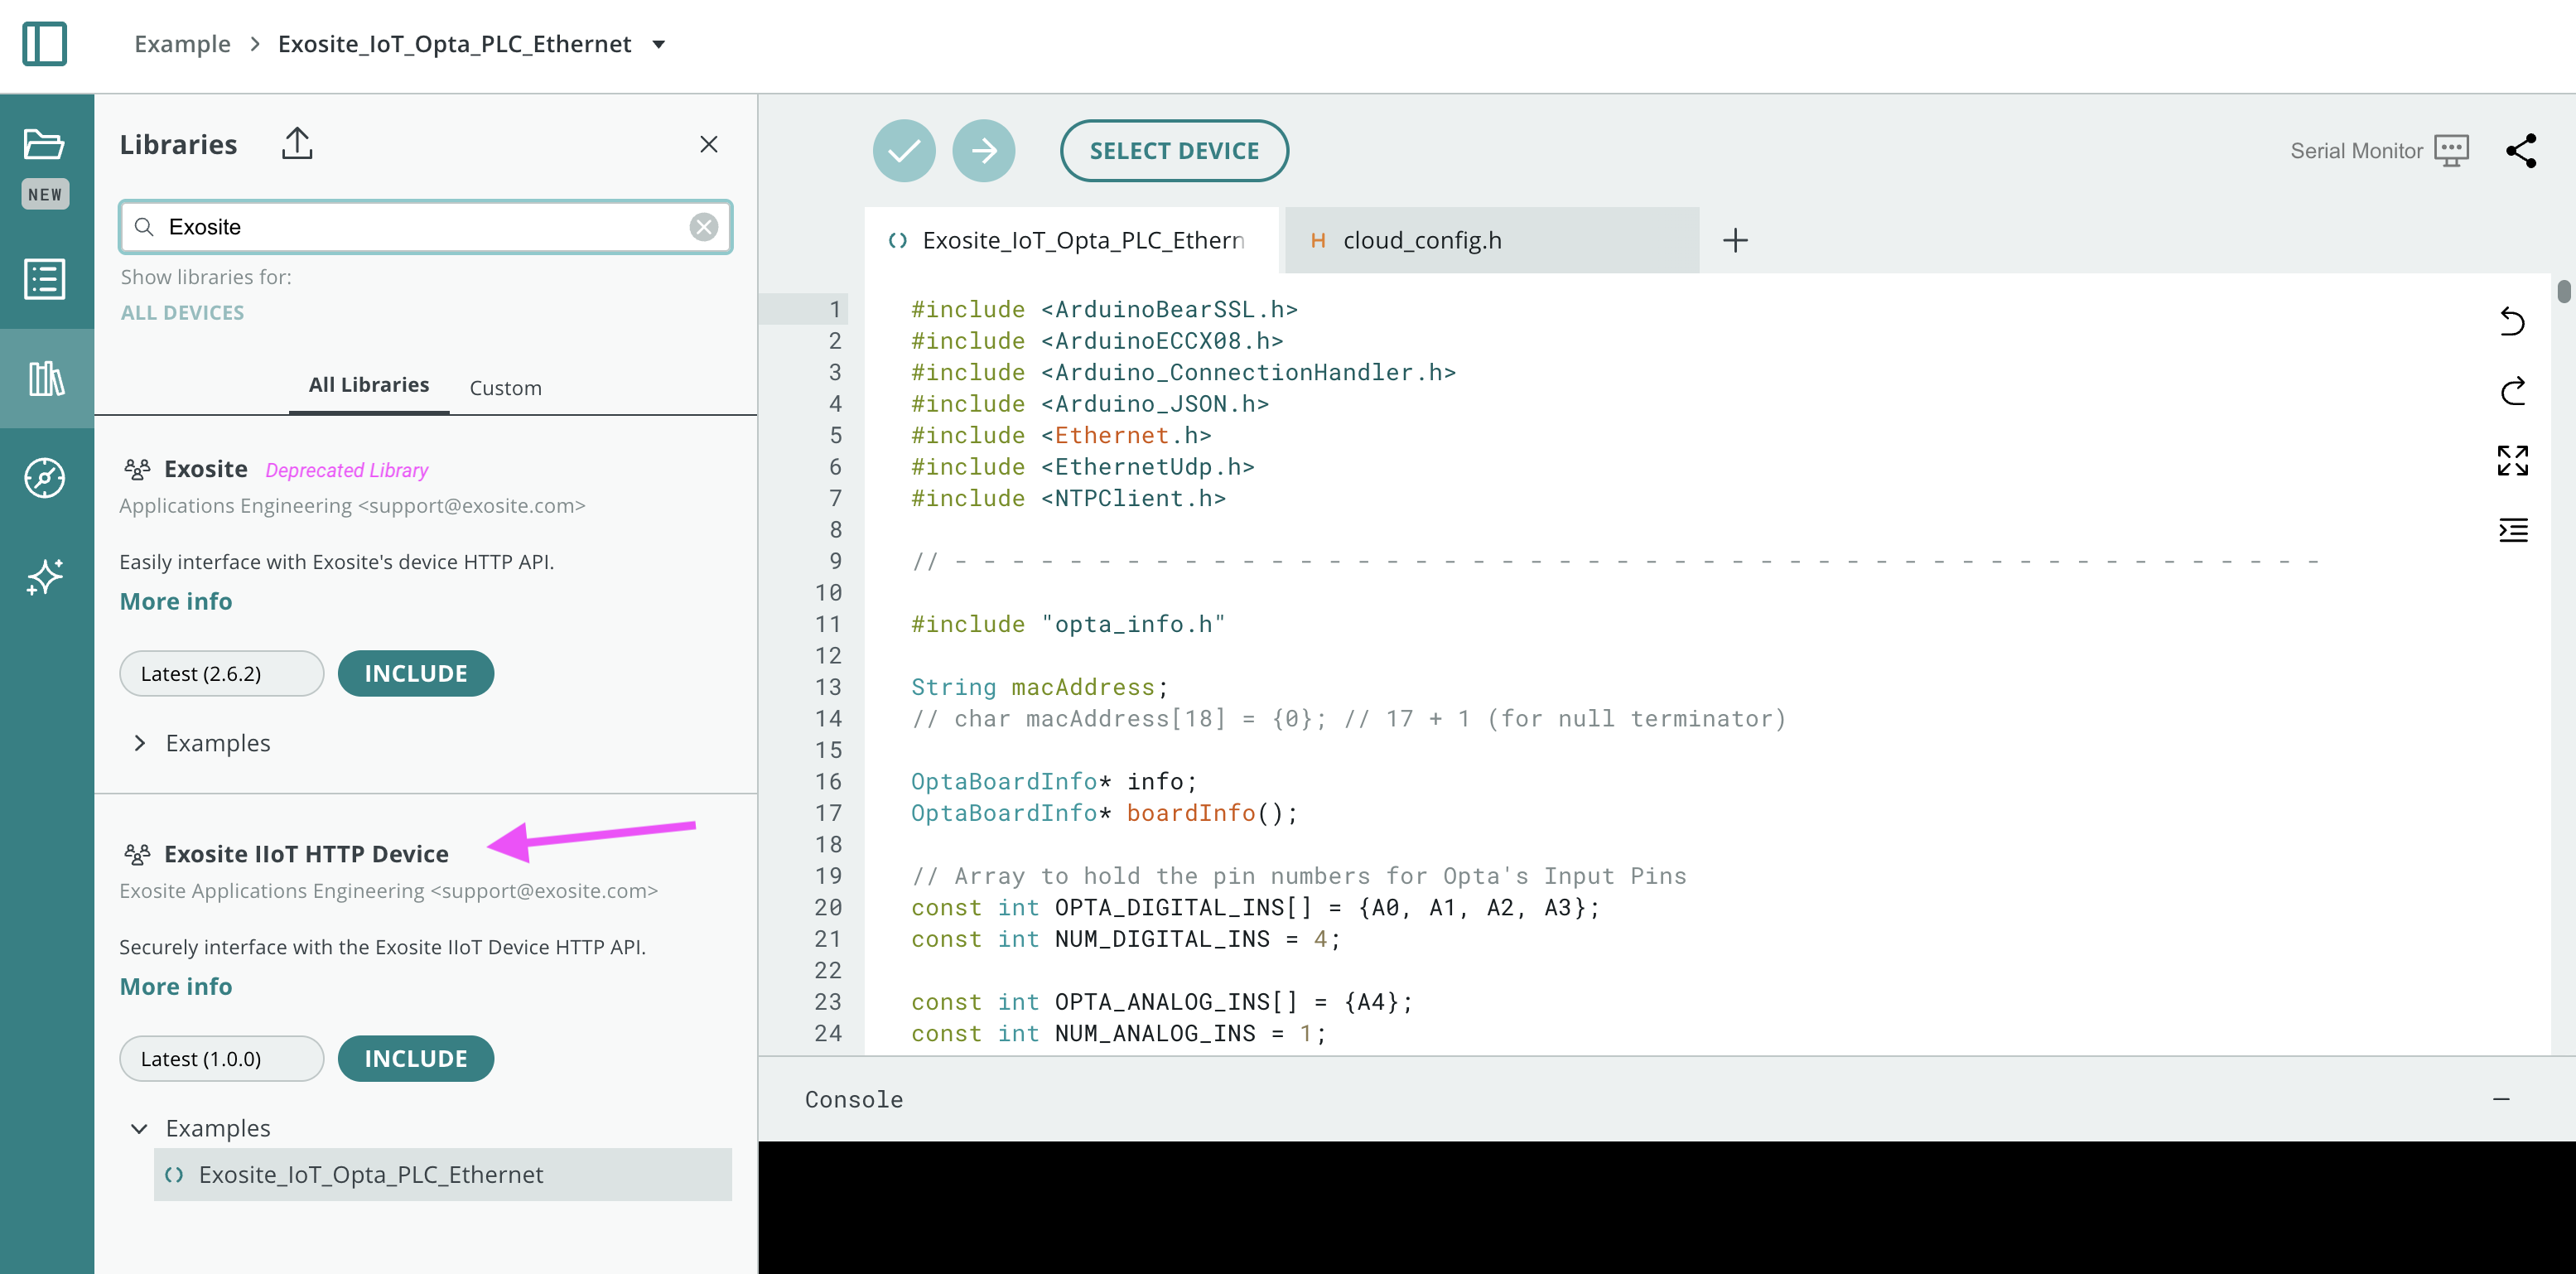
Install the Exosite IIoT HTTP Device library from the Arduino Library Manager:
- In the Arduino IDE, open Sketch → Include Library → Manage Libraries…
- Search for
Exosite - Install Exosite IIoT HTTP Device
Alternatively, clone or download the library directly from github.com/exosite/arduino_exosite_http and place it in your Arduino libraries folder.
Configure the Sketch
The arduino_exosite_http library handles device provisioning, authentication, and data transfer over HTTPS. The library's included example Exosite_IoT_Opta_PLC_Ethernet is a complete starting point — open it from File → Examples → Exosite IIoT HTTP Device.
Key Configuration
If you are using the included example sketch, the IoT Connector domain and channel configuration are defined in a companion file called cloud_config.h that lives alongside the sketch. Edit that file to set your connector domain and customize your channel definitions.
If you are starting from scratch, define these directly at the top of your sketch:
#include <ExositeHTTP.h>
#include <ExositeTrustAnchors.h>

// Replace with your IoT Connector domain
const char CONNECTOR[] = "a5c9szkndm4g00000.m2.exosite.io"; //YOUR CONNECTOR FQDN
Device Provisioning
The first time your Opta connects, it provisions itself with ExoSense using its MAC address as the unique device identity. A token is returned and stored in flash for subsequent connections:
String deviceToken;
String macAddress = "A8:61:0A:00:11:22";  // Opta MAC address as unique identifier

ExositeHTTP exosite(&sslClient, CONNECTOR);
ApiResponse res = exosite.provision(macAddress, deviceToken);

if (res.success) {
  // Store token in flash for reuse
  exosite.setToken(deviceToken);
}
Channel Configuration
const char CHANNEL_CONFIG[] = R"json(
{
  "channels": {
    "001": {
      "display_name": "Temperature",
      "properties": {
        "data_type": "TEMPERATURE",
        "data_unit": "CELSIUS",
        "precision": 1
      },
      "protocol_config": {
        "report_rate": 10000
      }
    },
    "002": {
      "display_name": "Digital Input 1",
      "properties": {
        "data_type": "BOOLEAN"
      },
      "protocol_config": {
        "report_rate": 10000
      }
    }
  }
}
)json";

exosite.write("config_io", String(CHANNEL_CONFIG));
For the full channel configuration specification including all available data types, units, and properties, see the ExoSense Channel Signal IO Schema.
Sending Data
In your main loop, build a JSON payload from your Opta's I/O and send it to ExoSense:
void loop() {
  // Read Opta inputs
  float temperature = readTemperatureSensor();
  bool digitalIn1 = digitalRead(A0);

  // Build JSON payload keyed by channel ID
  String payload = "{\"001\":" + String(temperature, 1) +
                   ",\"002\":" + String(digitalIn1 ? "true" : "false") + "}";

  ApiResponse res = exosite.write("data_in", payload);

  if (!res.success) {
    Serial.print("Write failed, HTTP ");
    Serial.println(res.statusCode);
  }

  delay(10000);  // Send every 10 seconds
}
To receive commands or configuration changes from ExoSense, read from data_out:
String command;
ApiResponse res = exosite.read("data_out", command);

if (res.success && command.length() > 0) {
  // Parse and act on the received command
}
Flash and Upload
Connect your Opta via USB, select the correct board and port in the Arduino IDE, and upload your sketch. Open the Serial Monitor at 9600 baud to observe provisioning and data transmission status.
Claim the Device
Once your Opta is successfully sending data to the IoT Connector, claim it in ExoSense.
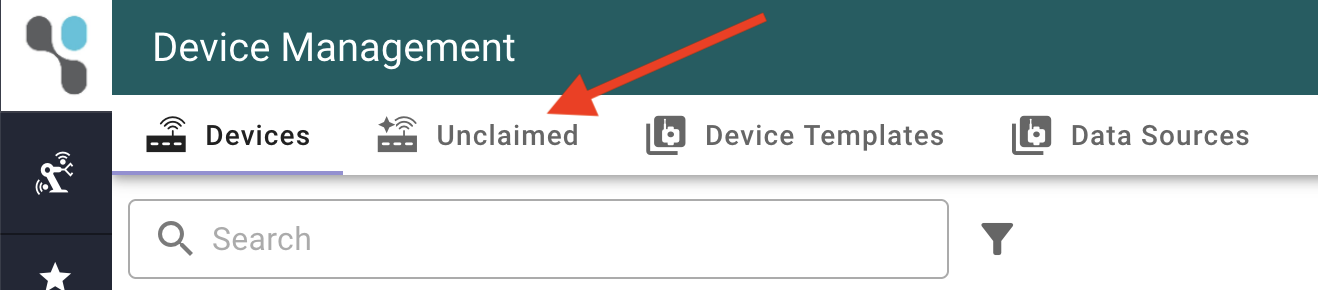
Navigate to the Devices tab in your ExoSense instance and select the Unclaimed tab.
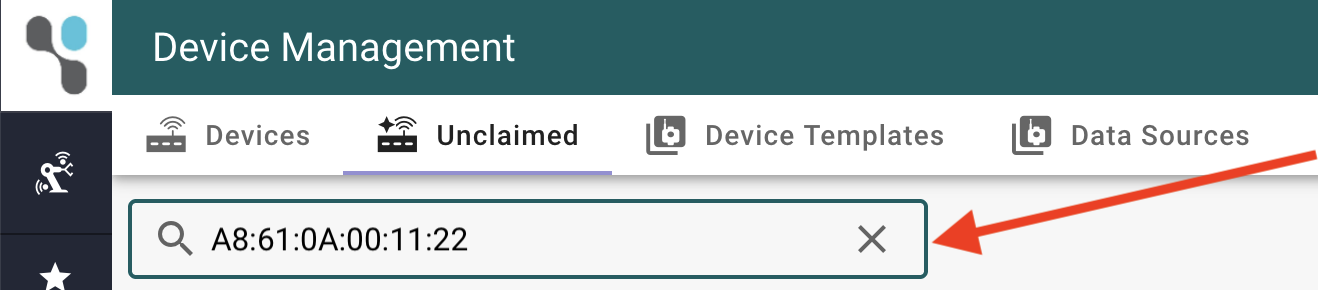
Search for your device using the MAC address identifier you configured earlier. Select the device from the results.
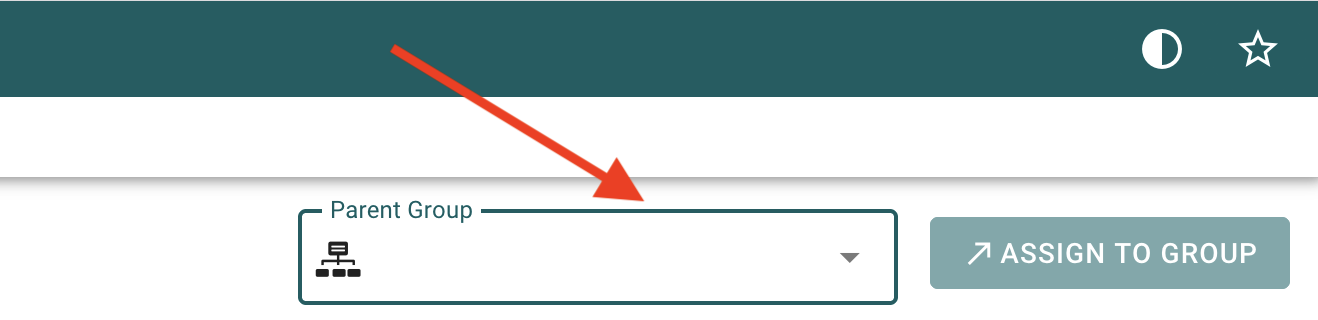
Select a device group to organize your device. You can change this assignment later if needed. Complete the claim process.
Create an Asset
To visualize and monitor the data from your Opta, create an asset in ExoSense.
From the device details page, select Create Asset from Device. This will create a new asset linked to your claimed device.
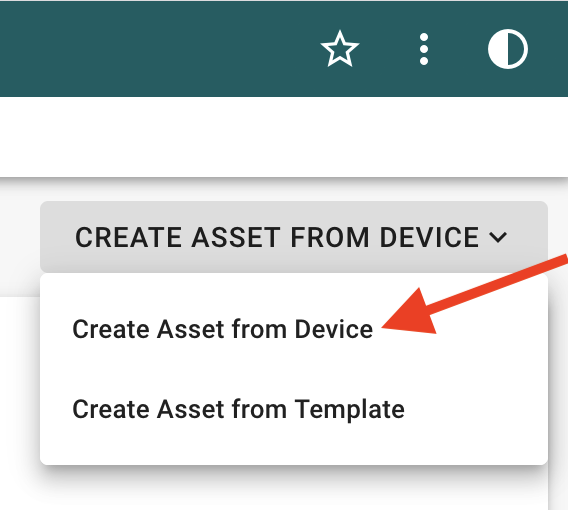
Name your new asset and confirm. The asset will inherit the device's configured channels and data streams, allowing you to build dashboards and set up notifications for monitoring purposes.
You can now add dashboards and visualizations to your asset. Refer to the ExoSense documentation on dashboards and assets for more information on customizing your monitoring experience.