BACE For Exosite
This document will walk through connecting devices to Exosite that are already connected to the BACE web portal
Prerequisites
- BACE Account with device configuration rights.
- Online BACE device.
- Exosite webhook URL. (This may be set up for you already)
- Working ExoSense Application.
Add your BACE Gateway into ExoSense
Configure Exosite Business
Log into your Exosite Business account.
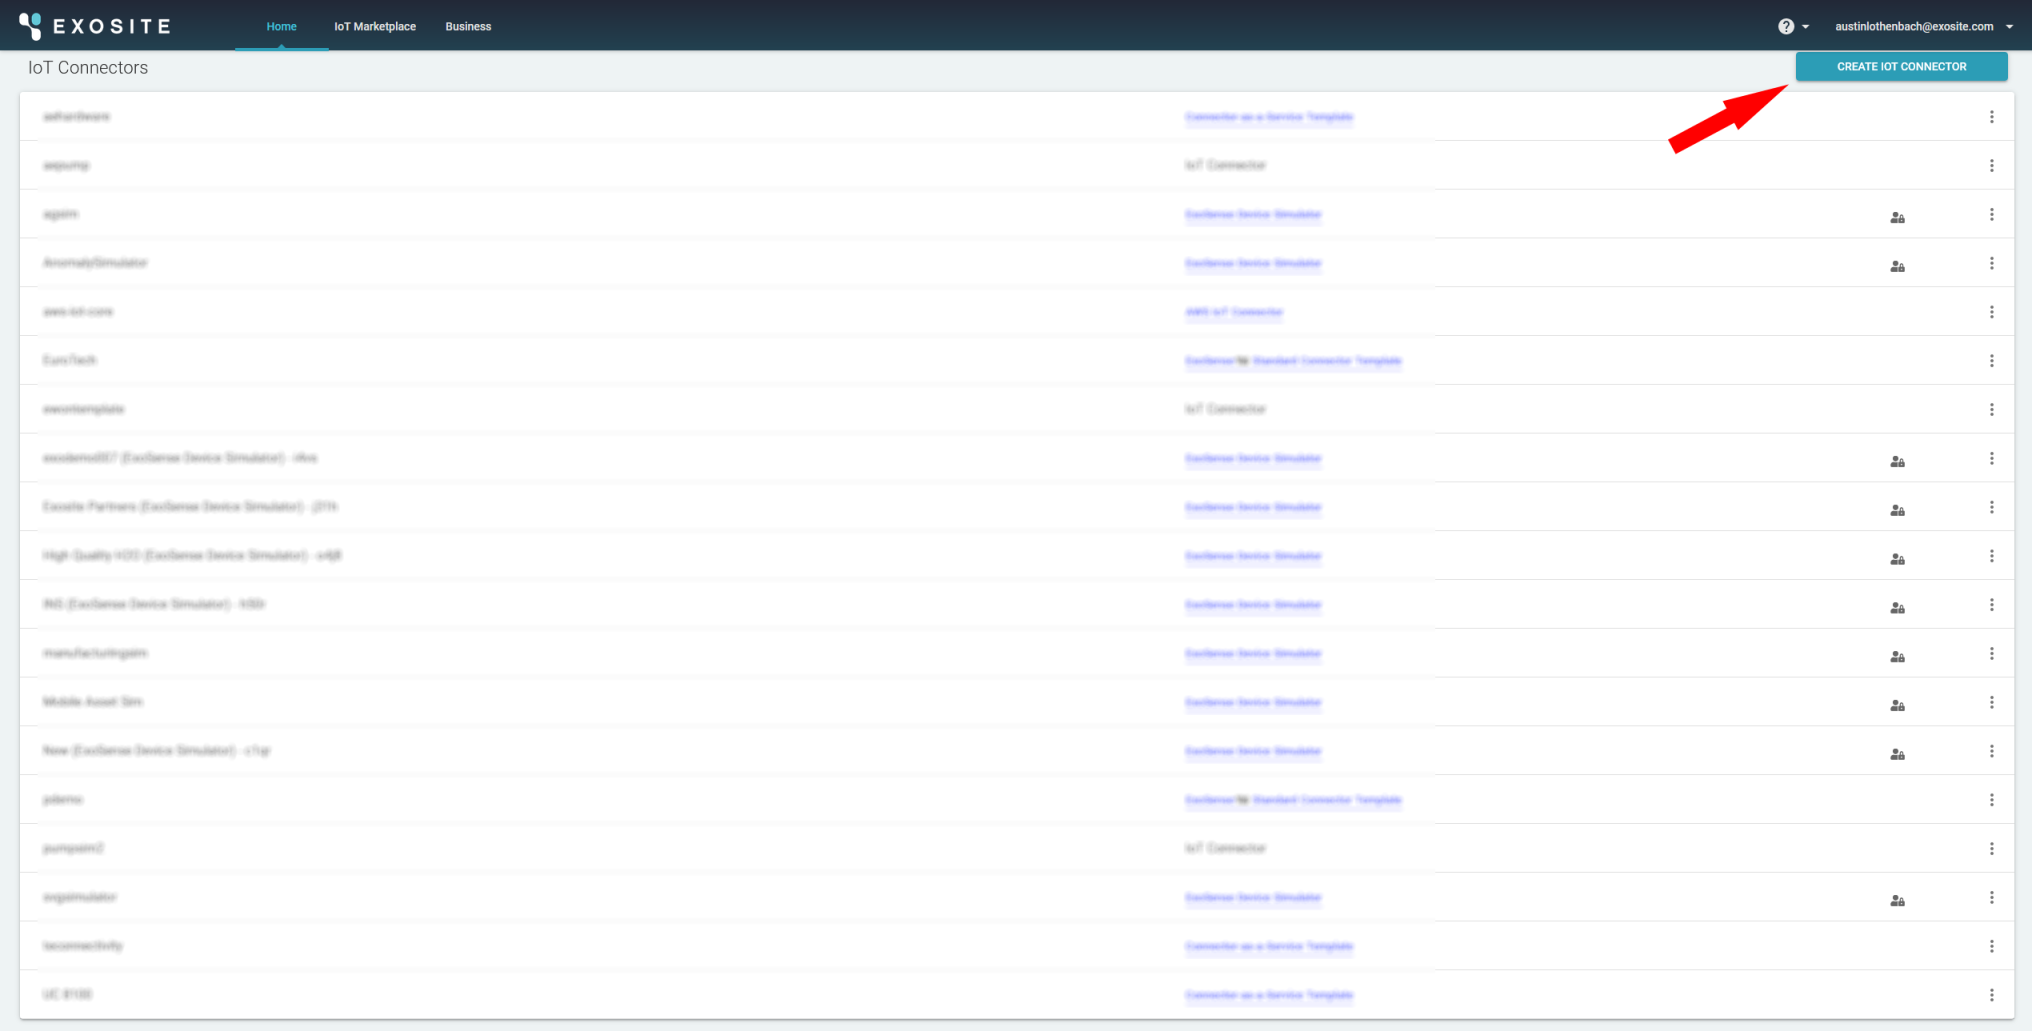
Create IoT Connector
- Scroll down to the IoT Connectors section and click on Create IoT Connector.
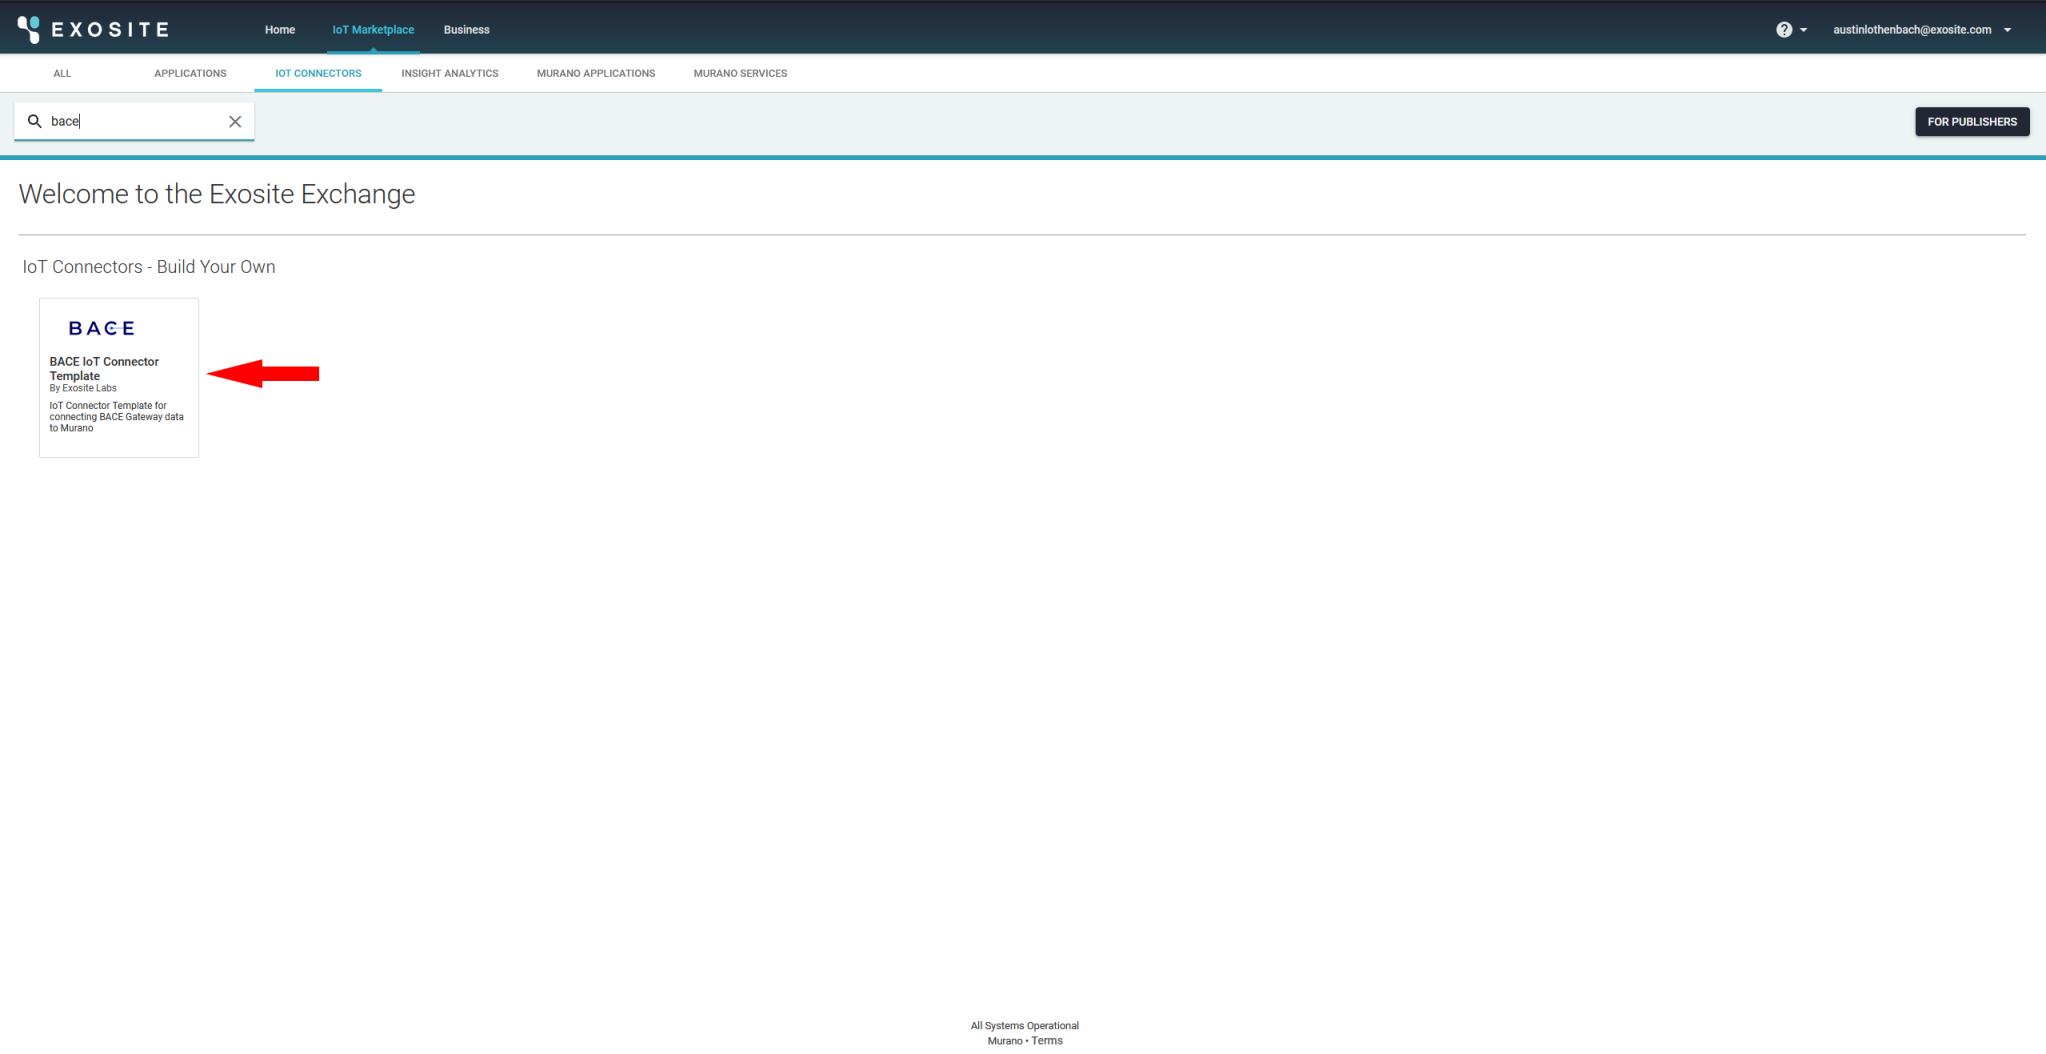
- In the top left search bar search for "BACE" to bring up the BACE Gateway connector.
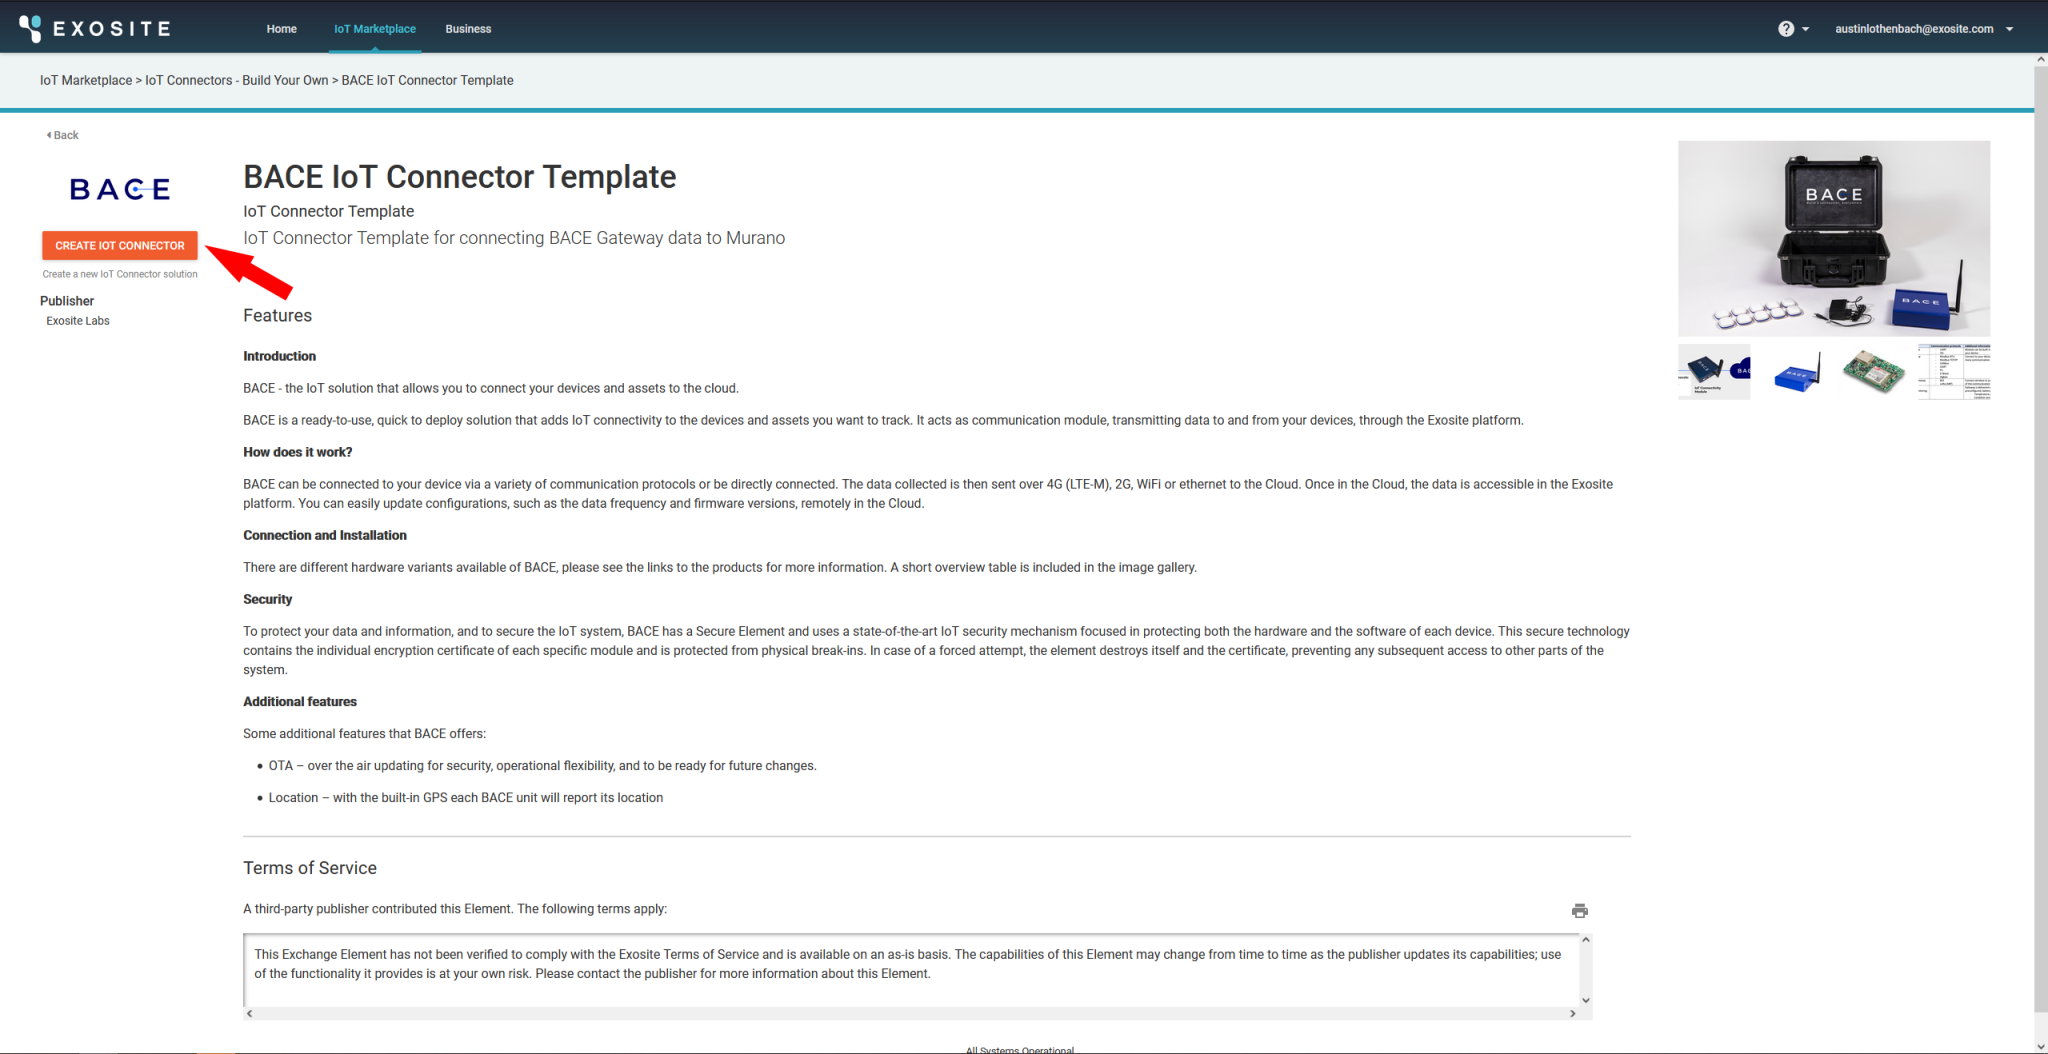
- Click on Create IoT Connector and name the IoT Connector.
Link IoT Connector to ExoSense
- From the business homepage, select your ExoSense application.
- From the left-hand menu, select IoT Connectors.
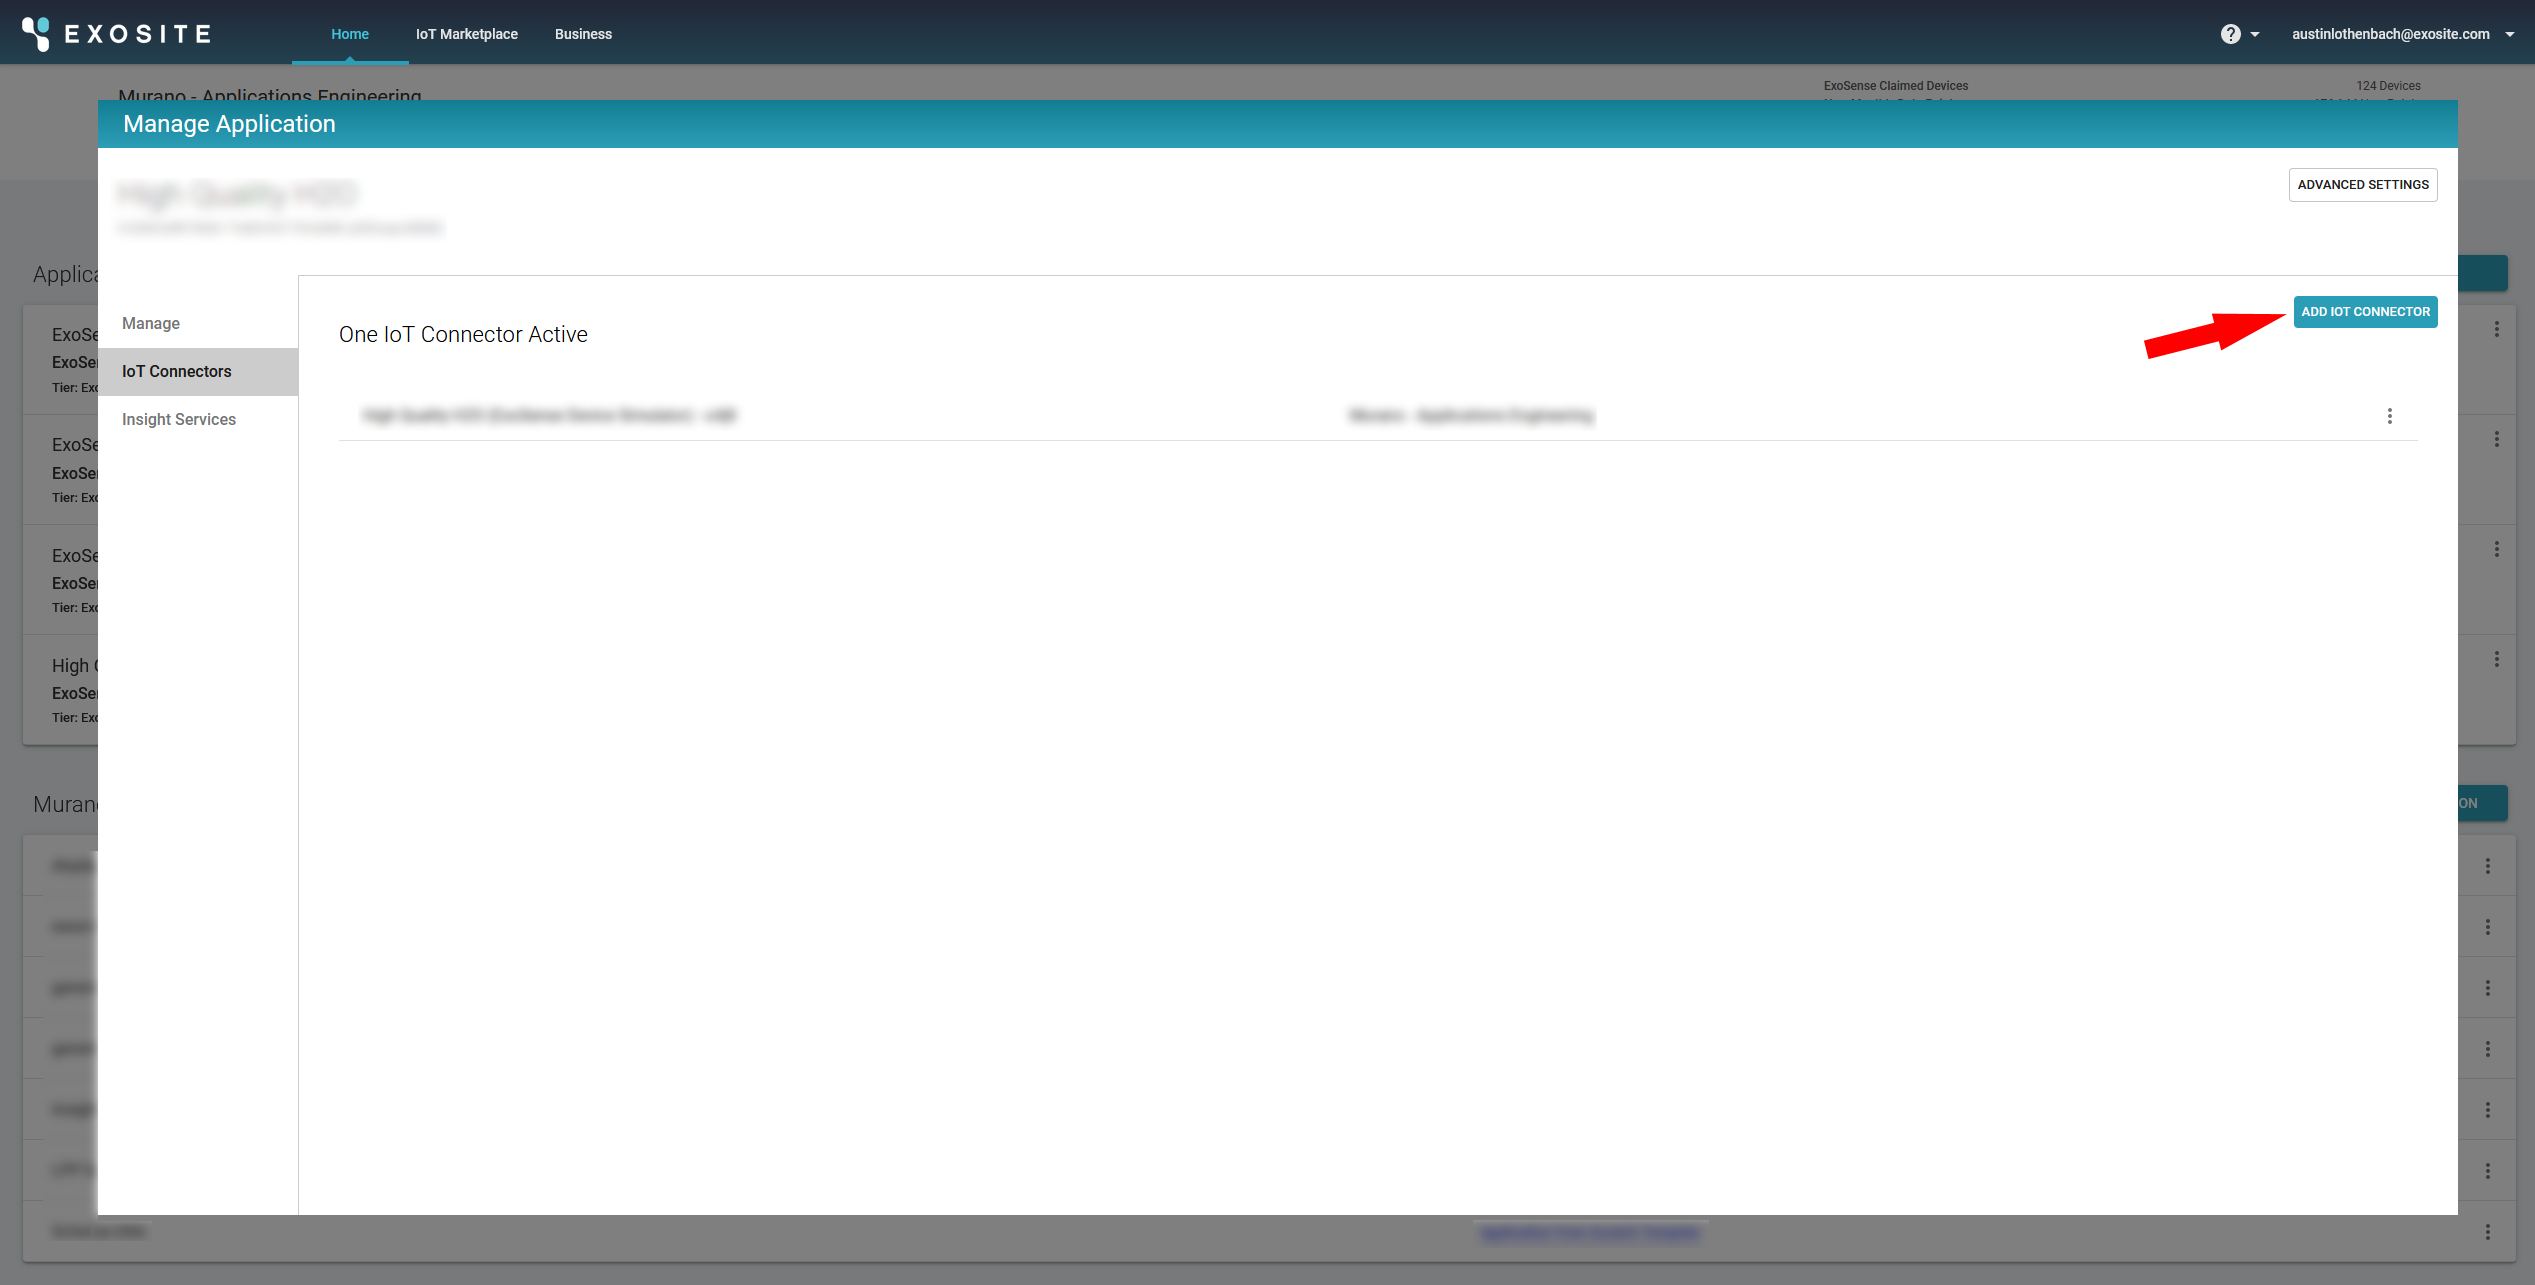
- Click on Add IoT Connector.
- Select your IoT Connector you named earlier in the "IoT Connectors" section.
- Click on Add To Solution.
- Click on Add To Solution.
Build Webhook URL
- From business homepage, click on your IoT Connector.
- Click on shield icon to copy Connector ID.
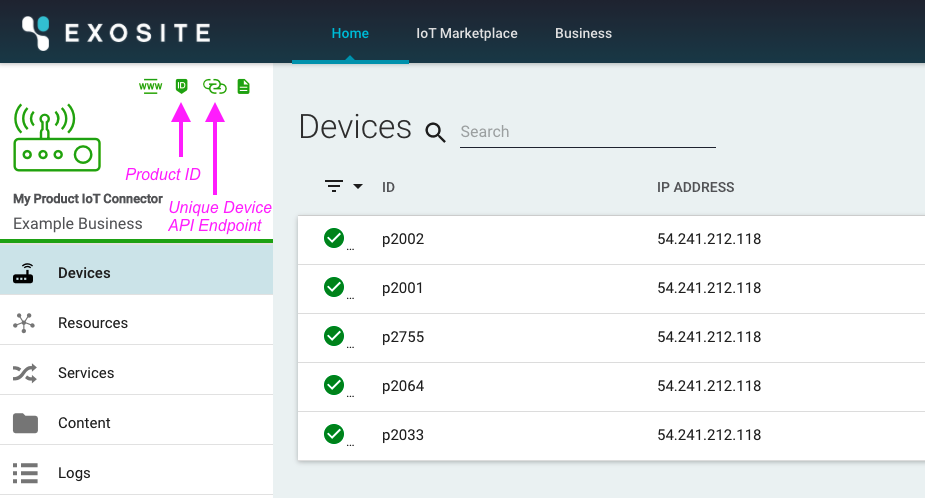
- Copy the following URL, substituting your Connector ID:
https://{CONNECTOR_ID}.apps.exosite.io/c2c/callback
Configure the BACE Portal
Login to your BACE web portal by going to https://dashboard.bace-iot.com and login with your personal credentials.
Creating a group
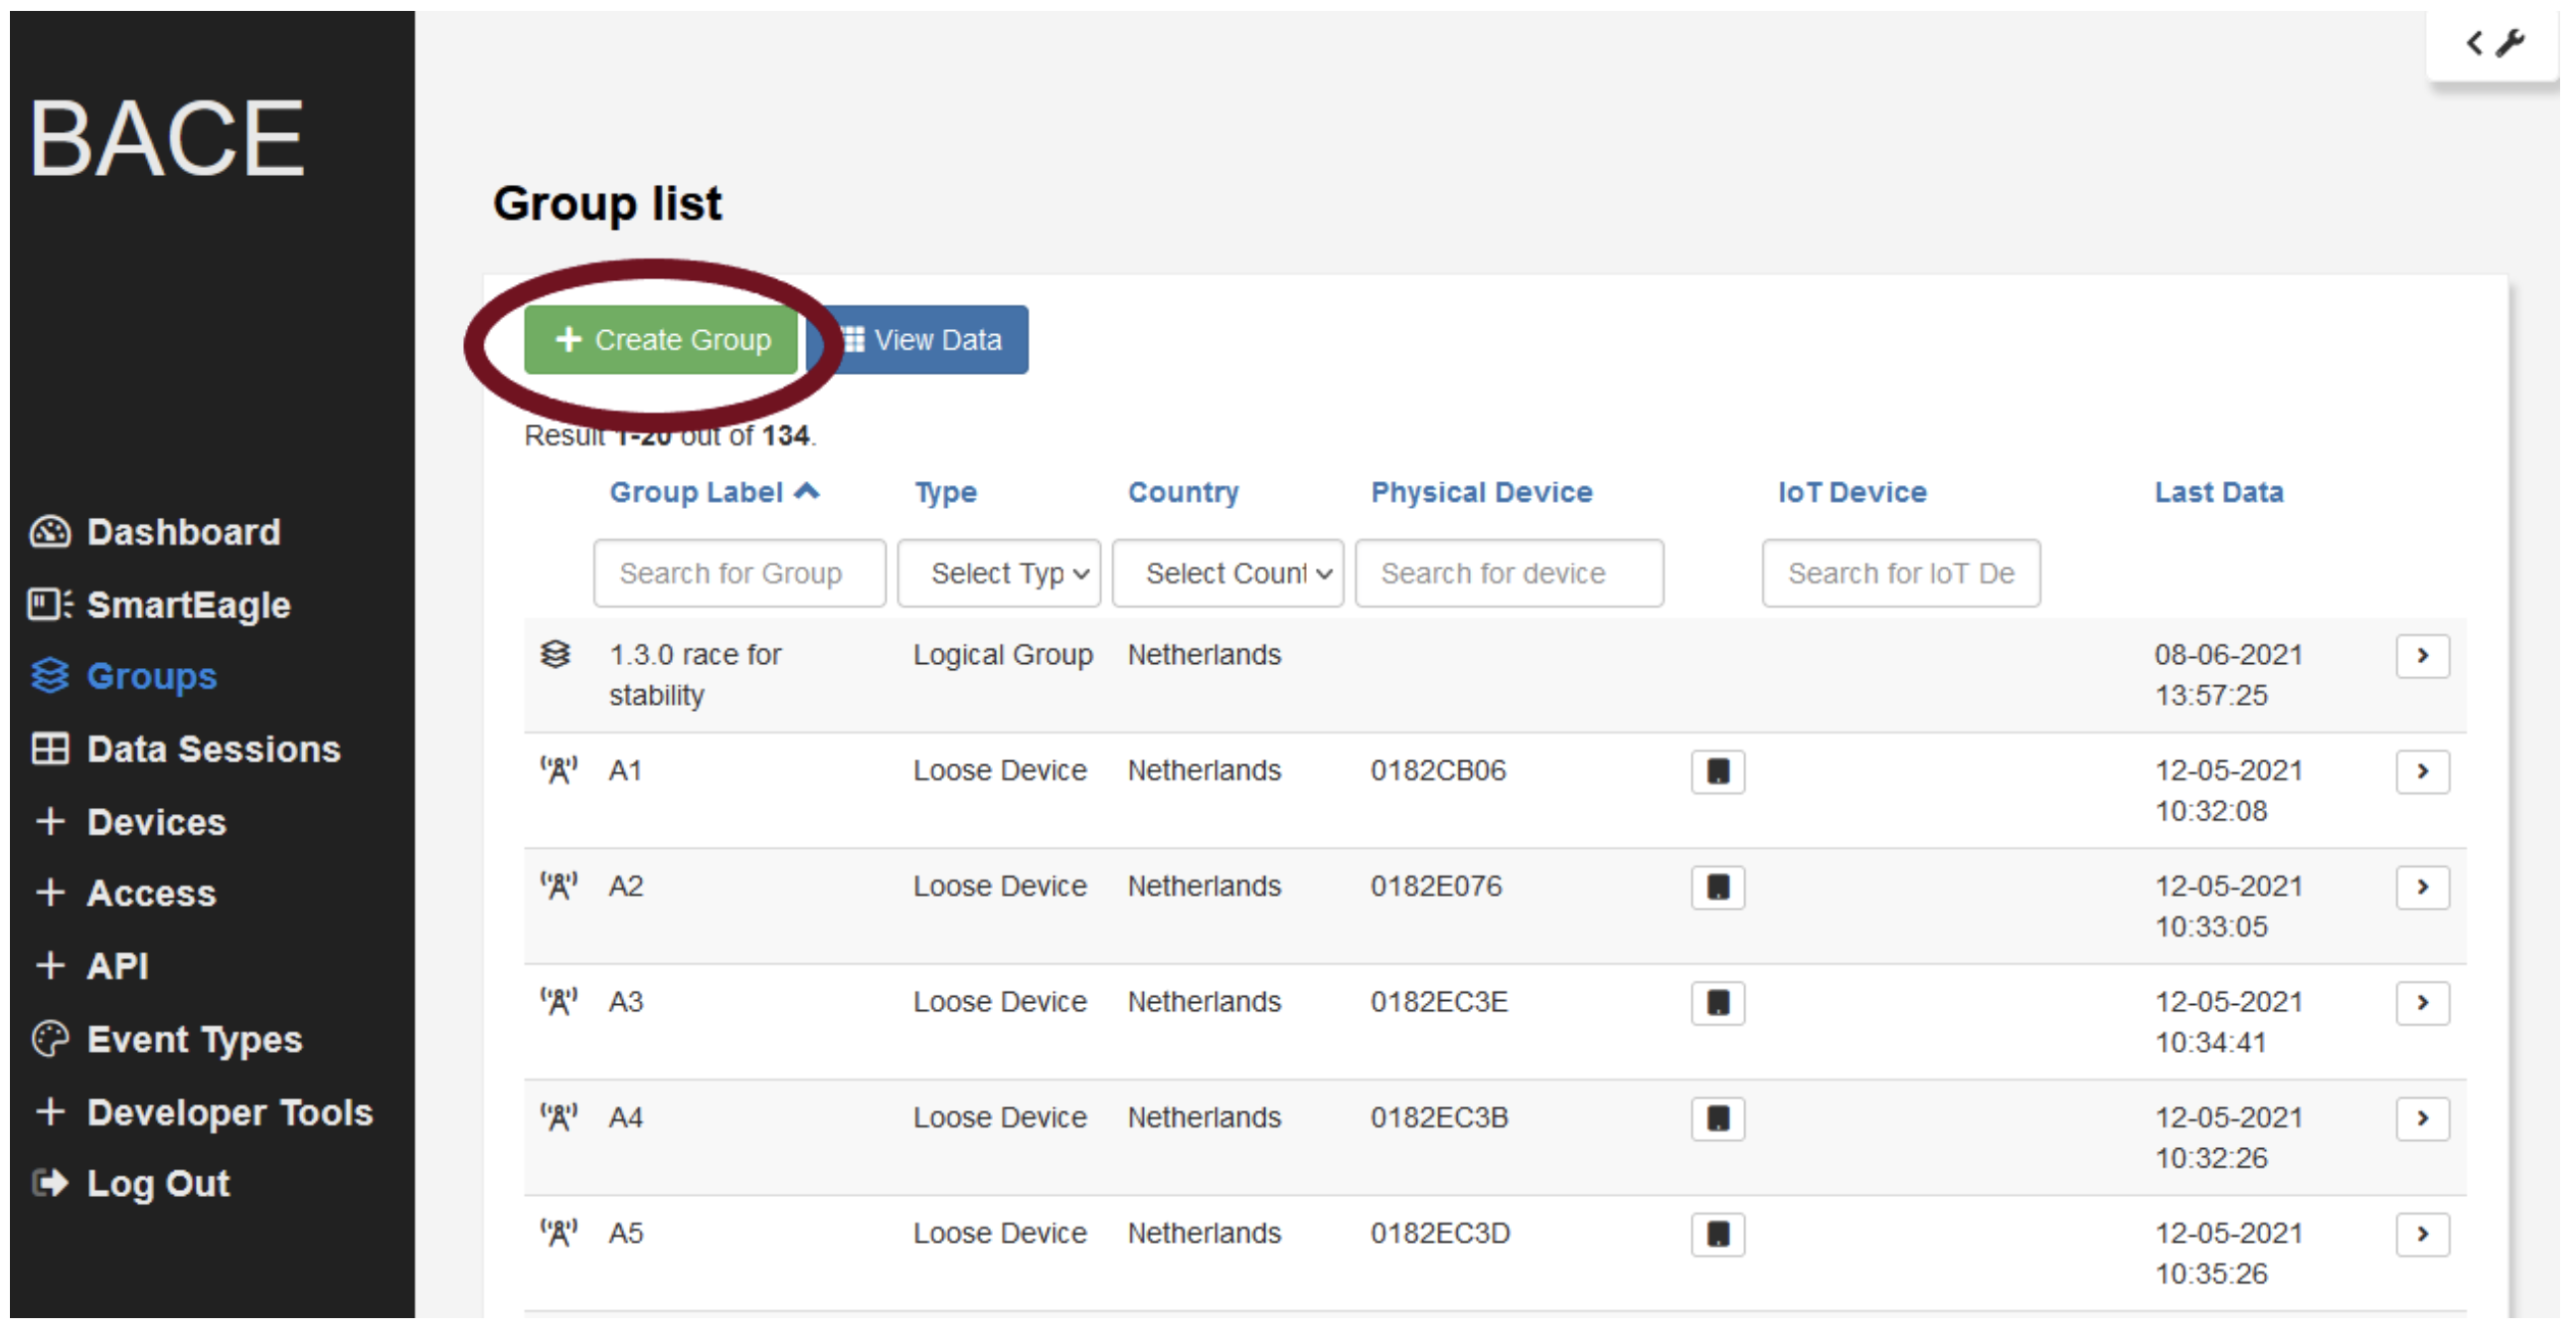
-
Go to the 'Groups' tab and click on + Create Group.
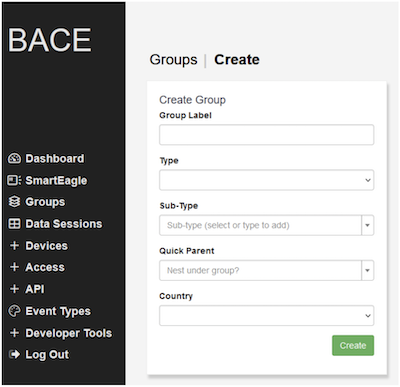
-
Choose a label and type and click on 'create'.
Assign your device
-
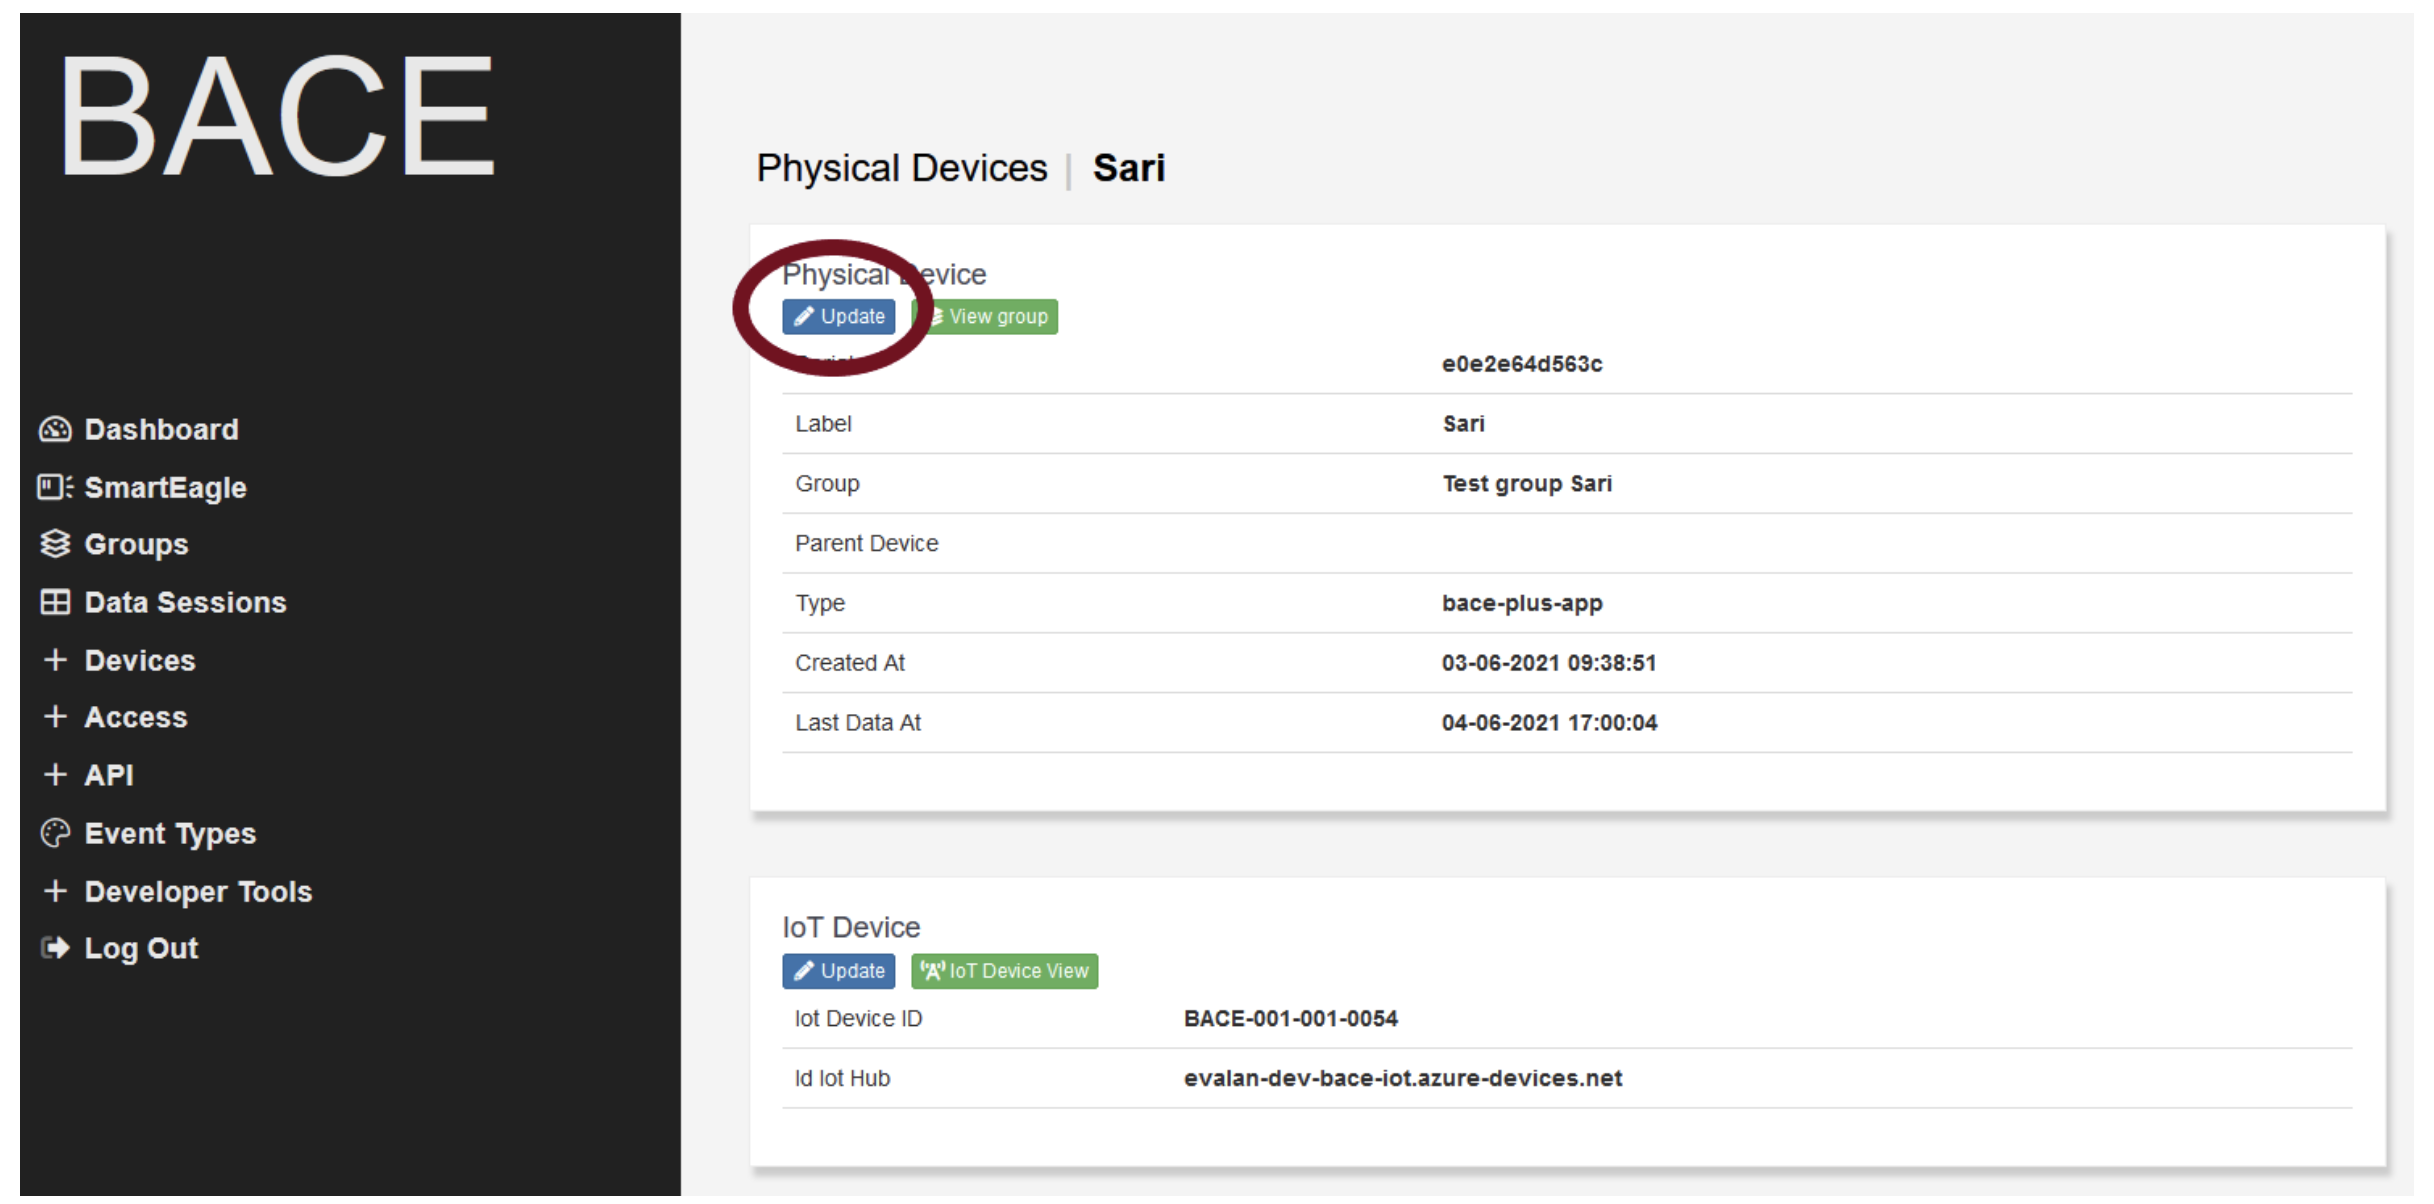
Go to the 'Devices' section and navigate to the 'Physical devices' sub tab.
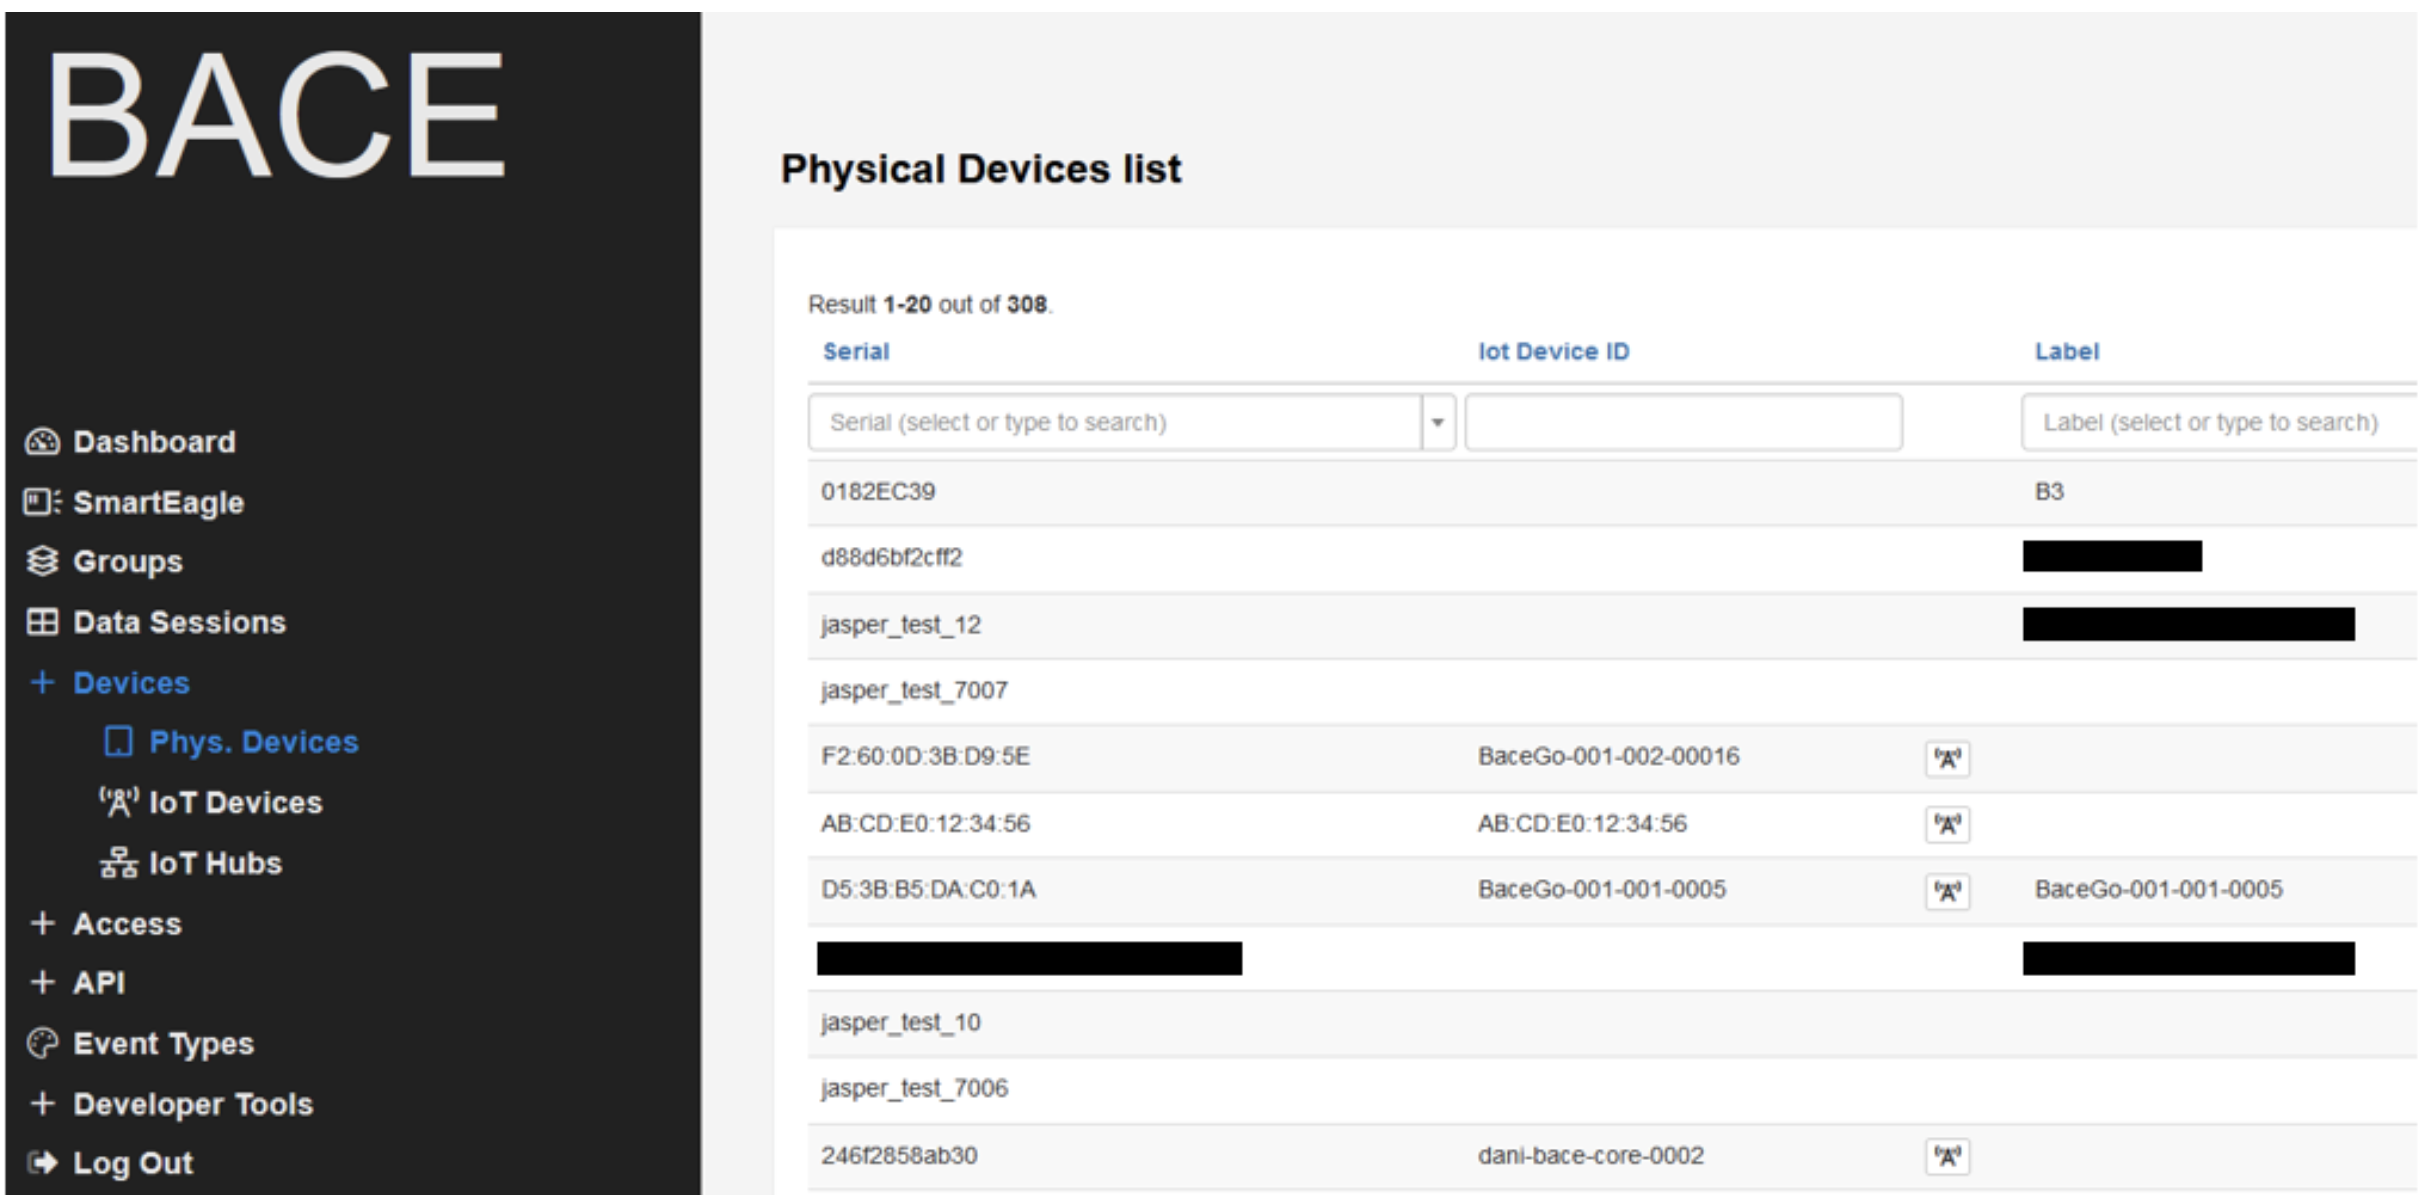
-
Find your BACE device by searching for its serial number, IoT Device ID or label and open up your device's page. Then click the 'update' button.
-
Give your device a label of your choice and assign it to the group you created earlier. Click 'Update' to save your changes.
Create the Webhook
-
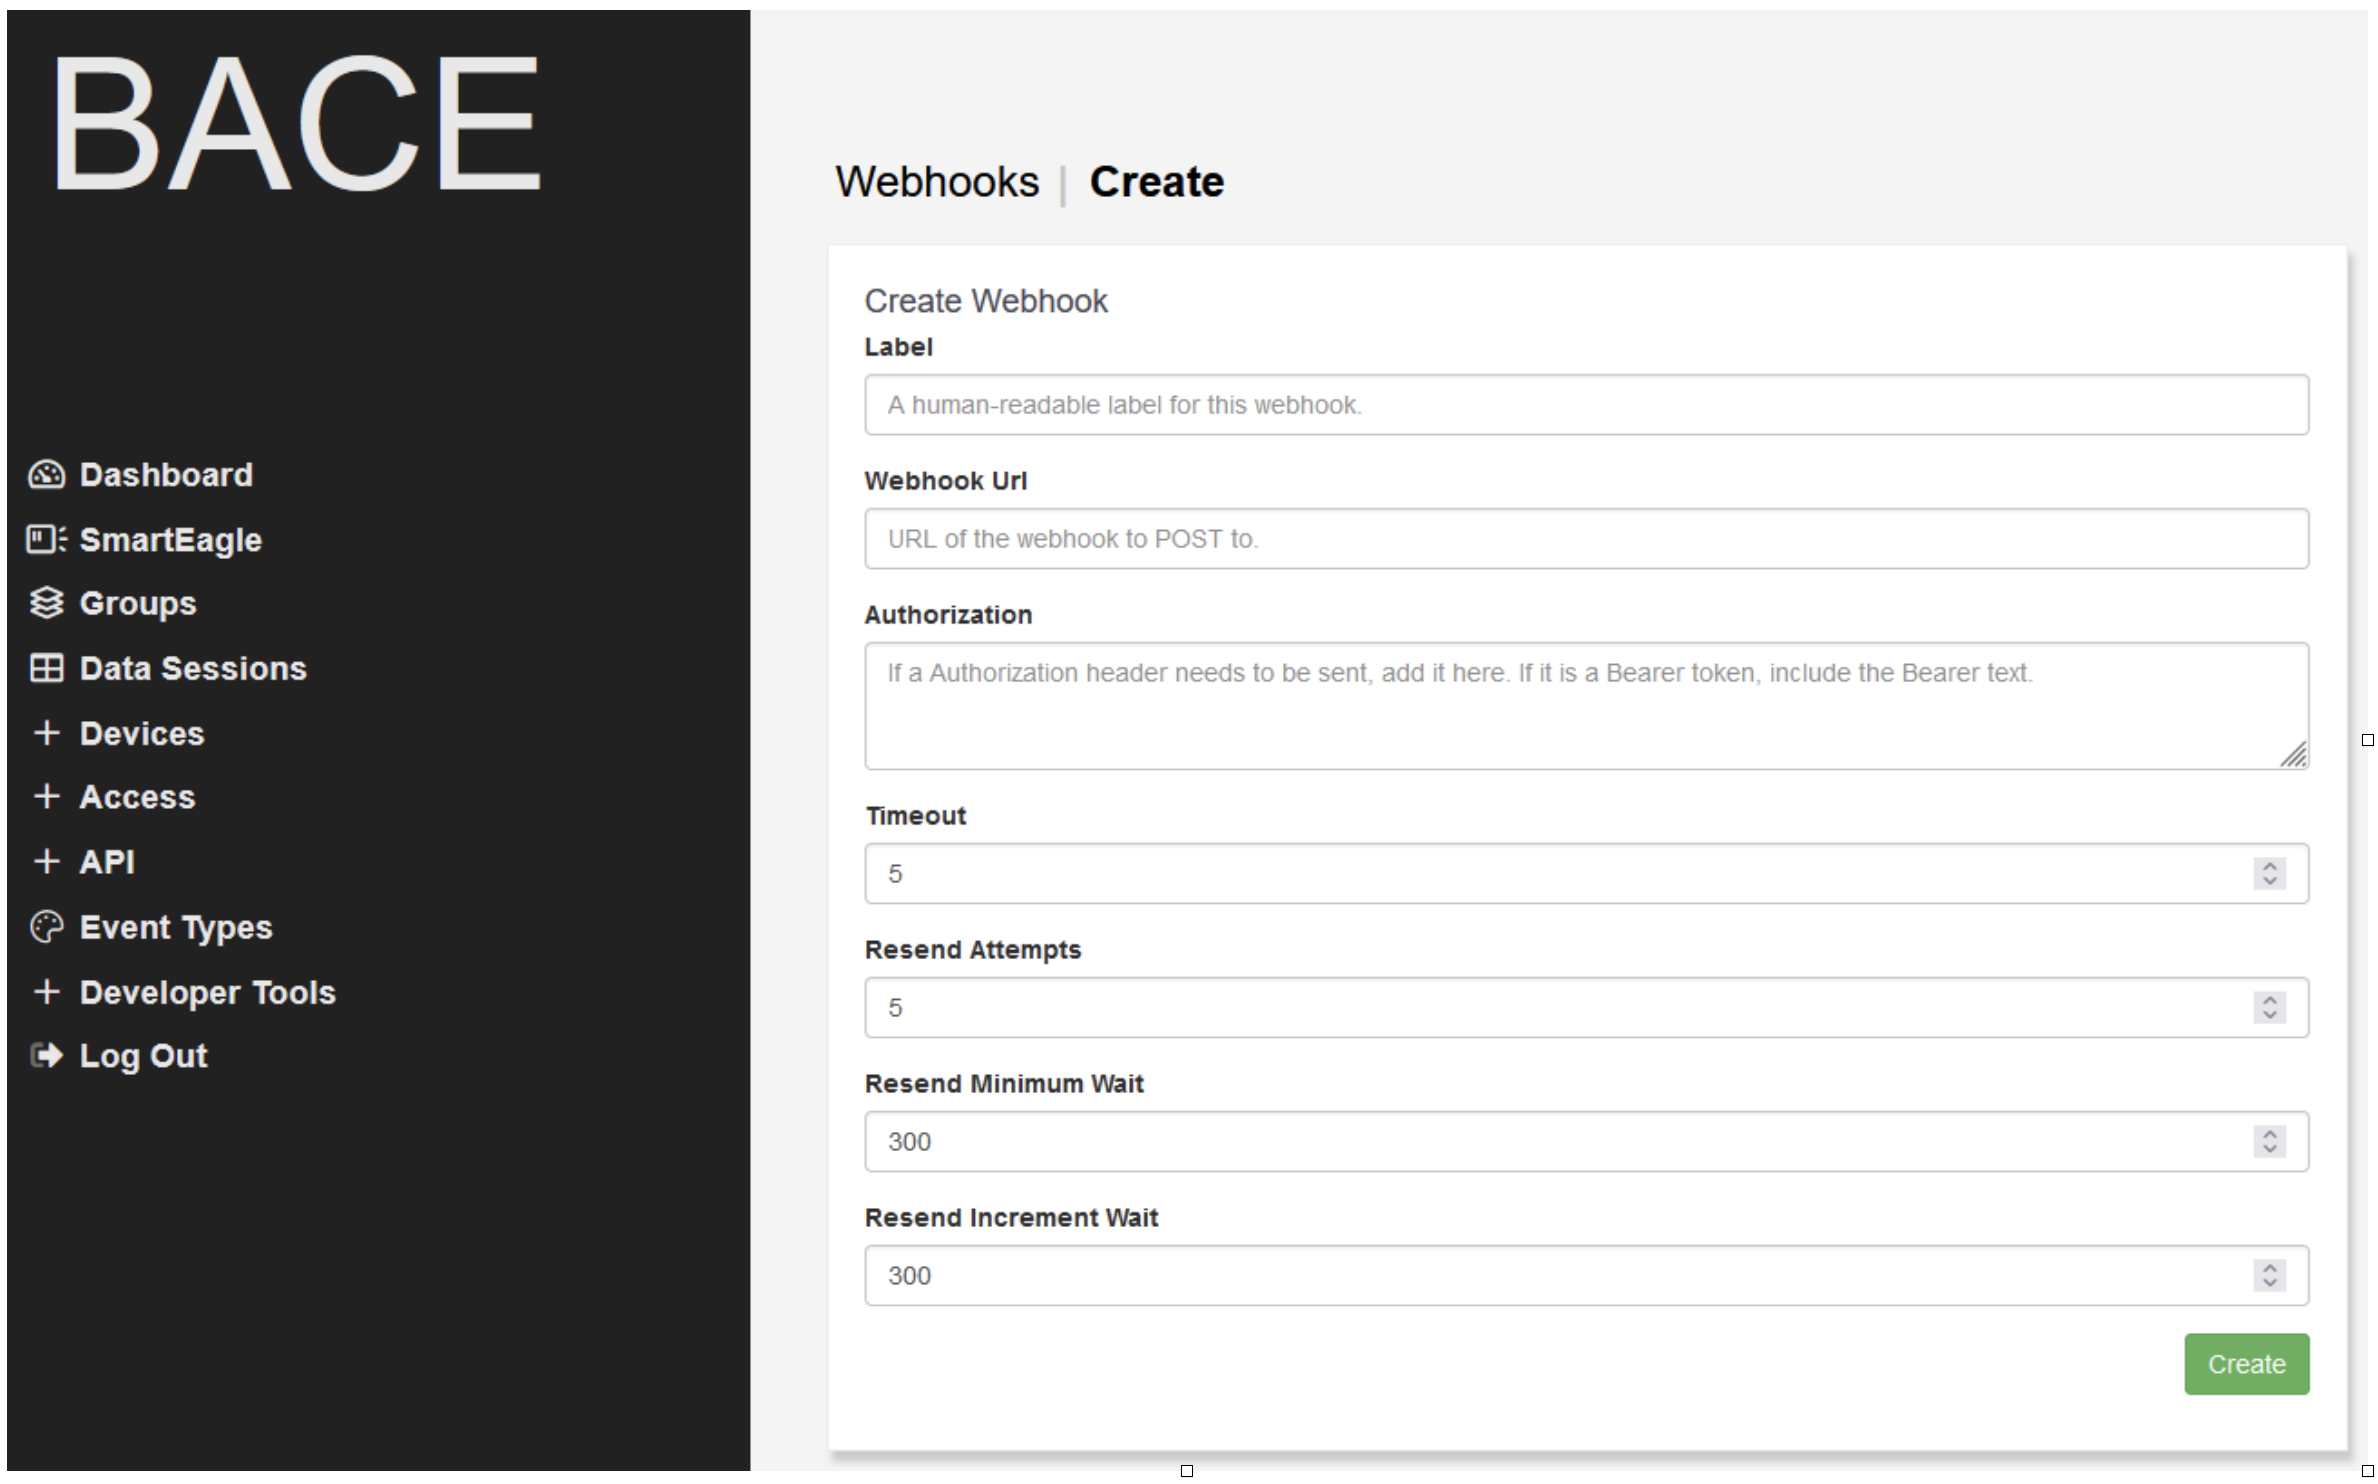
Navigate to the webhook tab inside the API section. Click on 'Create webhook'.
-
Give the webhook a representative label and insert your Exosite Webhook URL created above. Other settings can be left on default.
-
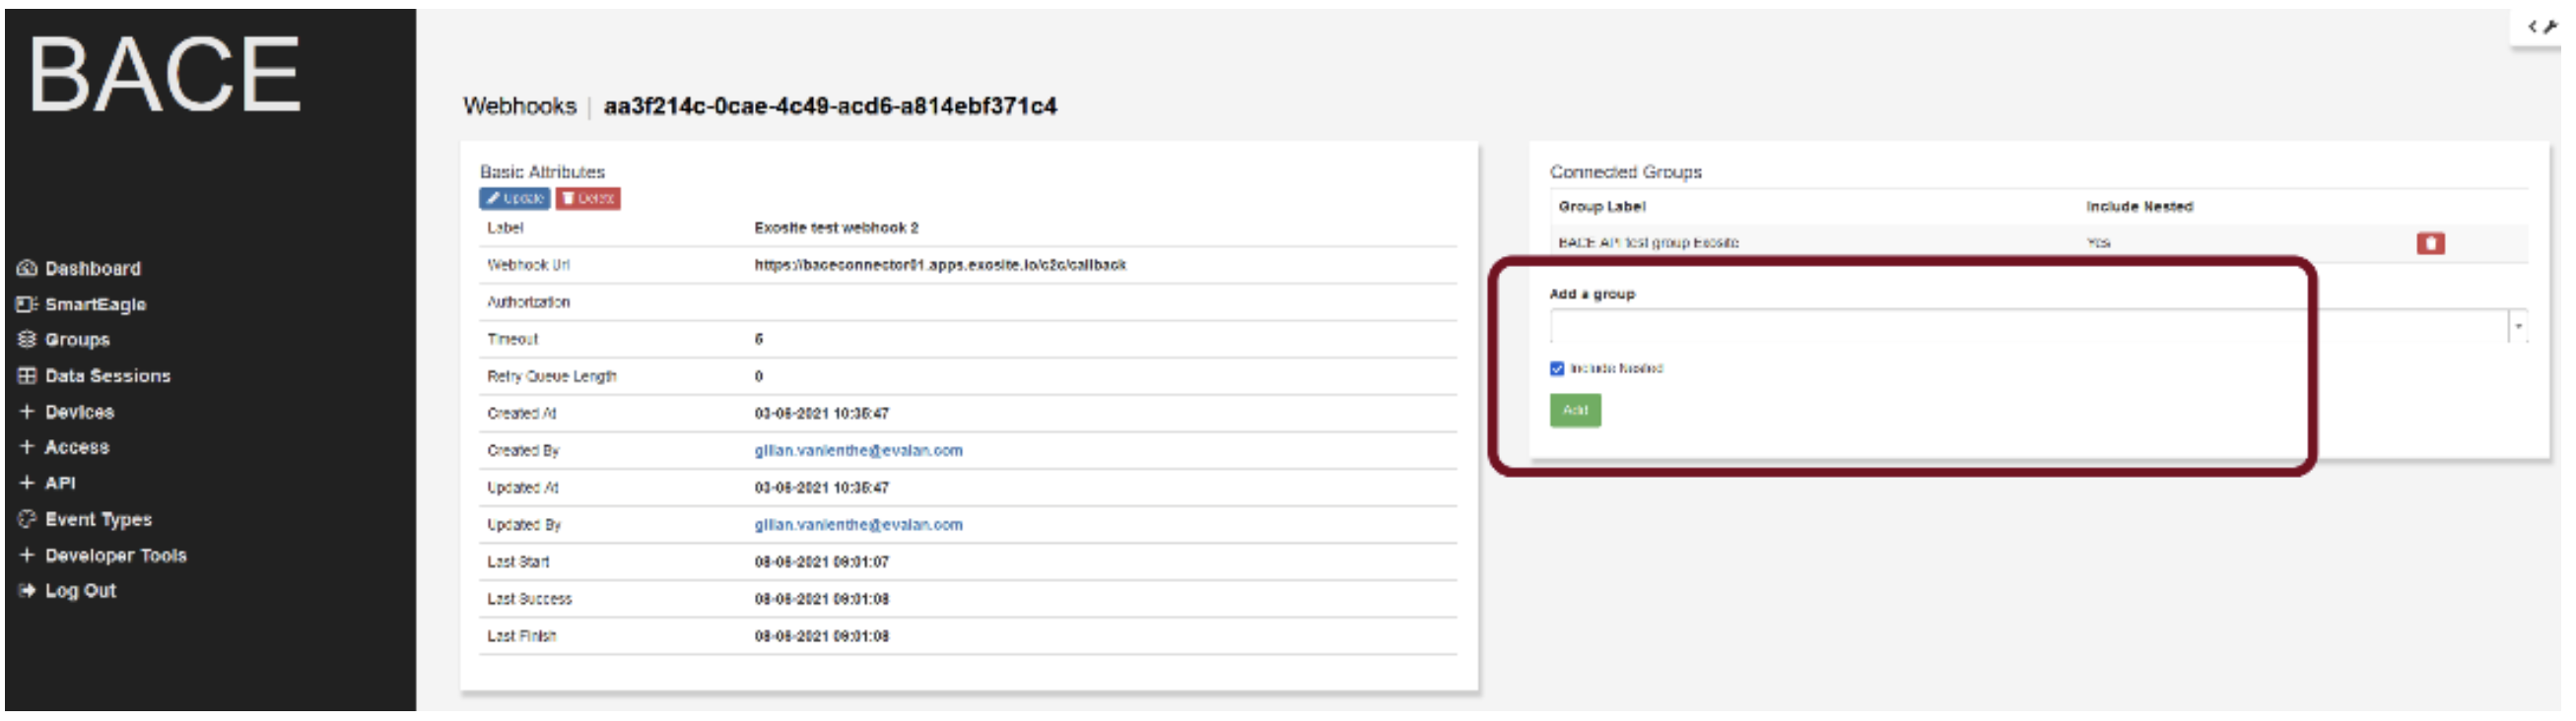
Click on 'Create' when you are done. Now open your newly created webhook and assign the group you created before.
You will now receive all measurements from your BACE device in the Exosite platform. The next step is to claim your device in ExoSense.