Banner DXM Industrial Wireless
Warning
Exosite Labs: The Banner DXM IoT Connector is currently provided by Exosite Labs and is in a BETA state. Beta state means that functionality is being developed yet and we are looking for feedback and improvement requests.
Overview
Exosite provides an off the shelf IoT Connector that enables data flow from DXM Industrial Wireless Controllers to Exosite. This allows use of Banner's Industrial Wireless sensor products with ExoSense condition monitoring.
Banner's Industrial Wireless products offer controllers, modules, and sensors for real-time monitoring of assets and are ideal for conditions in difficult to access locations or where wired solutions are not practical or cost-prohibitive.
Banner's controllers, nodes, and sensors provide many options for sensors, inputs, and outputs \(I/O\) and include support for different power supply options, housing styles, hazardous area.
Sensor and Input/Output options include:
- Vibration
- Temperature \(Thermocouple and RTD\)
- Humidity
- Ultrasonic Distance/Level
- Pulse Counters
- Discrete \(Dry contact, PNP/NPN\)
- Analog \(0-20mA, 0-10VDC\) Inputs and Outputs
- 1-Wire
- Modbus RTU/TCP,
Applications Include
- Remote Monitoring
- Predictive Maintenance
- Water & Wastewater
- Tank Monitoring
- Vibration / Rotating equipment
- Agriculture
- Smart Factory / Manufacturing Automation
- Digital Oil Field
Detailed Specifications and Purchasing
Prerequisites
- An Exosite account with an ExoSense application deployed \([Sign up here](http://exosite.io/start)\)
- The Exosite Banner IoT Connector deployed in the Exosite acocunt \([instructions below](#exosite-setup)\)
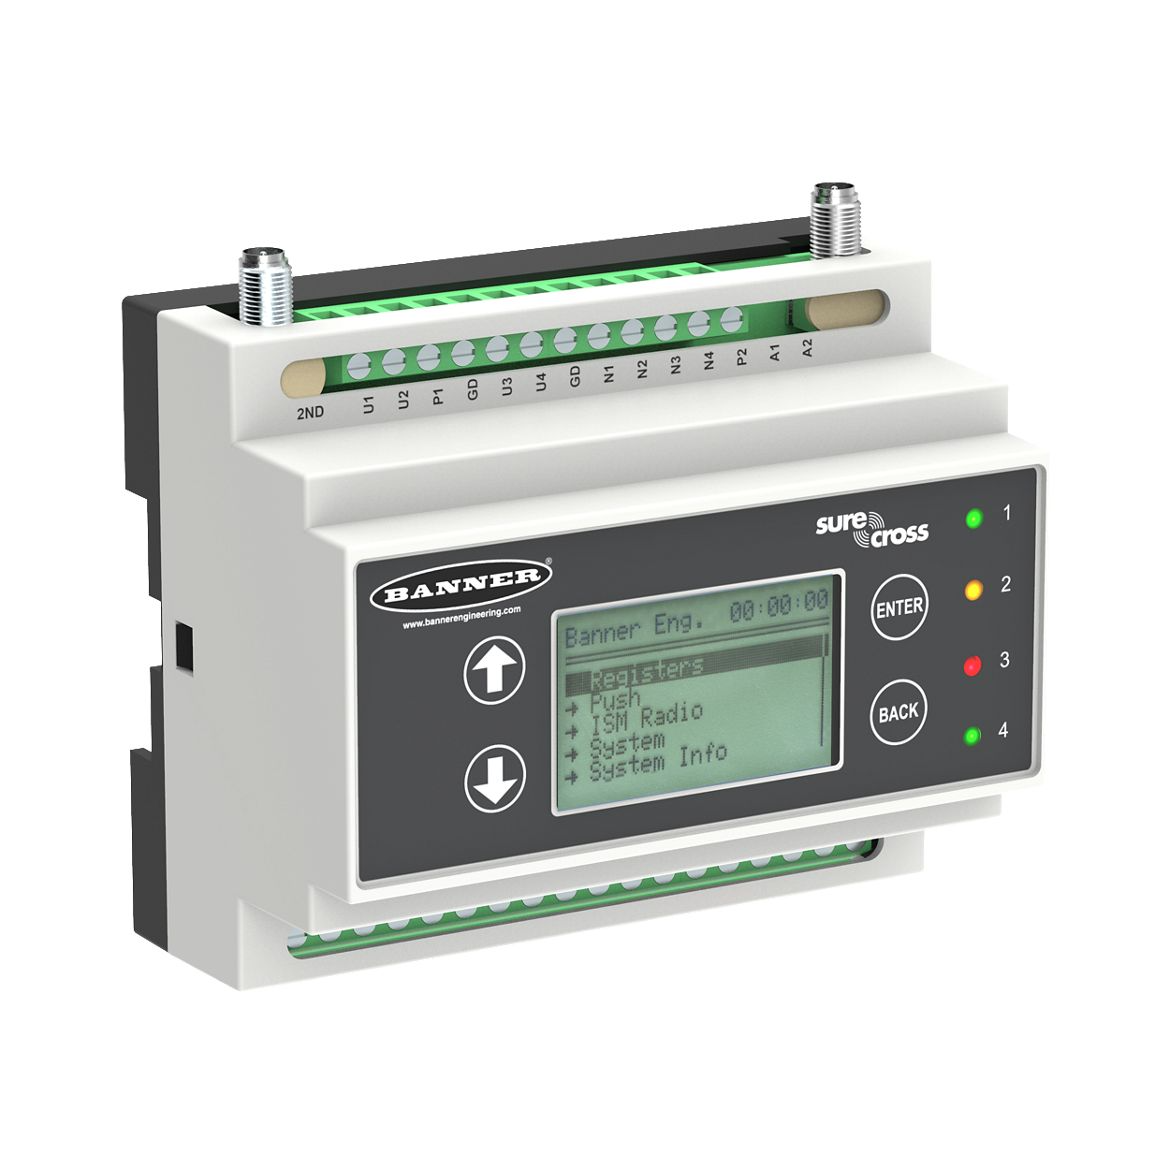
- Purchase a Banner DXM100/DXM700 Wireless Controller
- Requires Firmware > 2.02
- Firmware version 2.02 Download
Technical Implementation Details
The DXM allows users to set up a Cloud Services connection, allowing you to point at a specific Web Server \(URL/IP address and page\). This IoT Connector implements a HTTP end-point that when called, will parse the data packet that is sent from your DXM devices. This packate includes the device's GUID \(identifier\), which is what is used for identifying the device and how to associated with the cloud side device.
Info
The DXM's Cloud Services interface does not support device provisioning and authentication. Data is encrypted using HTTPS, but there is no way to validate the data is from the actual device rather than a third-party who discovered your DXM's GUID and your IoT Connector's unique product URL \(https://<uniqueproductid>.m2.exosite.io\).
In the Exosite IoT Connector, you can track the IP Addresses that the controllers will be sending data from.
Exosite Setup
If you don't already, create an Exosite account which will deploy new ExoSense instance. https://www.exosite.io/start
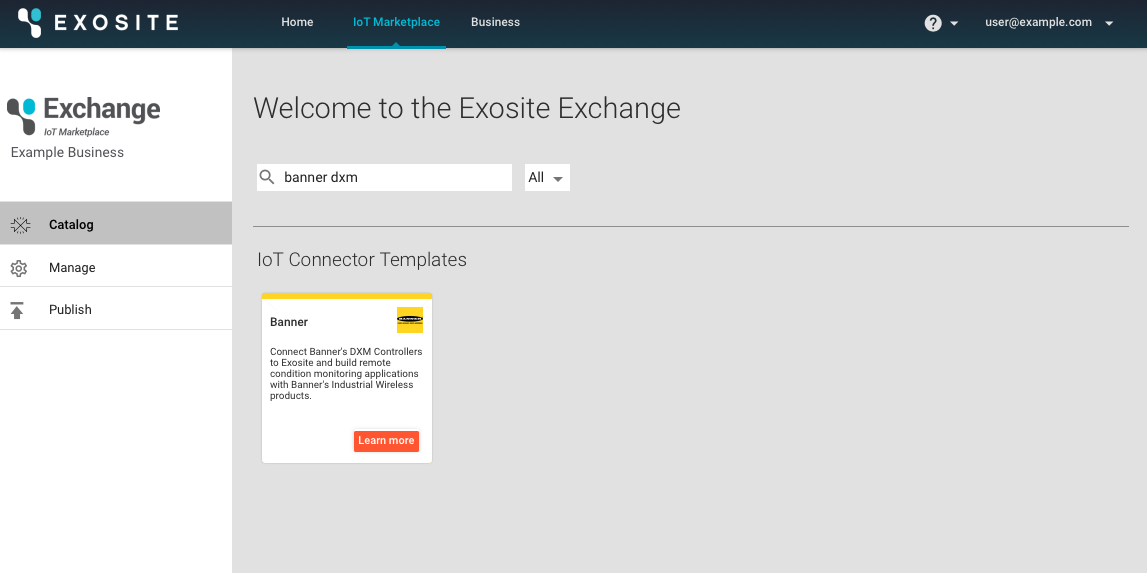
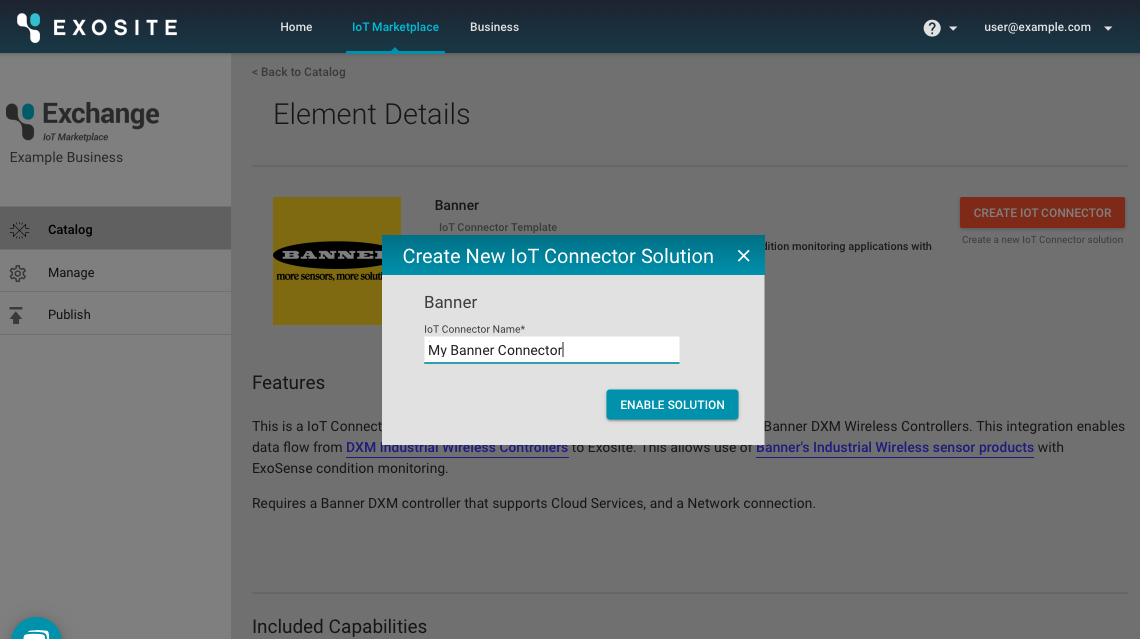
Creating a new Connector
In your Exosite account, create a new IoT Connector using the Banner IoT Connector Template from the IoT Marketplace.
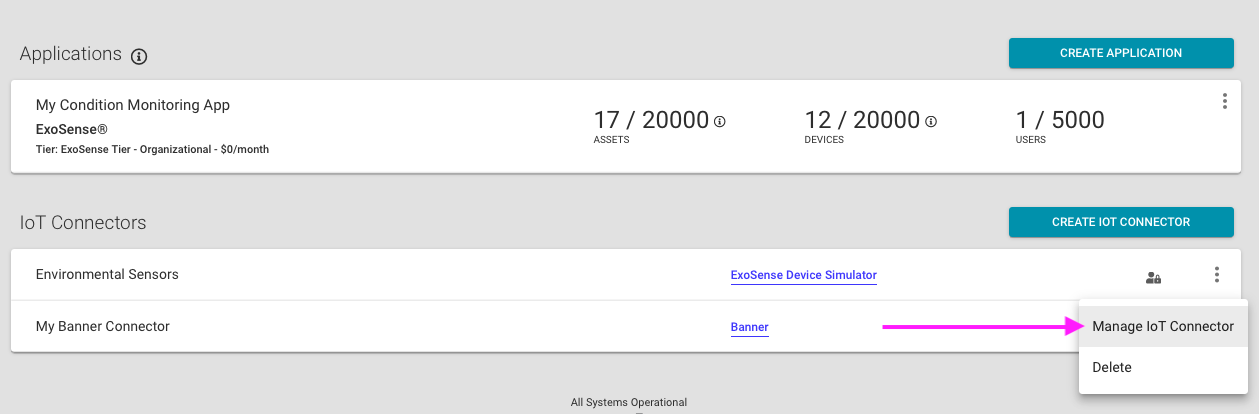
Manage / Settings for your Connector
Next we will publish your Connector as a service for your business and get your unique end-point to have your DXM's send data to. Click on the 'more' menu icon \(three dots\) for your connector and click 'Manage IoT Connector'. This is where you can manage your devices and settings.
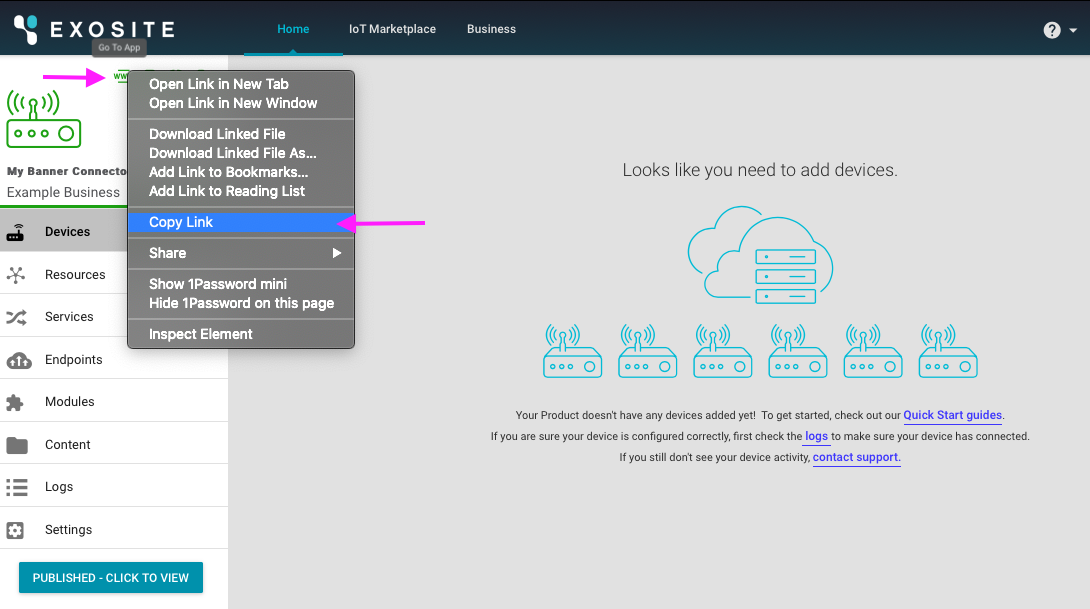
When you have your devices connected, they will show up here in the IoT Connector solution area. We want to get your webservice URL that we will have your DXM units talk to.
Right Click on the 'www' and click 'Copy Link'. The format will be:
https://<iotconnectorname>.apps.exosite.io
Paste this as we will need it for the DXM cloud services setup step below. You can always come back and find it here.
Connect the Connector to your ExoSense Application
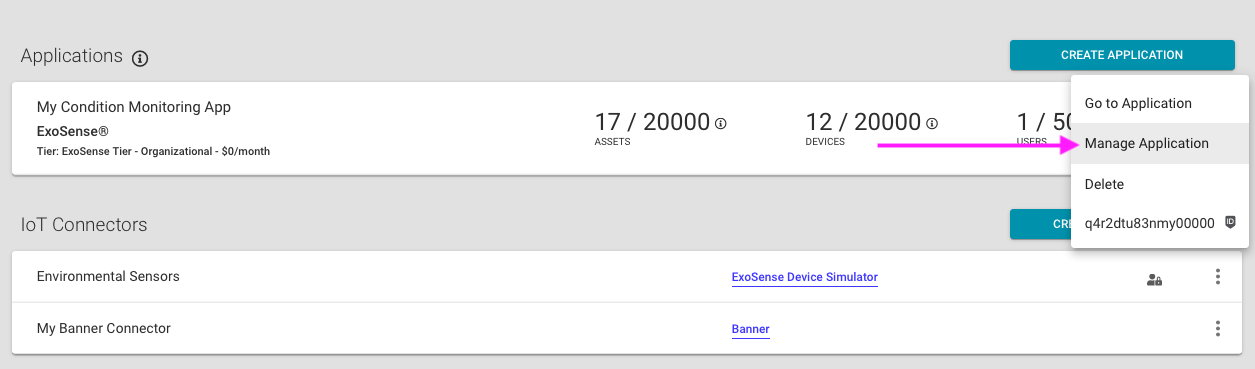
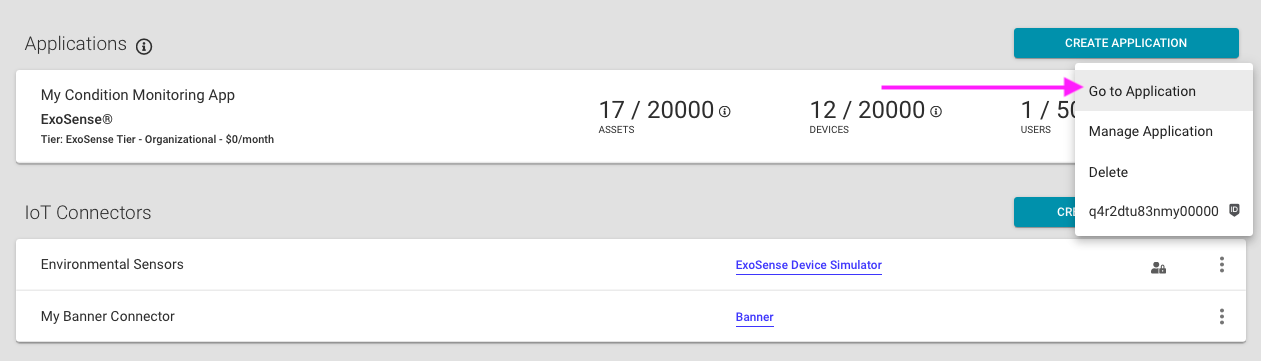
Your IoT Connector is now available as a service, which allows data events to be routed to applications. Add it to your ExoSense Application next by clicking on the 'more' menu for your ExoSense application and clicking 'Manage Application'.
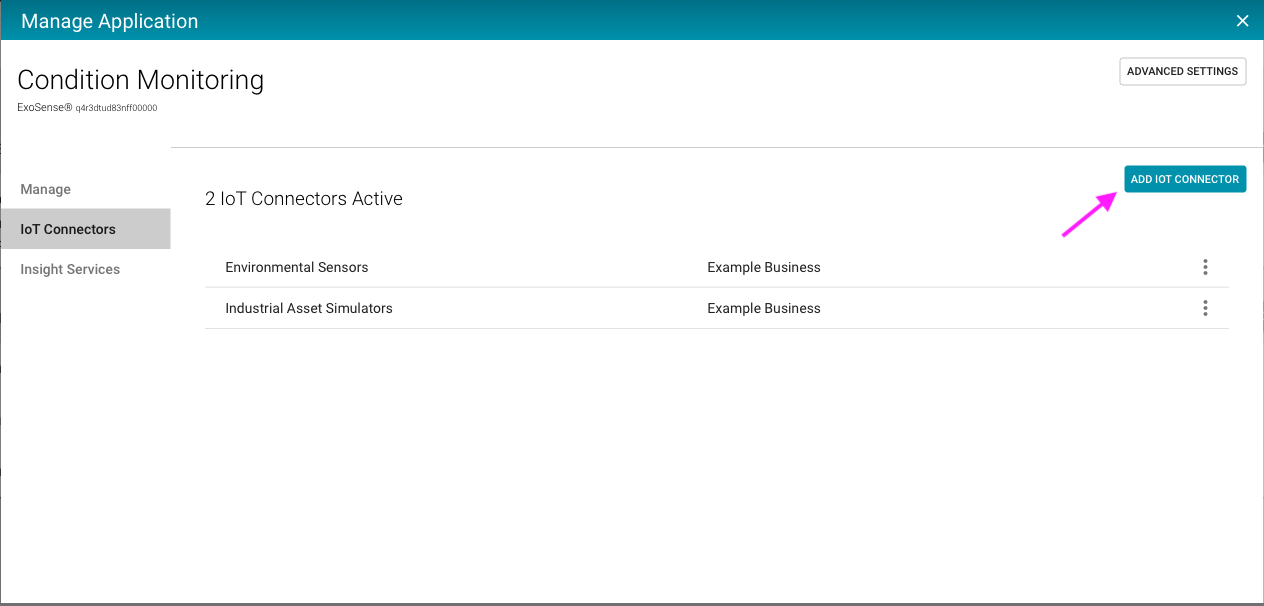
Using this interface, click the 'ADD IOT CONNECTOR' button on the IoT Connectors tab.
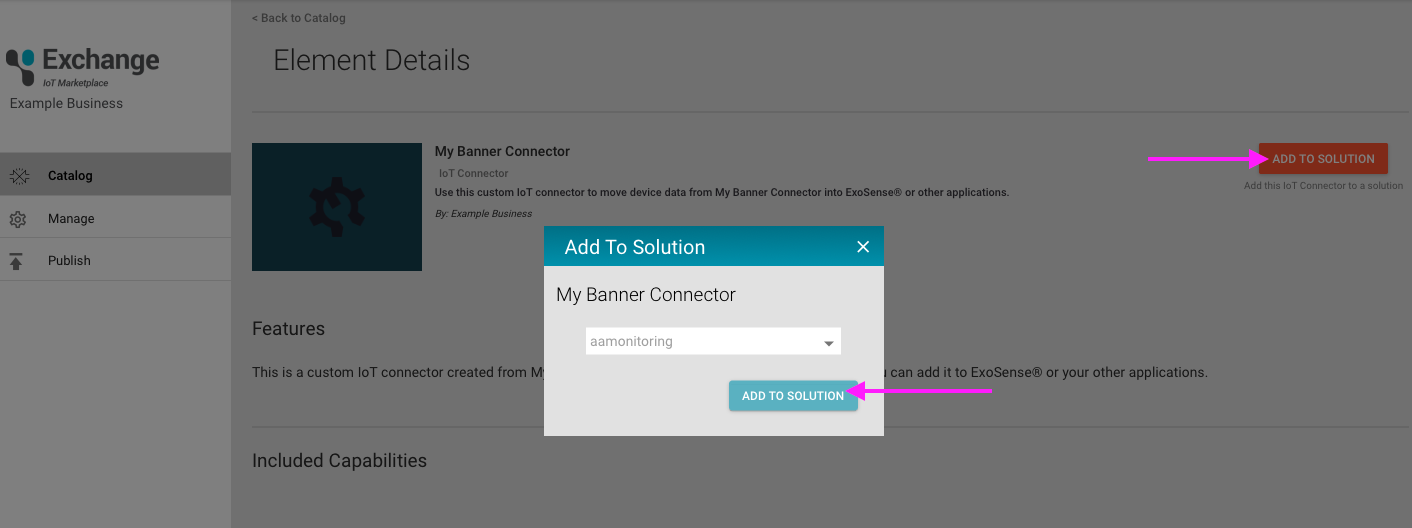
This will bring up the marketplace, where you can add your connector service, click on the element. \(_Note we want your IoT Connector now, not the Banner connector template_\)
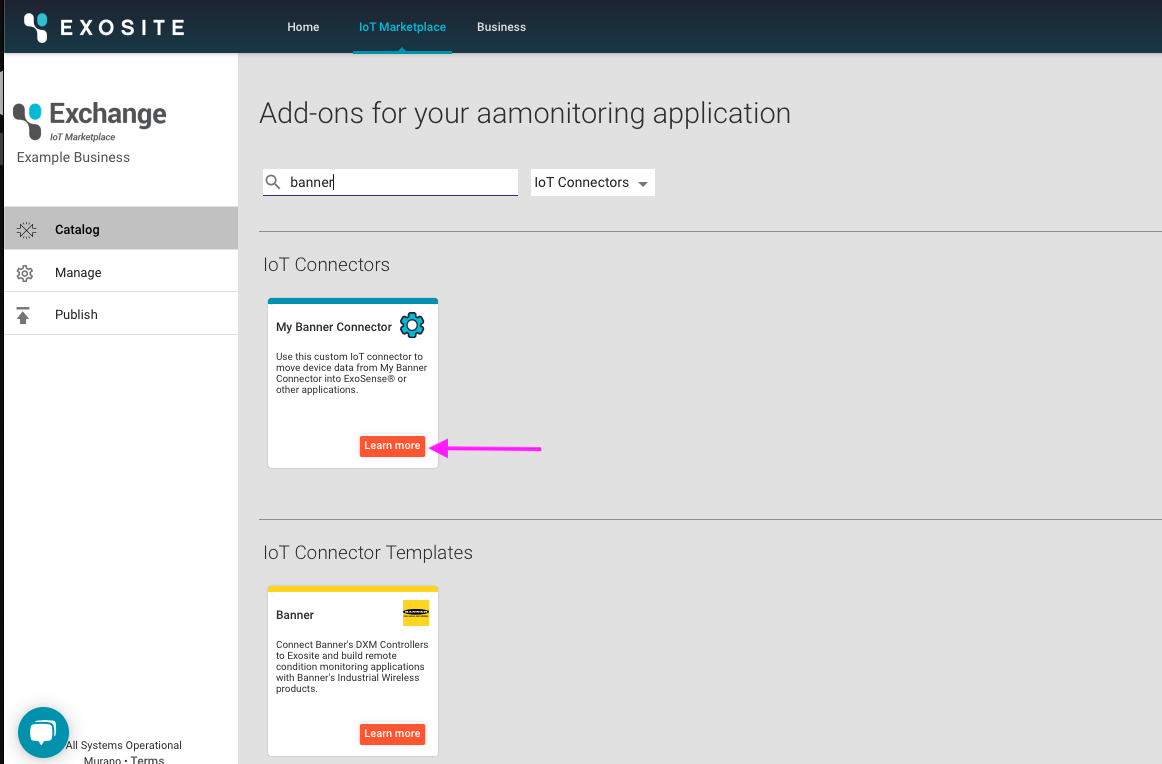
Add this to your application solution.
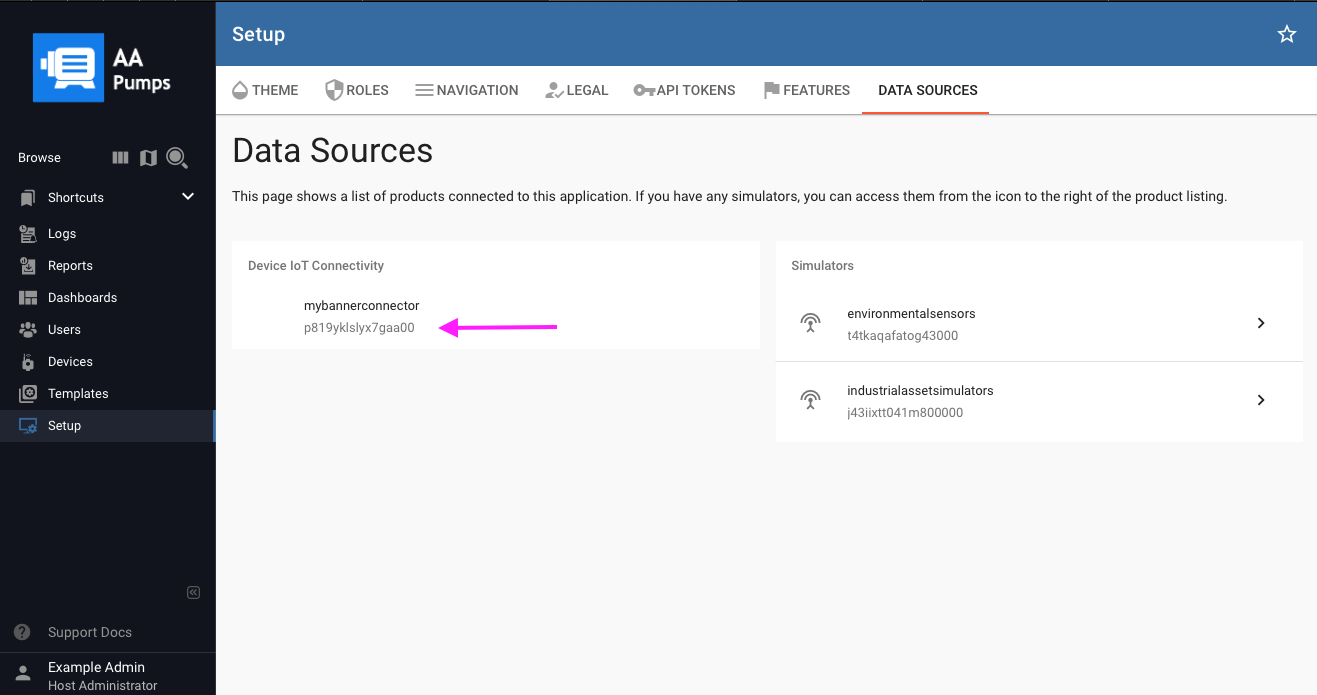
You can now open up your ExoSense application and you will find this device IoT Connector service listed. Your ExoSense application is running your your custom url _https://<example>.apps.exosite.io_.
After logging into ExoSense \(yours will be branded differently than this\), go to the Setup page and click on the DATA SOURCES tab. Here you will see your Banner IoT Connector.
Banner DXM Setup
Set up DXM Registers to send to the cloud
Edit the local registers to be readable by the cloud. This can be done from the "Edit Register" tab or "Modify Multiple Registers" tab.

Set the DXM's Cloud Services up for your IoT Connector
Your DXM needs to be told where to send data. Follow these instructions.
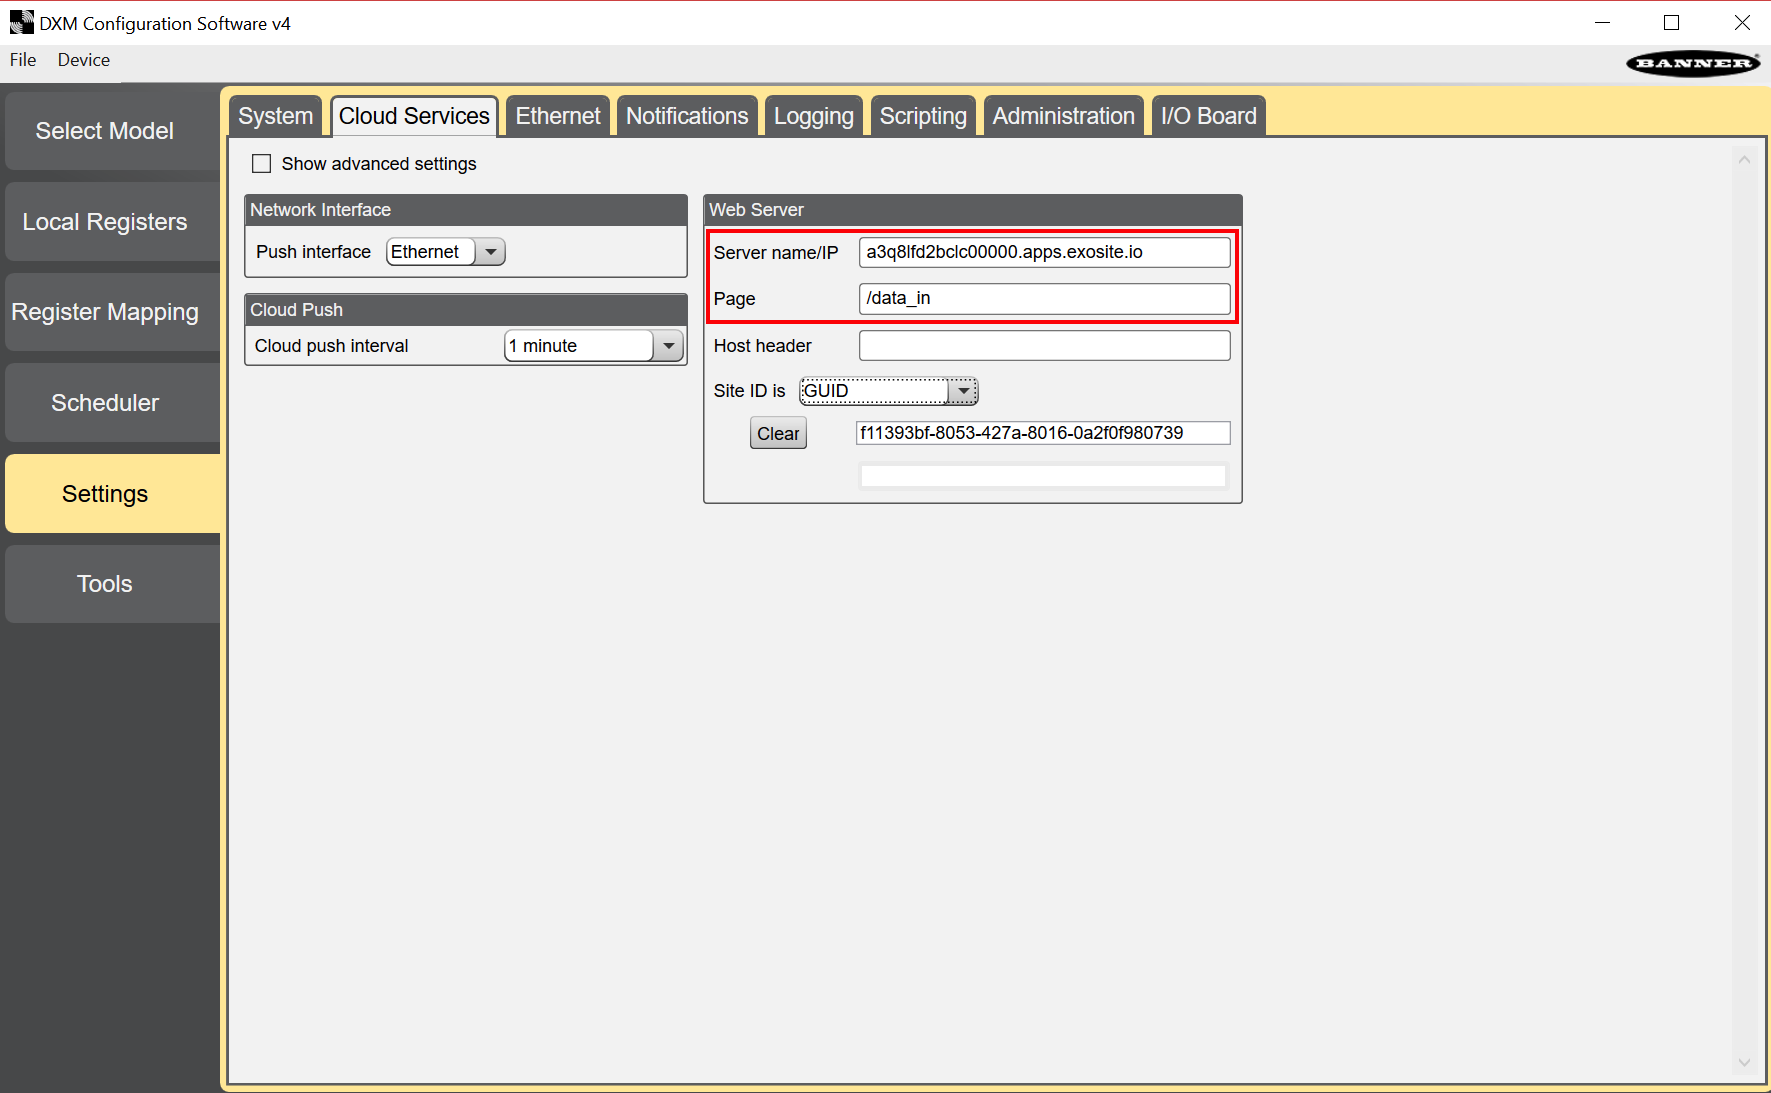
- Navigate to "Settings" -> "Cloud Services" in the DXM Configuration application
- In the "Web Server" settings, input your unique endpoint URL from the above step which has the format of '<example>.apps.exosite.io' for the Server name/IP. Note: Remove the
httpsfrom this string. - Input
/data_inas the Page - The Site ID should be the GUID.
- Save and load this onto your DXM.
Note: The configuration file must be programmed initially to the DXM to initiate the cloud connection. Additionally updates can be made inside ExoSense.
Using the Data in ExoSense
After loading this new configuration onto your DXM controller, assuming it has a valid Network connection to the public internet, you will see your device in your IoT Connector on your Exosite account.
You may now claim your device in Exosite and begin using it for Assets and dashboards.