Electric Imp IoT Connector
Prerequisites
Familiarize yourself with your Electric Imp by setting it up using Electric Imp's getting started page.
Sign up for ExoSense
ImpCentral
To have your Electric Imp device communicate with Exosite, you will need to add code through Electric Imp's ImpCentral
If you are not yet familiar with impCentral and want to learn more, follow the getting started page linked above. Otherwise continue on with these simple steps:
- Get agent code from here and copy it into the Agent Code in impCentral
- Get device code from here and copy it into the Device Code in impCentral
- Change the Agent Code to use IOT_CONNECTOR. Near the end of the file, change the following line
from:
exositeAgent <- Exosite(EXOSITE_MODES.MURANO_PRODUCT, settings);
to:
exositeAgent <- Exosite(EXOSITE_MODES.IOT_CONNECTOR, settings);
- Build!
ExoSense
Add the ElectricImp IoT Connector to your ExoSense Instance. \(Select "ADD TO SOLUTION"\)
Claim Device
Once the code is running on the ElectricImp device, the device can be claimed in ExoSense.
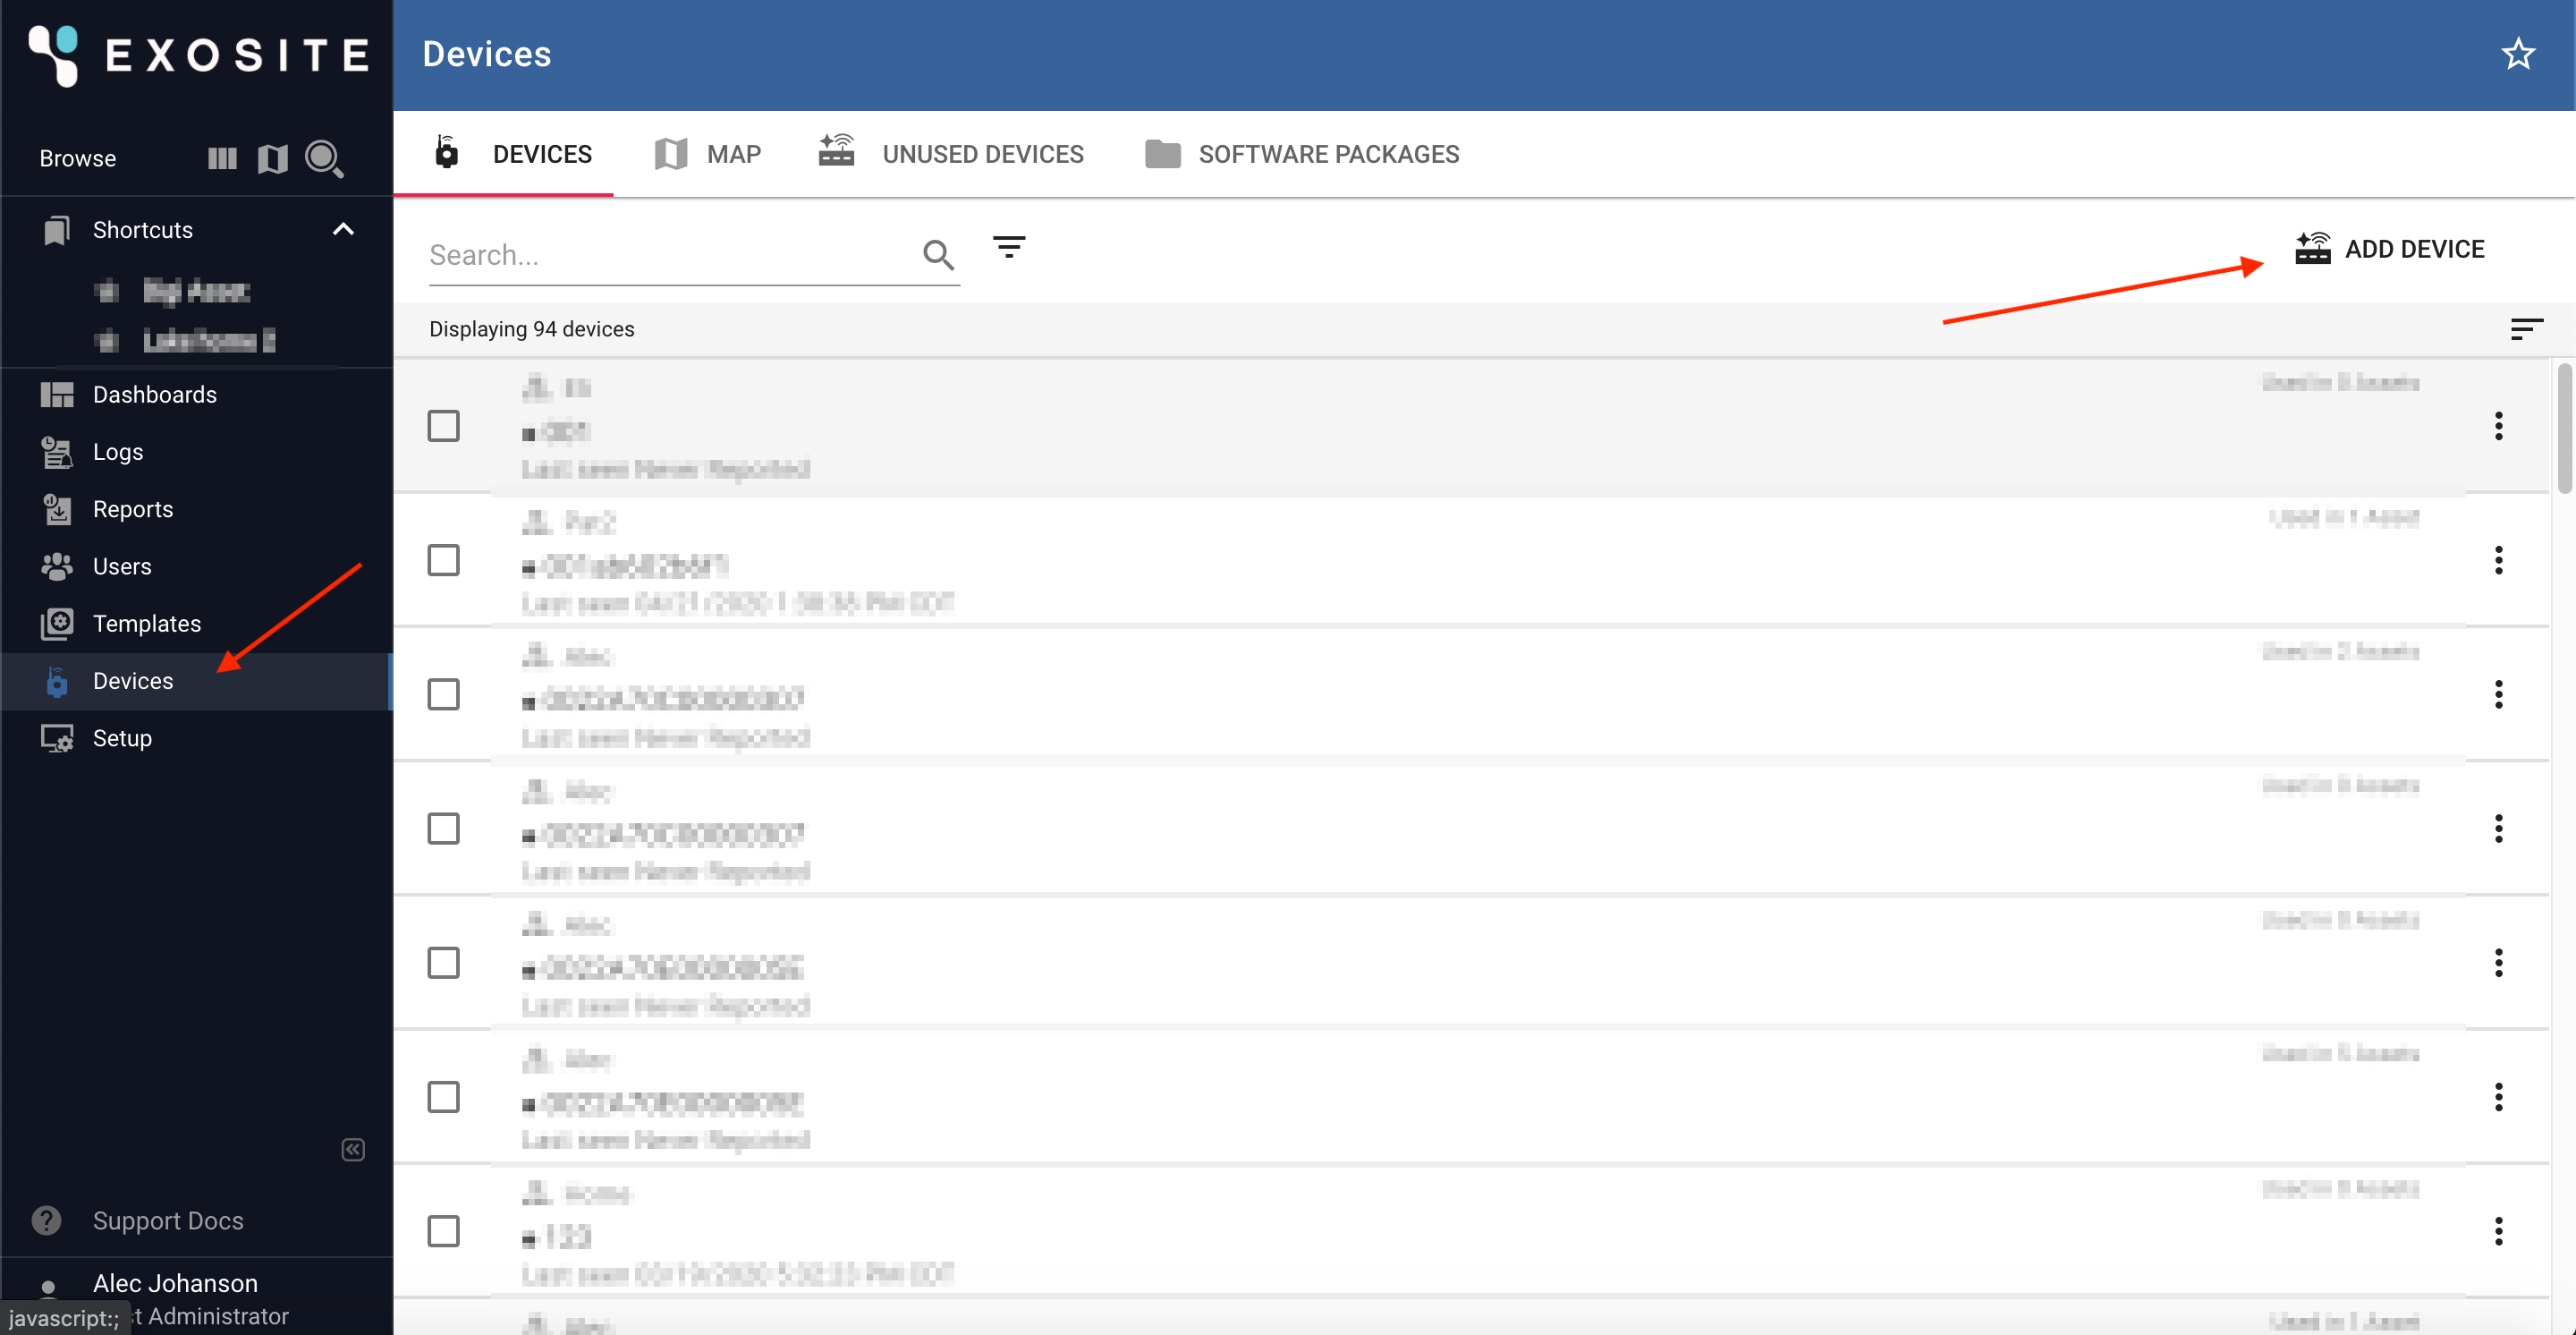
To claim the device, navigate to the "Devices" page and select "ADD DEVICE"
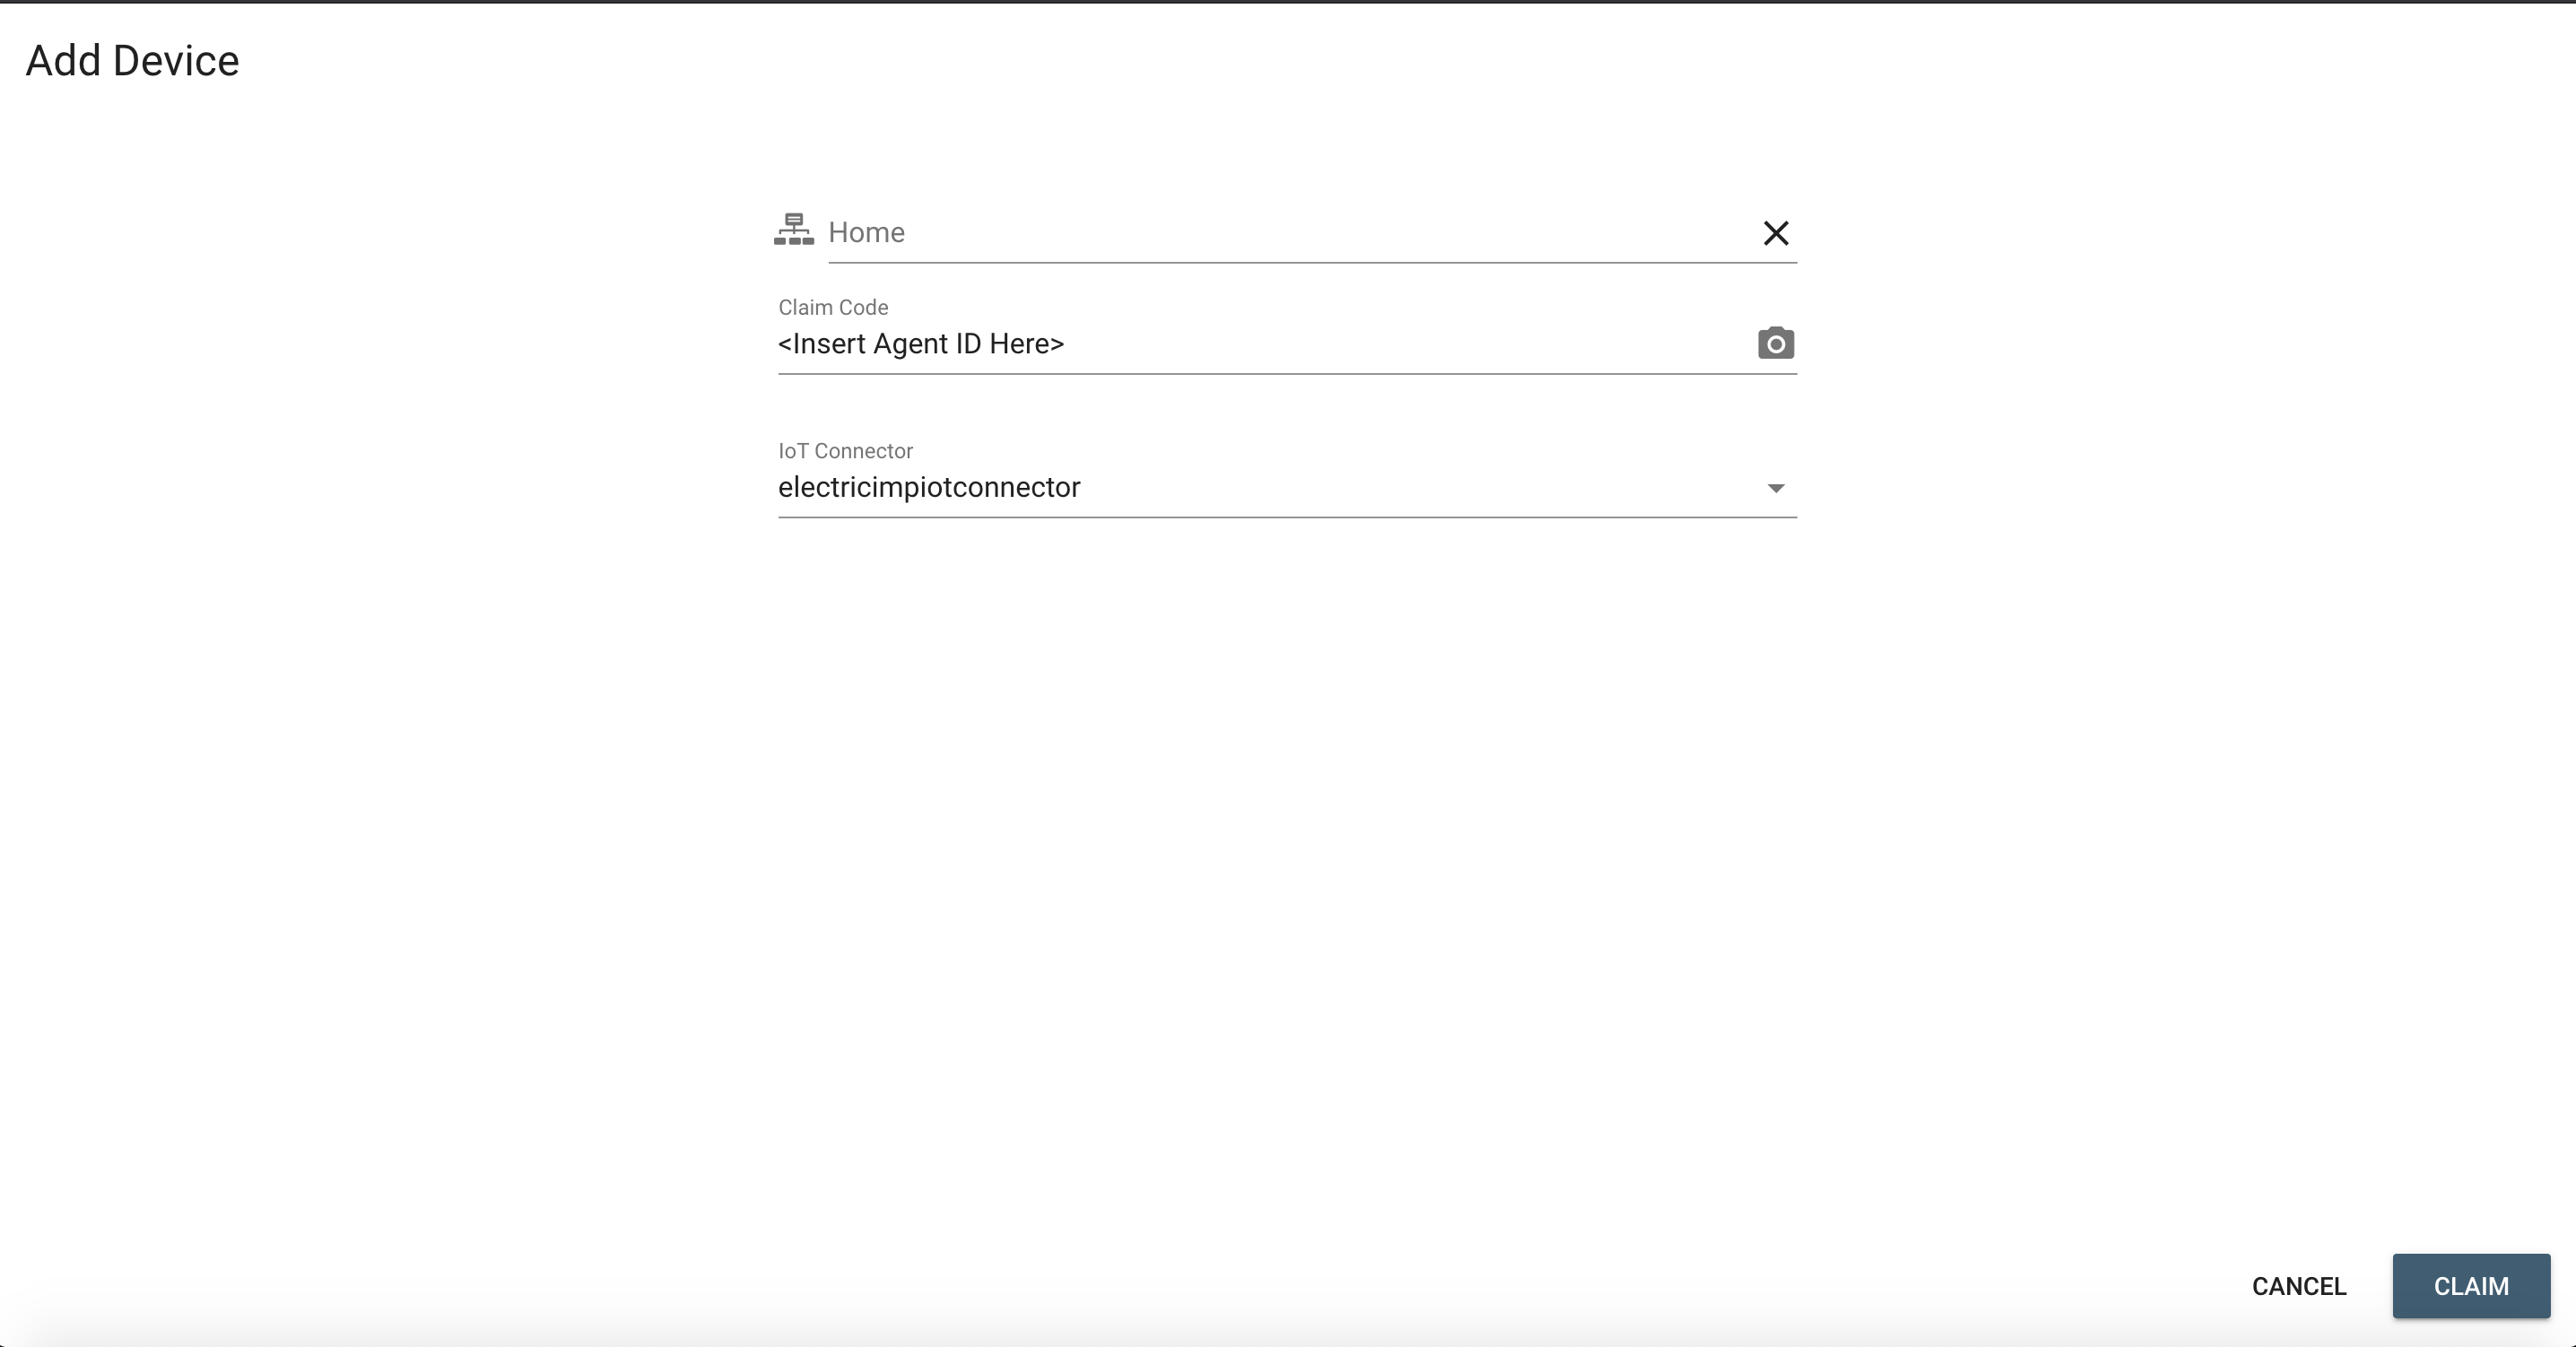
Then,
- Select a group to add the device to
- Insert the AgentID \(found in impCentral\) for the Claim Code
- Select the ElectricImp IoT Connector
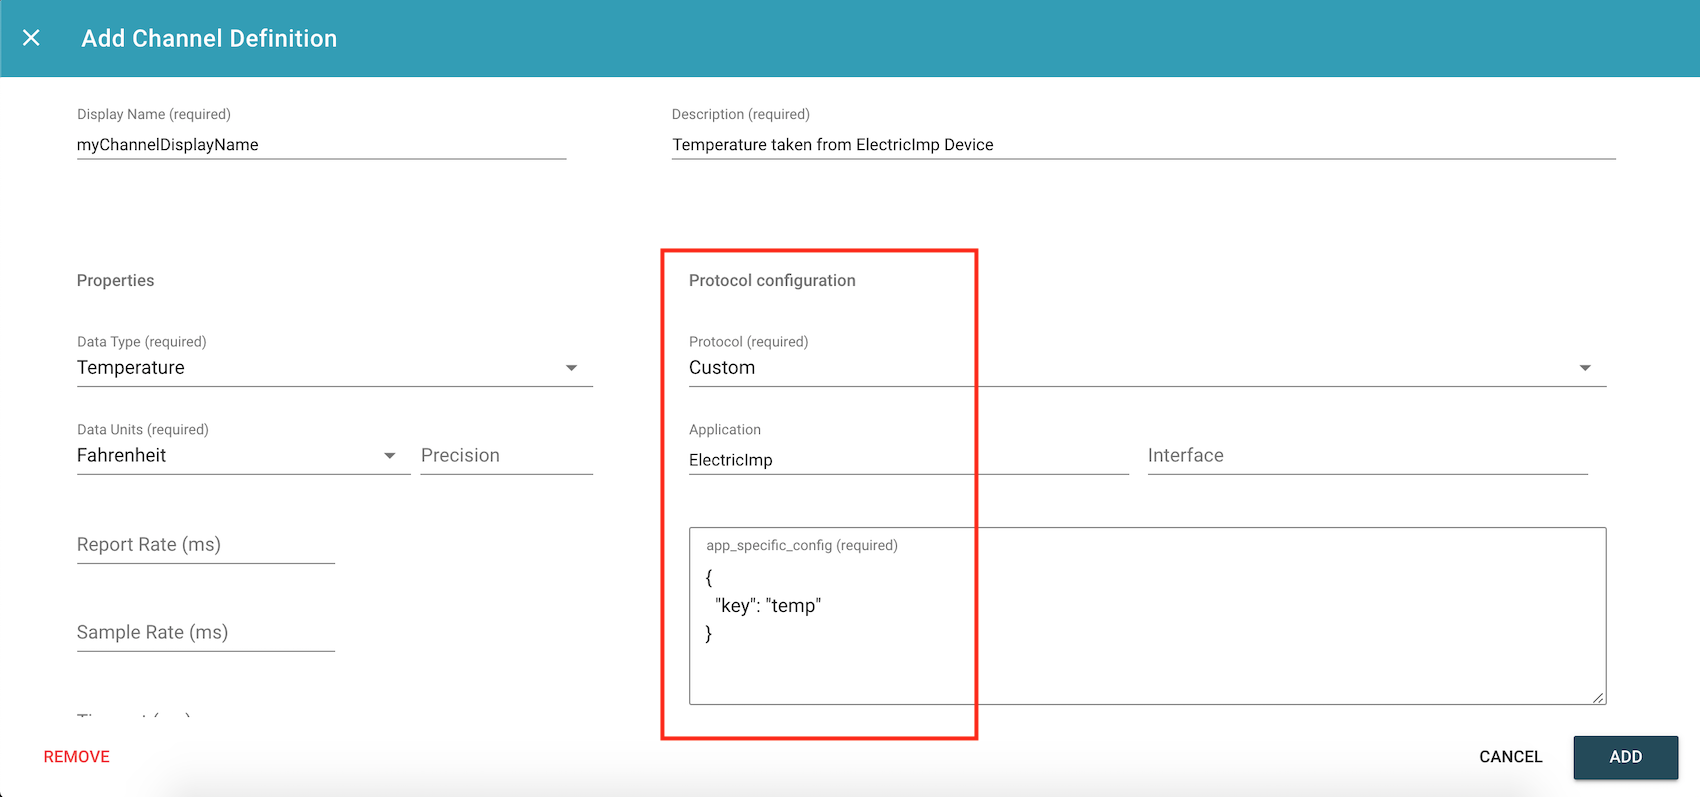
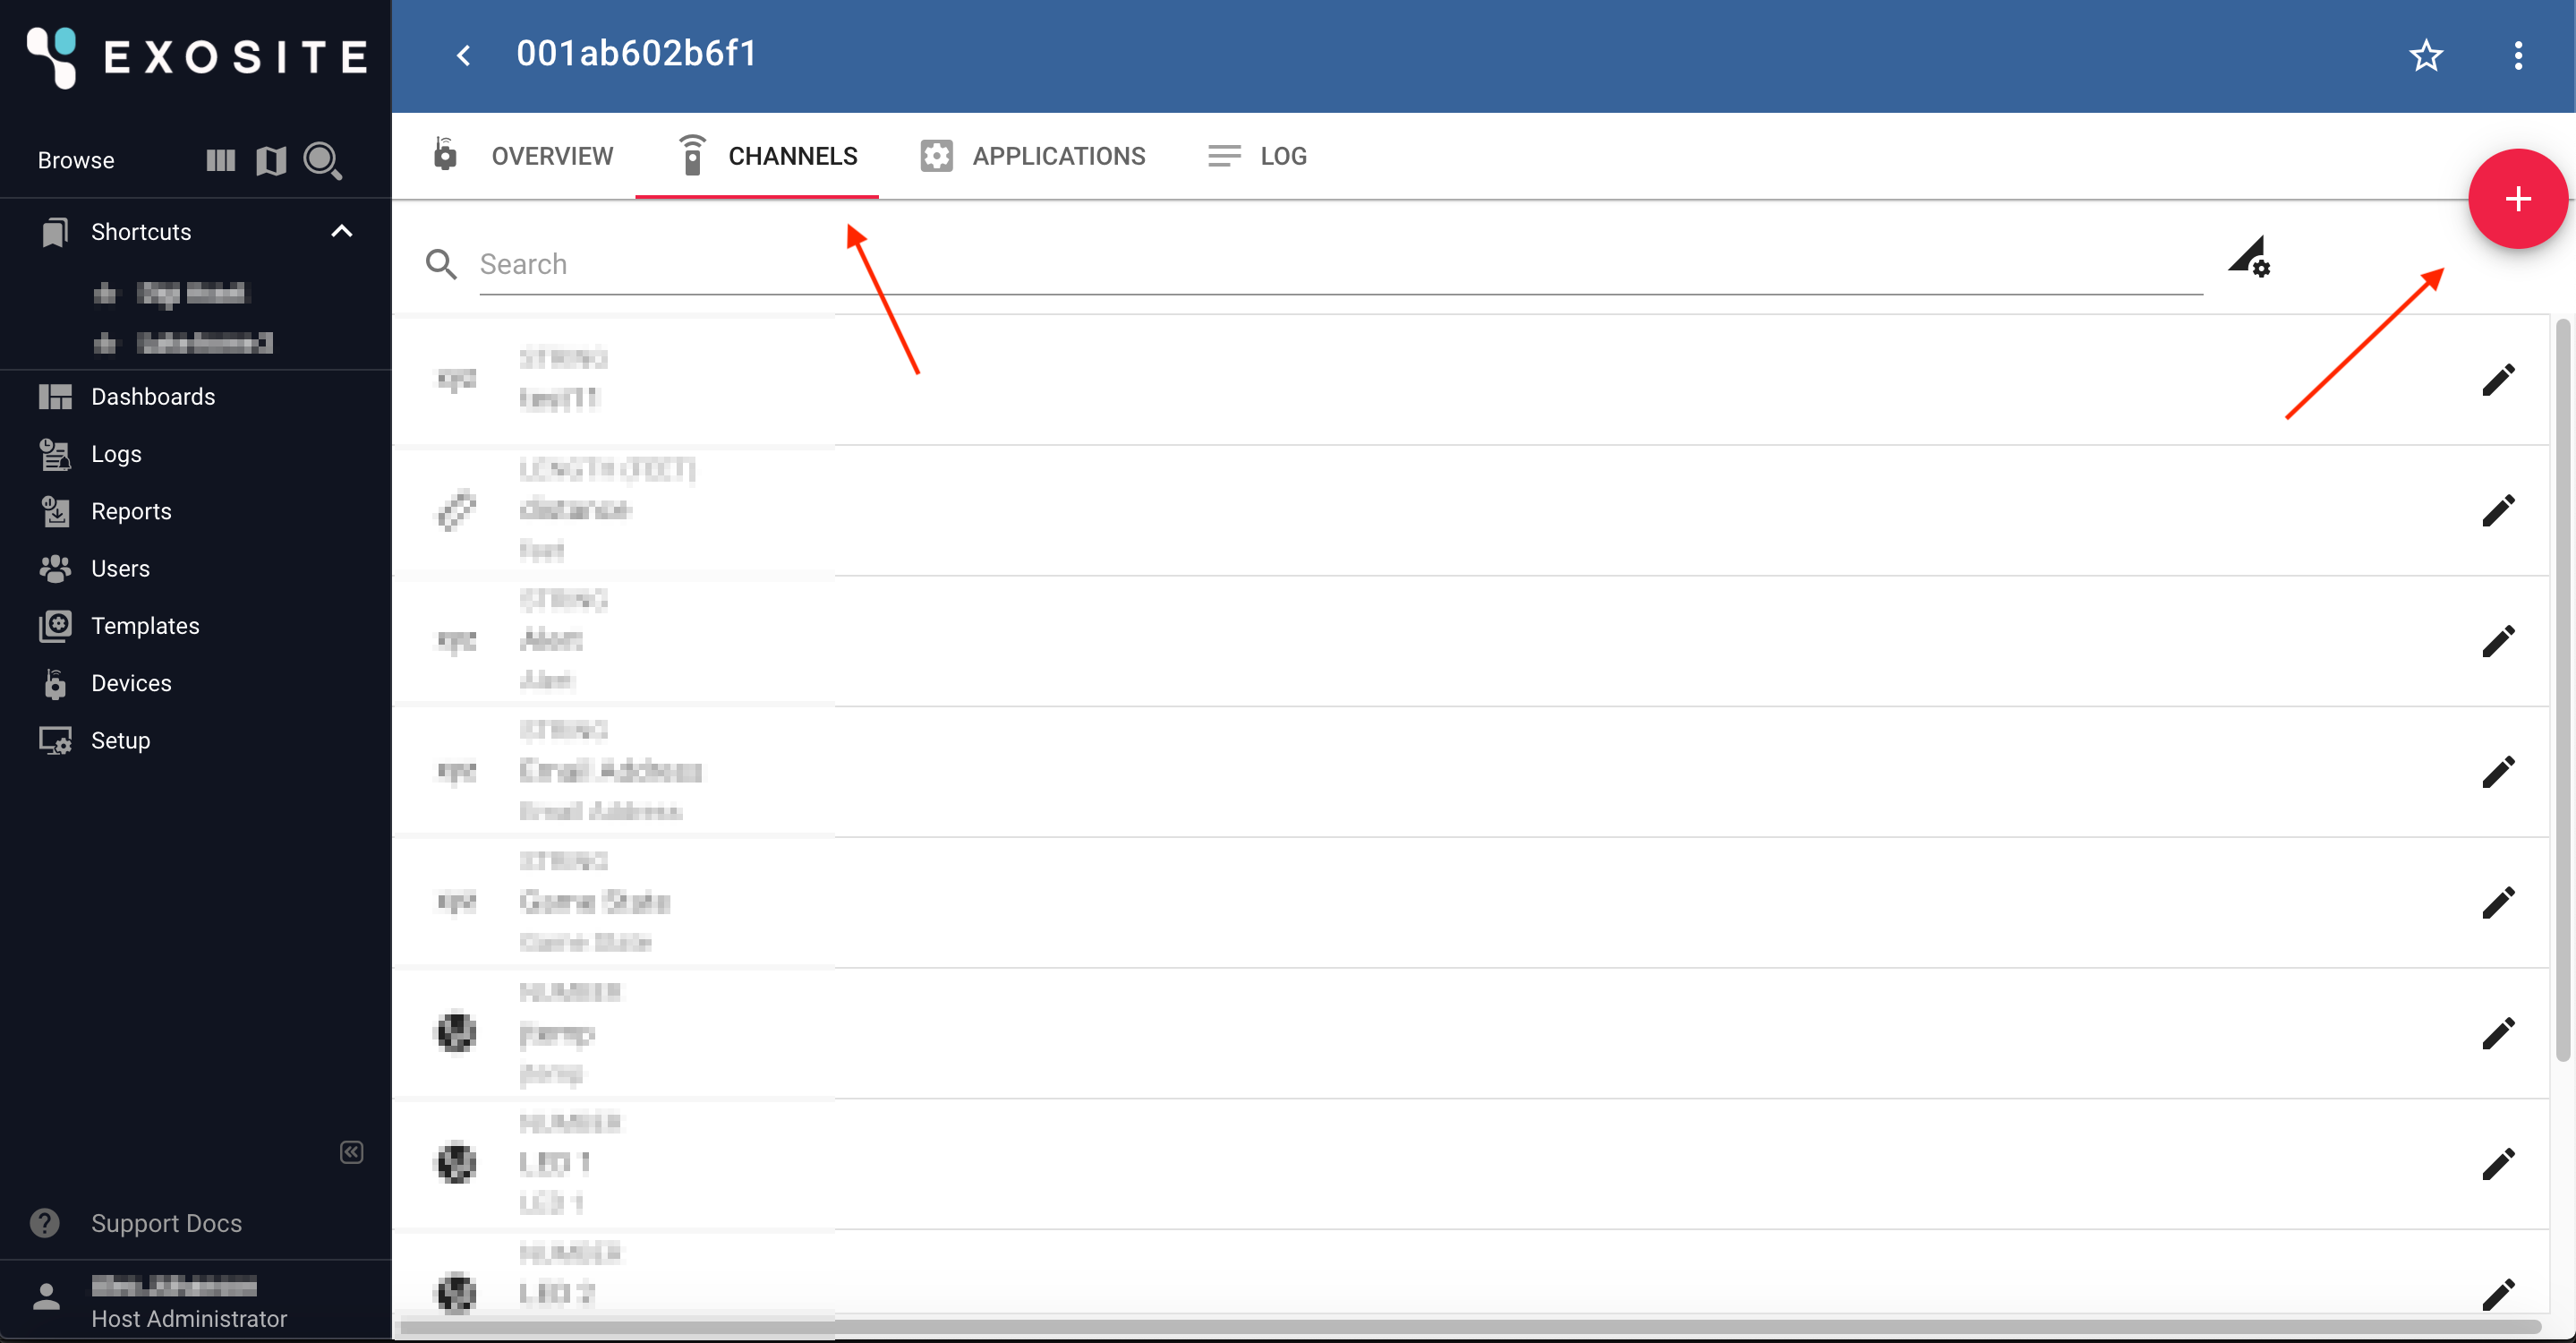
Channel Configuration
To configure channels, select the device from the "Devices" tab, then navigate to the "Channels" tab.
To configure the channels in ExoSense to read correctly from the device. The key that the device uses for the data needs to be defined.
To achieve this, the user must have a "Custom" Protocol, with "ElectricImp" as the Application, and {"key":<device's corresponding key>}
For example, if the device calls
local conditions = {};
conditions.temp <- reading.temperature;
agent.send("reading.sent", conditions);
A corresponding channel configuration could look like the following: