ICP DAS WISE
The ICP DAS WISE-5231M IIoT Edge Controller is a part of the ExoWISE Industrial Solution offered by ICP DAS. It has native support for Exosite's Murano platform and ExoSense condition monitoring application. For more information about this solution, please check the Additional Information section. This guide will focus on the steps for connecting it to Exosite's platform and use with ExoSense.
Prerequisites
- Purchase and access to the ICP DAS WISE-5231M Edge controller
- An existing Exosite account with ExoSense or you are planning to sign-up to deploy ExoSense.
New ExoSense - Application Deployment with the ICP DAS IoT Connector
This section assumes you do not have an Exosite Business Account or ExoSense application. You may skip this part if you already have access to ExoSense.
-
Deploy the bundled ICP DAS ExoSense solution that includes the WISE-5231M required IoT Connectors by navigating to www.exosite.io/start
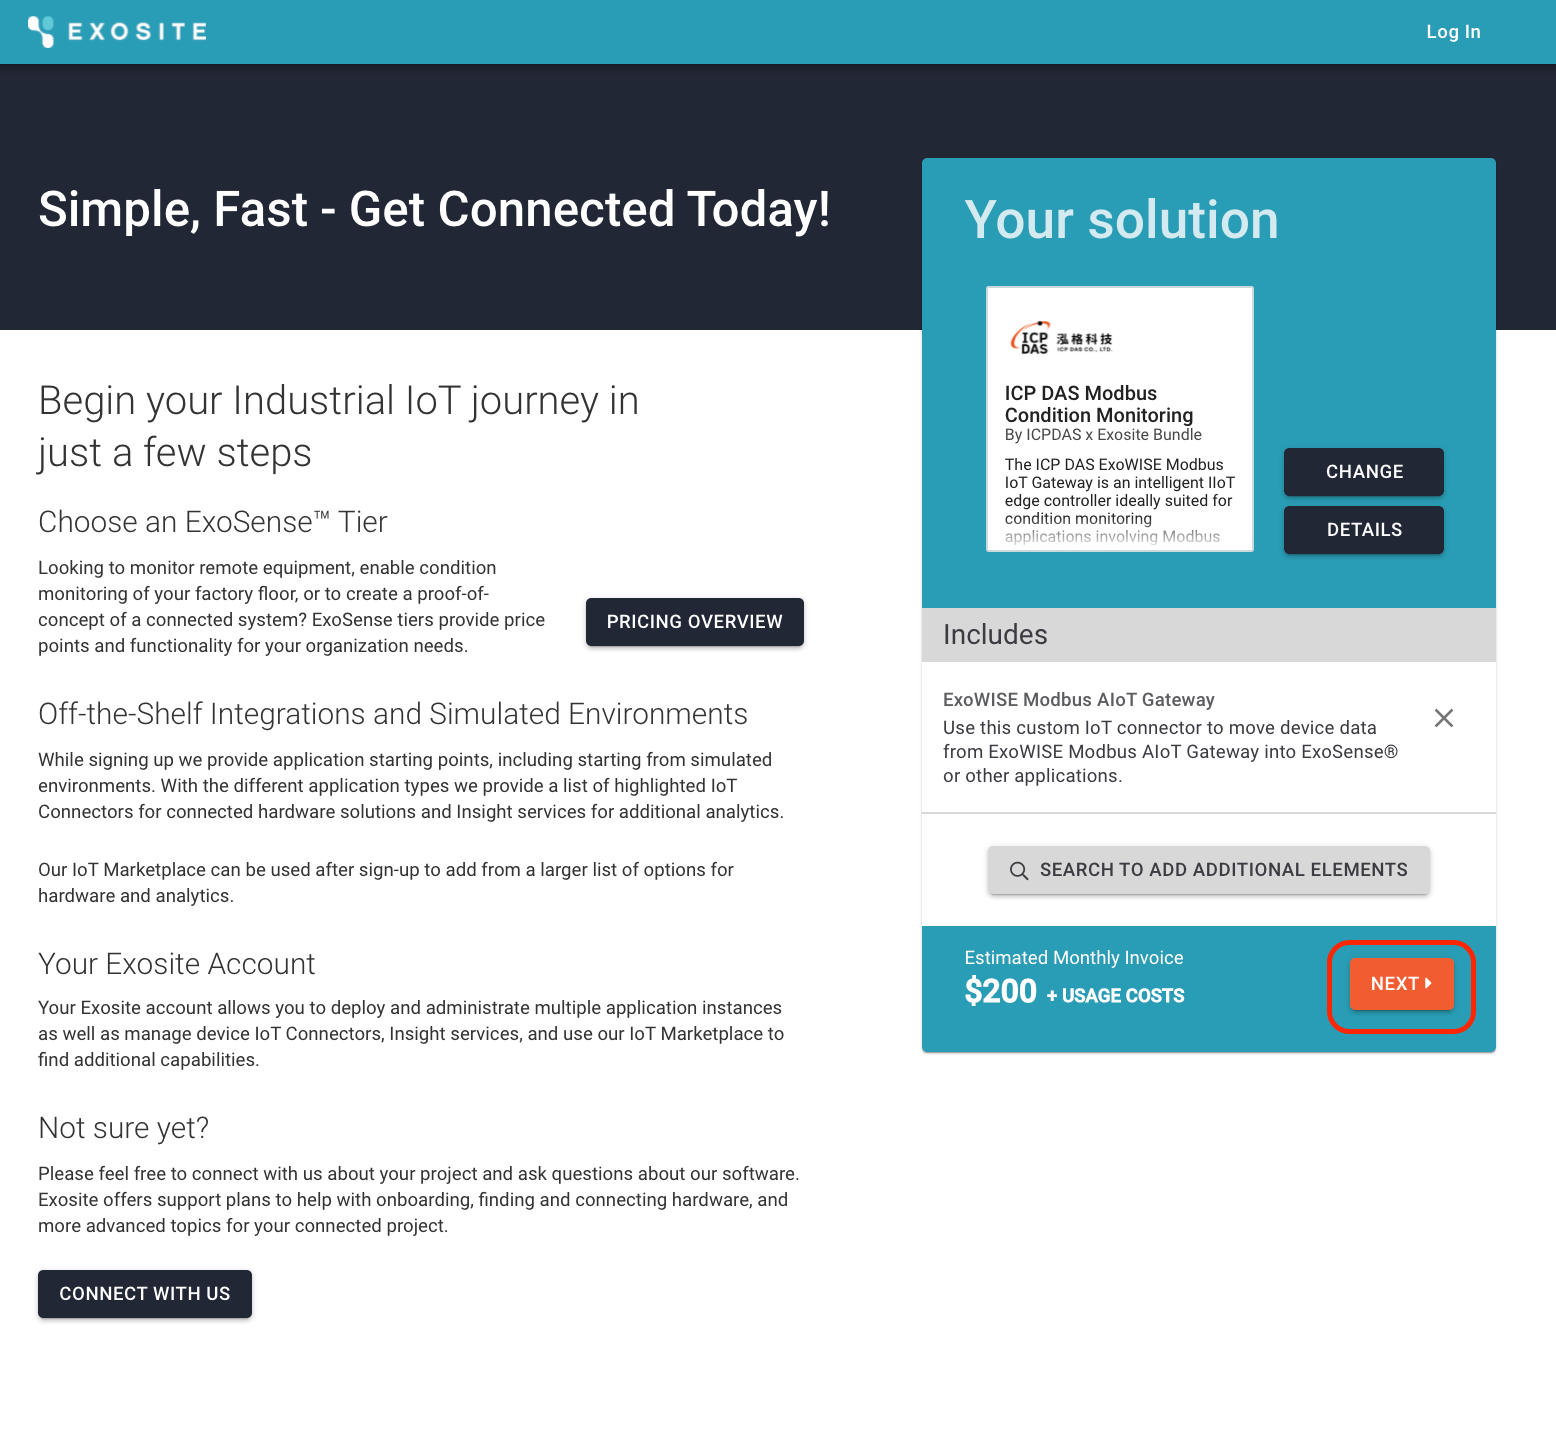
-
Follow the steps in Sign-up and deploy ExoSense page to complete the deployment.
Once you've done the steps above, you have deployed ExoSense and got the Off the Shelf IoT Connector added. You can now go to Section 2 to configure your ICP DAS controller to report data.
Configure the ICP DAS hardware
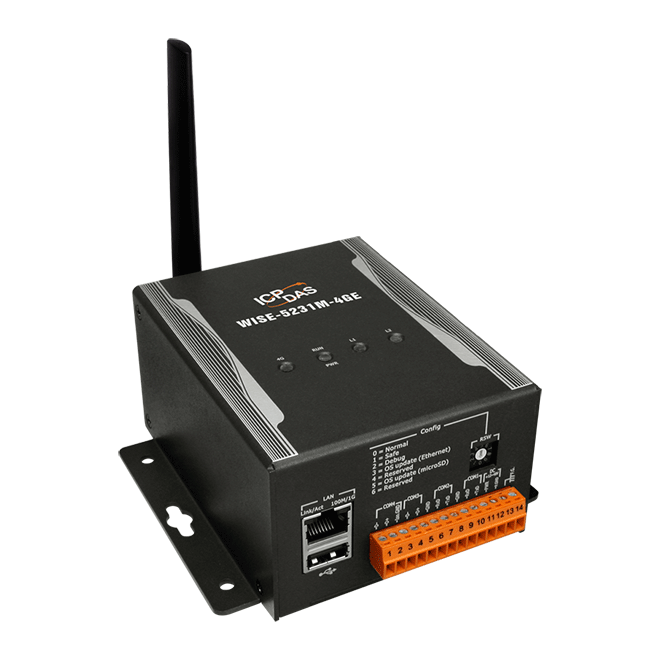
The ICP DAS ExoWISE Modbus IoT Gateway is an intelligent IIoT edge controller ideally suited for condition monitoring applications involving Modbus connected equipment and sensors. This section will be introduced with a set of ICP DAS controller and the data logger device (DL-300 series). For finding more supported hardware and related setup guide, can contact ICP DAS or have a visit to their website.
Controller setup
Certain steps including IP setting might be required for setting up a controller. Follow the link here to download the User Manual in your language: WISE-52xx, WISE-224x Series
Note
Before configuring any setting on ICP DAS WISE, ensure that you connect to Wi-Fi that can have access to it. Then, login with the credential provided by ICP DAS.
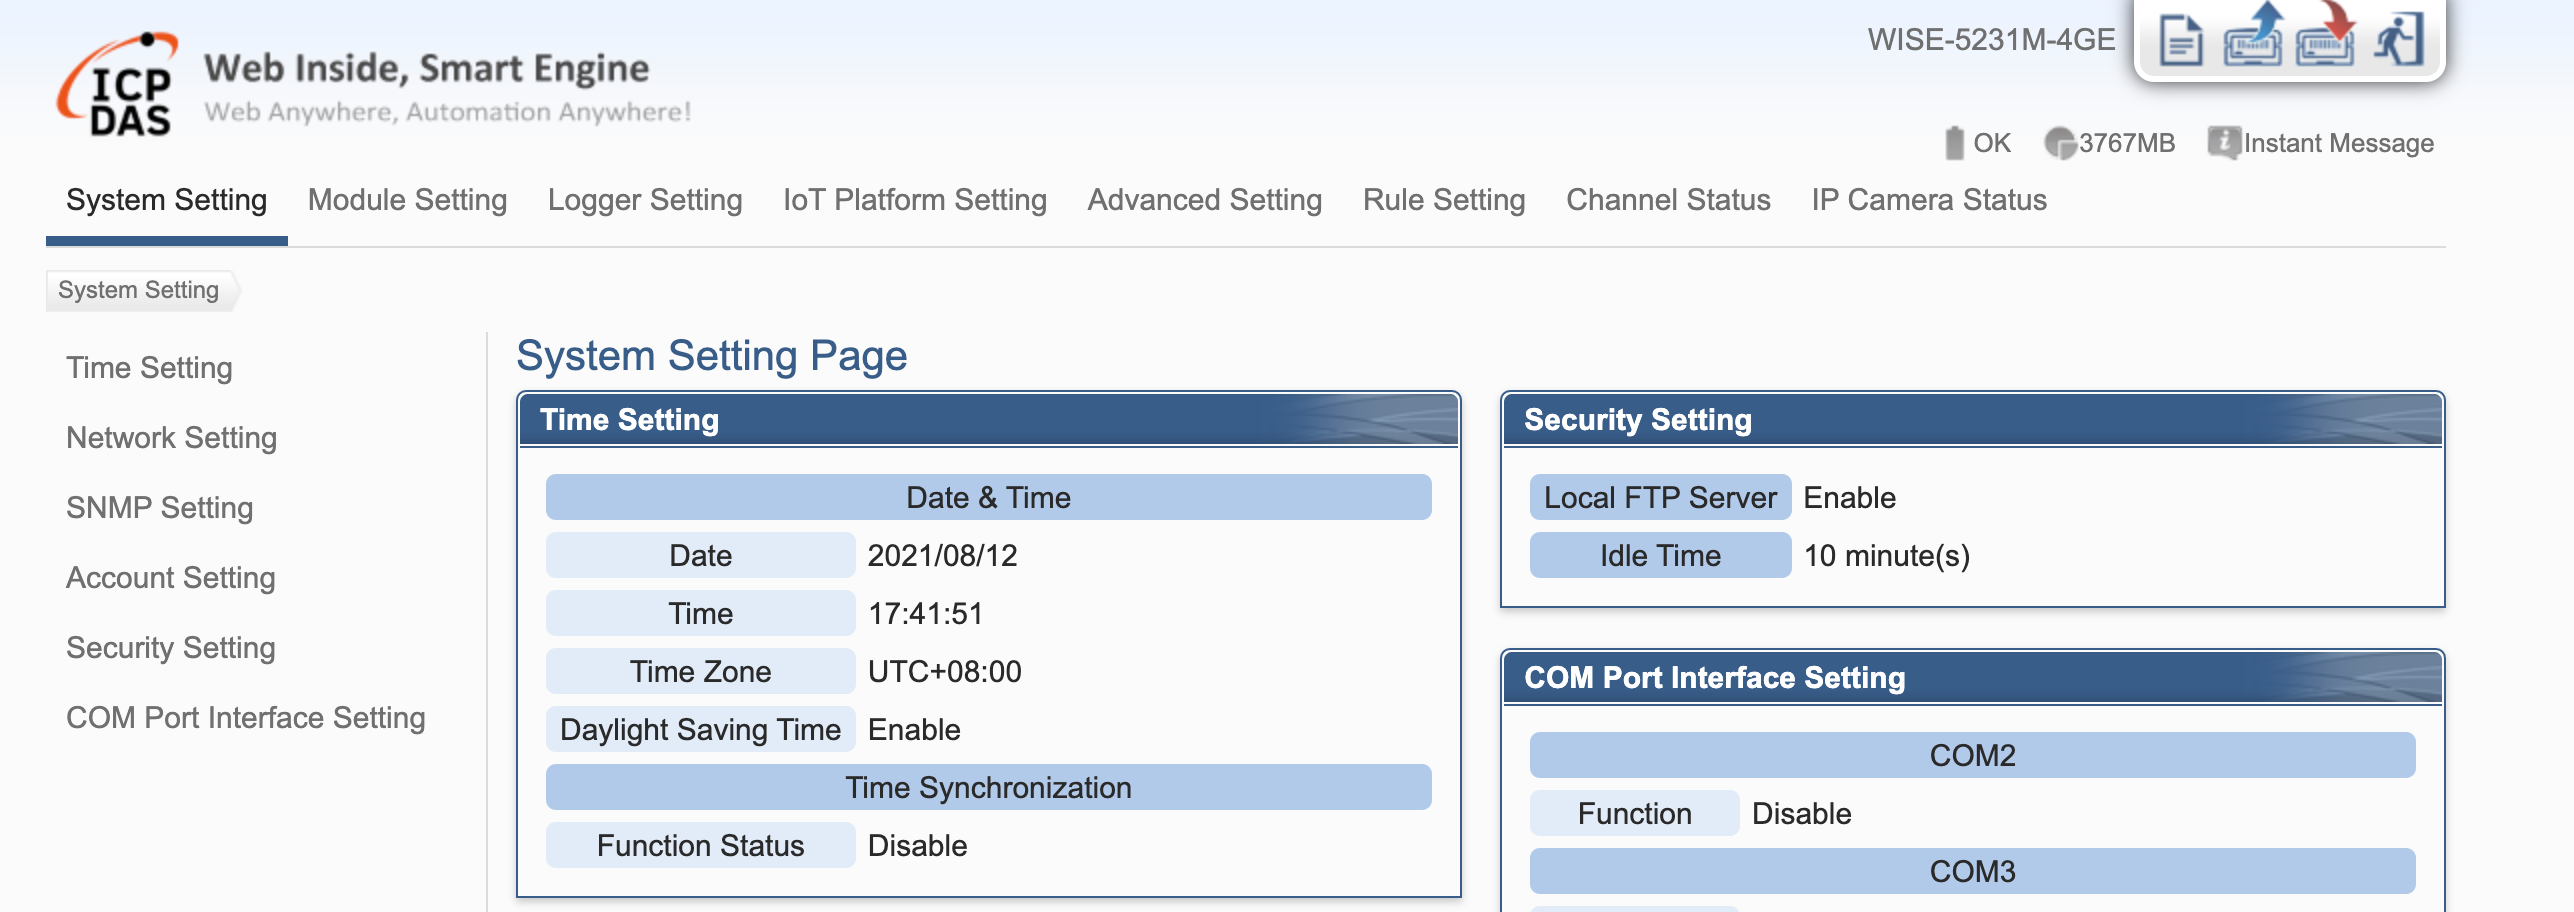
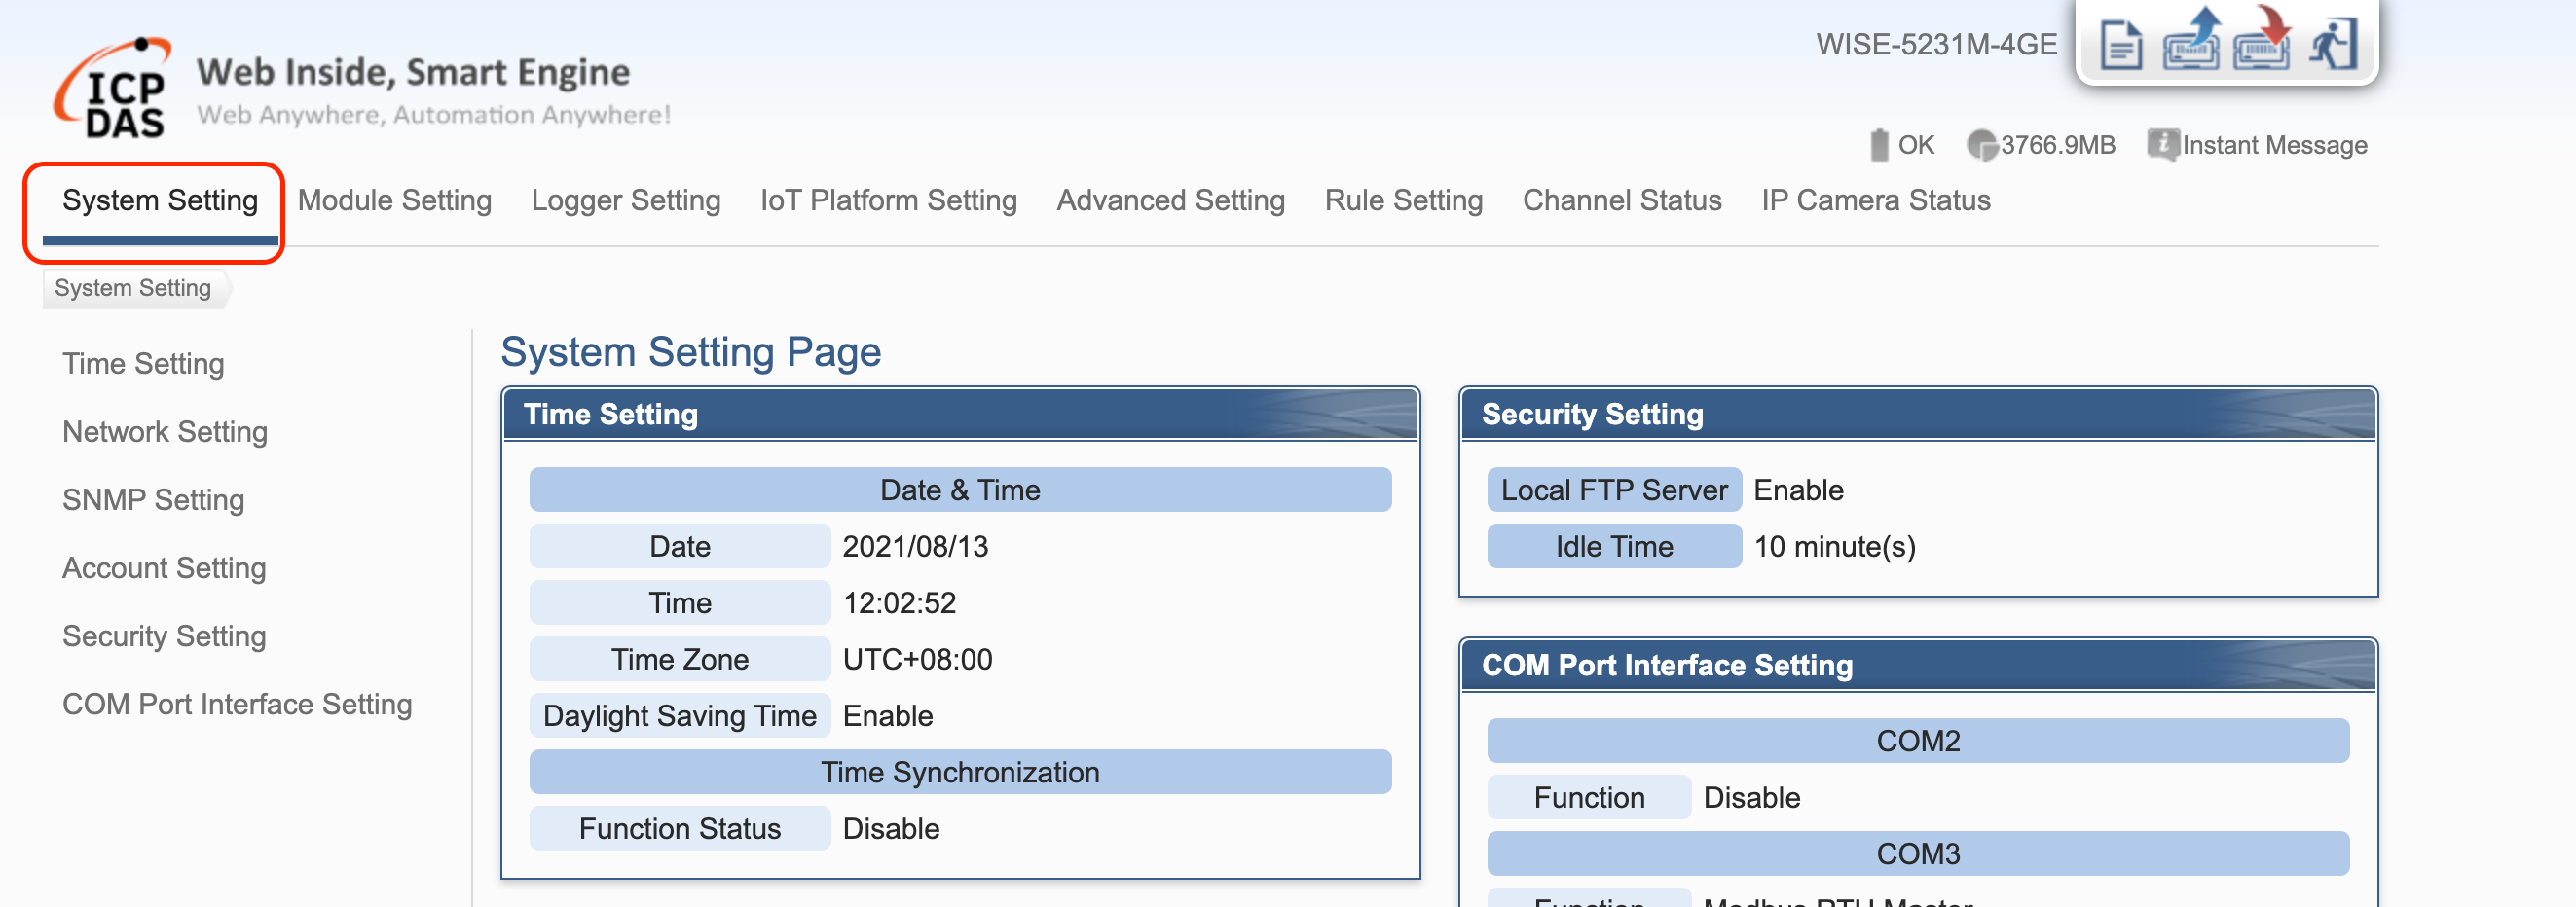
WISE System Setting
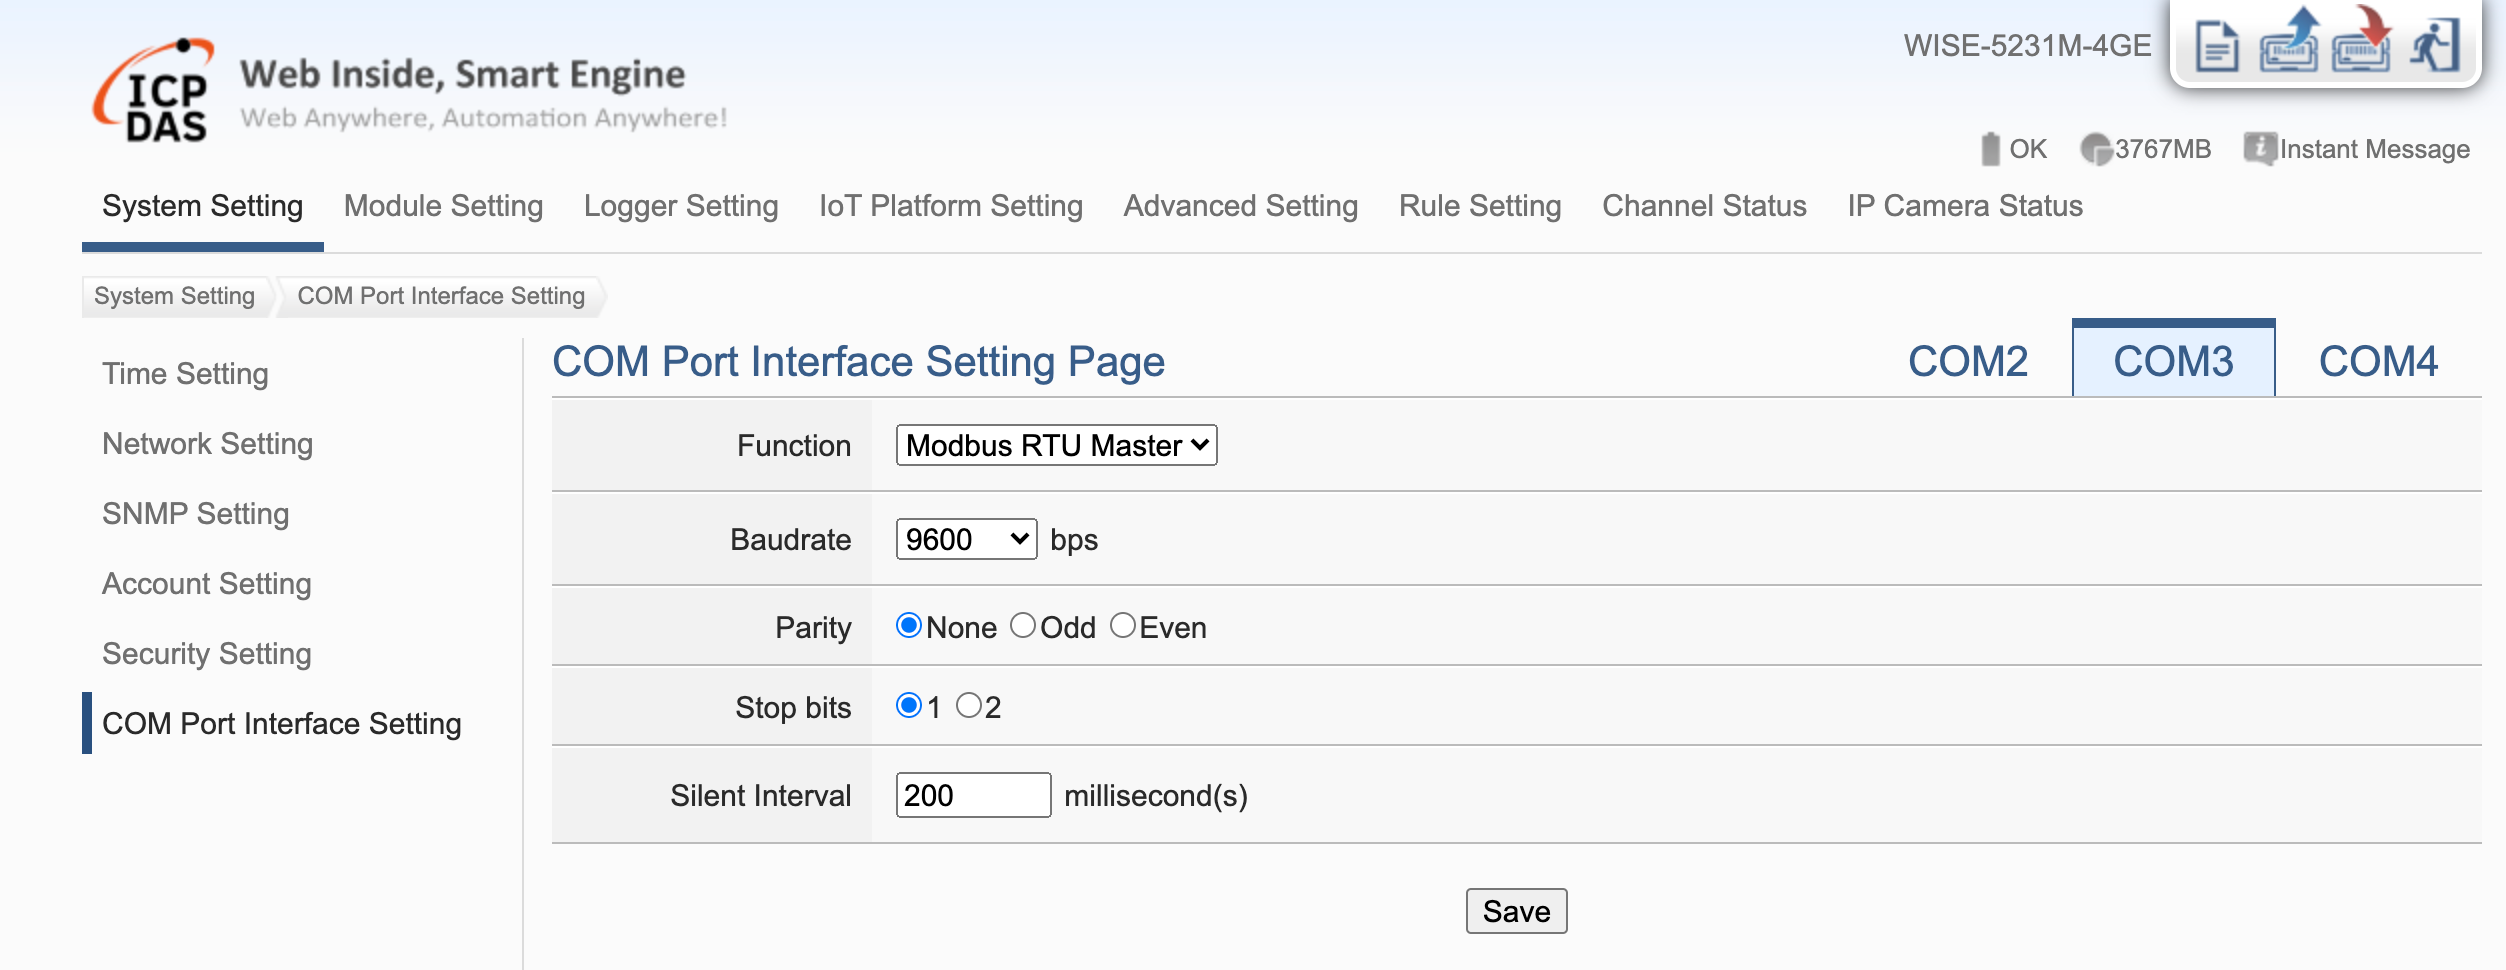
COM Port Interface Setting
WISE-5231M supports COM3 and COM4 which can let sensors connect to. The user can then configure the COM port by the selected sensor(s).
WISE Module Setting
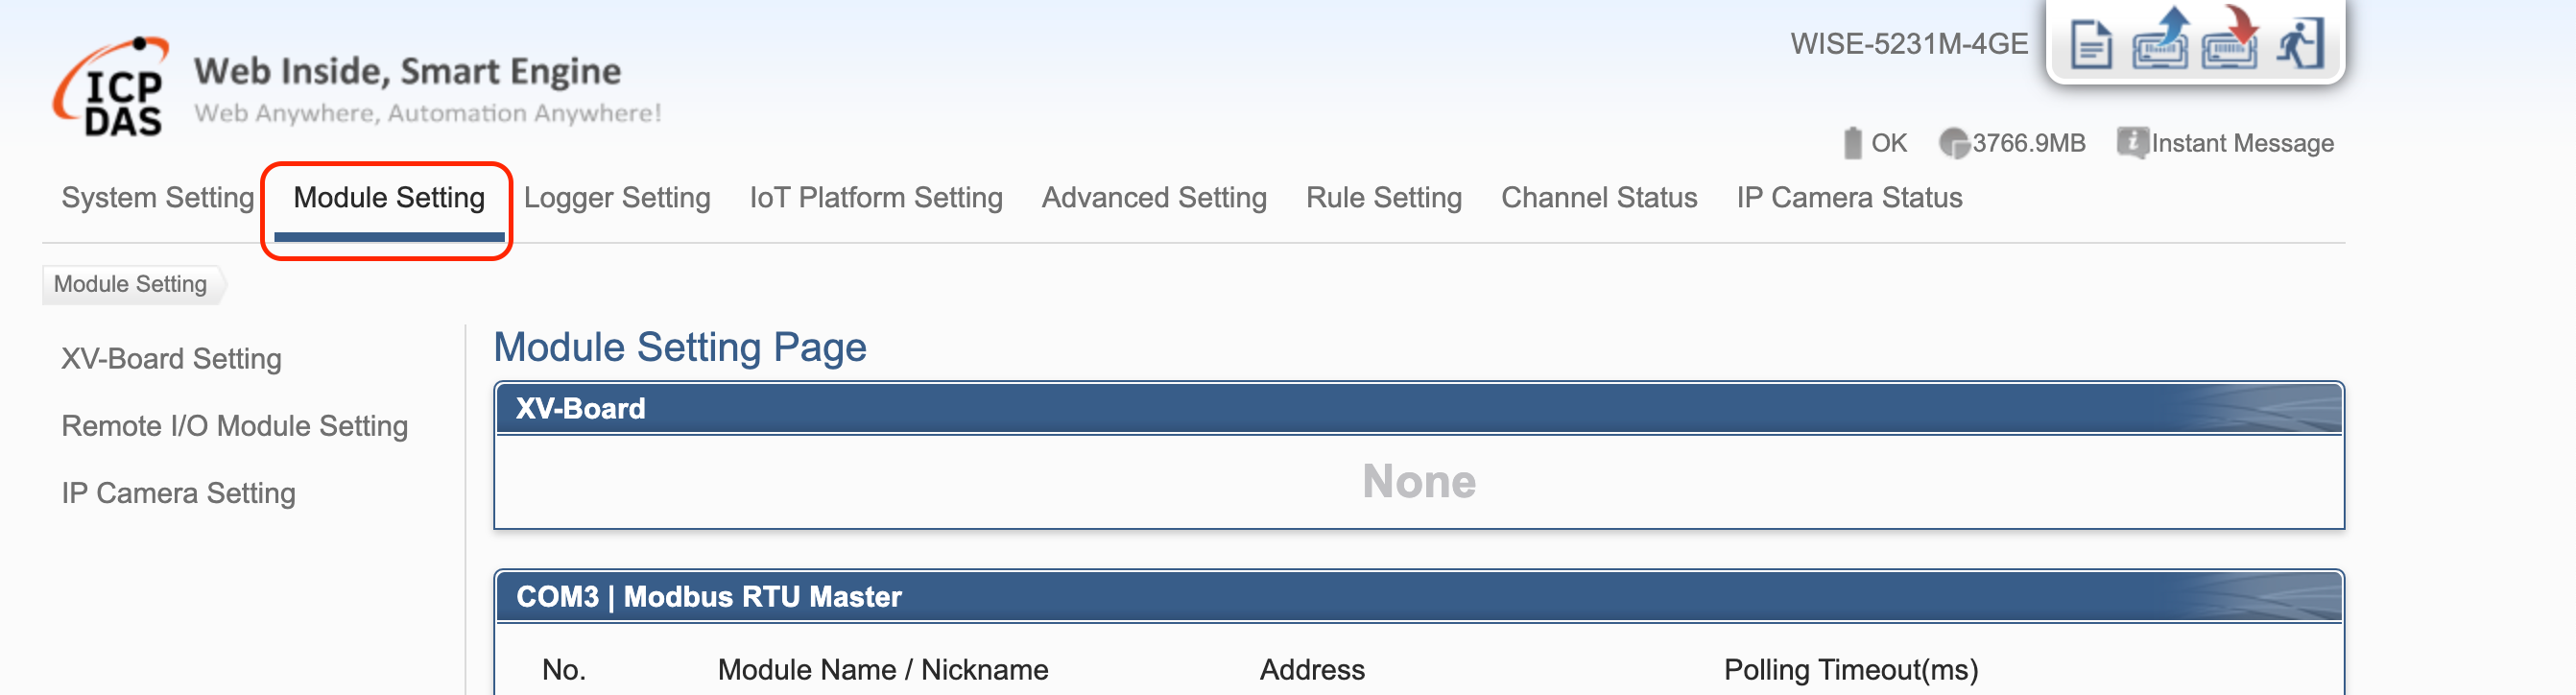
Remote I/O Module Setting
-
Click the Remote I/O Module Setting to enter the configuration page

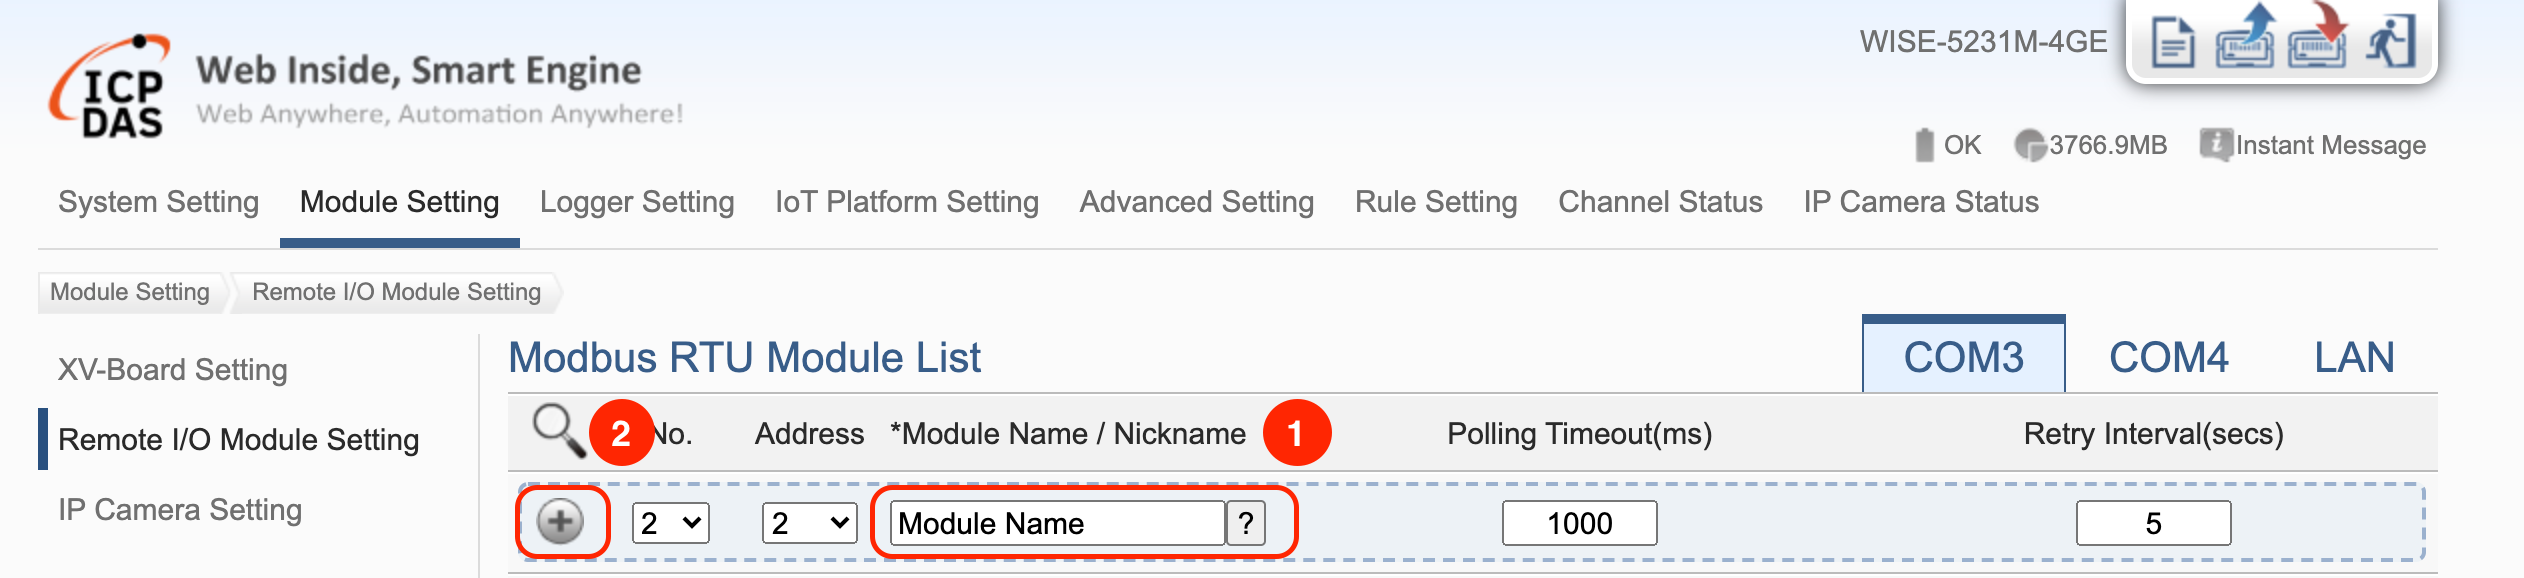
-
Input the Module name (Step 1) and click add button (Step 2)
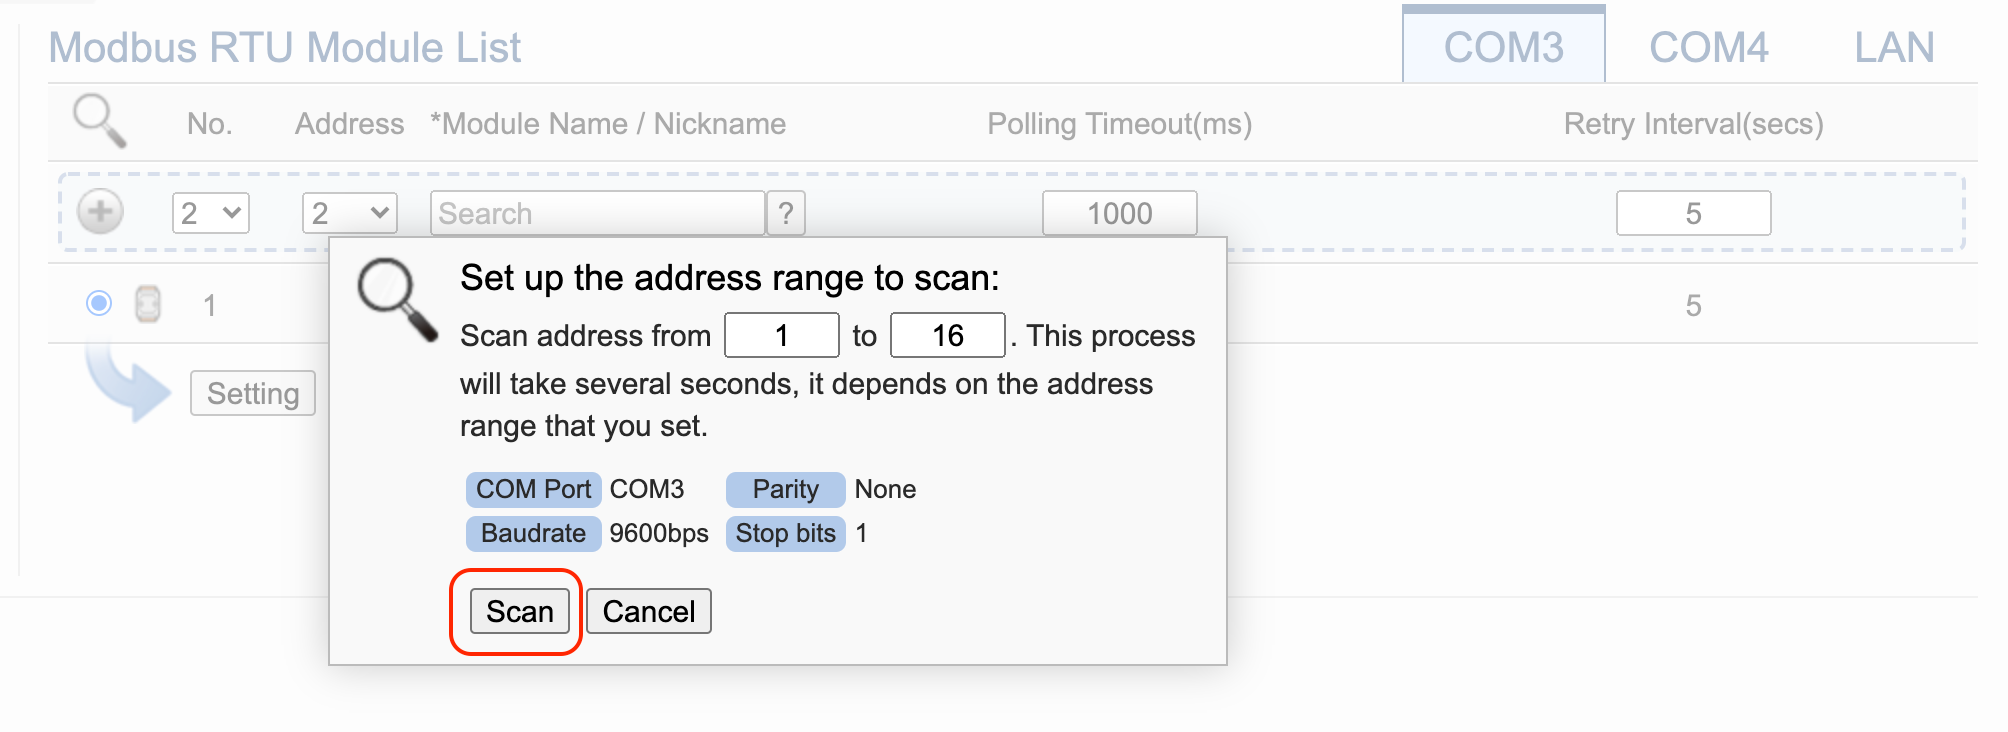
Tip
There is scan function for searching and configuring ICP DAS supported module(s) in quick. By inputing the address range for scanning and successsfully get your module(s) scanned, you can then skip the configuration parts in this section below which defines the data scheme.
Click the Scan(magnifier) button

Input the address range for scanning, then hit "Scan"
-
Select your module and click Setting to configure module detail
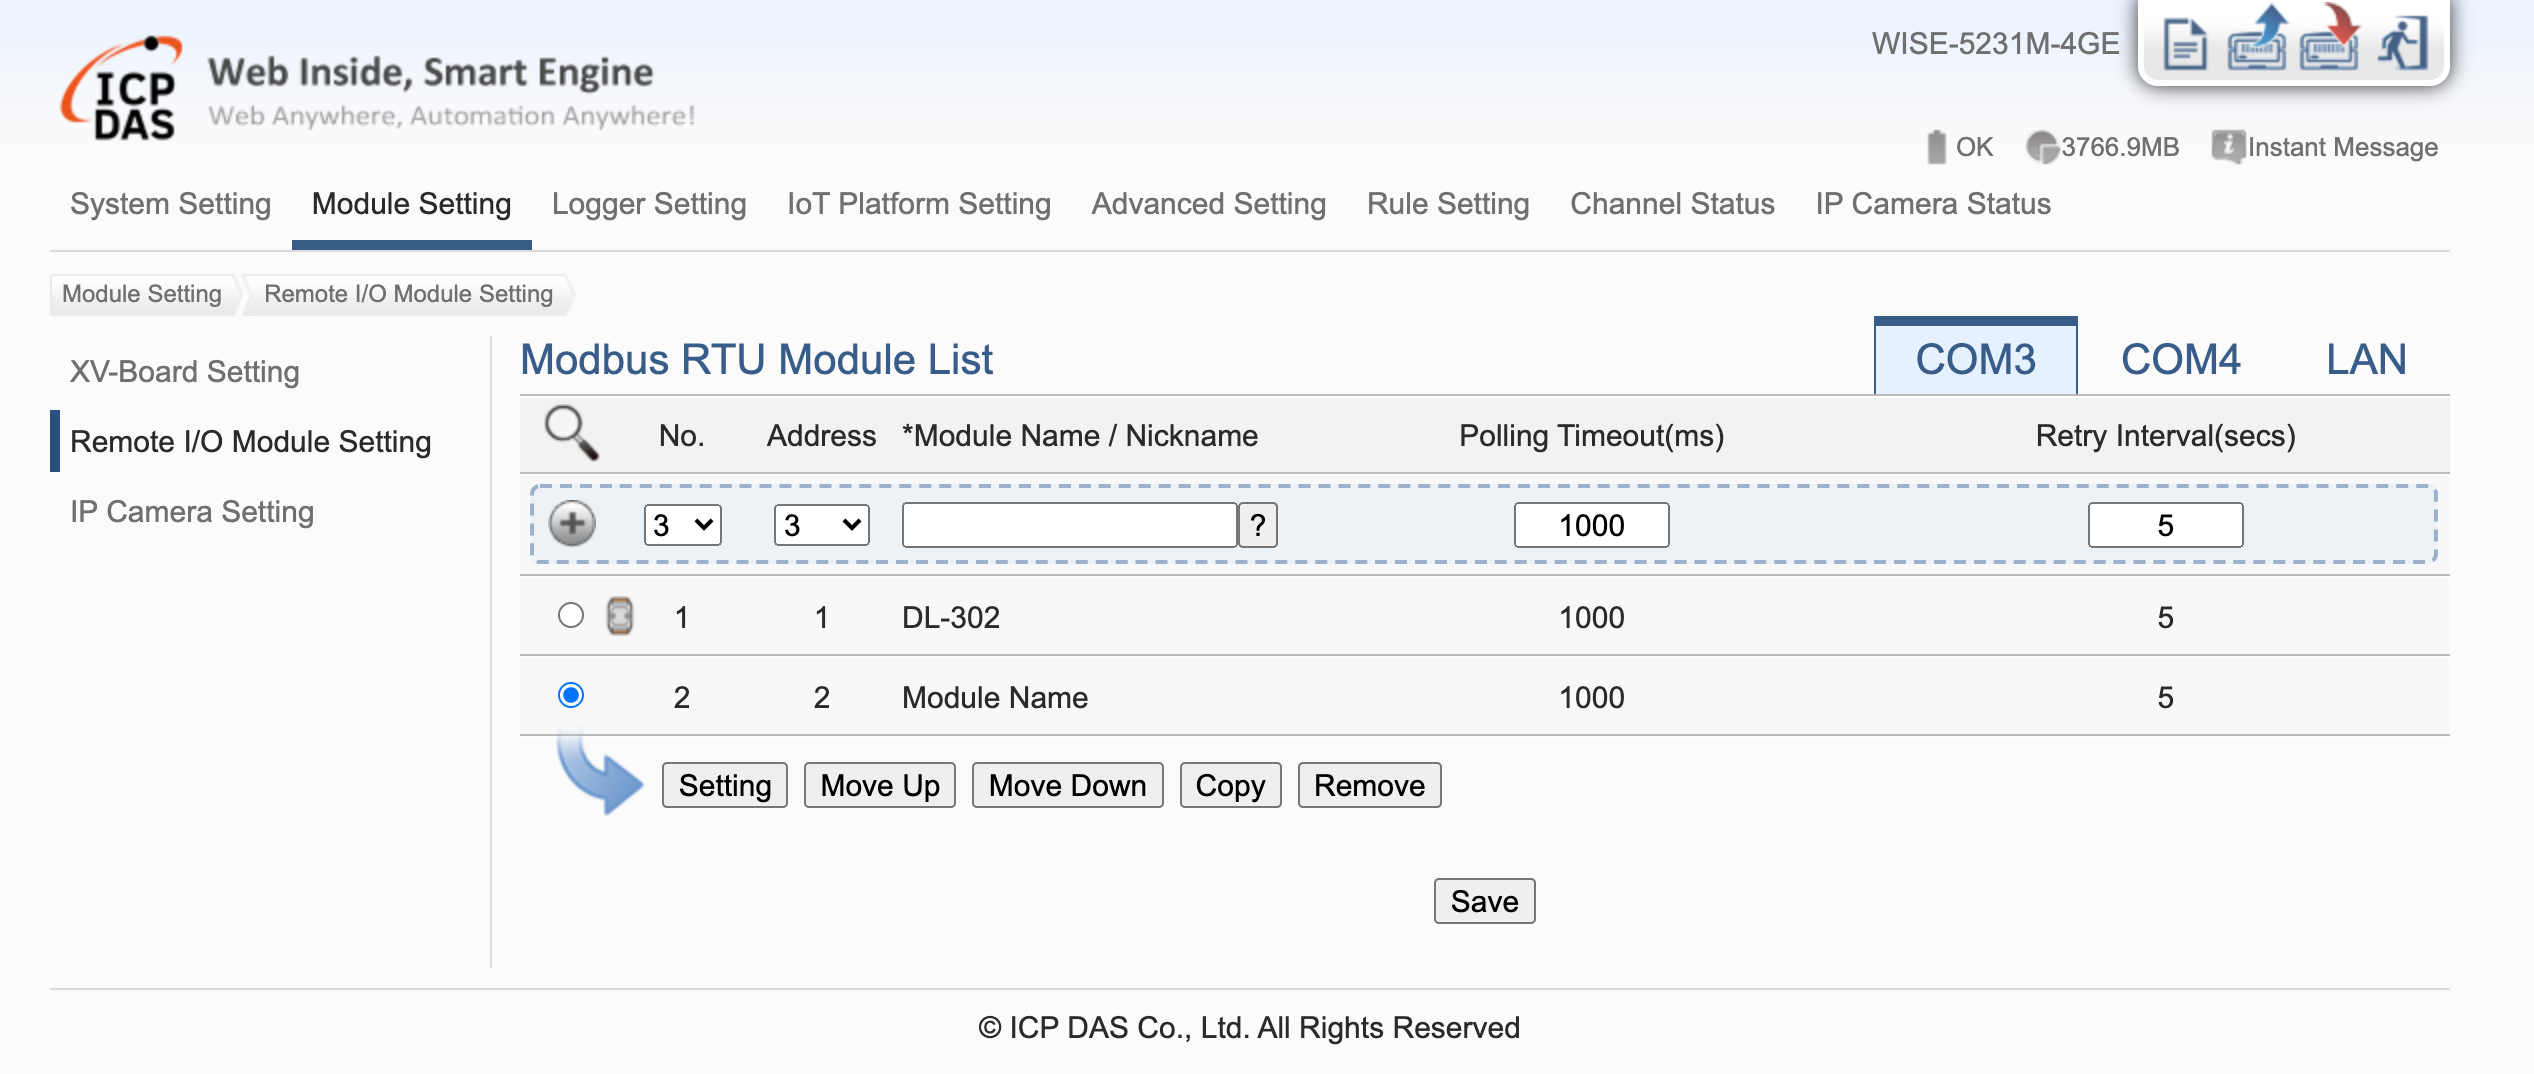
-
Complete the required settings in configuration page by module definition and hit OK
- Click Save button at bottom and Write button at top right of the window to save the setting
WISE IoT Platform Setting
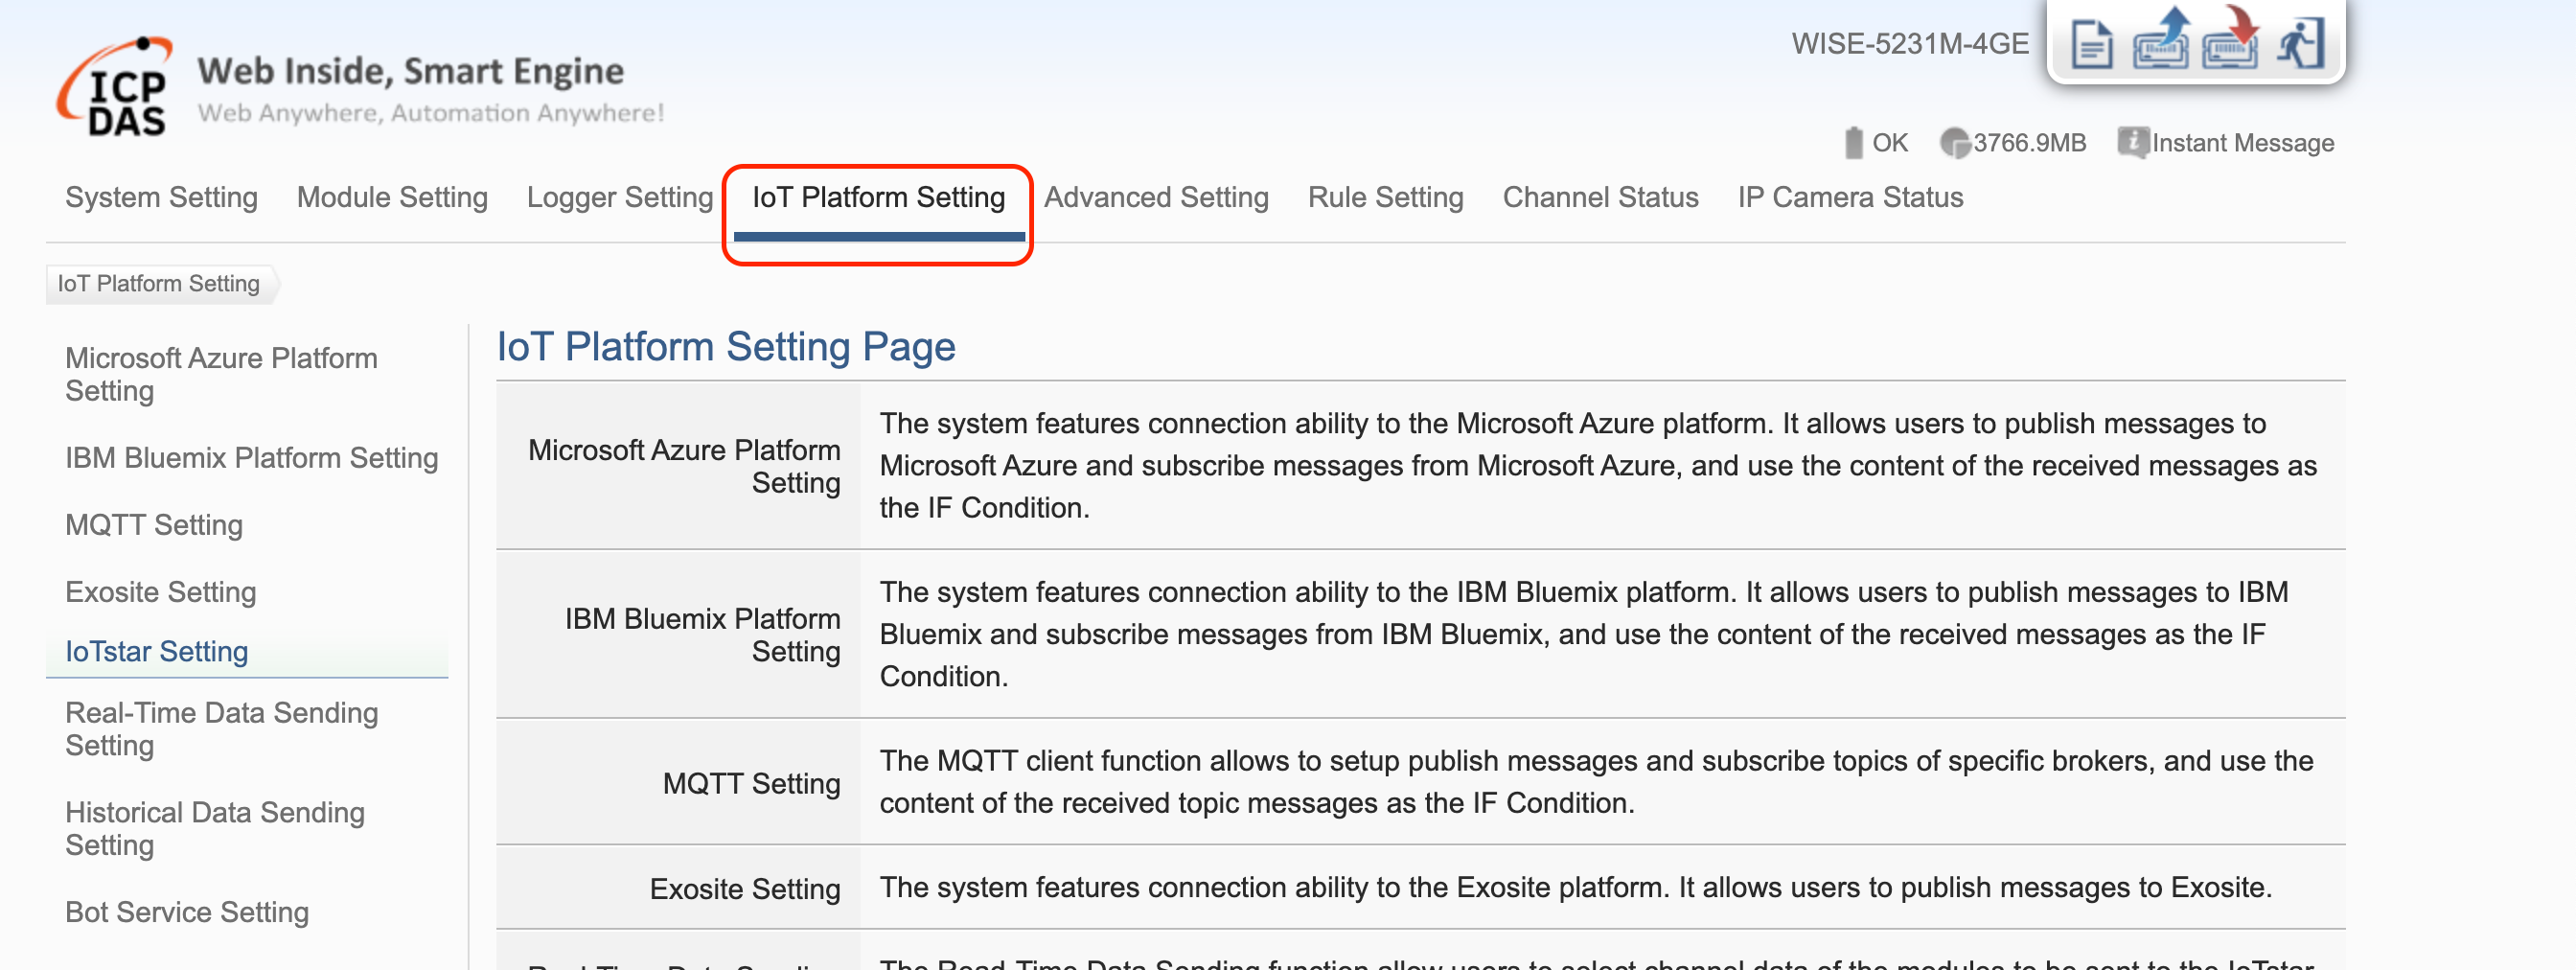
Exosite Setting
Presupported WISE Modbus Modules
ICP DAS has done the data scheme integration for many of their Modbus modules. If you are using the WISE controller with the supported module(s), you can easily connect them to Exosite. The connection setting is setup in the WISE Exosite Setting page.
- Click the Exosite Setting to enter the configuration page
-
Complete the required settings and select the module that you would like to connect to Exosite's platform:
- Function Status: The "enable" option should be checked to get the connection works
- Address:
<IoT Connector URL>(ends with m2.exosite.io) - Device ID
- Password
- Periodical Publish Interval:
Nsecond(s)
Note
The Address / Device ID / Password shall be provided by ICP DAS
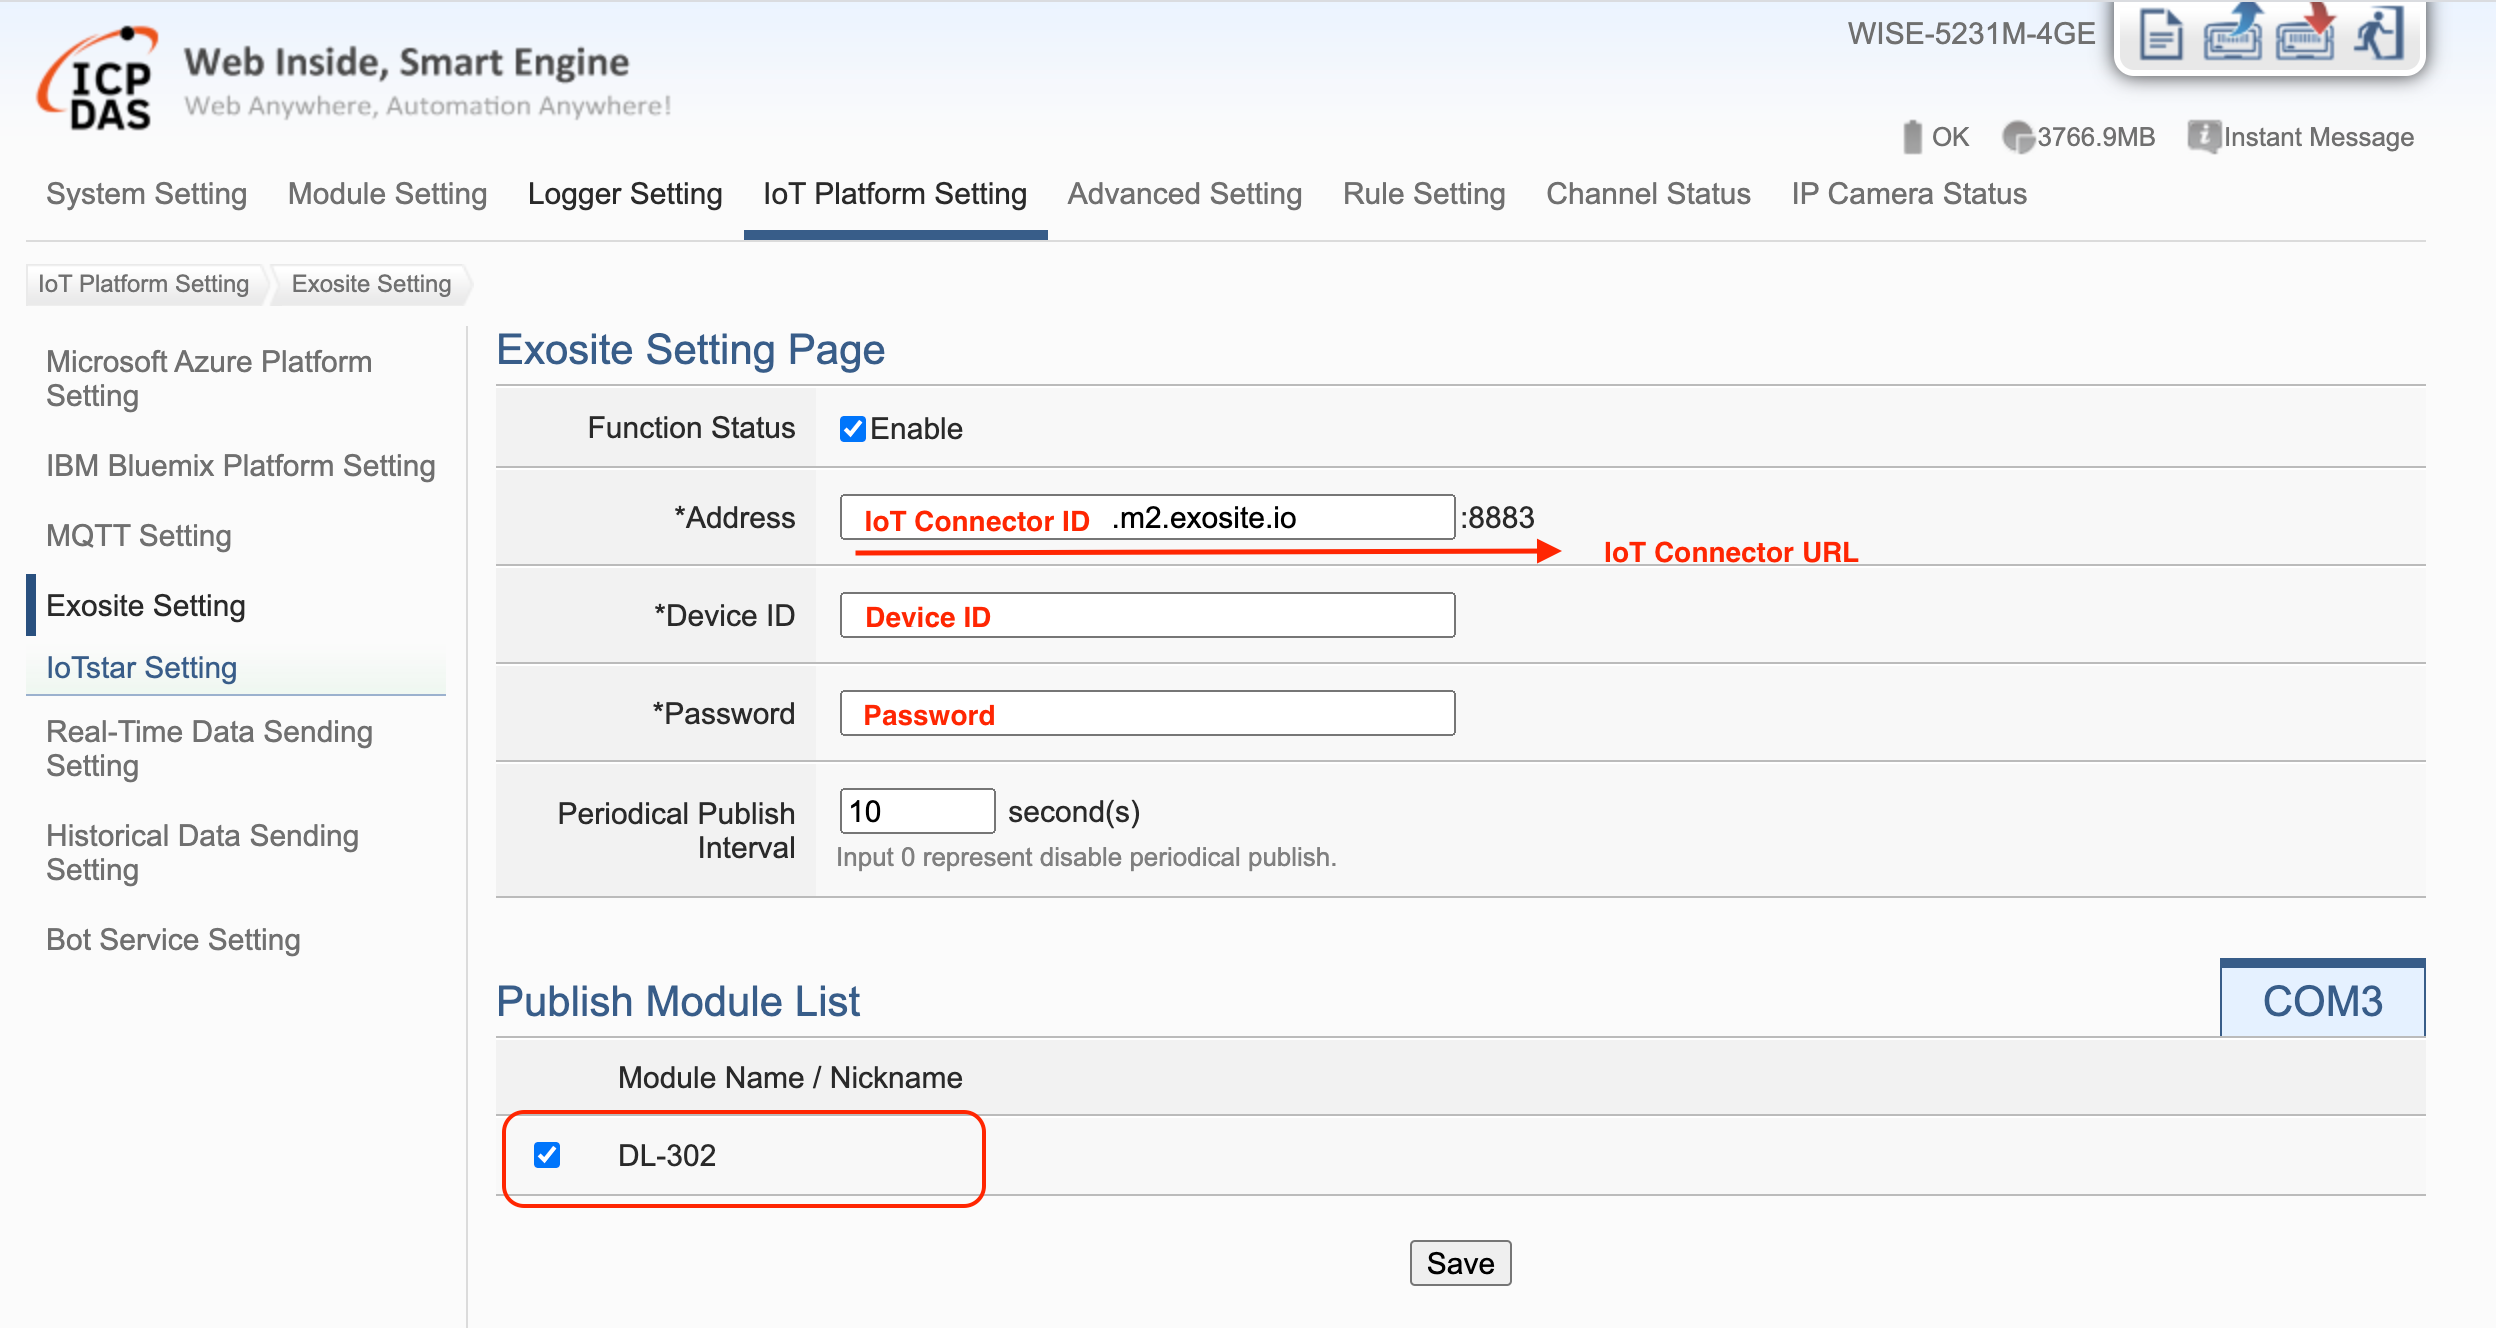
-
Click the Save button at bottom and then the Write button at top right of the window to save and apply the settings
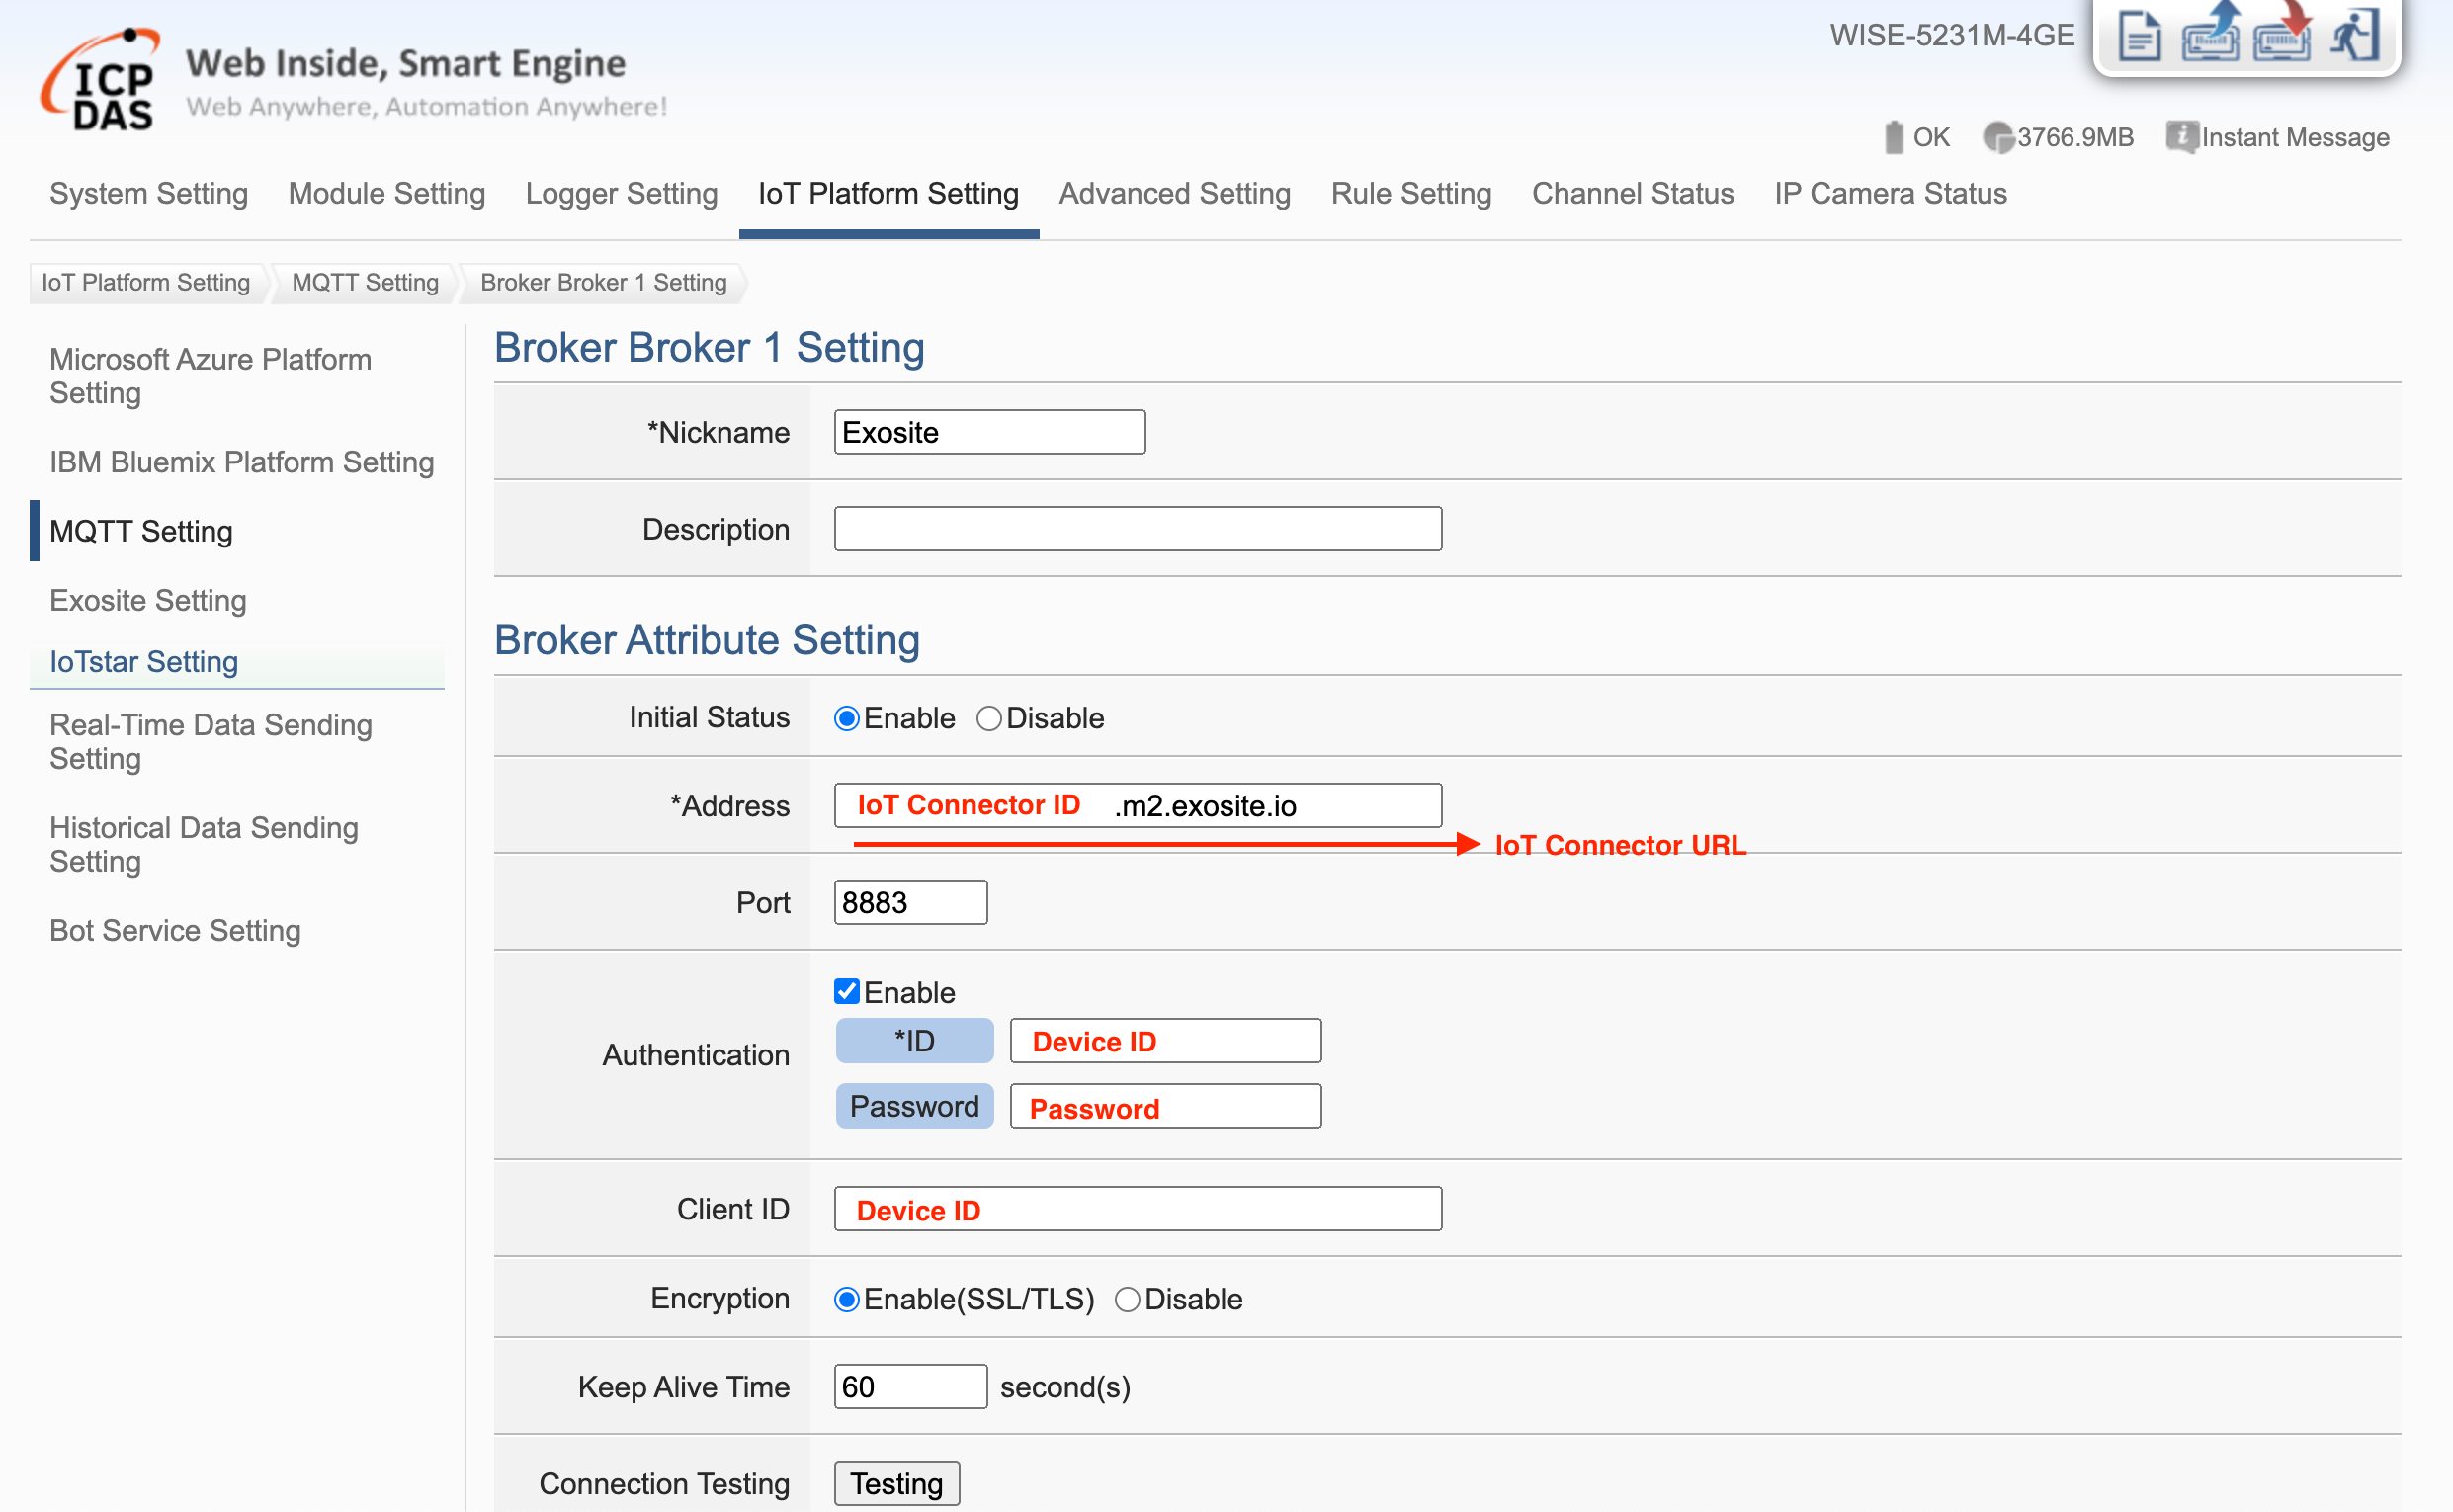
MQTT Setting
Other Modbus modules that are not pre-configured by ICP DAS are allowed to connect to their controller by defining the data scheme. Besides connection setting, you may need to specify the message(s) that will get subscribed/published in WISE MQTT Setting page.
- Click the MQTT Setting to enter the configuration page
-
Configure the MQTT broker setting to connect to Exosite's platform:
- Address:
<IoT Connector URL>(ends with m2.exosite.io) - Port
- ID: Device ID
- Password
- Client ID: Input the Device ID
- Encryption: Enable(SSL/TLS)
Important
- The Address / Port / Device ID / Password shall be provided by ICP DAS
- Can use the
Testingbutton to test the connection
- Address:
-
Select Publish option of Publish & Subscribe Setting and click + Add new Publish Message to configure the message you would like to publish
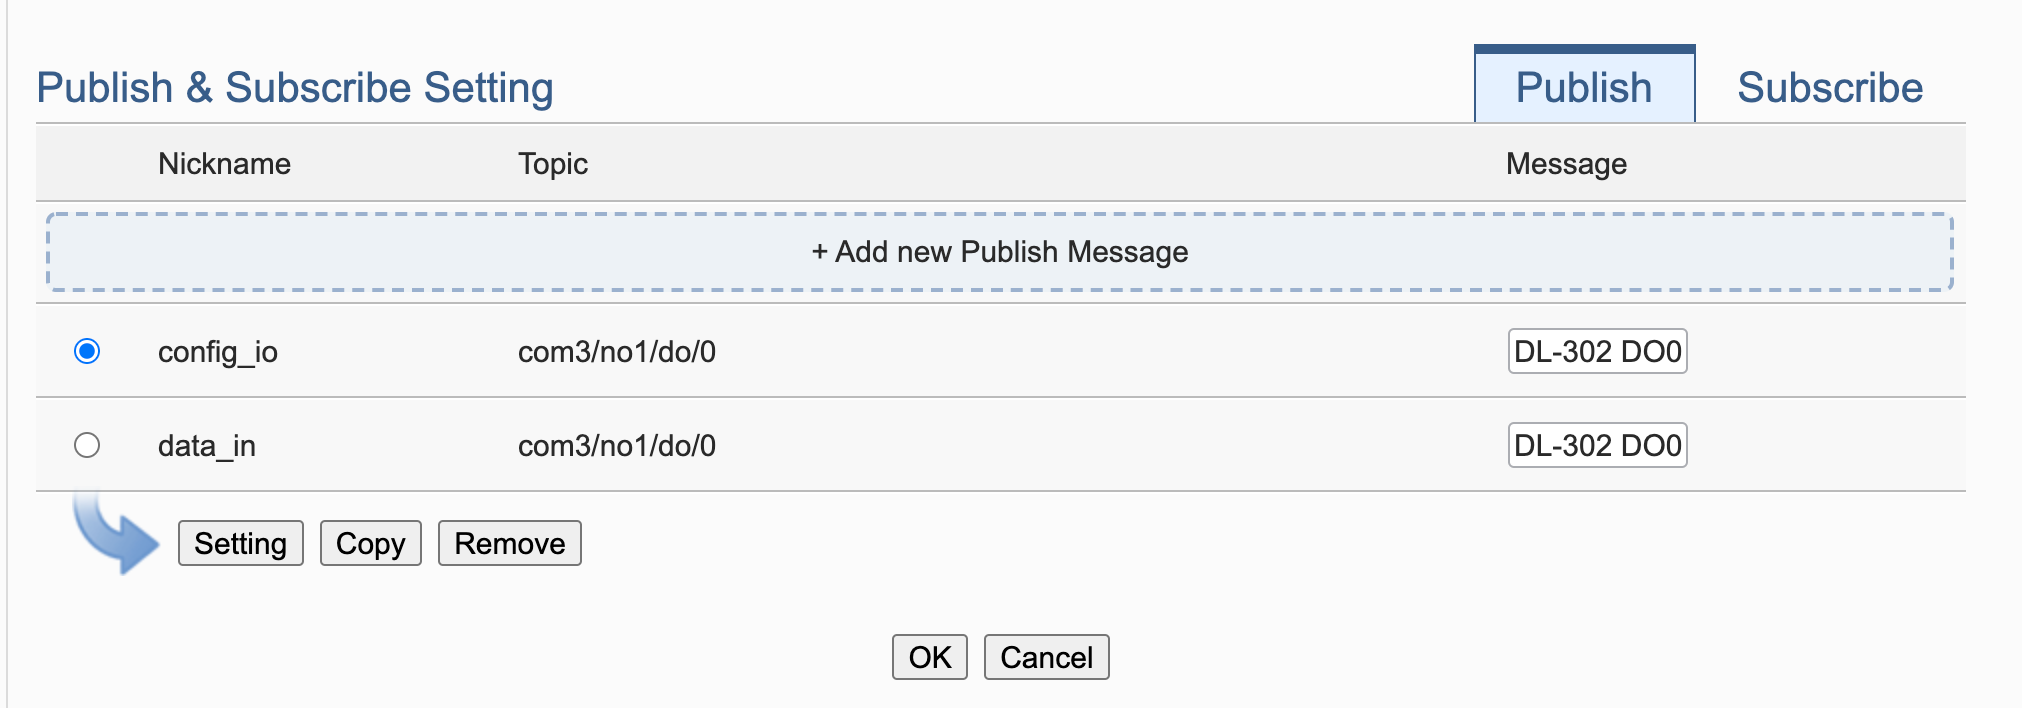
-
Hit OK then click Save button at bottom and Write button at top right of the window to save the setting
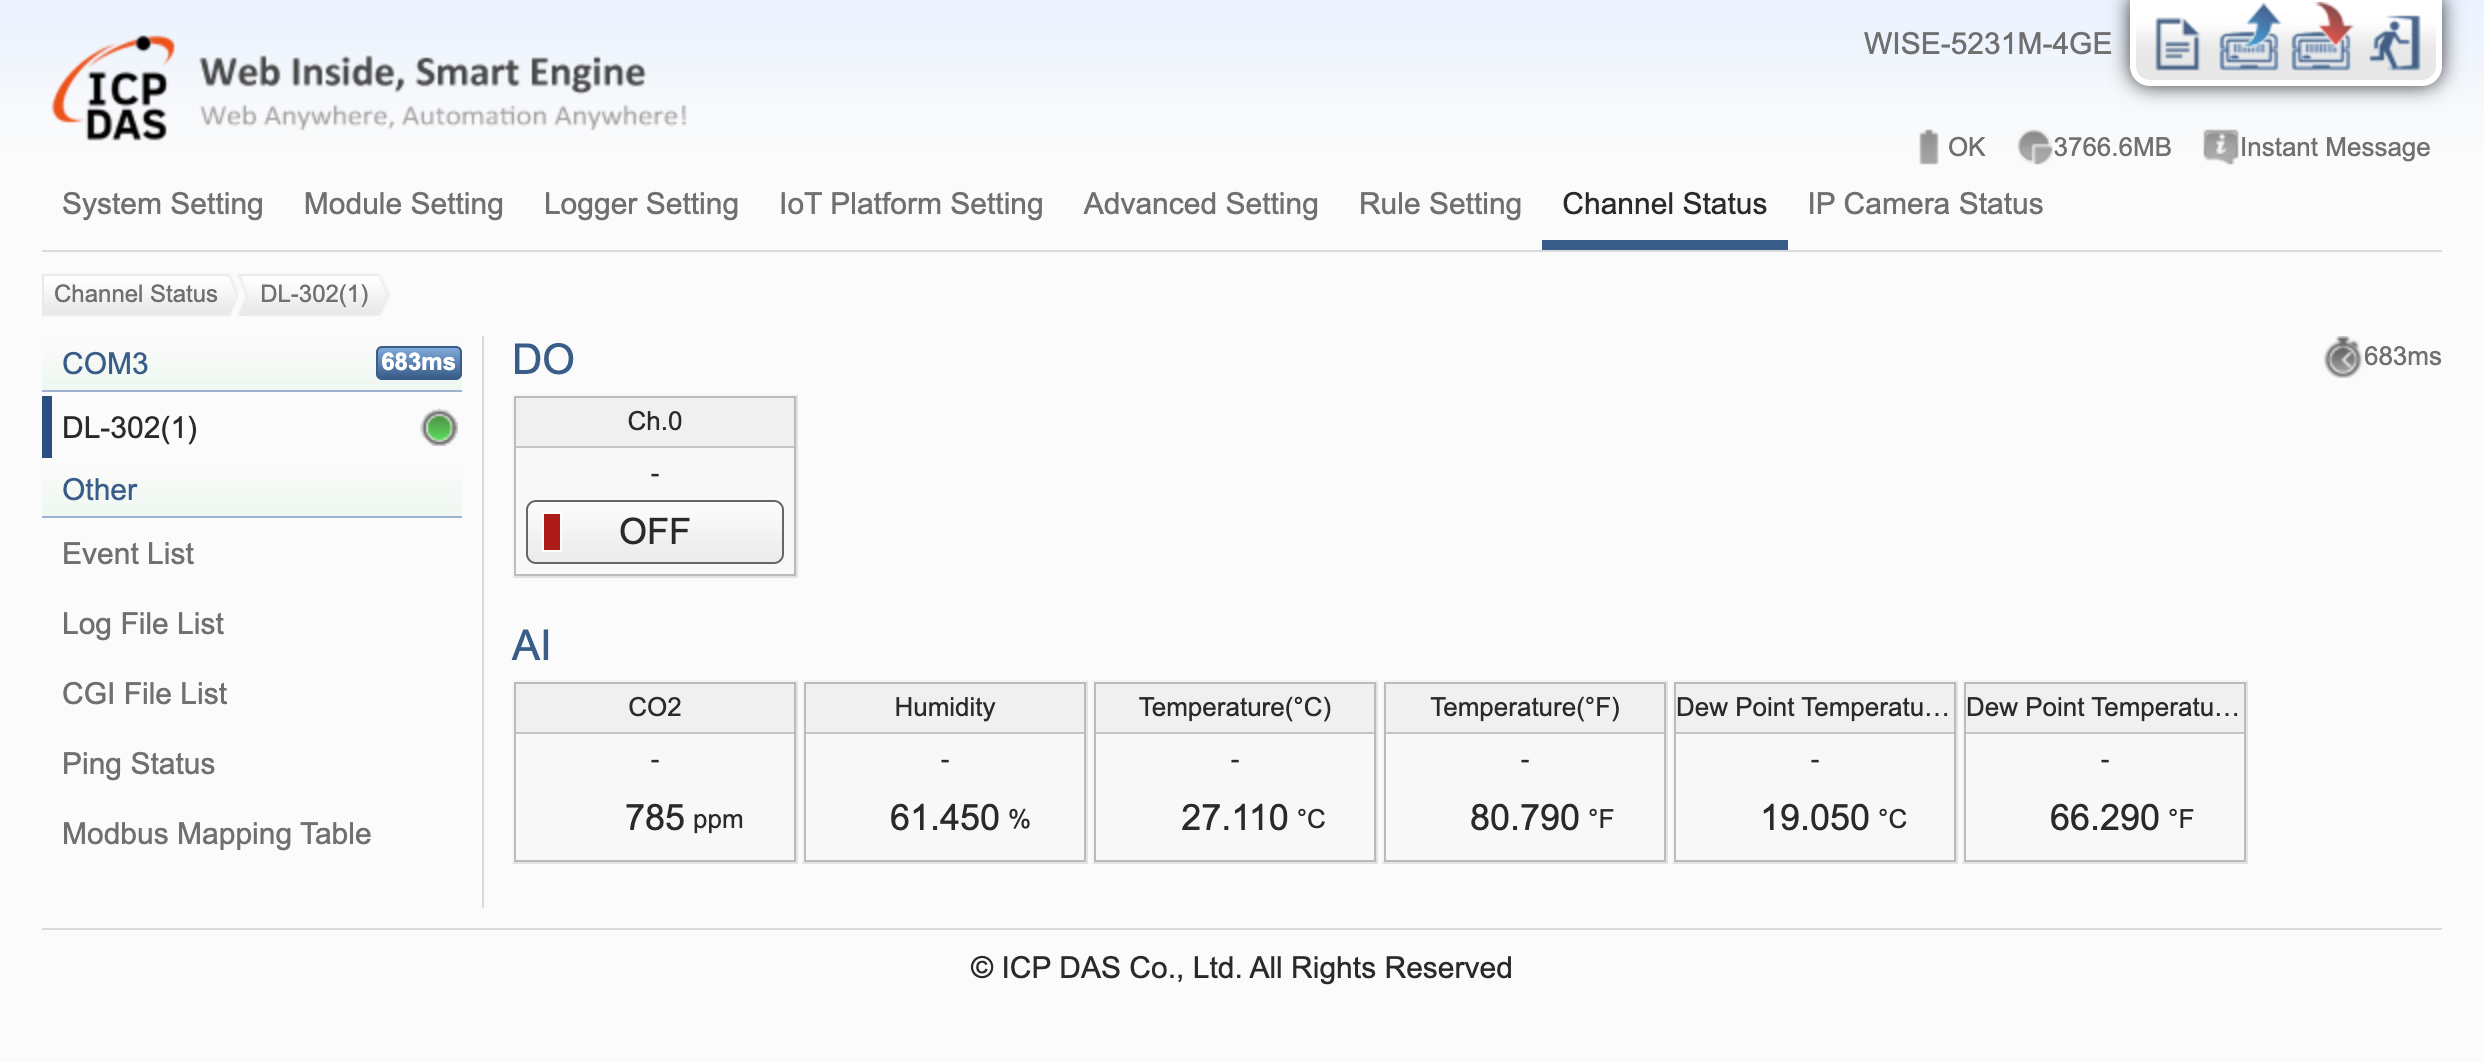
WISE Channel Status
Once all configuration is done, you should be able to check the data for connected device(s) under Channel Status page.
Adding Device to ExoSense
Make sure you have reviewed the required steps mentioned in Prerequisites section.
Claiming Device to ExoSense
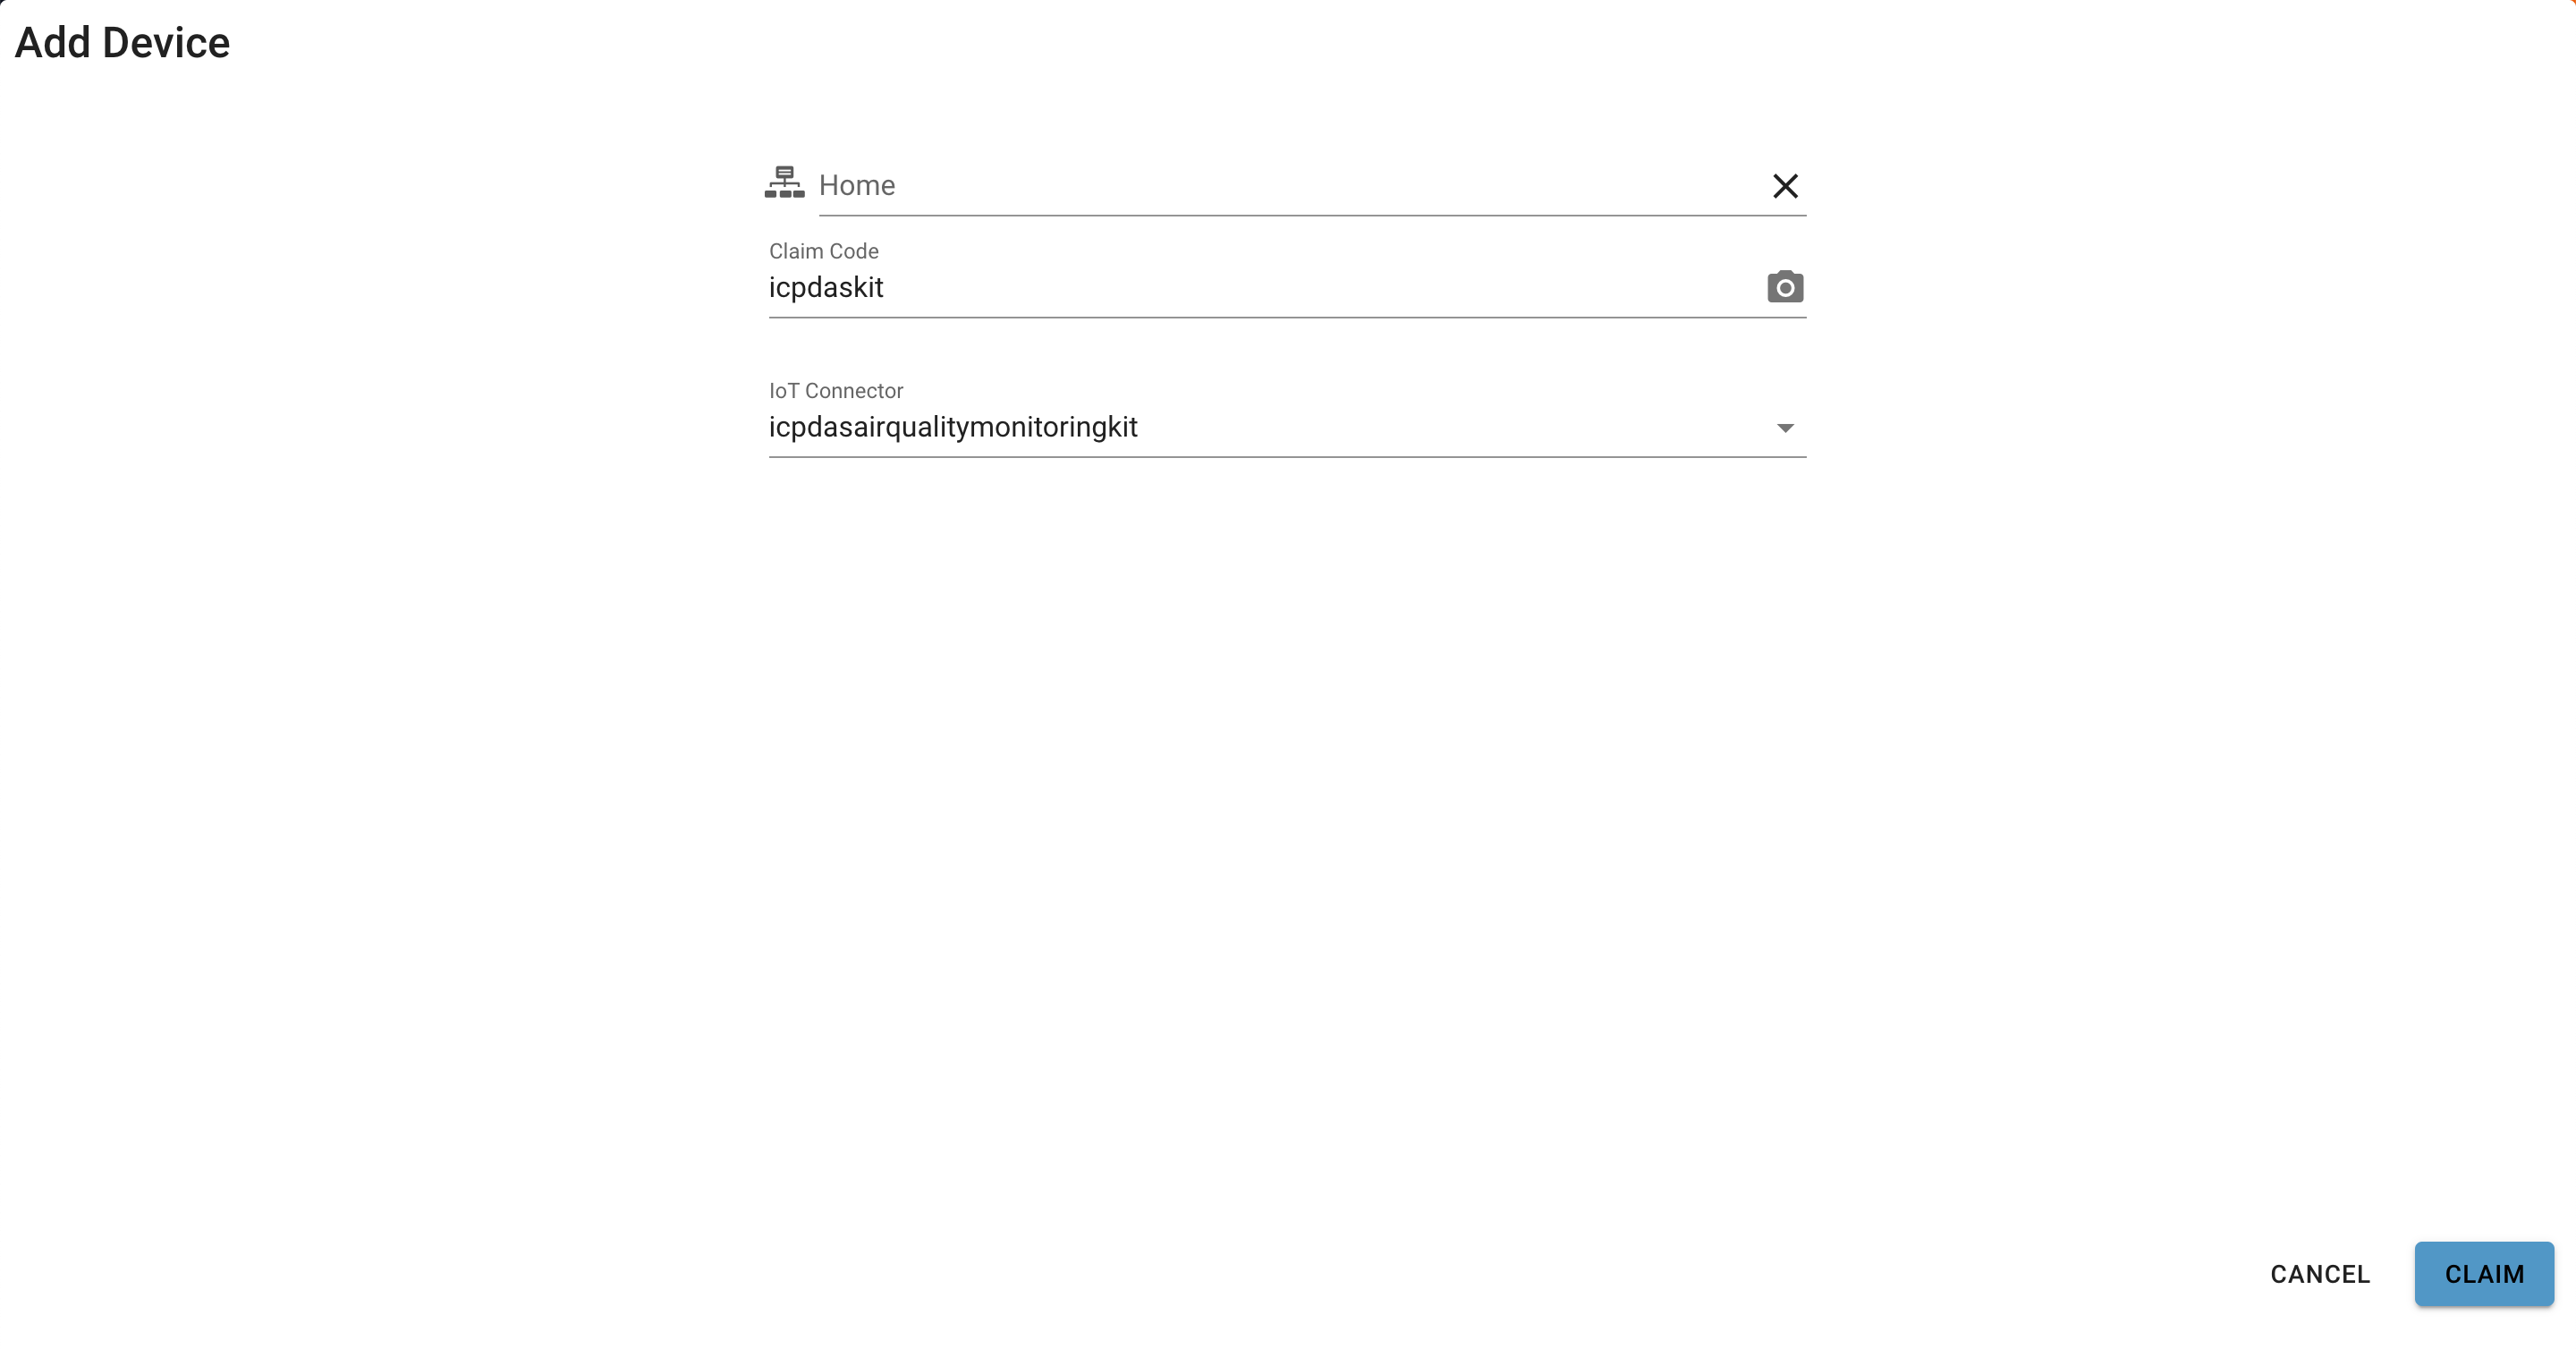
Follow the instructions to claim your device(s) to ExoSense
- Parent Group: Select the group that you'd like to add the device to.
- Claim Code: Which shall be provided by ICP DAS
- IoT Connector: Select
icpdasairqualitymonitoringkitfor the IoT Connector
Once the device is set up on your ExoSense, you can start to build assets, dashboards, and onboard users. ExoSense Overview. If you have any questions, contact support@exosite.com for assistance, or visit https://community.exosite.com for additional help.
Additional Information
ICP DAS ExoWISE Industrial Solution Page: ExoWISE Industrial Solution