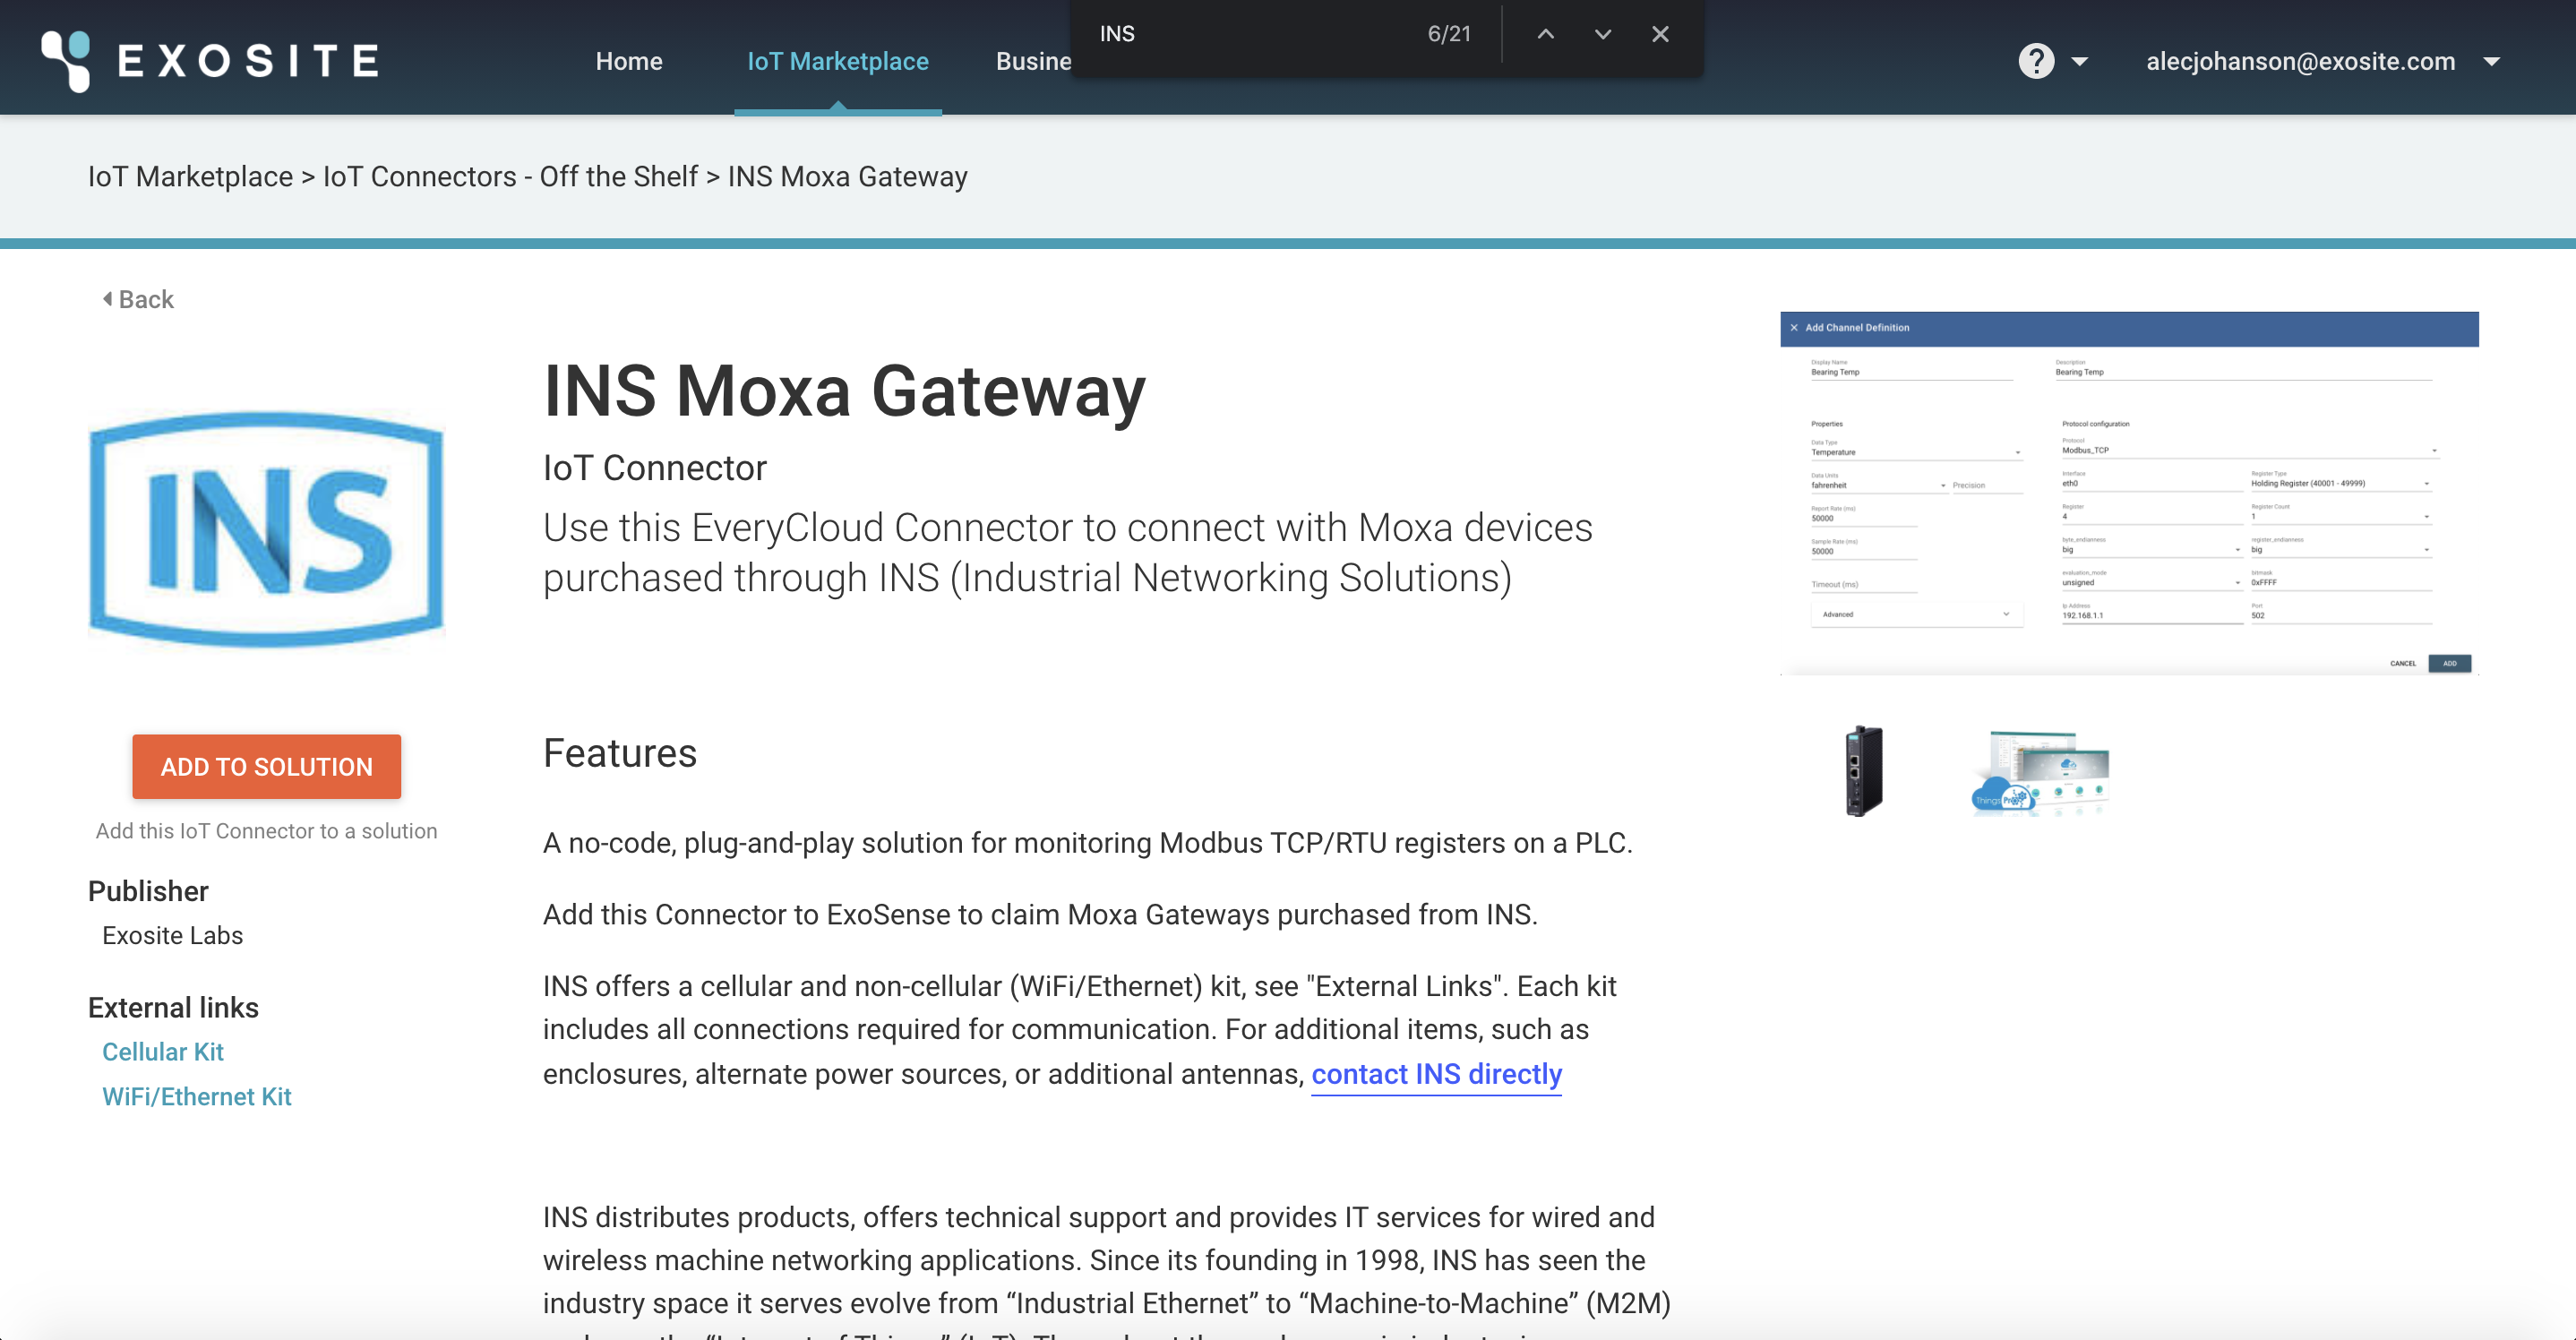
INS Moxa Connector
Industrial Networking Solutions (INS) provides industry-leading products, technical support and IT services for wired and wireless machine networking applications.
The INS Moxa Connector is used to connect to Moxa Gateways purchased from INS. Utilize the INS Moxa Connector to read and monitor Modbus registers from a PLC without any code.
Prerequisites
INS Moxa Gateway
Order a Moxa Gateway from INS, a Moxa distributor. There are two kits available, WiFi/Ethernet and Cellular
If you have purchased a Moxa Gateway that is not one of these kits, configuring a factory image Moxa gateway to connect to Exosite is documented here
Signing Up for ExoSense
Sign up for an Exosite Account at www.exosite.com
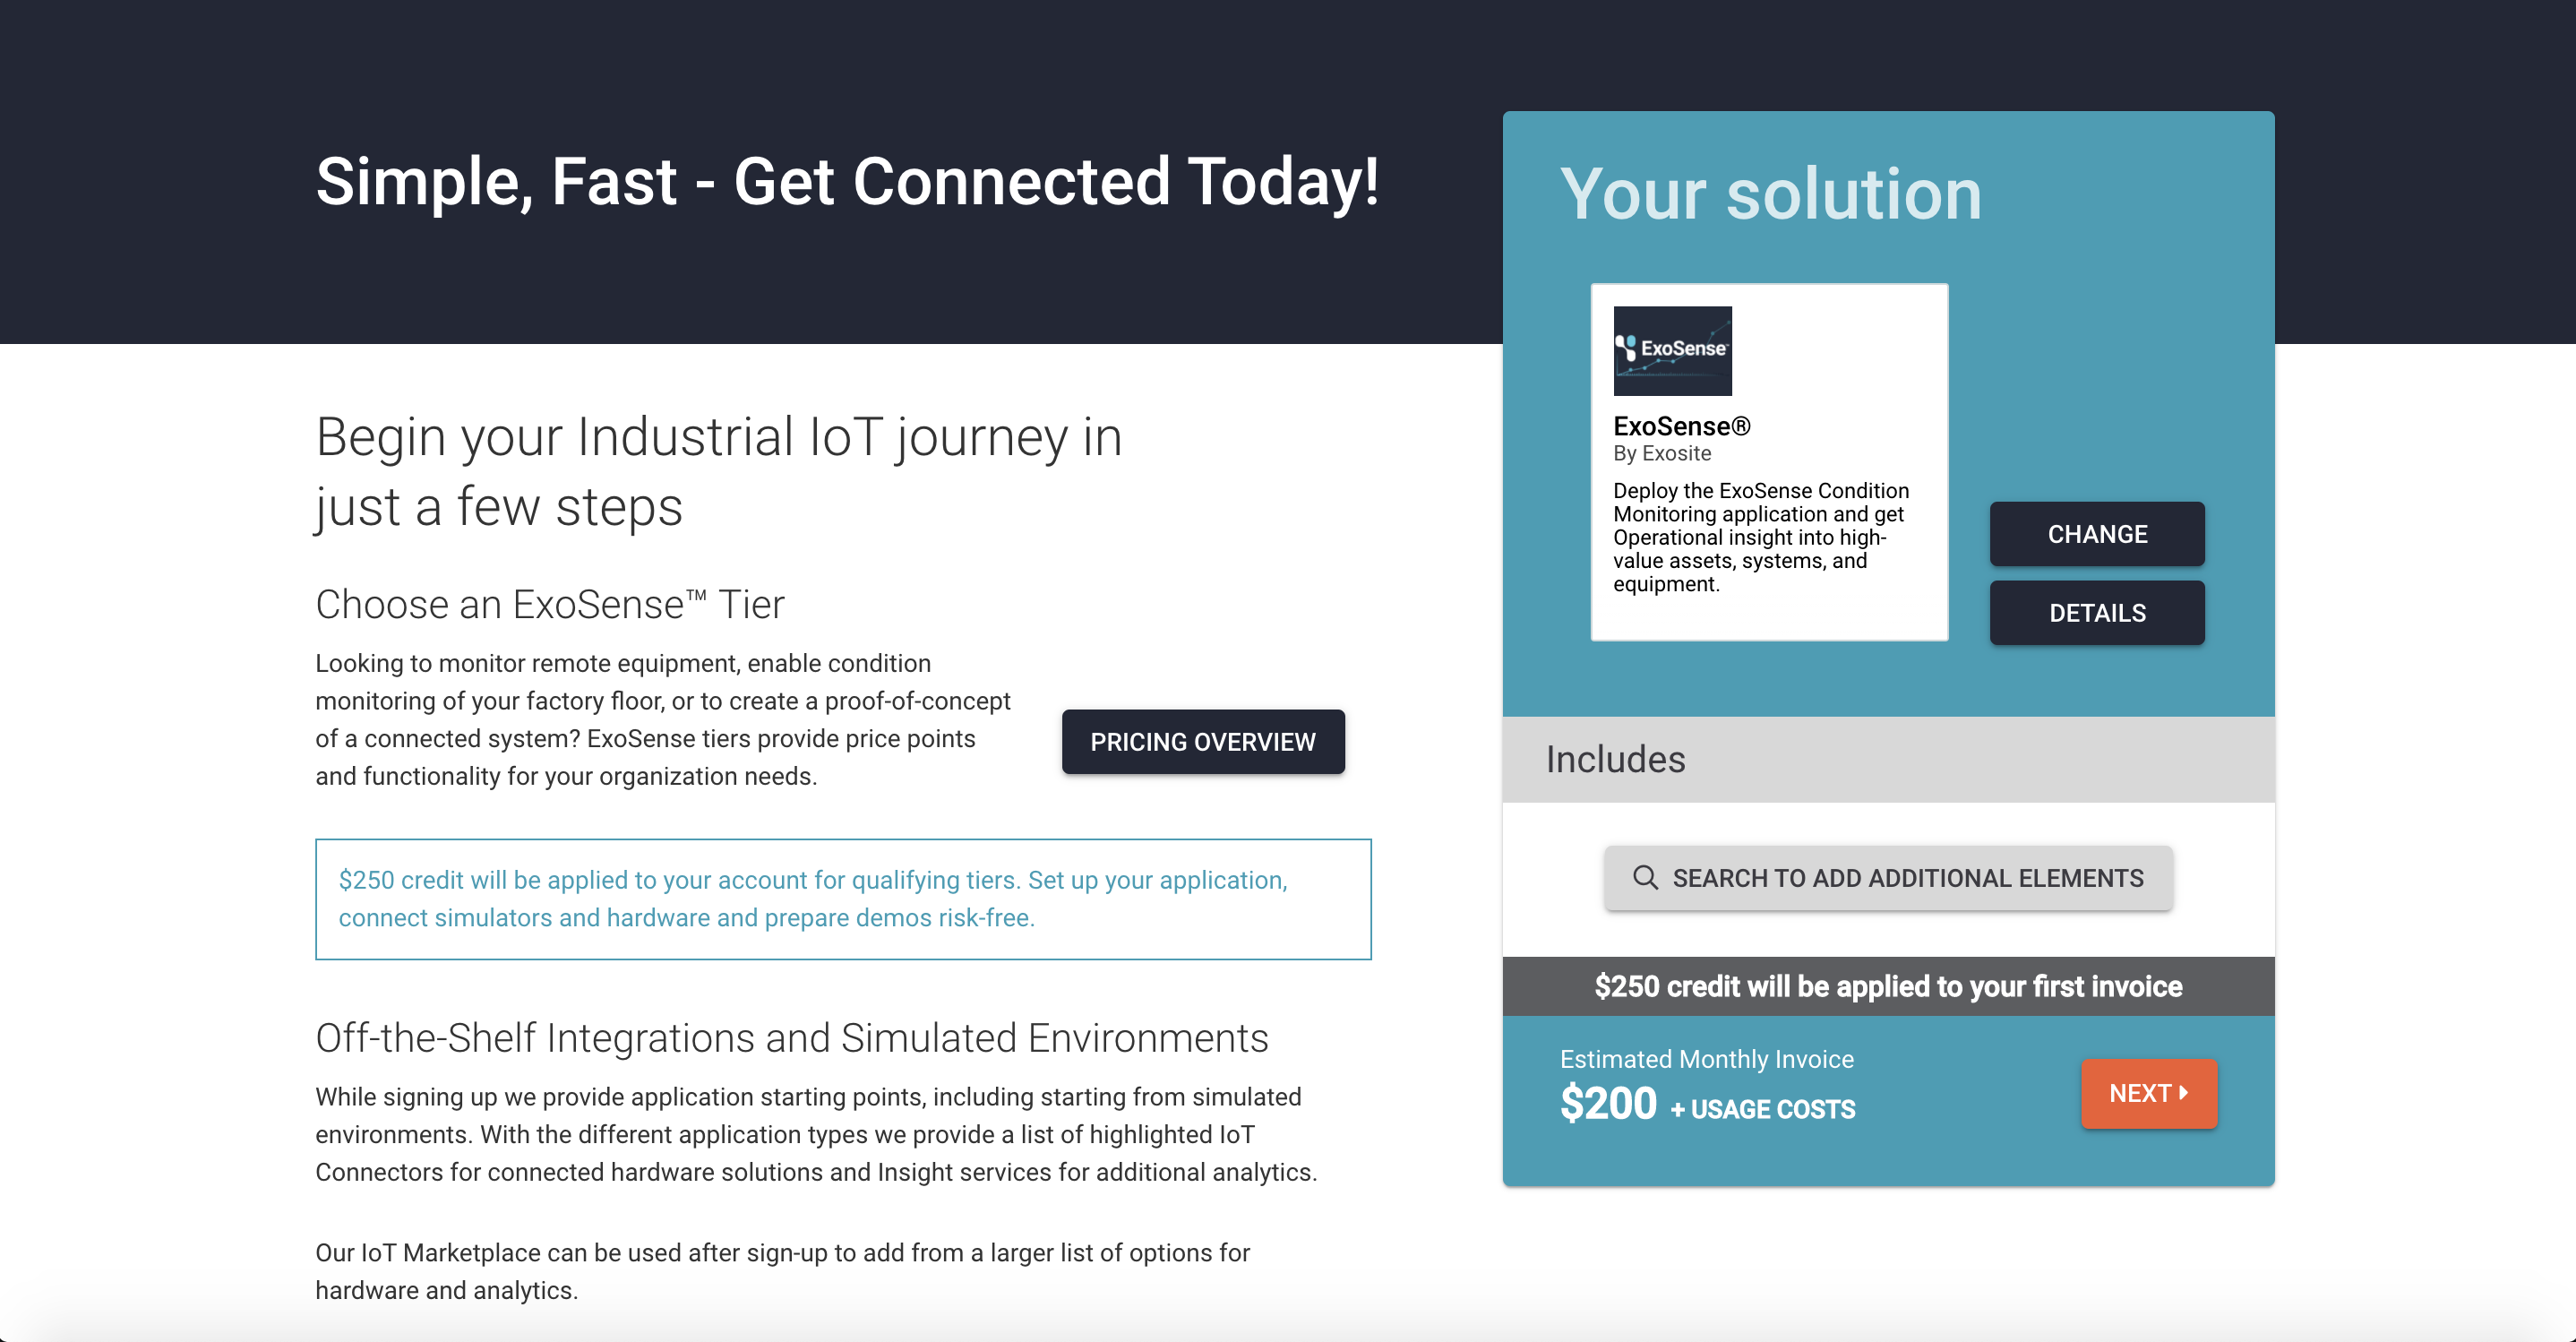
Already have ExoSense?
If you already have ExoSense, add the INS Moxa IoT Connector to your instance from the Exchange Marketplace.
Select "Add to Solution" and select your ExoSense instance
Claim the gateway
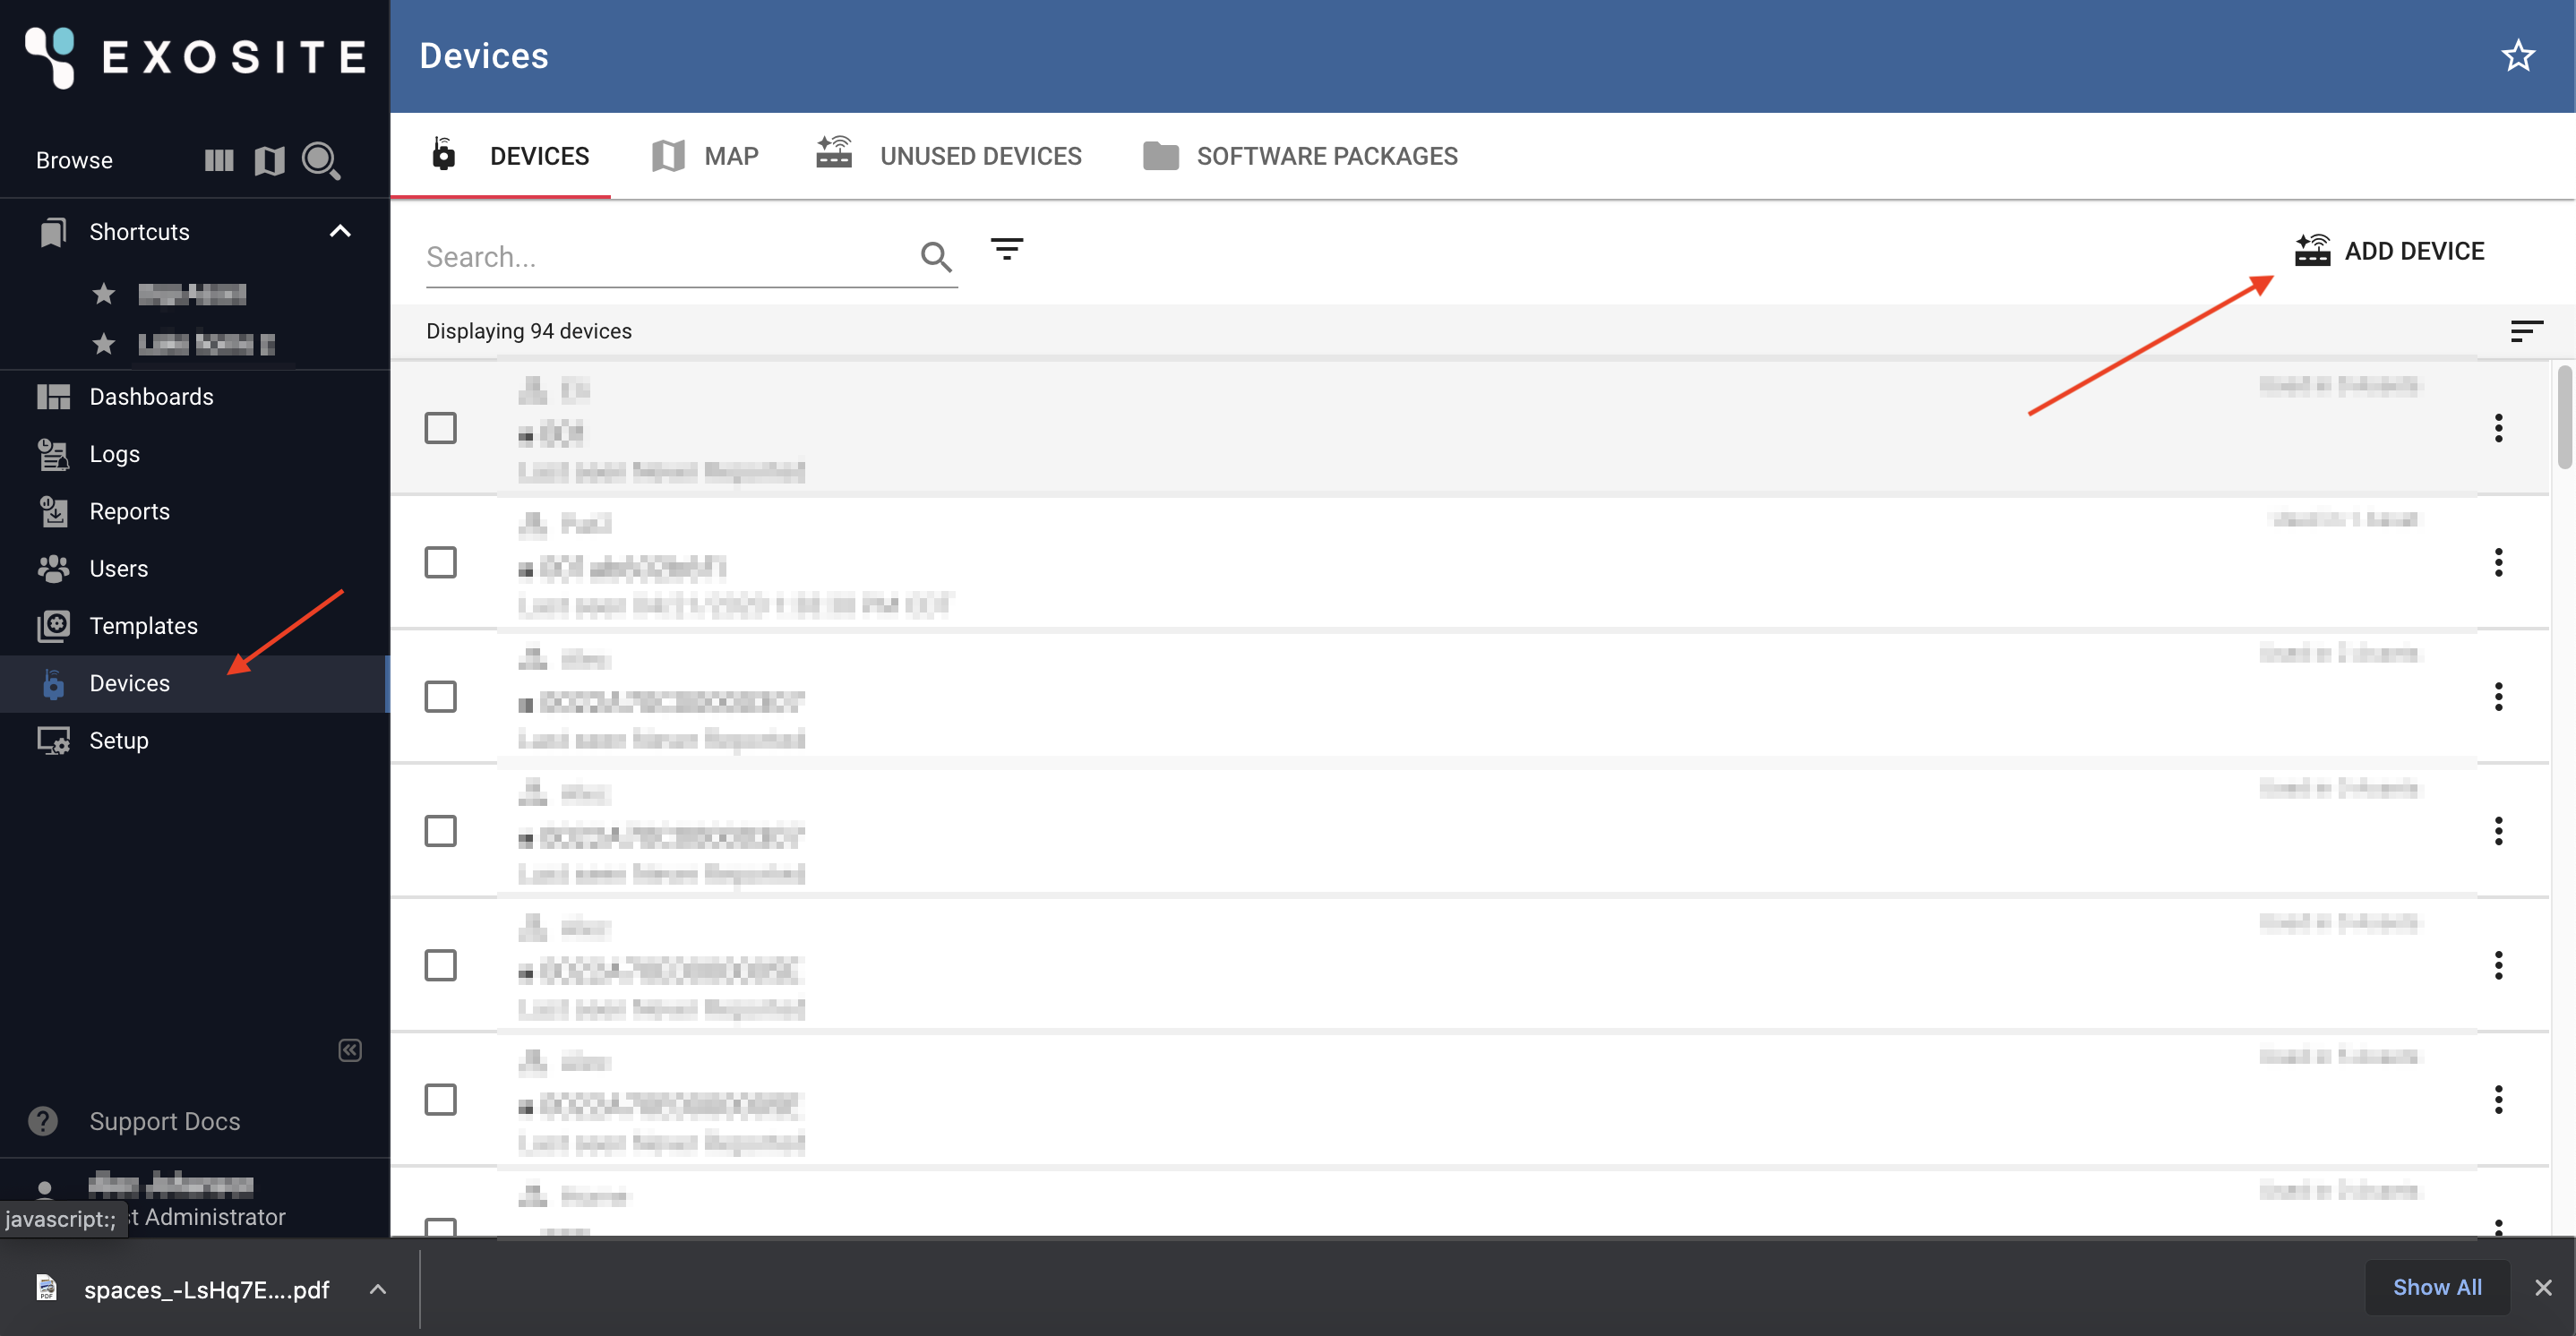
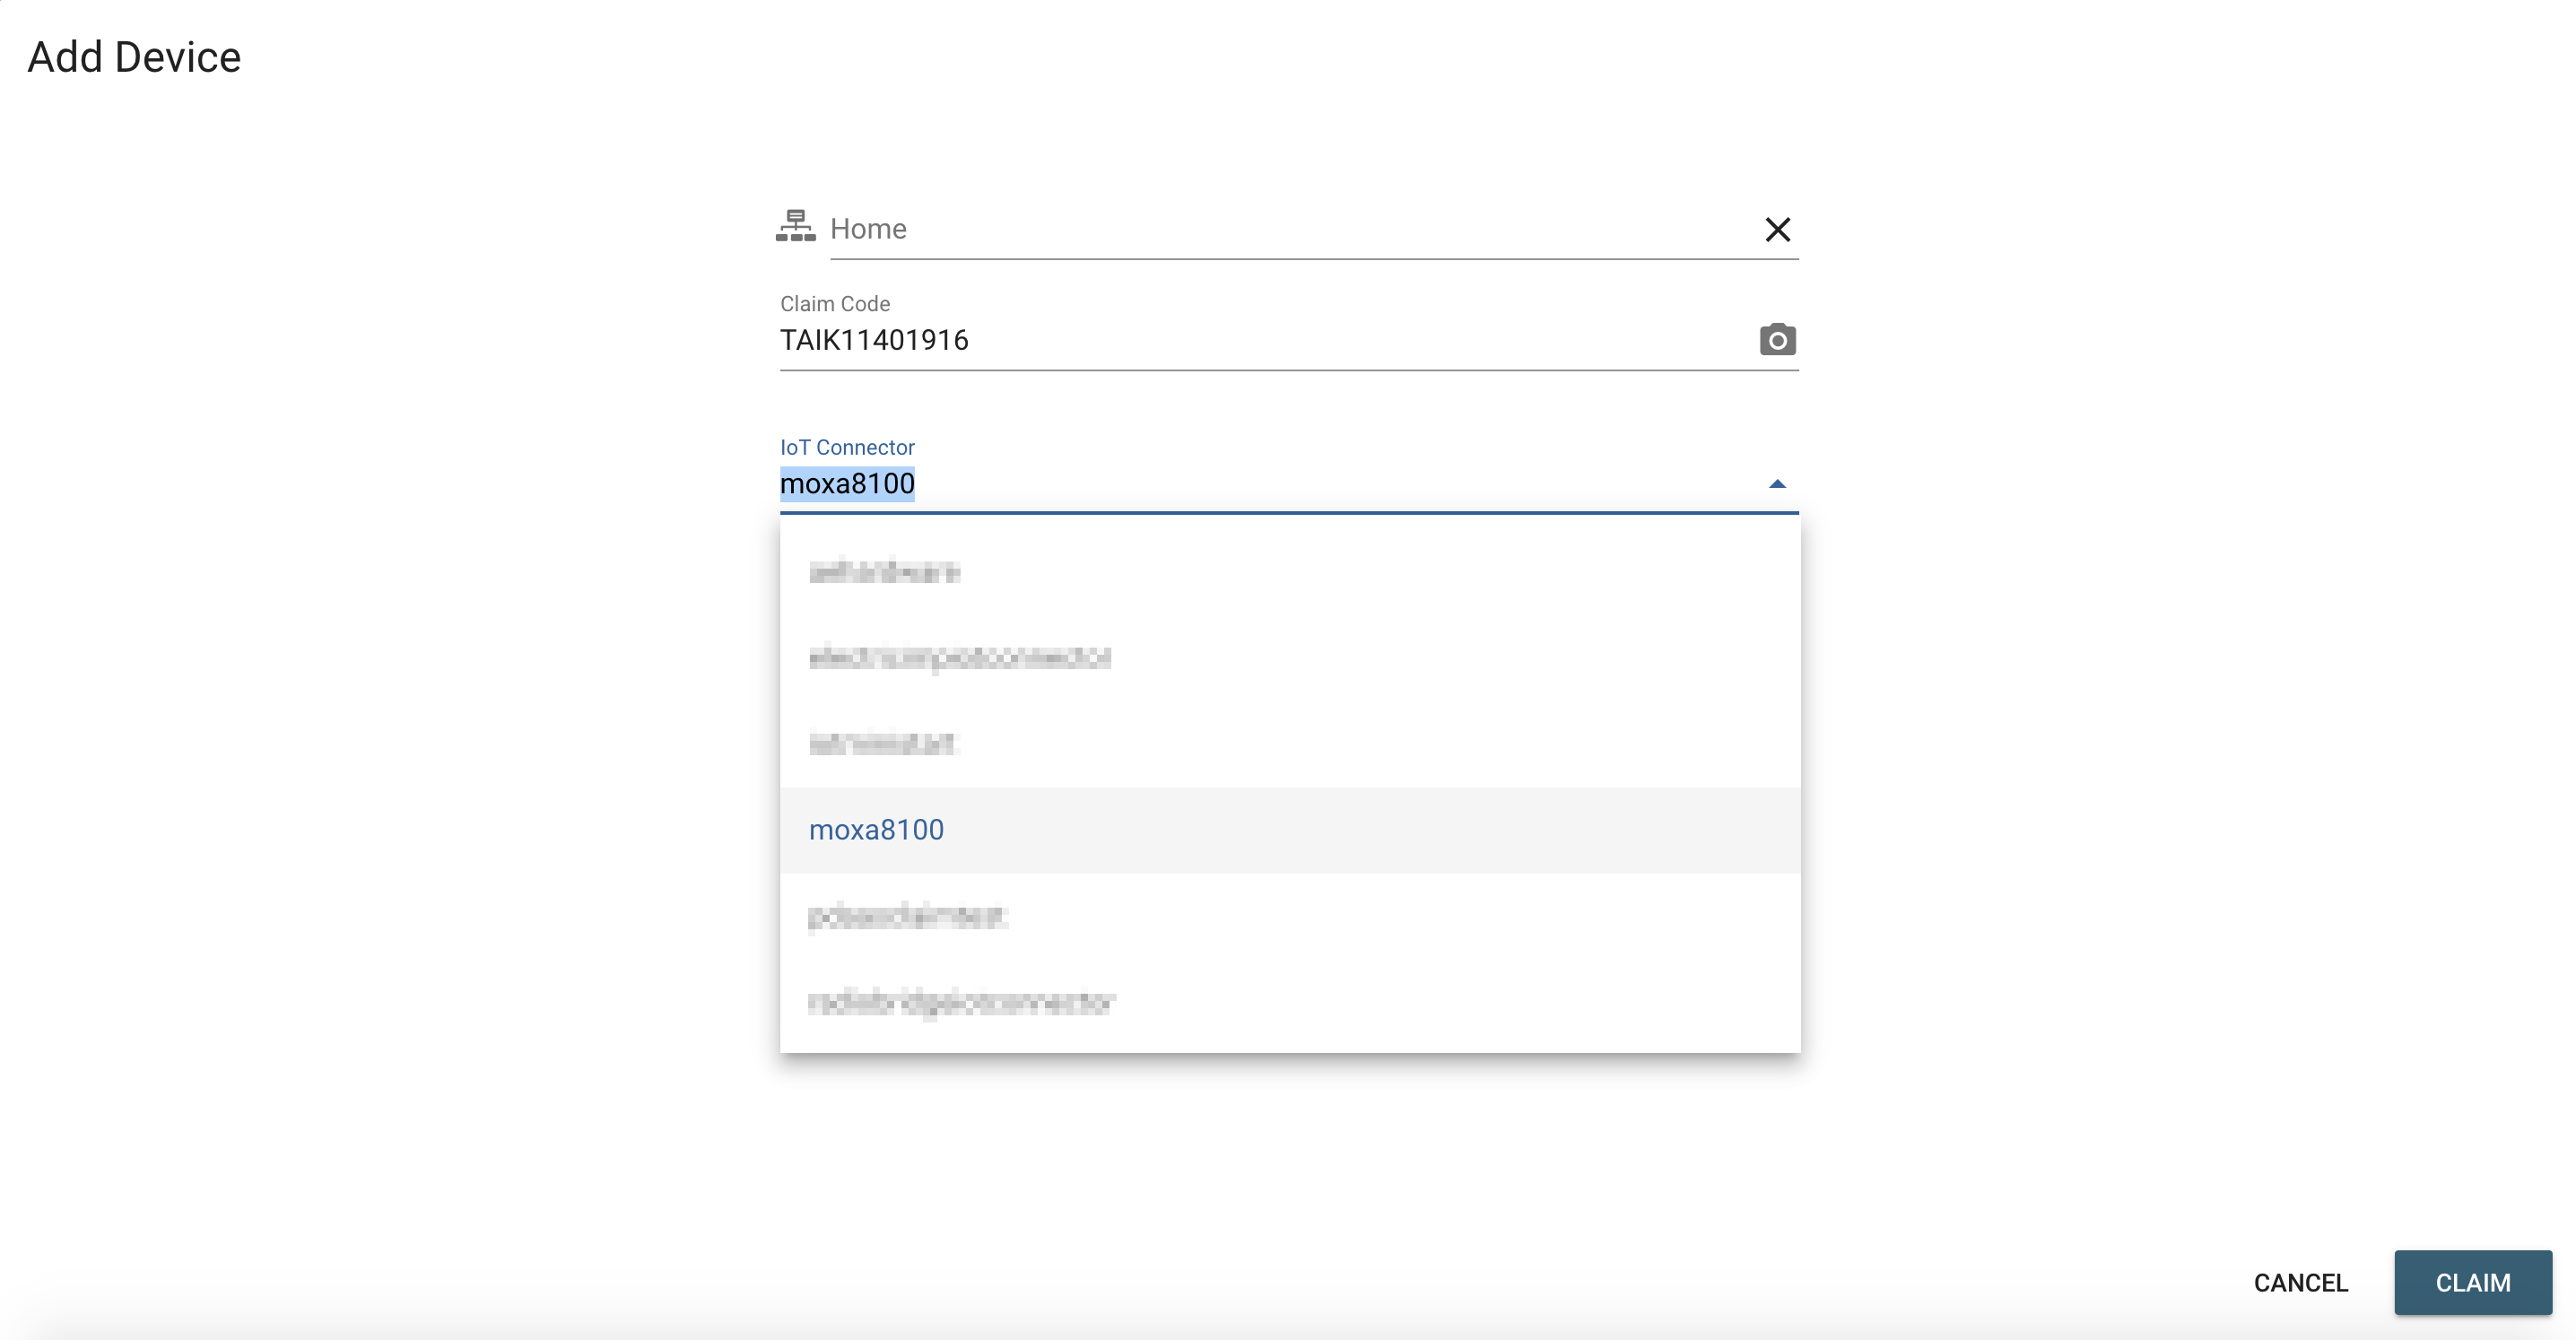
In the "Devices" tab of ExoSense, select "ADD DEVICE"
Select the group you would like to add the device to. This can be changed later.
Enter the claim code \(the Moxa S/N\)
Select "INS Moxa Connector"
Add Visualizations / Create an Asset
Add template \(Optional\)
To have visualizations created automatically on the asset, you can utilize an asset template. More on Asset templates can be found here.
Import the INS Moxa Asset Template by navigating to the "Templates" pane, and selecting the '+' button.
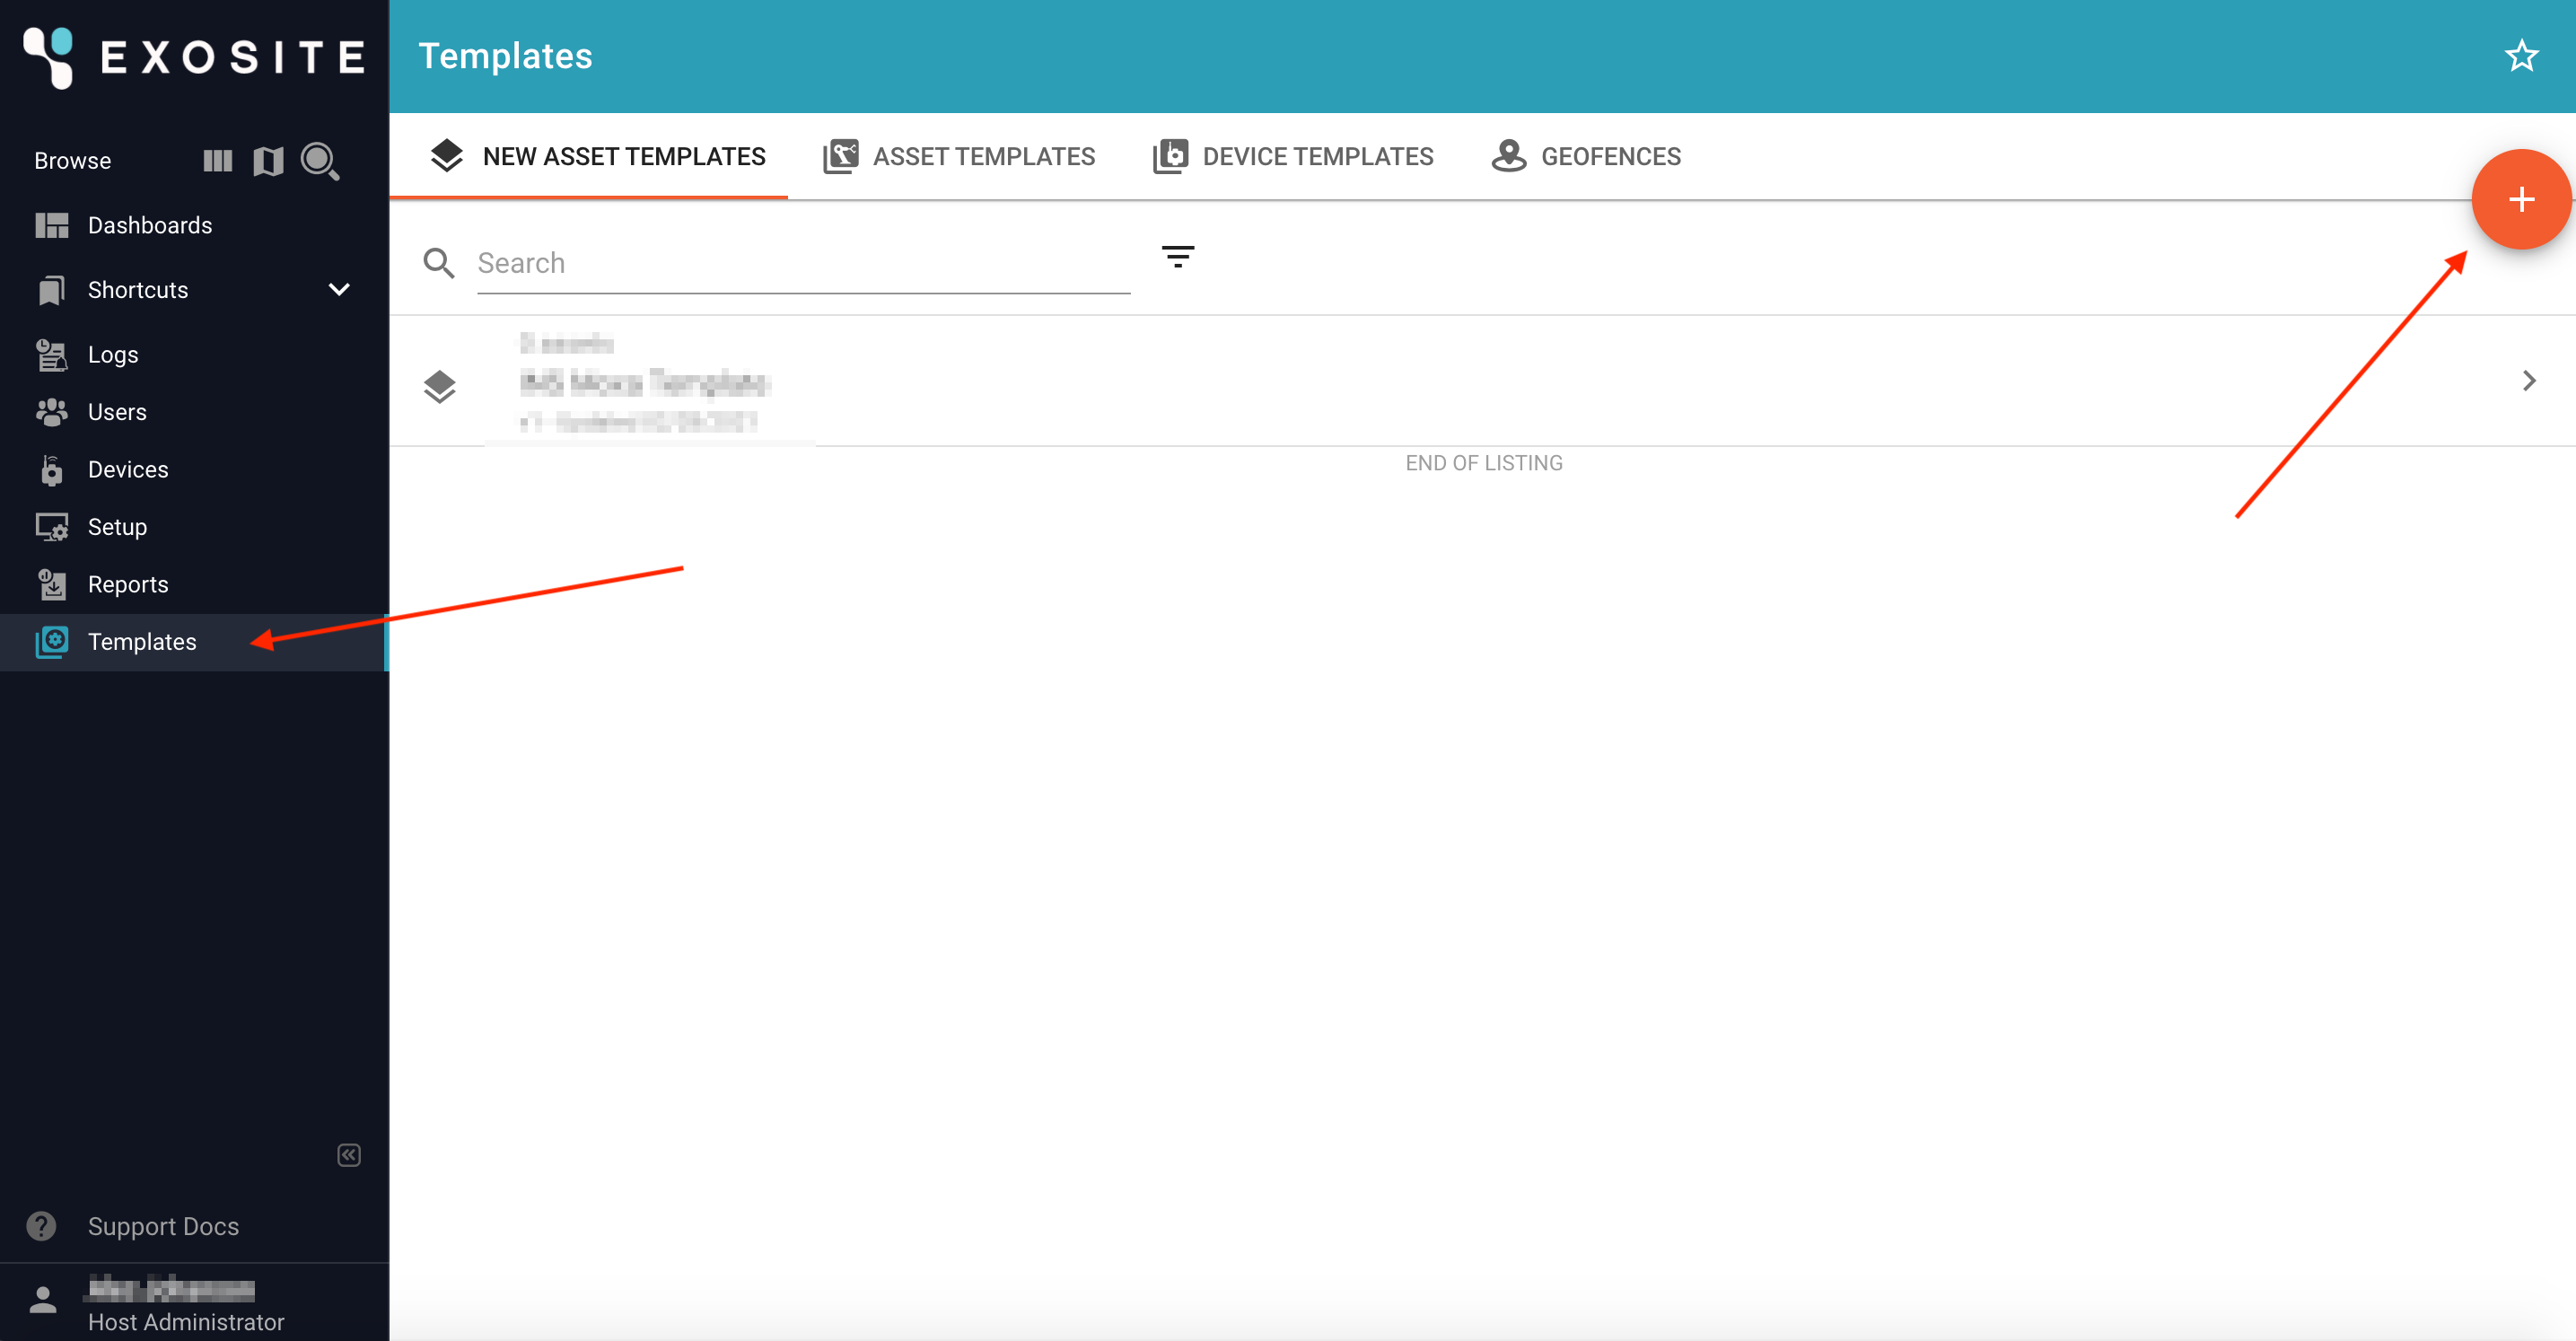
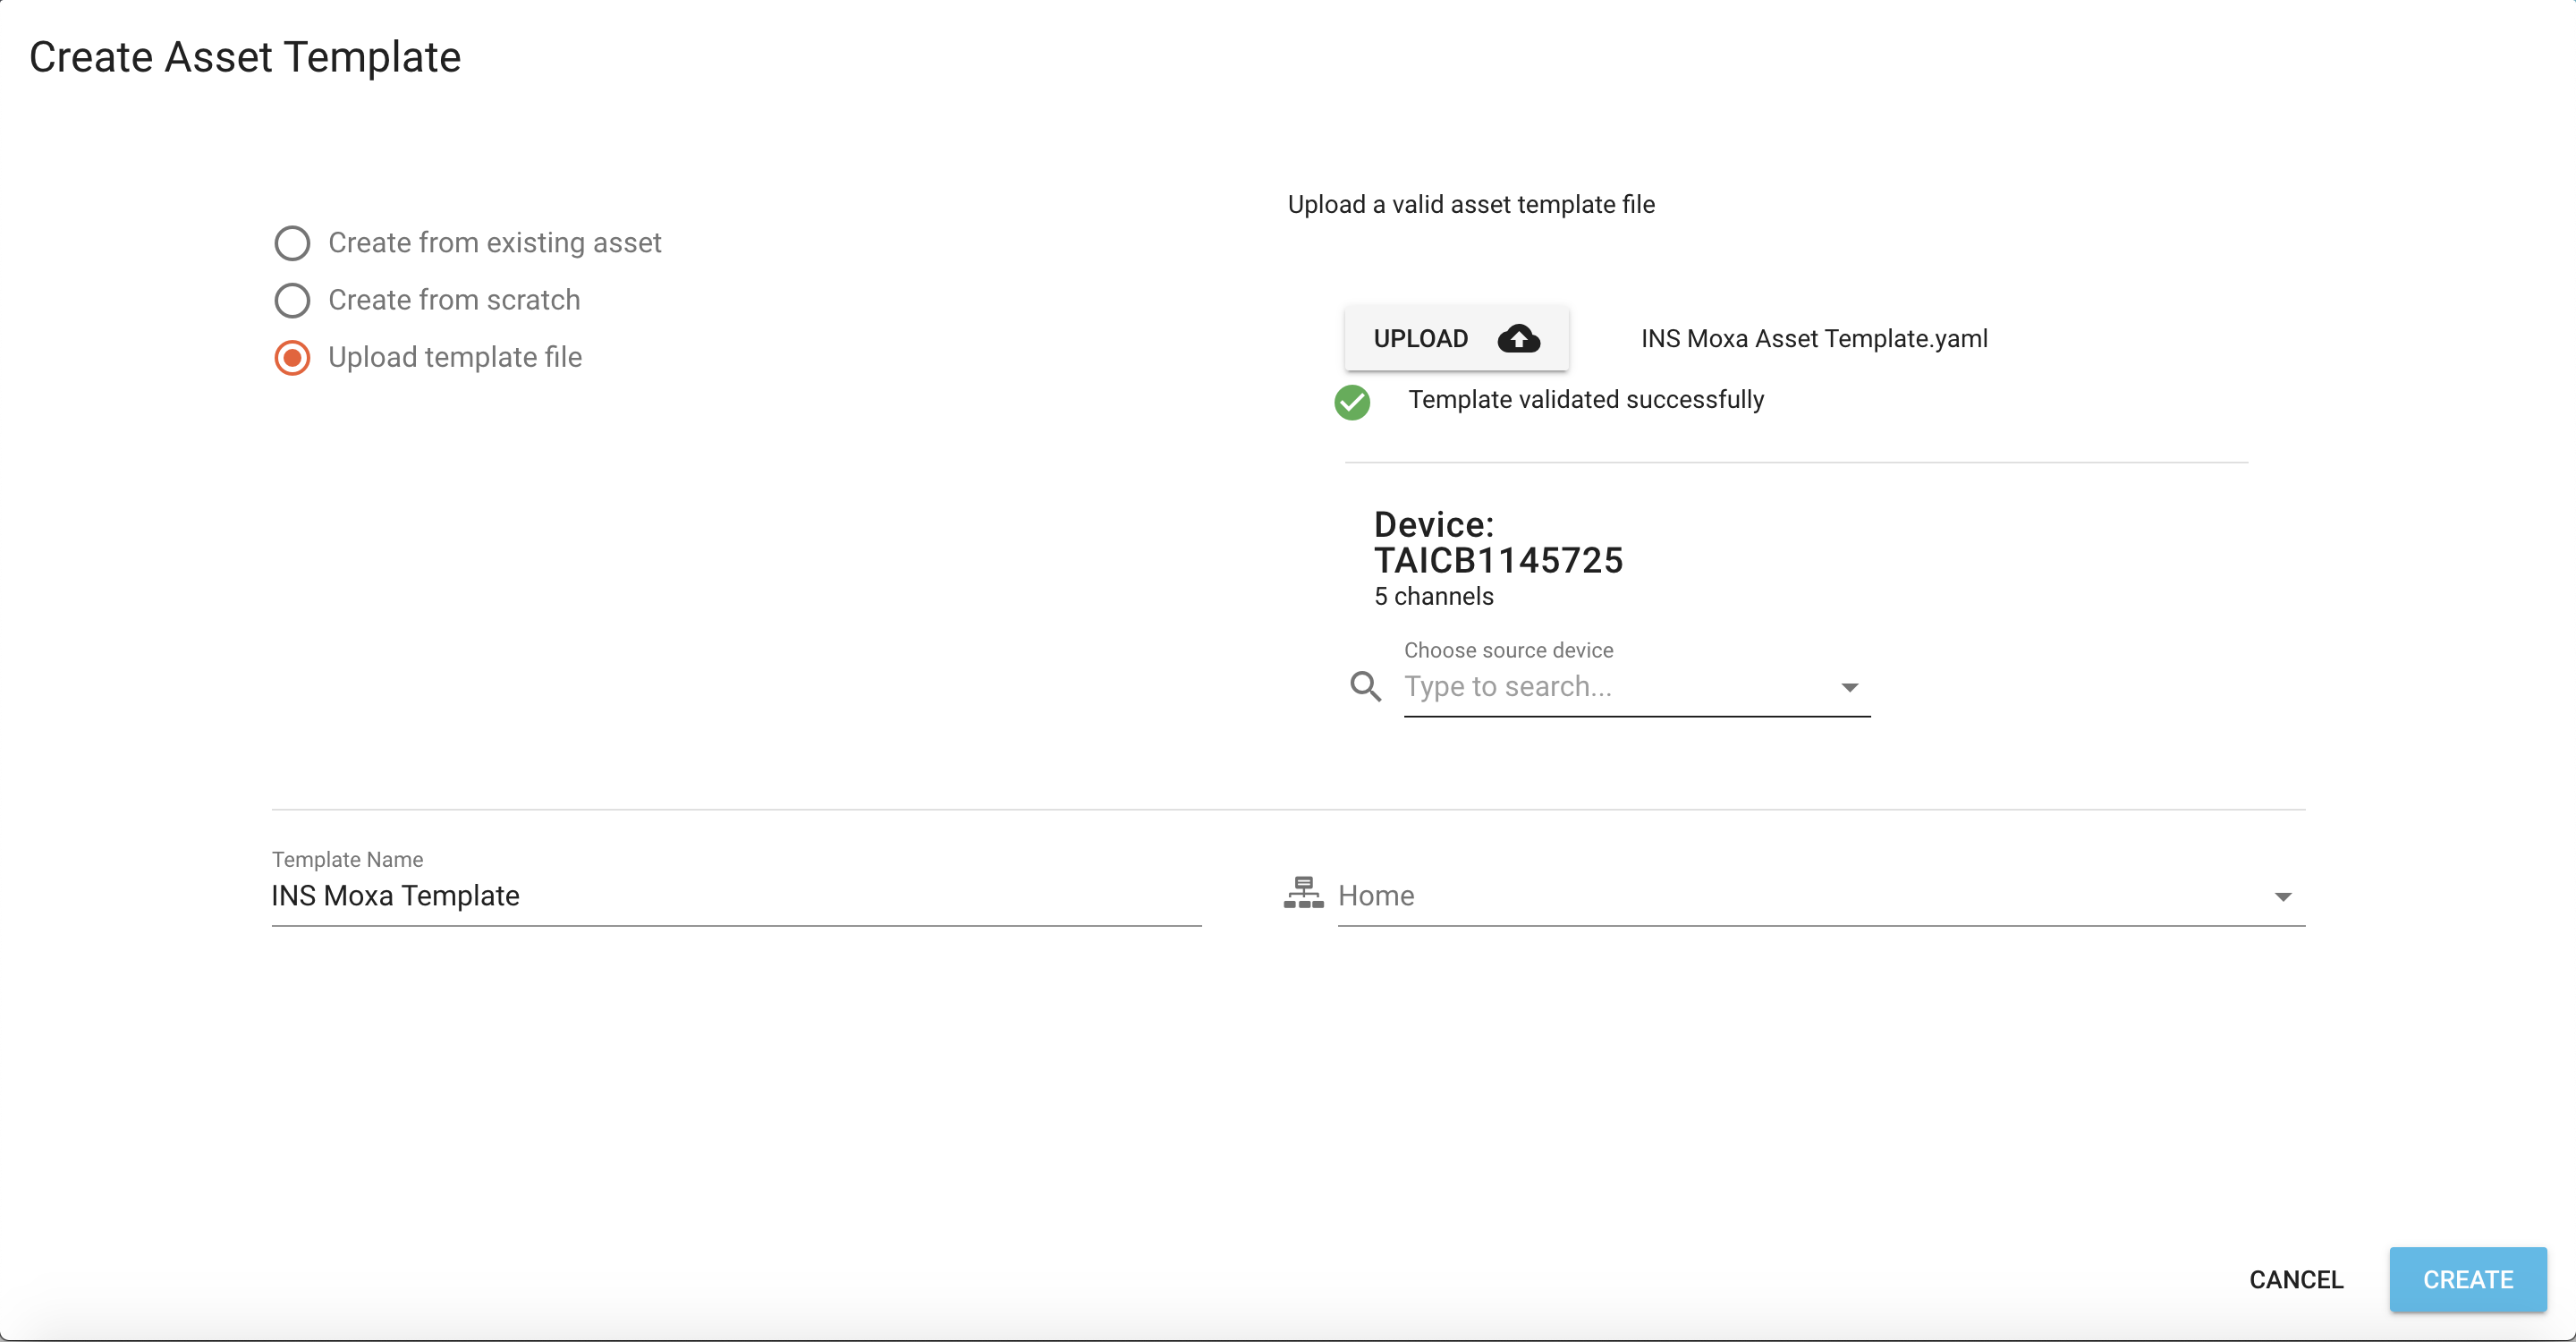
In this window:
- Select "Upload template file"
- Upload the "INS Moxa Asset Template.yaml" file \(Download Here\)
- Name the Template
- Select "Home" for the group to import to
- You can leave the source device empty
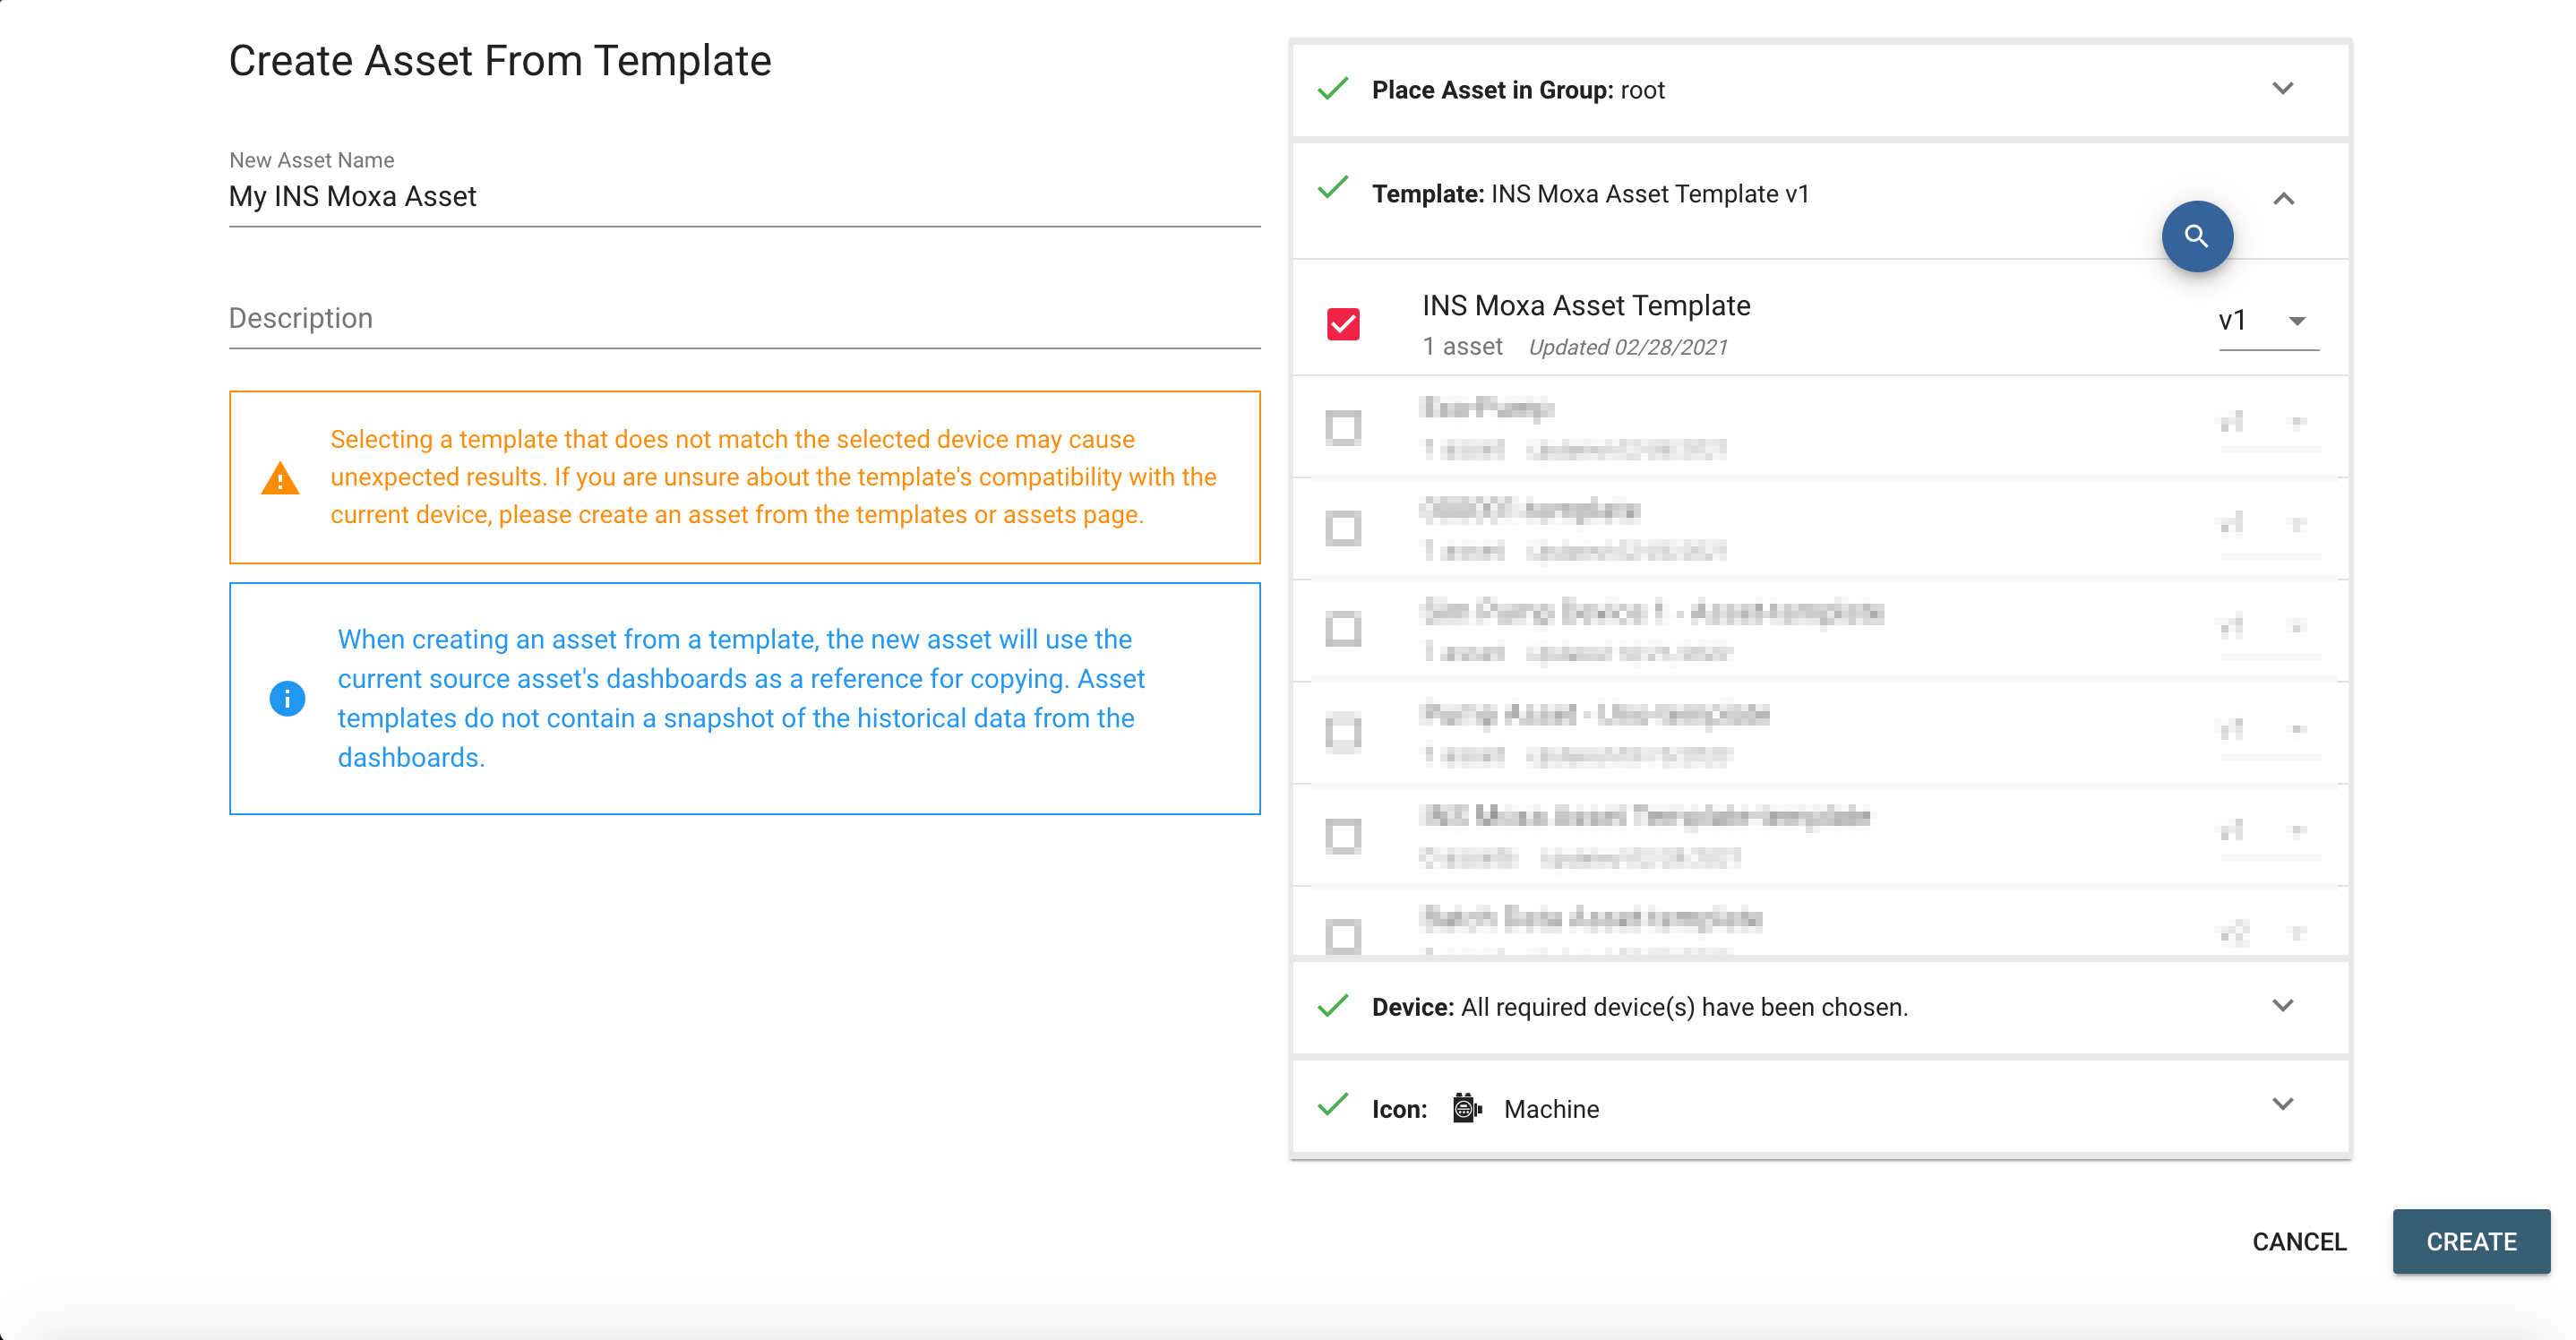
Create Asset
To visualize the data from the Moxa Gateway, we will create an asset that we can add dashboards to. More information on Assets are can be found here.
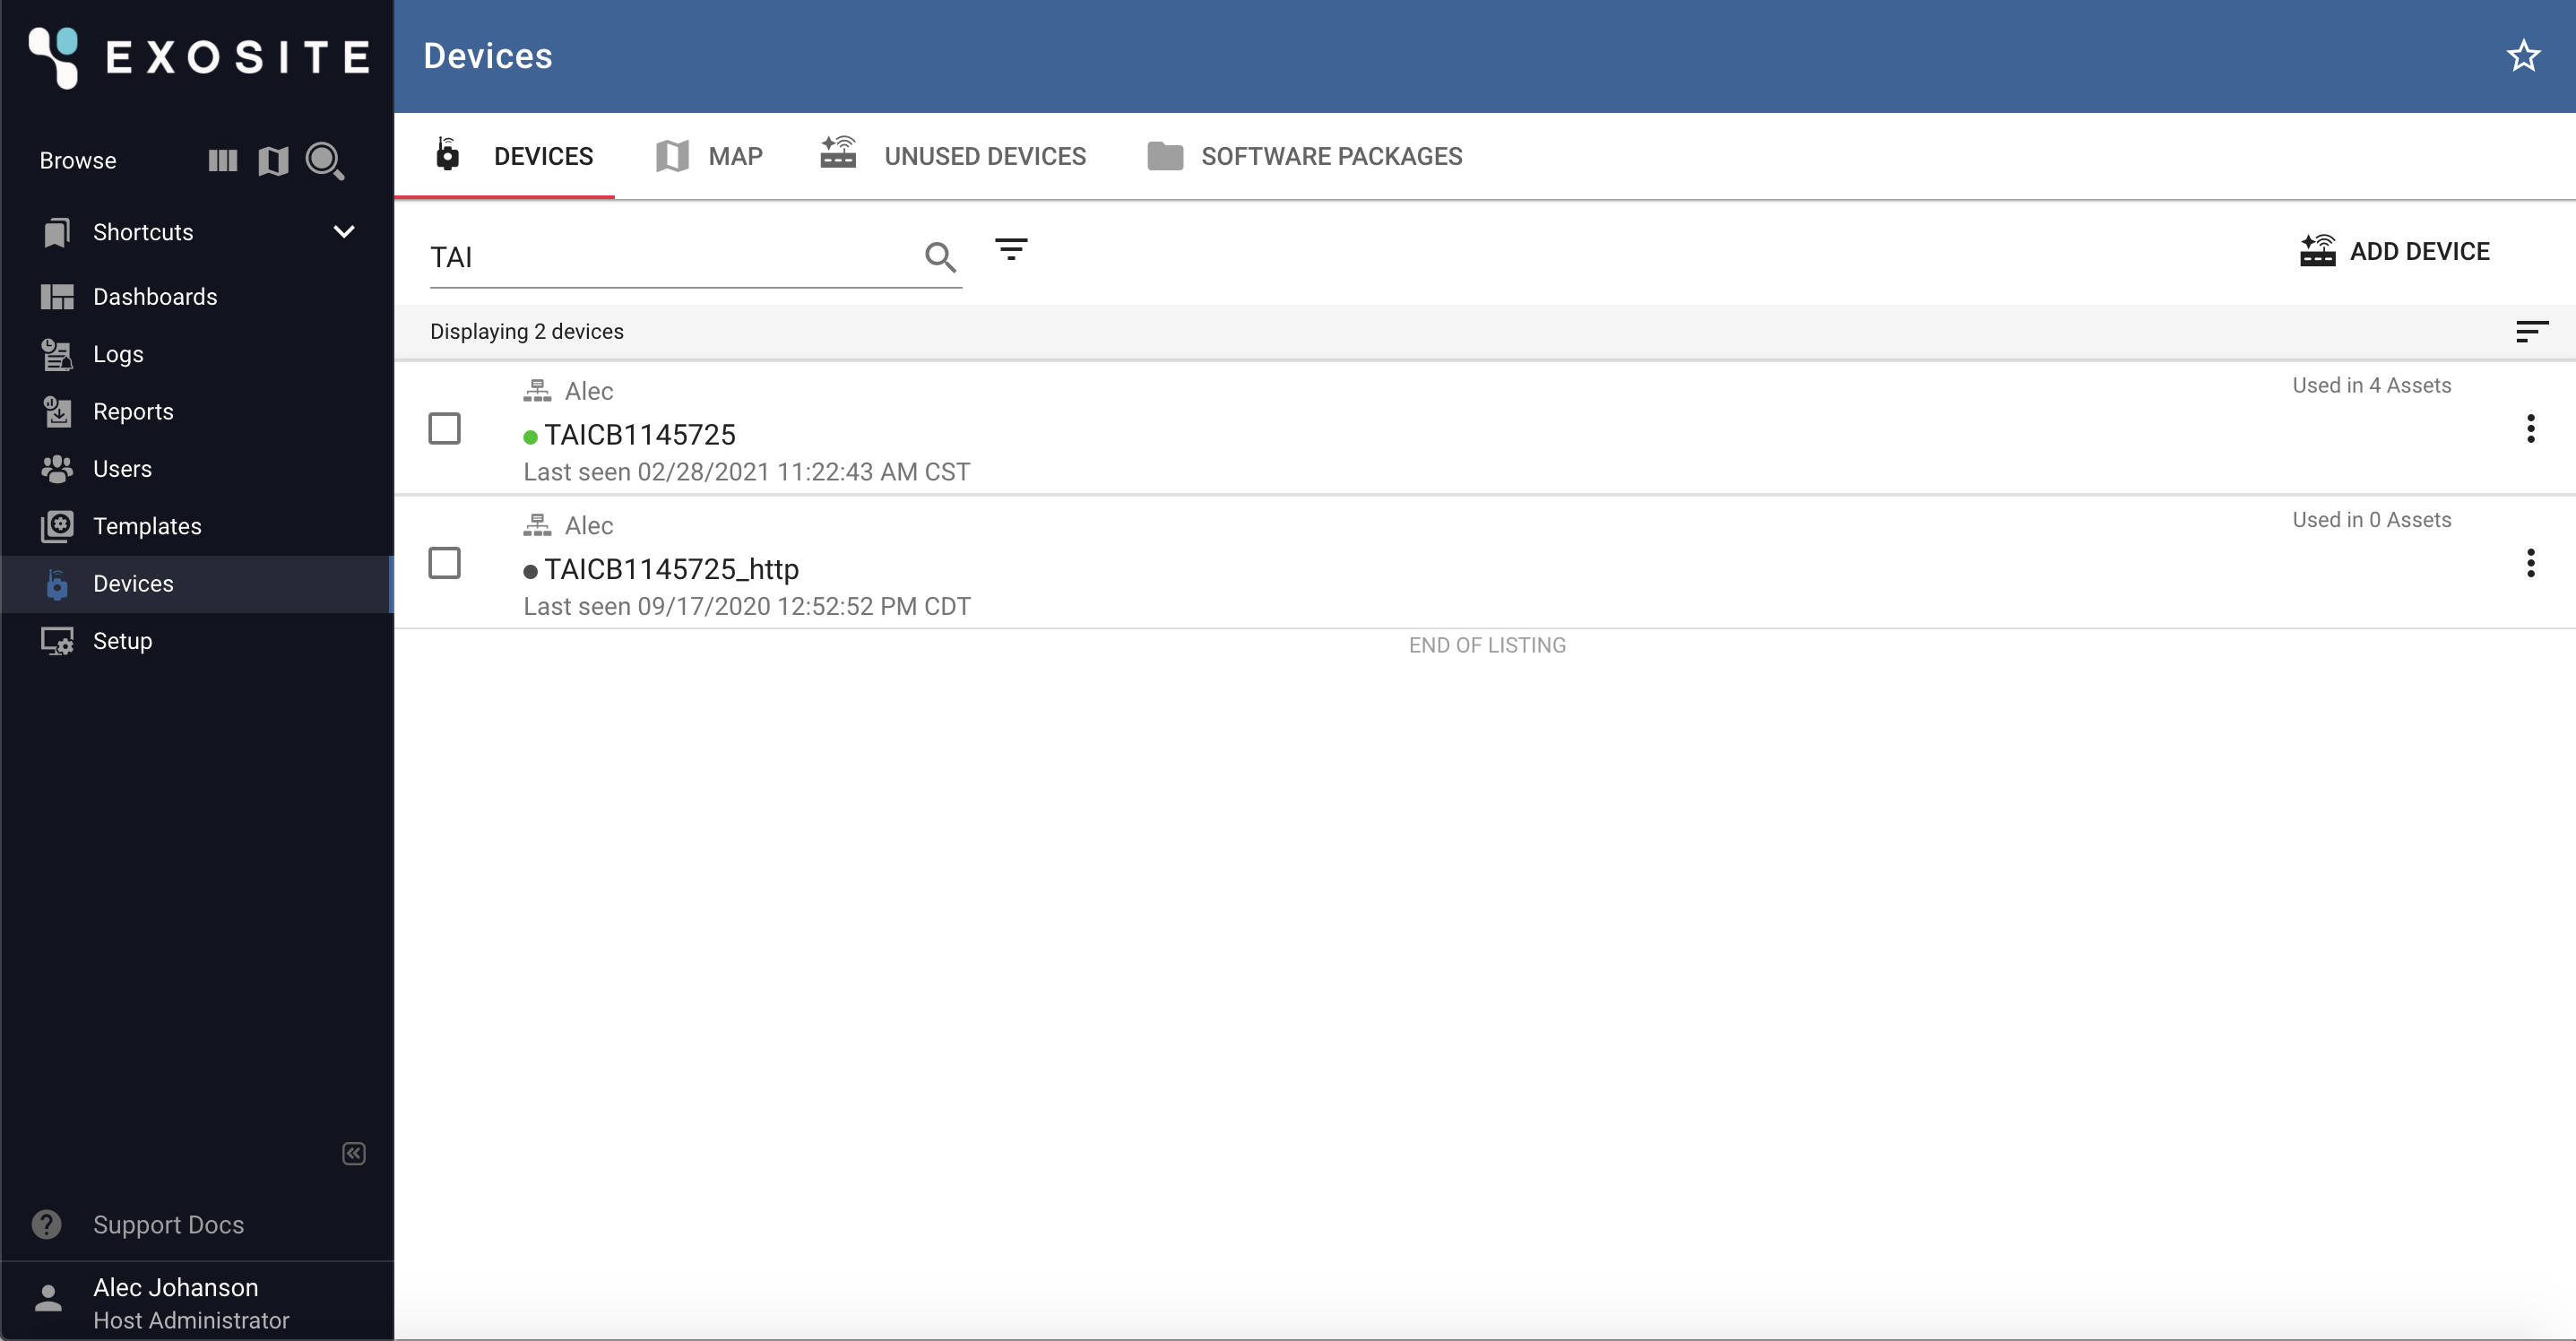
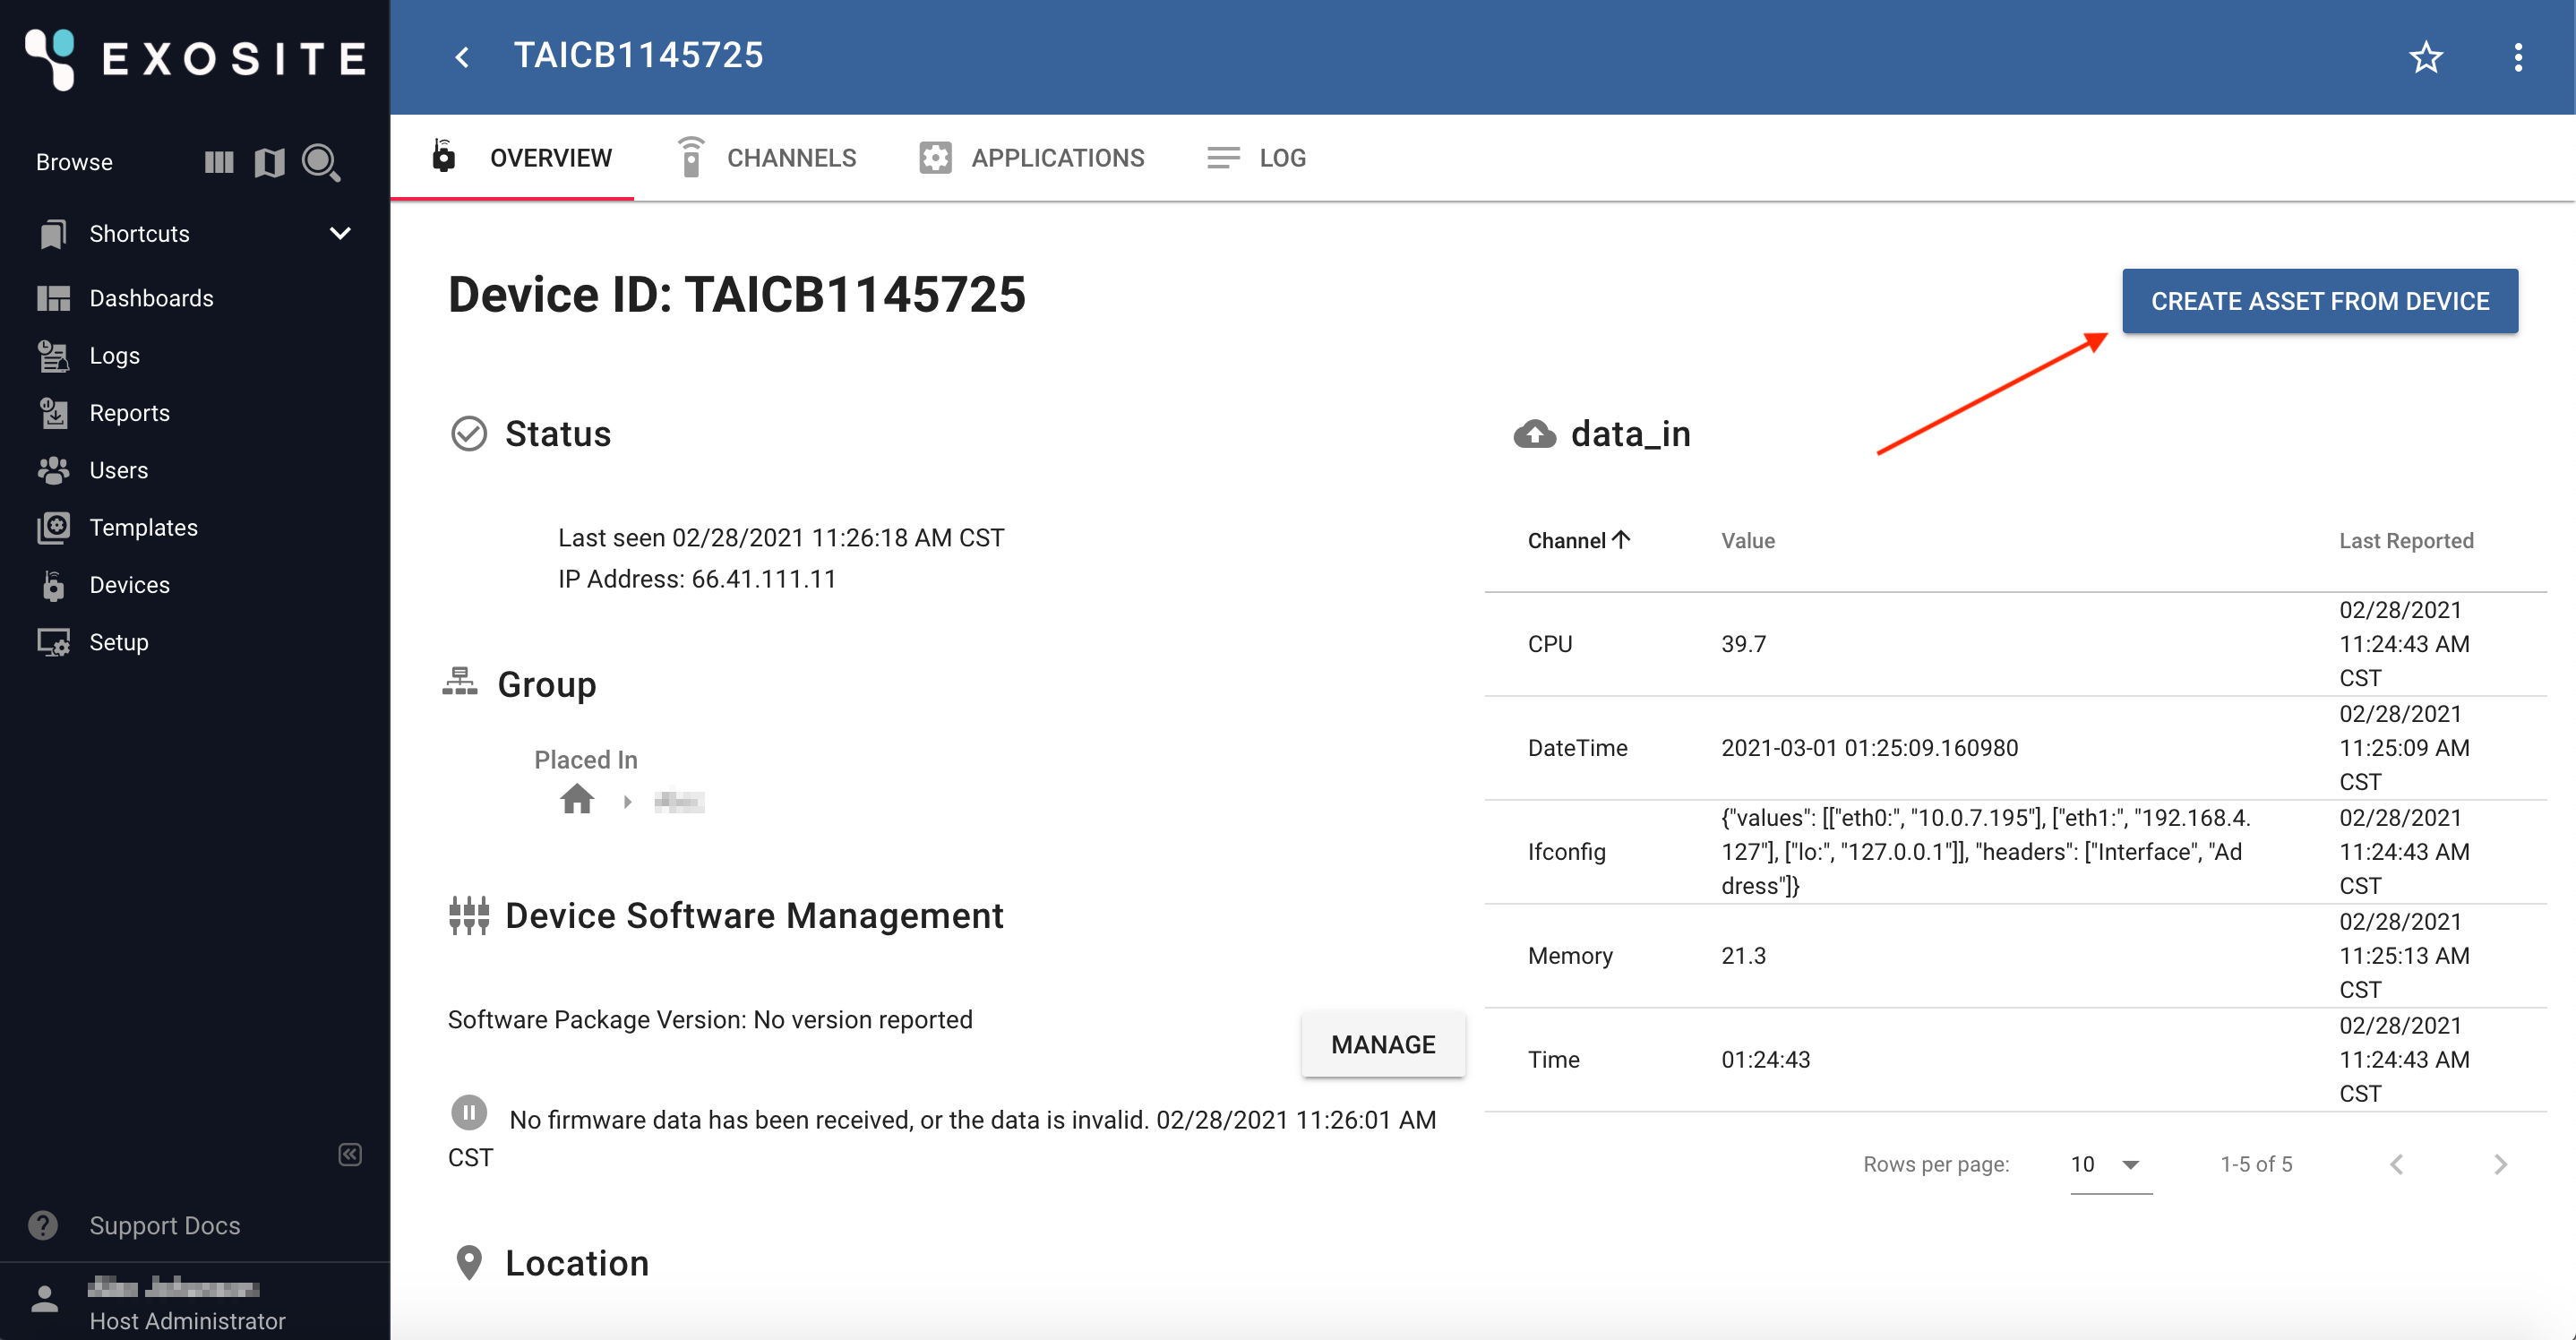
Navigate to the "Devices" page, and select your newly claimed device.
Select "Create Asset from Device"
In this screen, select a name for your new Asset. If you added the Asset Template earlier, select it here.
Add Modbus Channels to Device
To read modbus registers, new channels need to be added to the device.
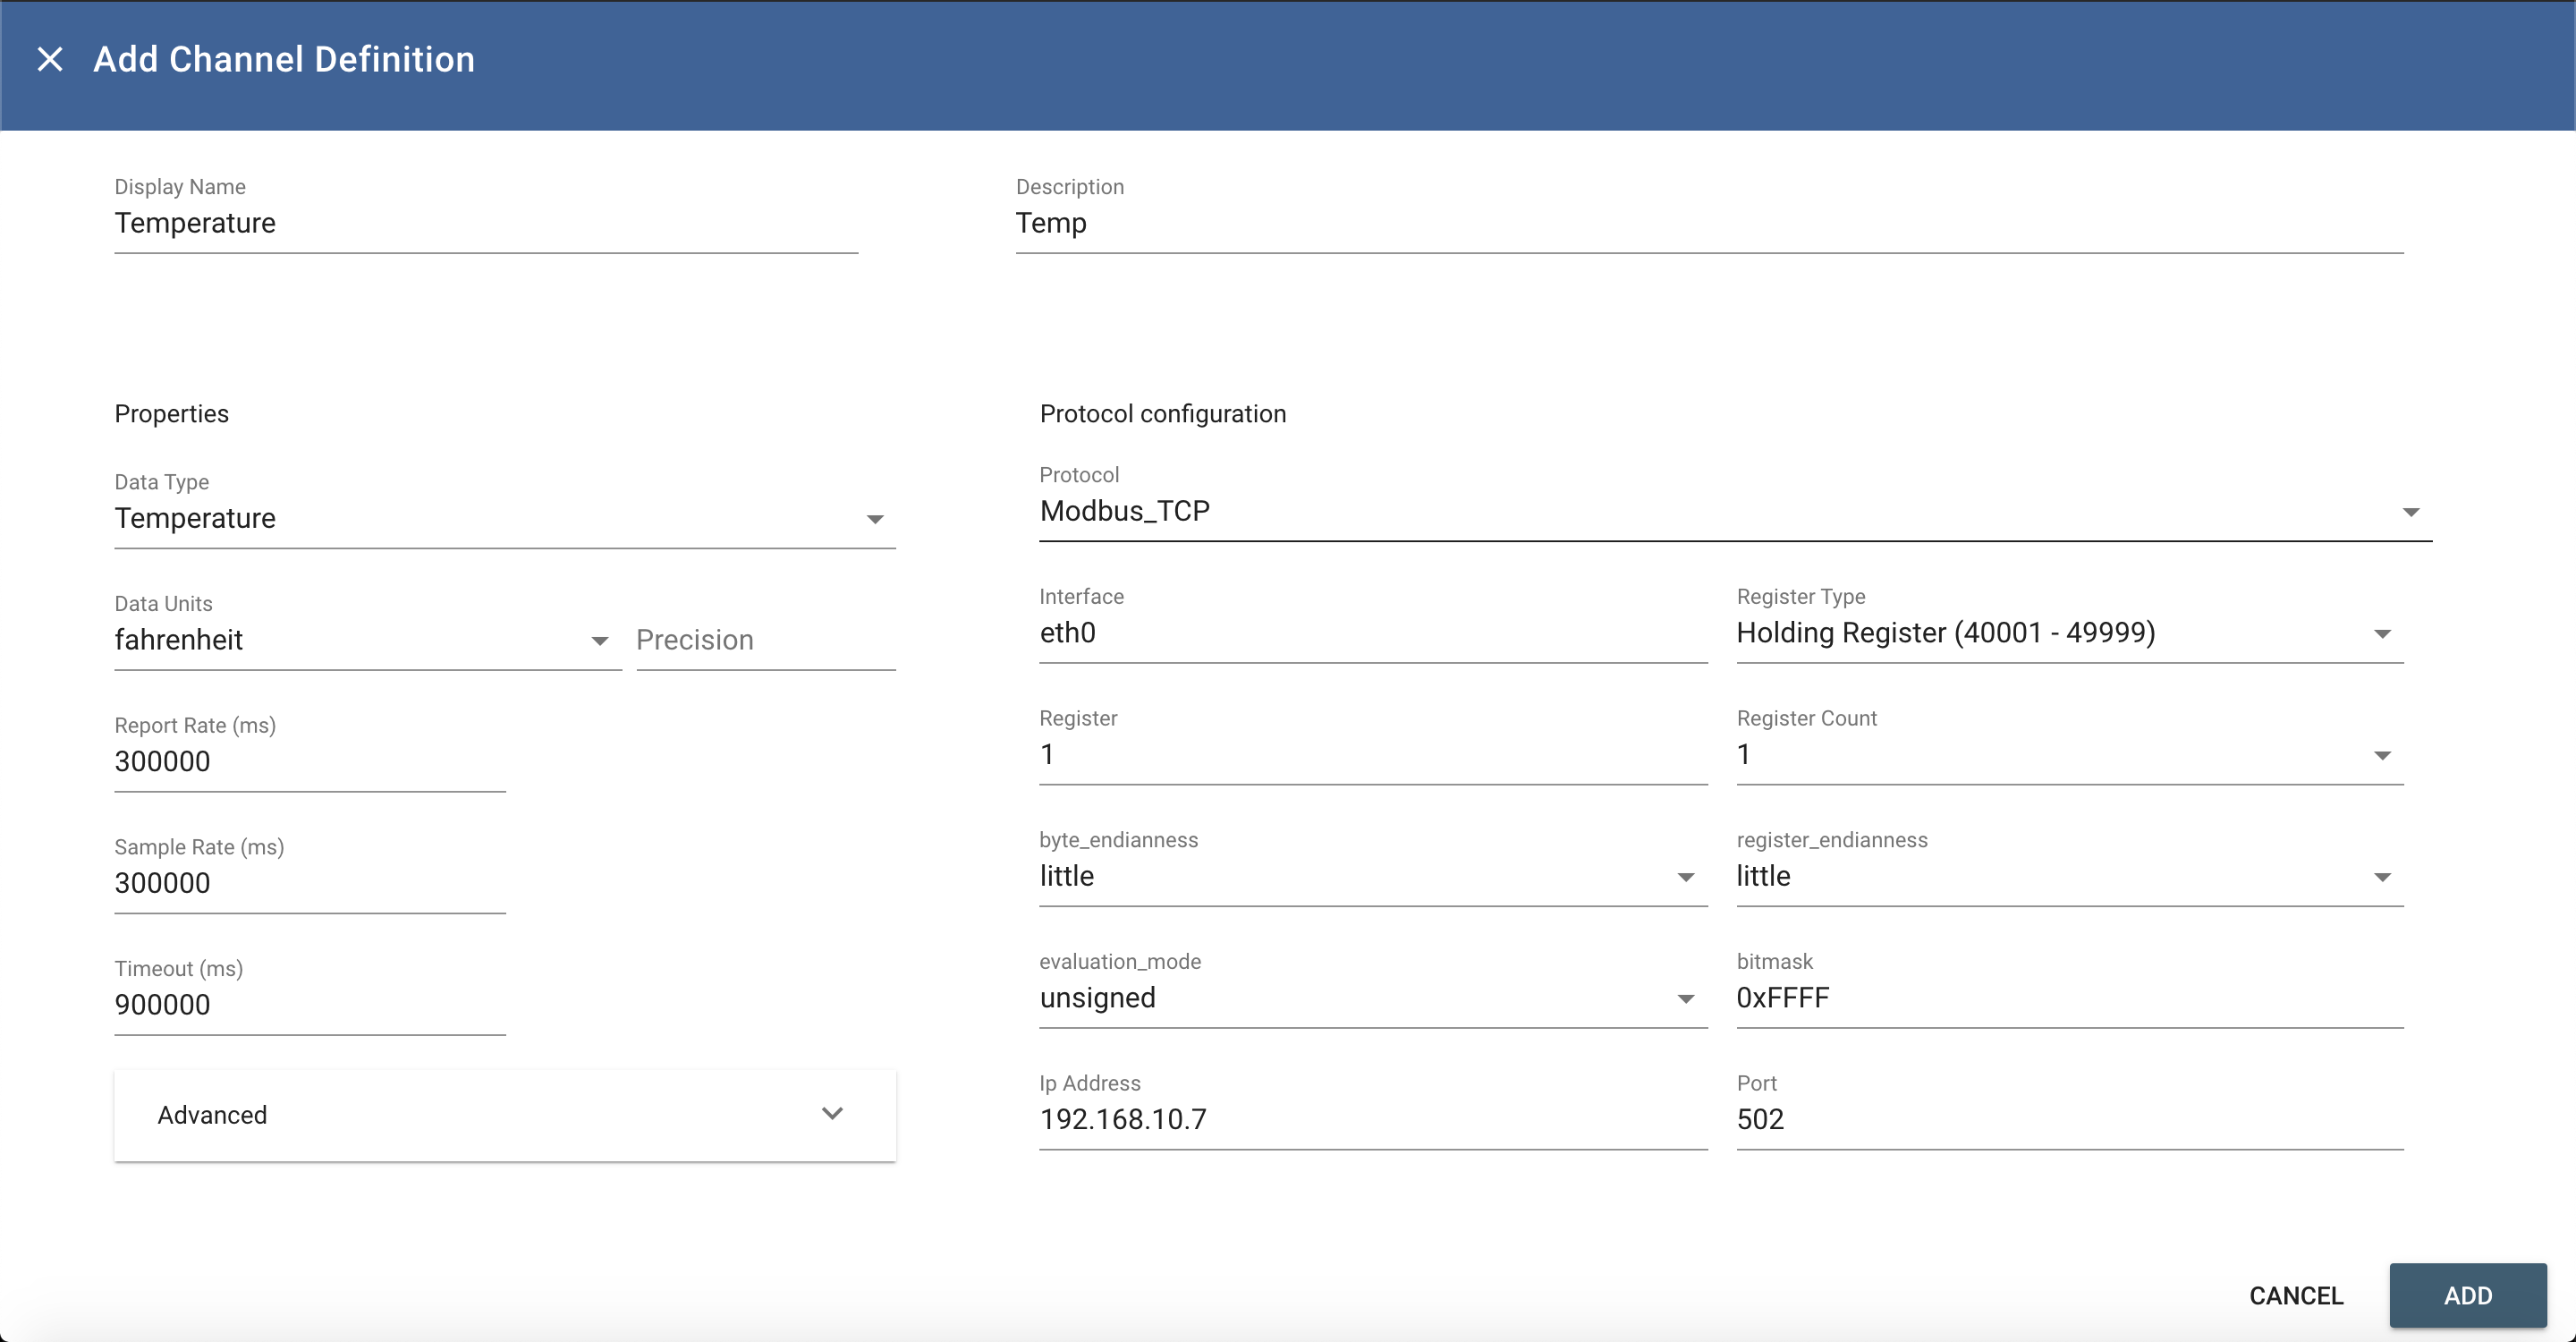
This is done from the Channels Tab of the Device Details page. To add a new channel, select the '+' button.
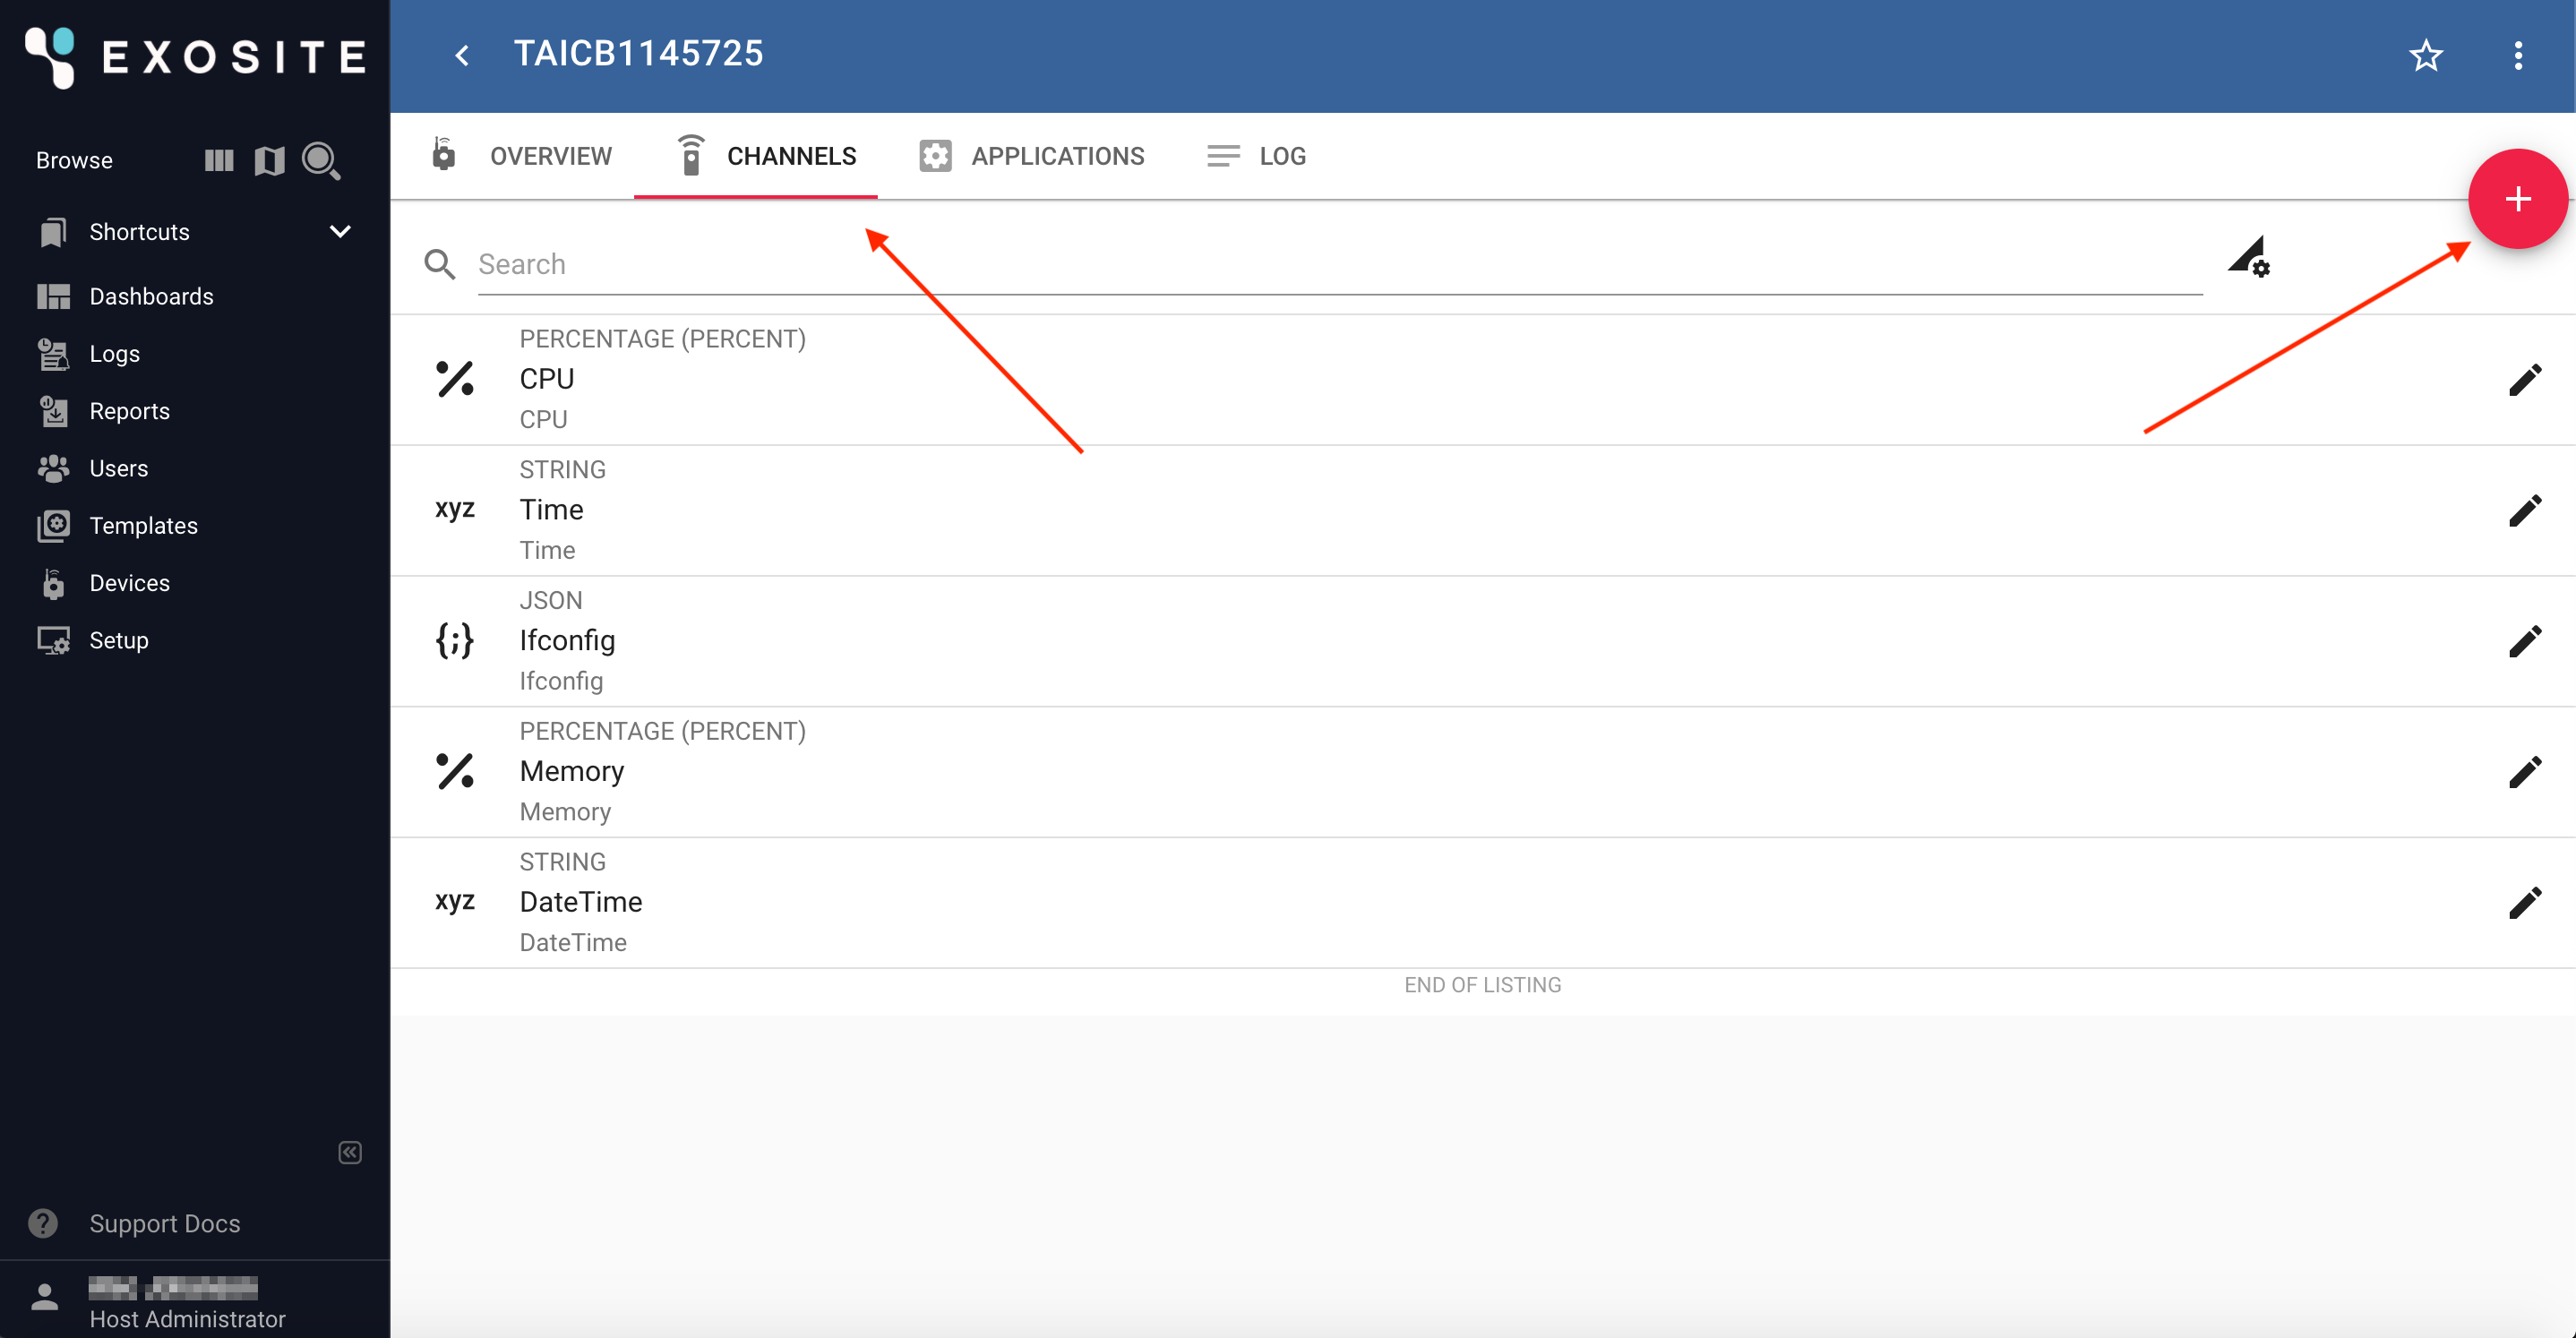
Select the correct protocol \(Modbus RTU or Modbus TCP\) and fill in the other fields that are prompted. Repeat for each Modbus Register.
Add new channels to asset for visualization
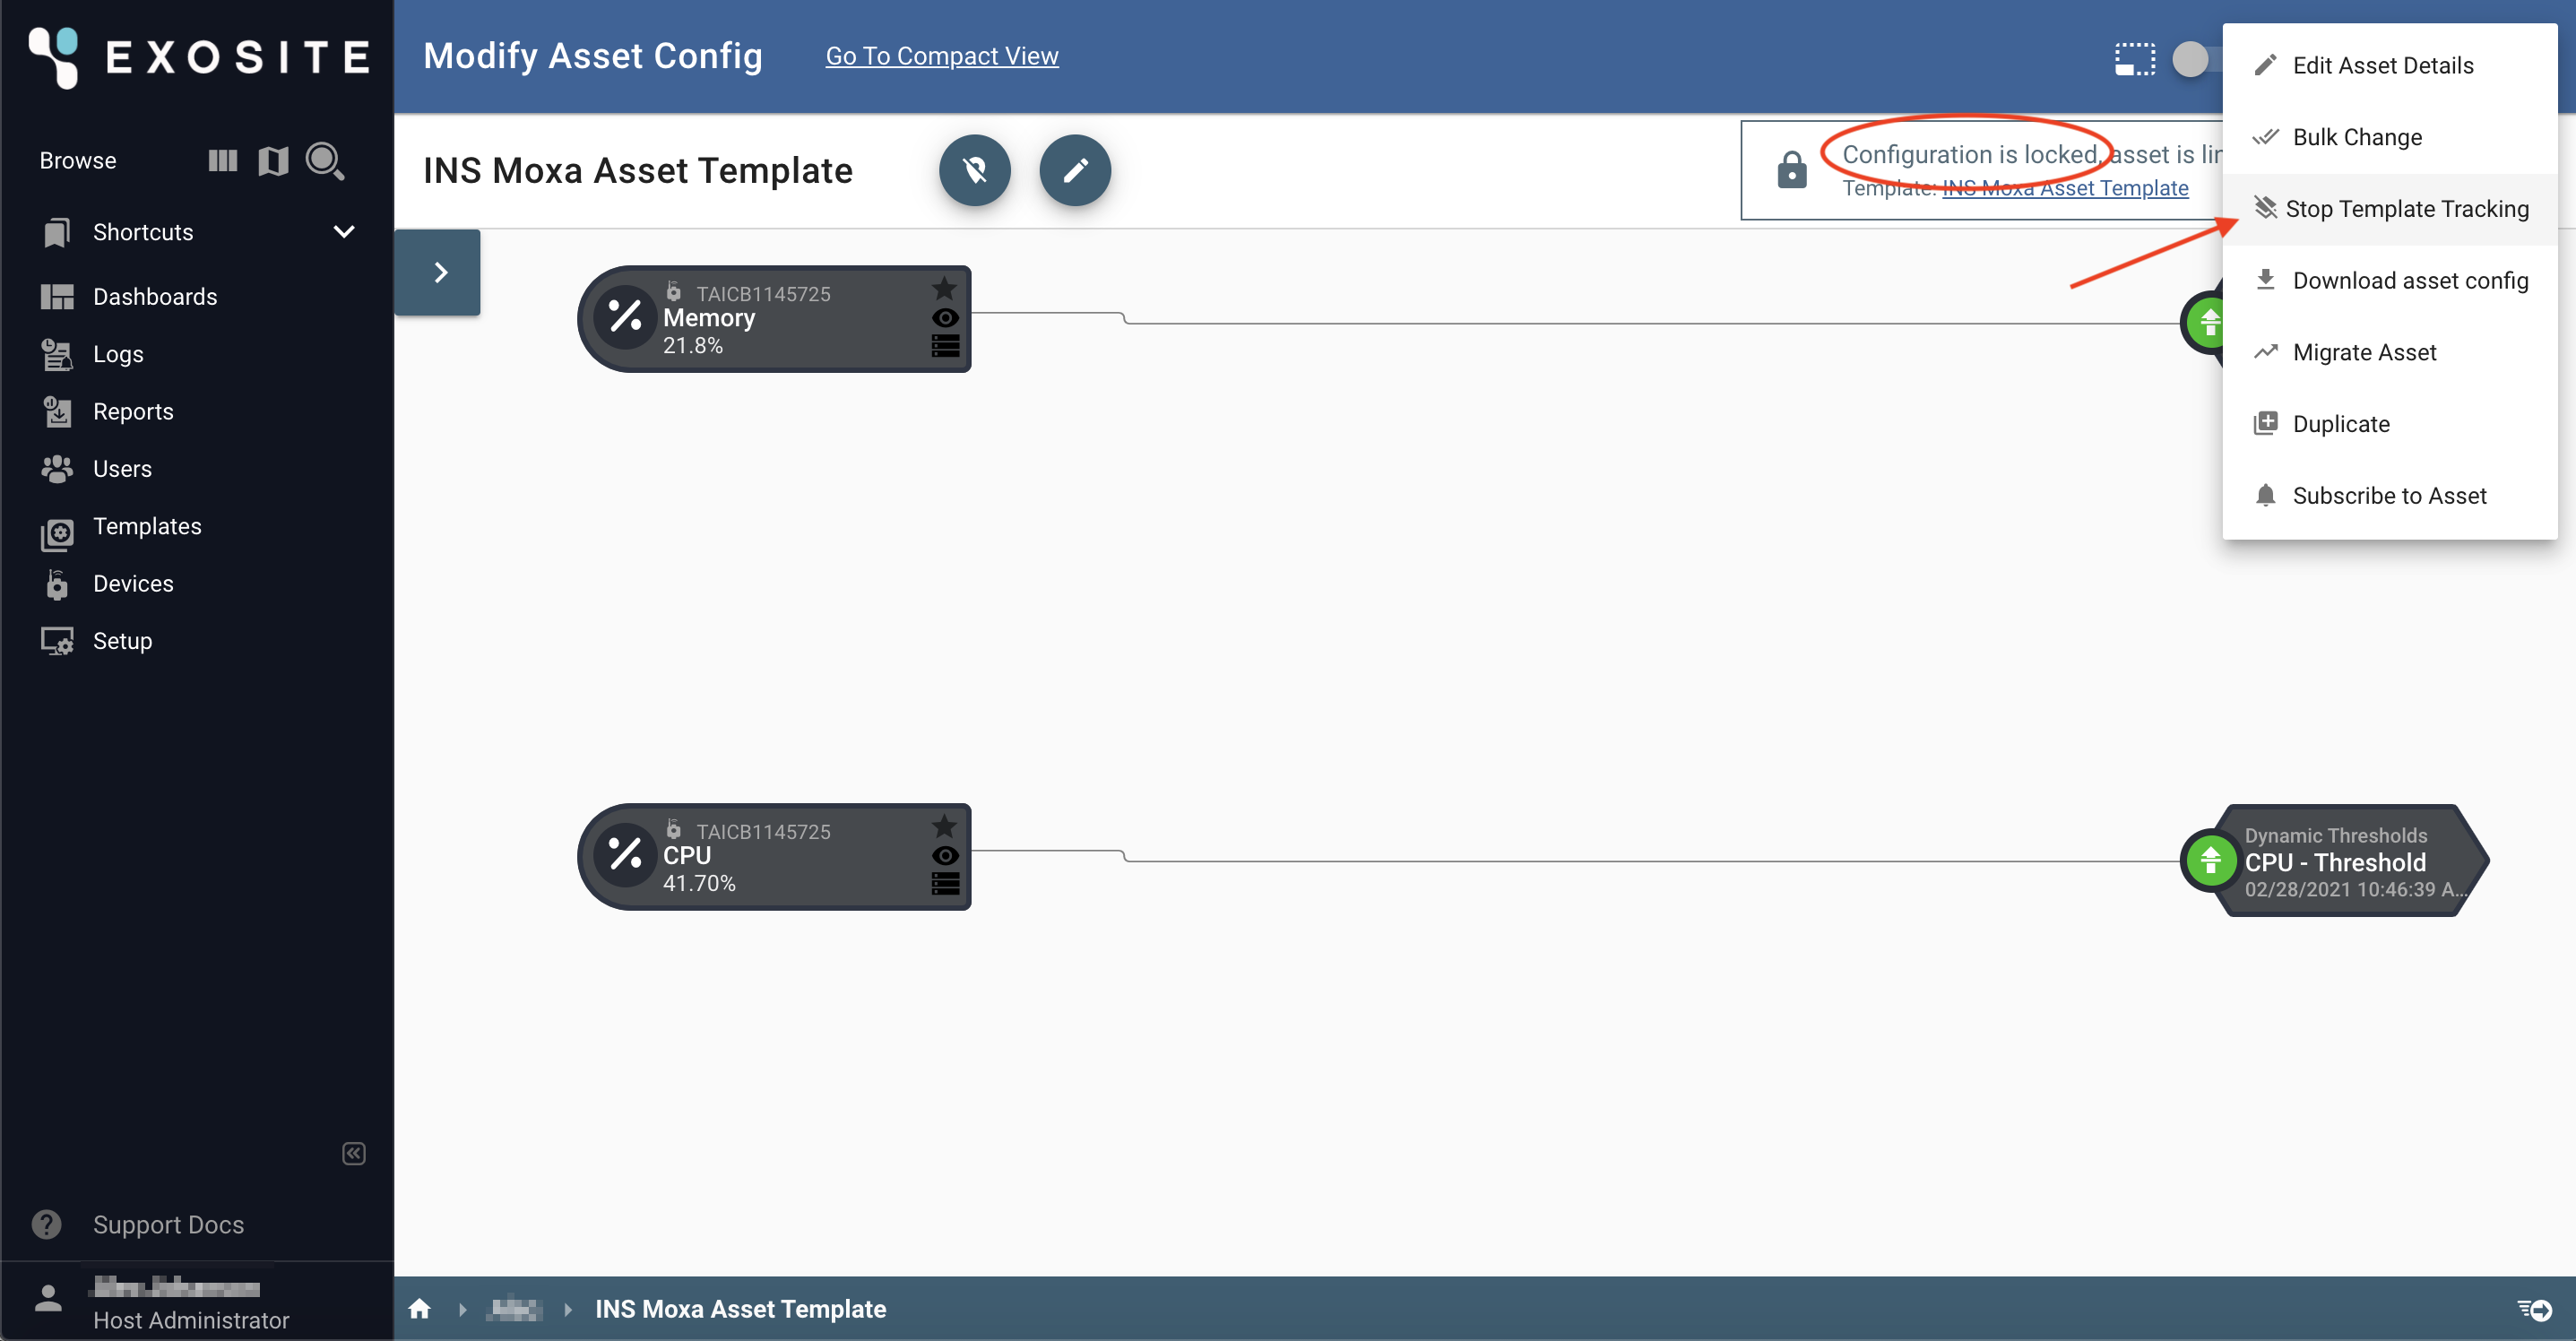
Channels that are added to a device after an Asset has been created do not automatically propagate to the Assets. To add the new channel to the existing Asset, navigate to the "Modify Asset" view of your Asset.
If you used the template, you will need to "Stop Template Tracking" to make changes to the asset. This means that if you make changes to the master template, these changes will not be reflected in the Asset.
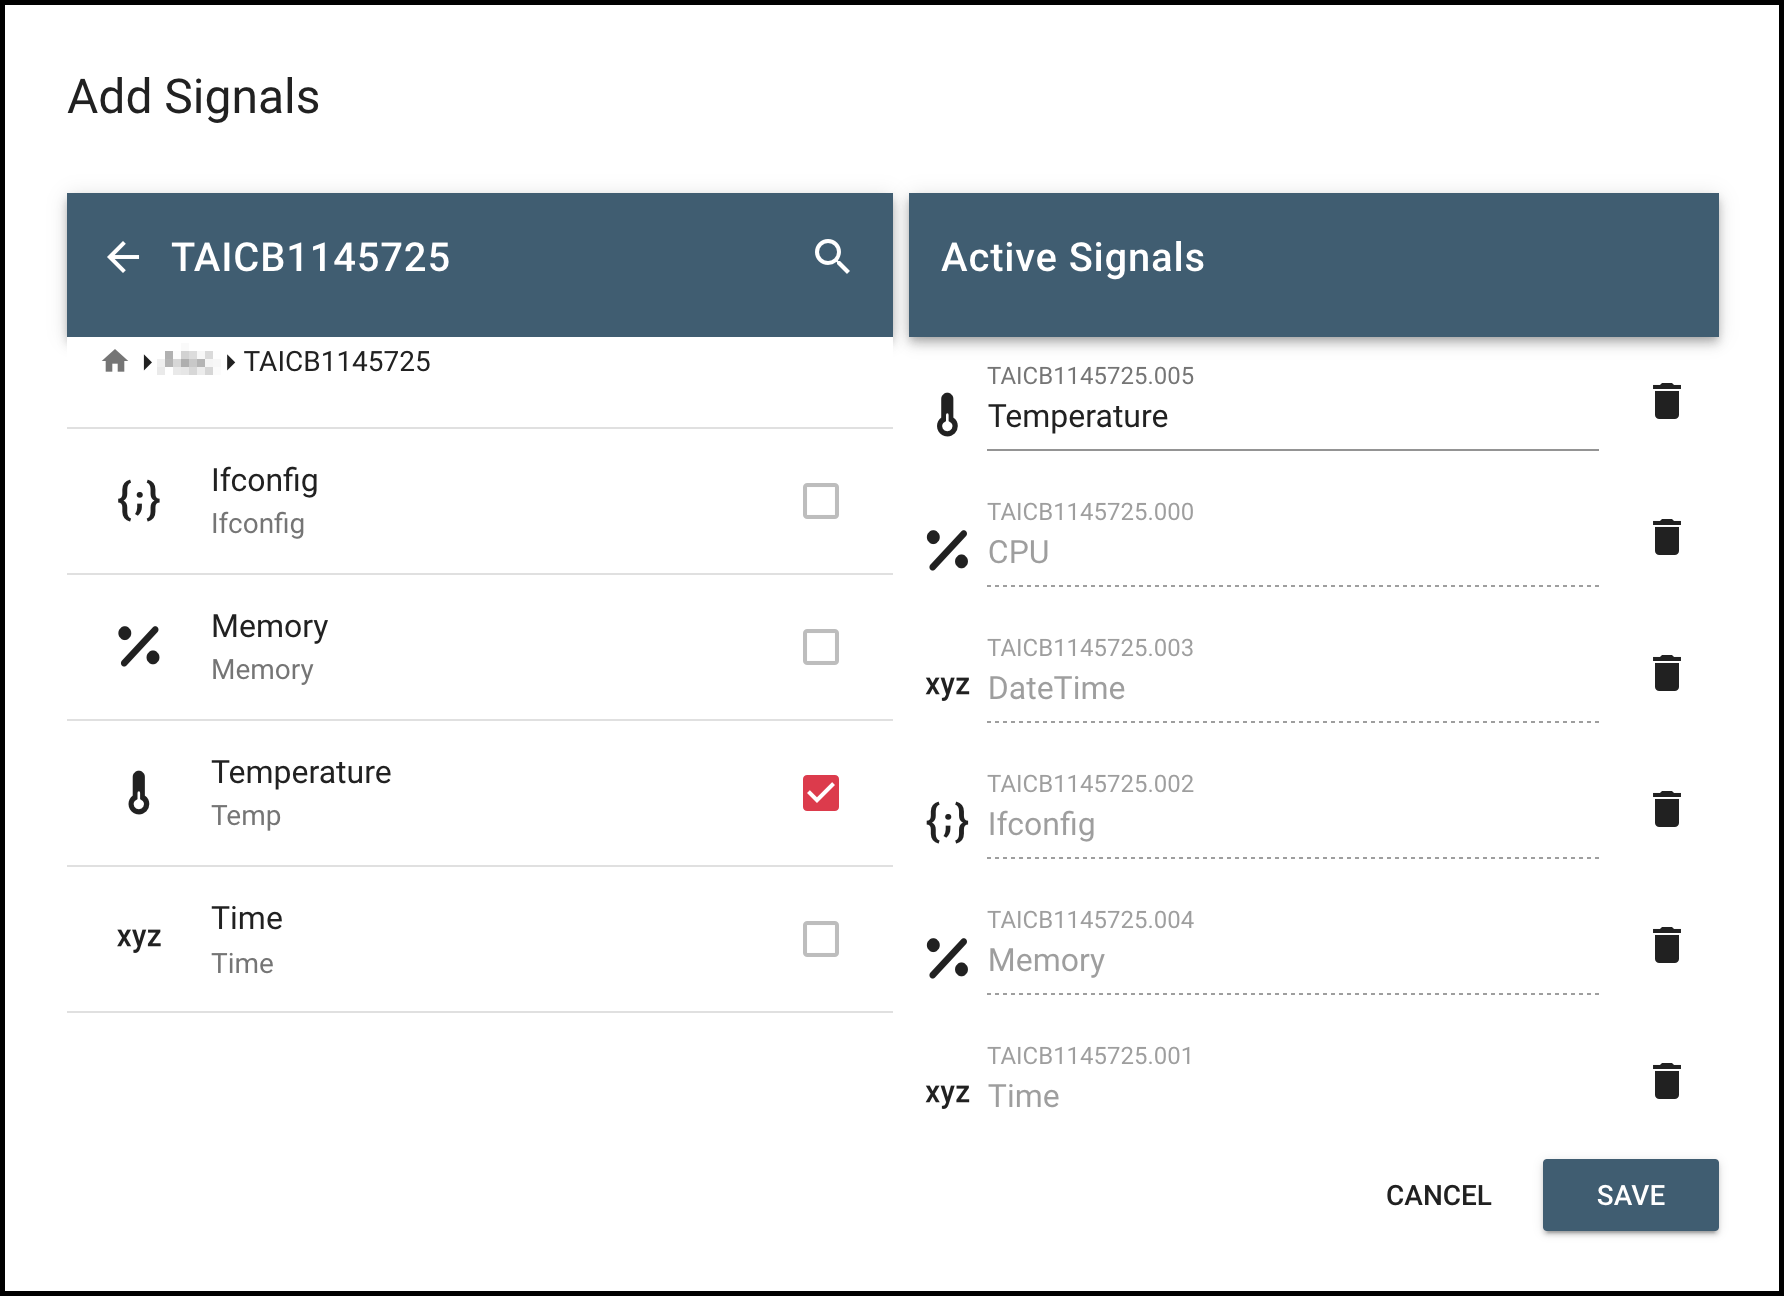
Select the '+' button to add a new signal.
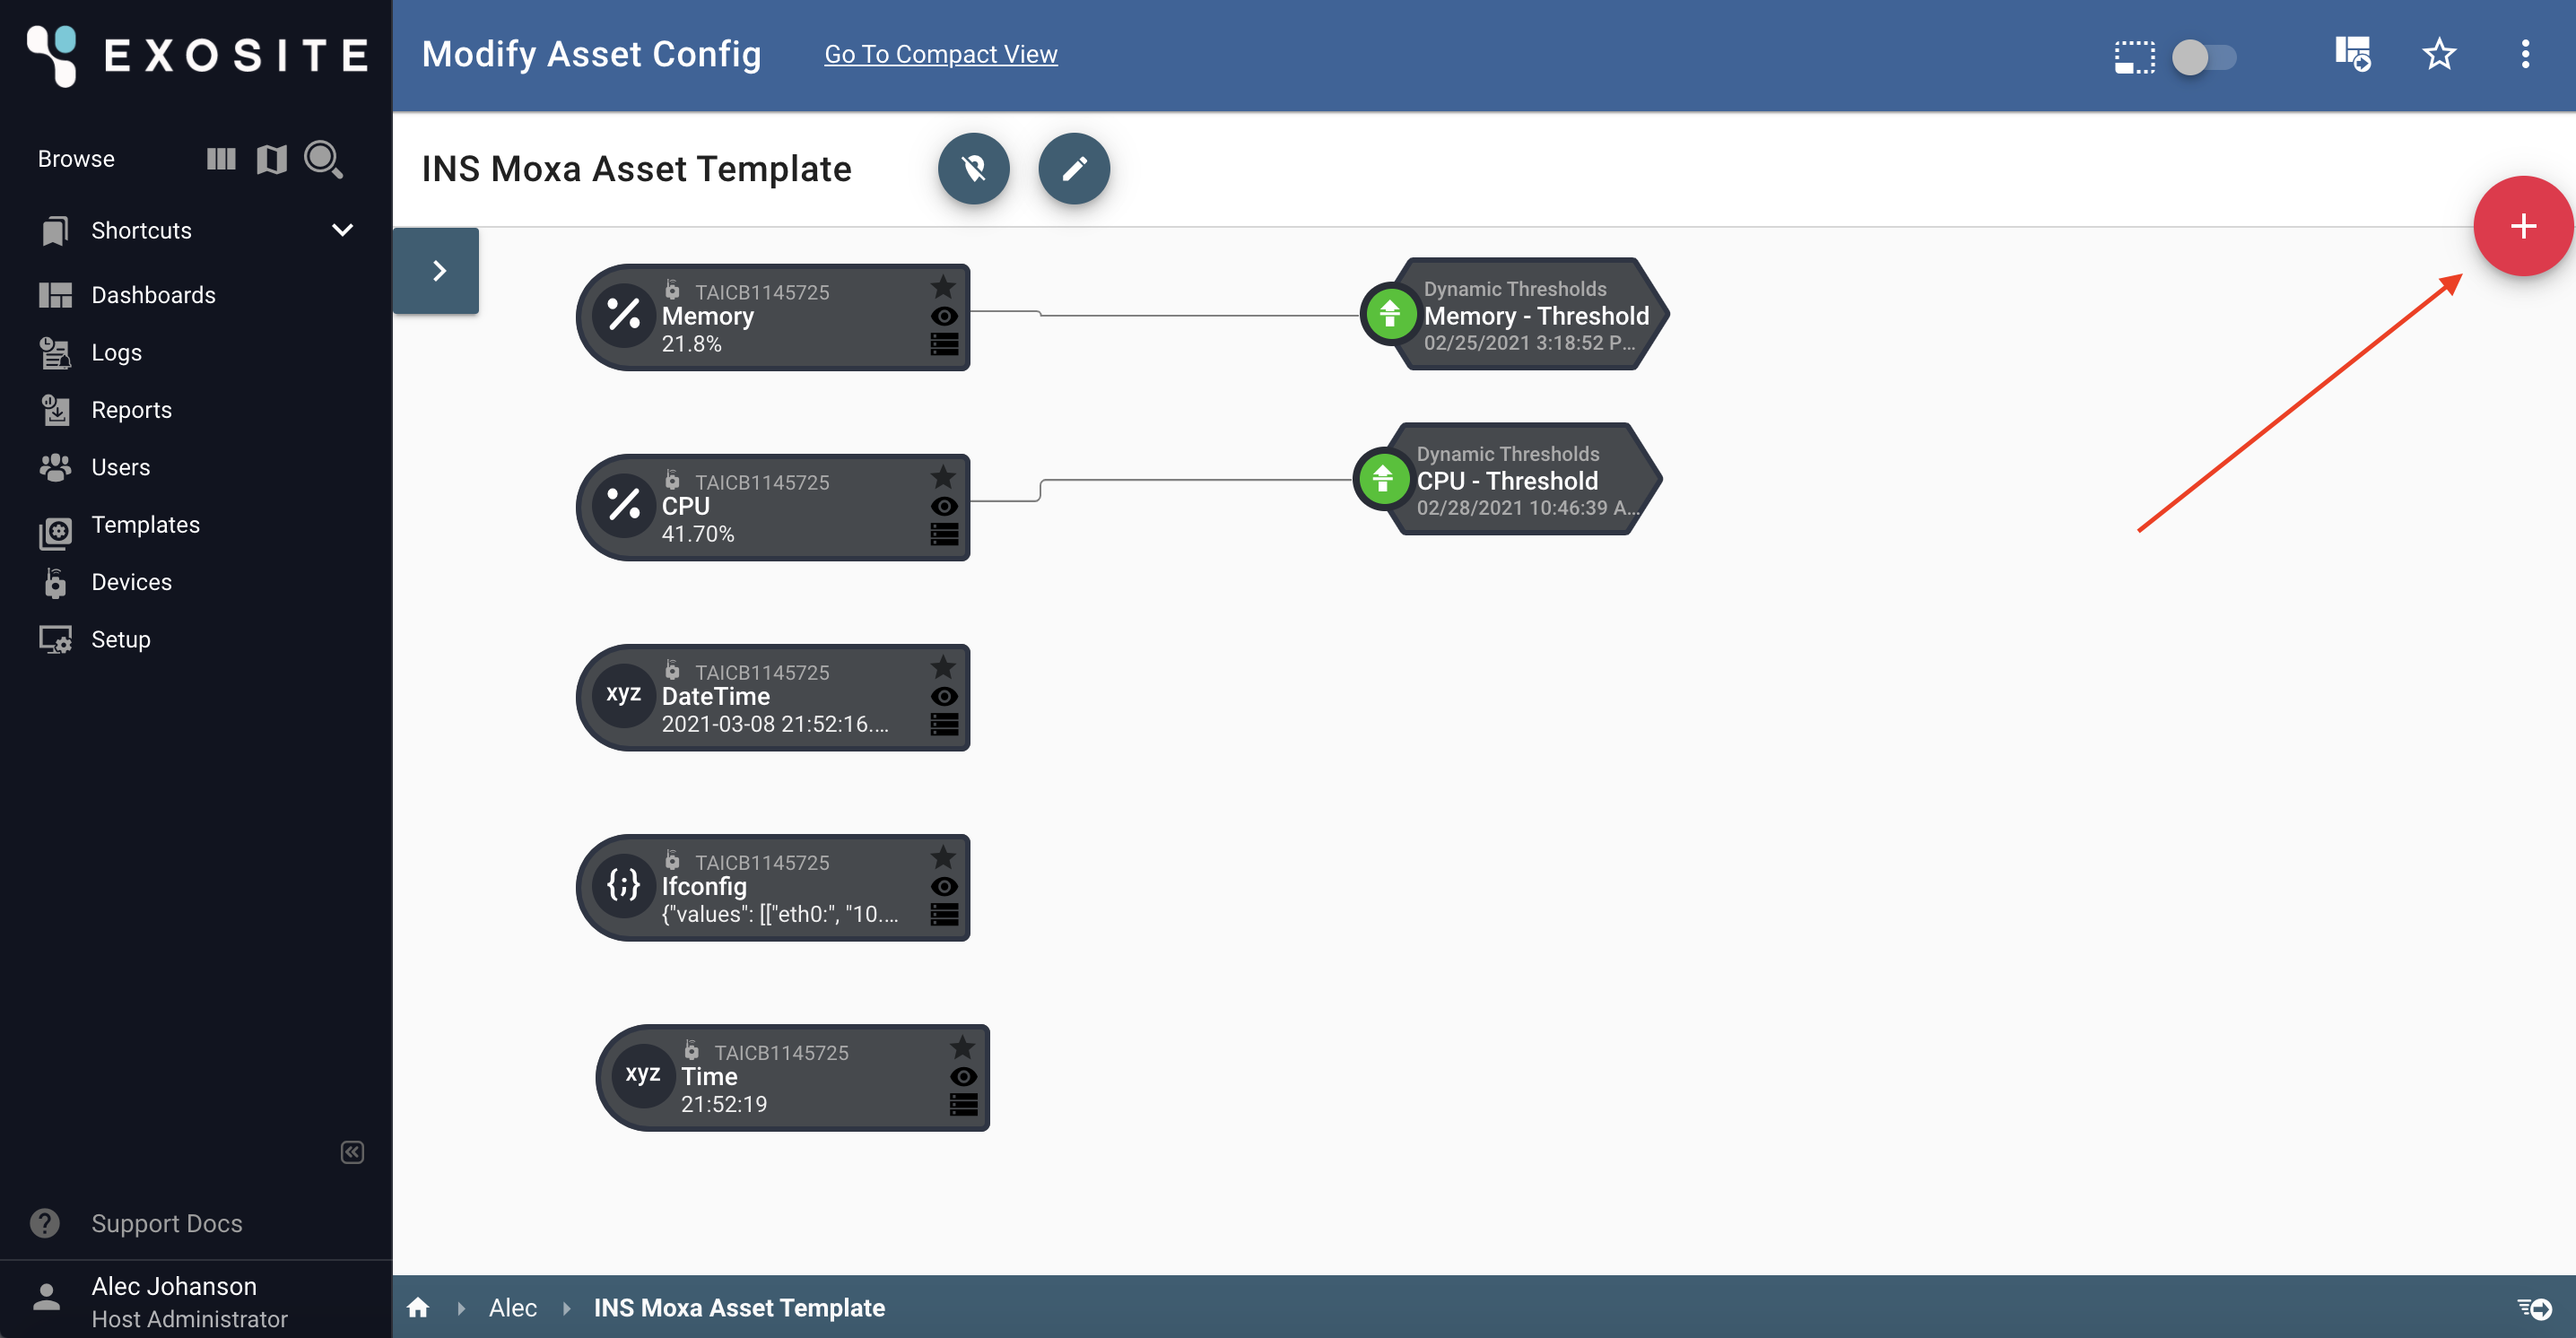
Locate your device and add the desired signal.
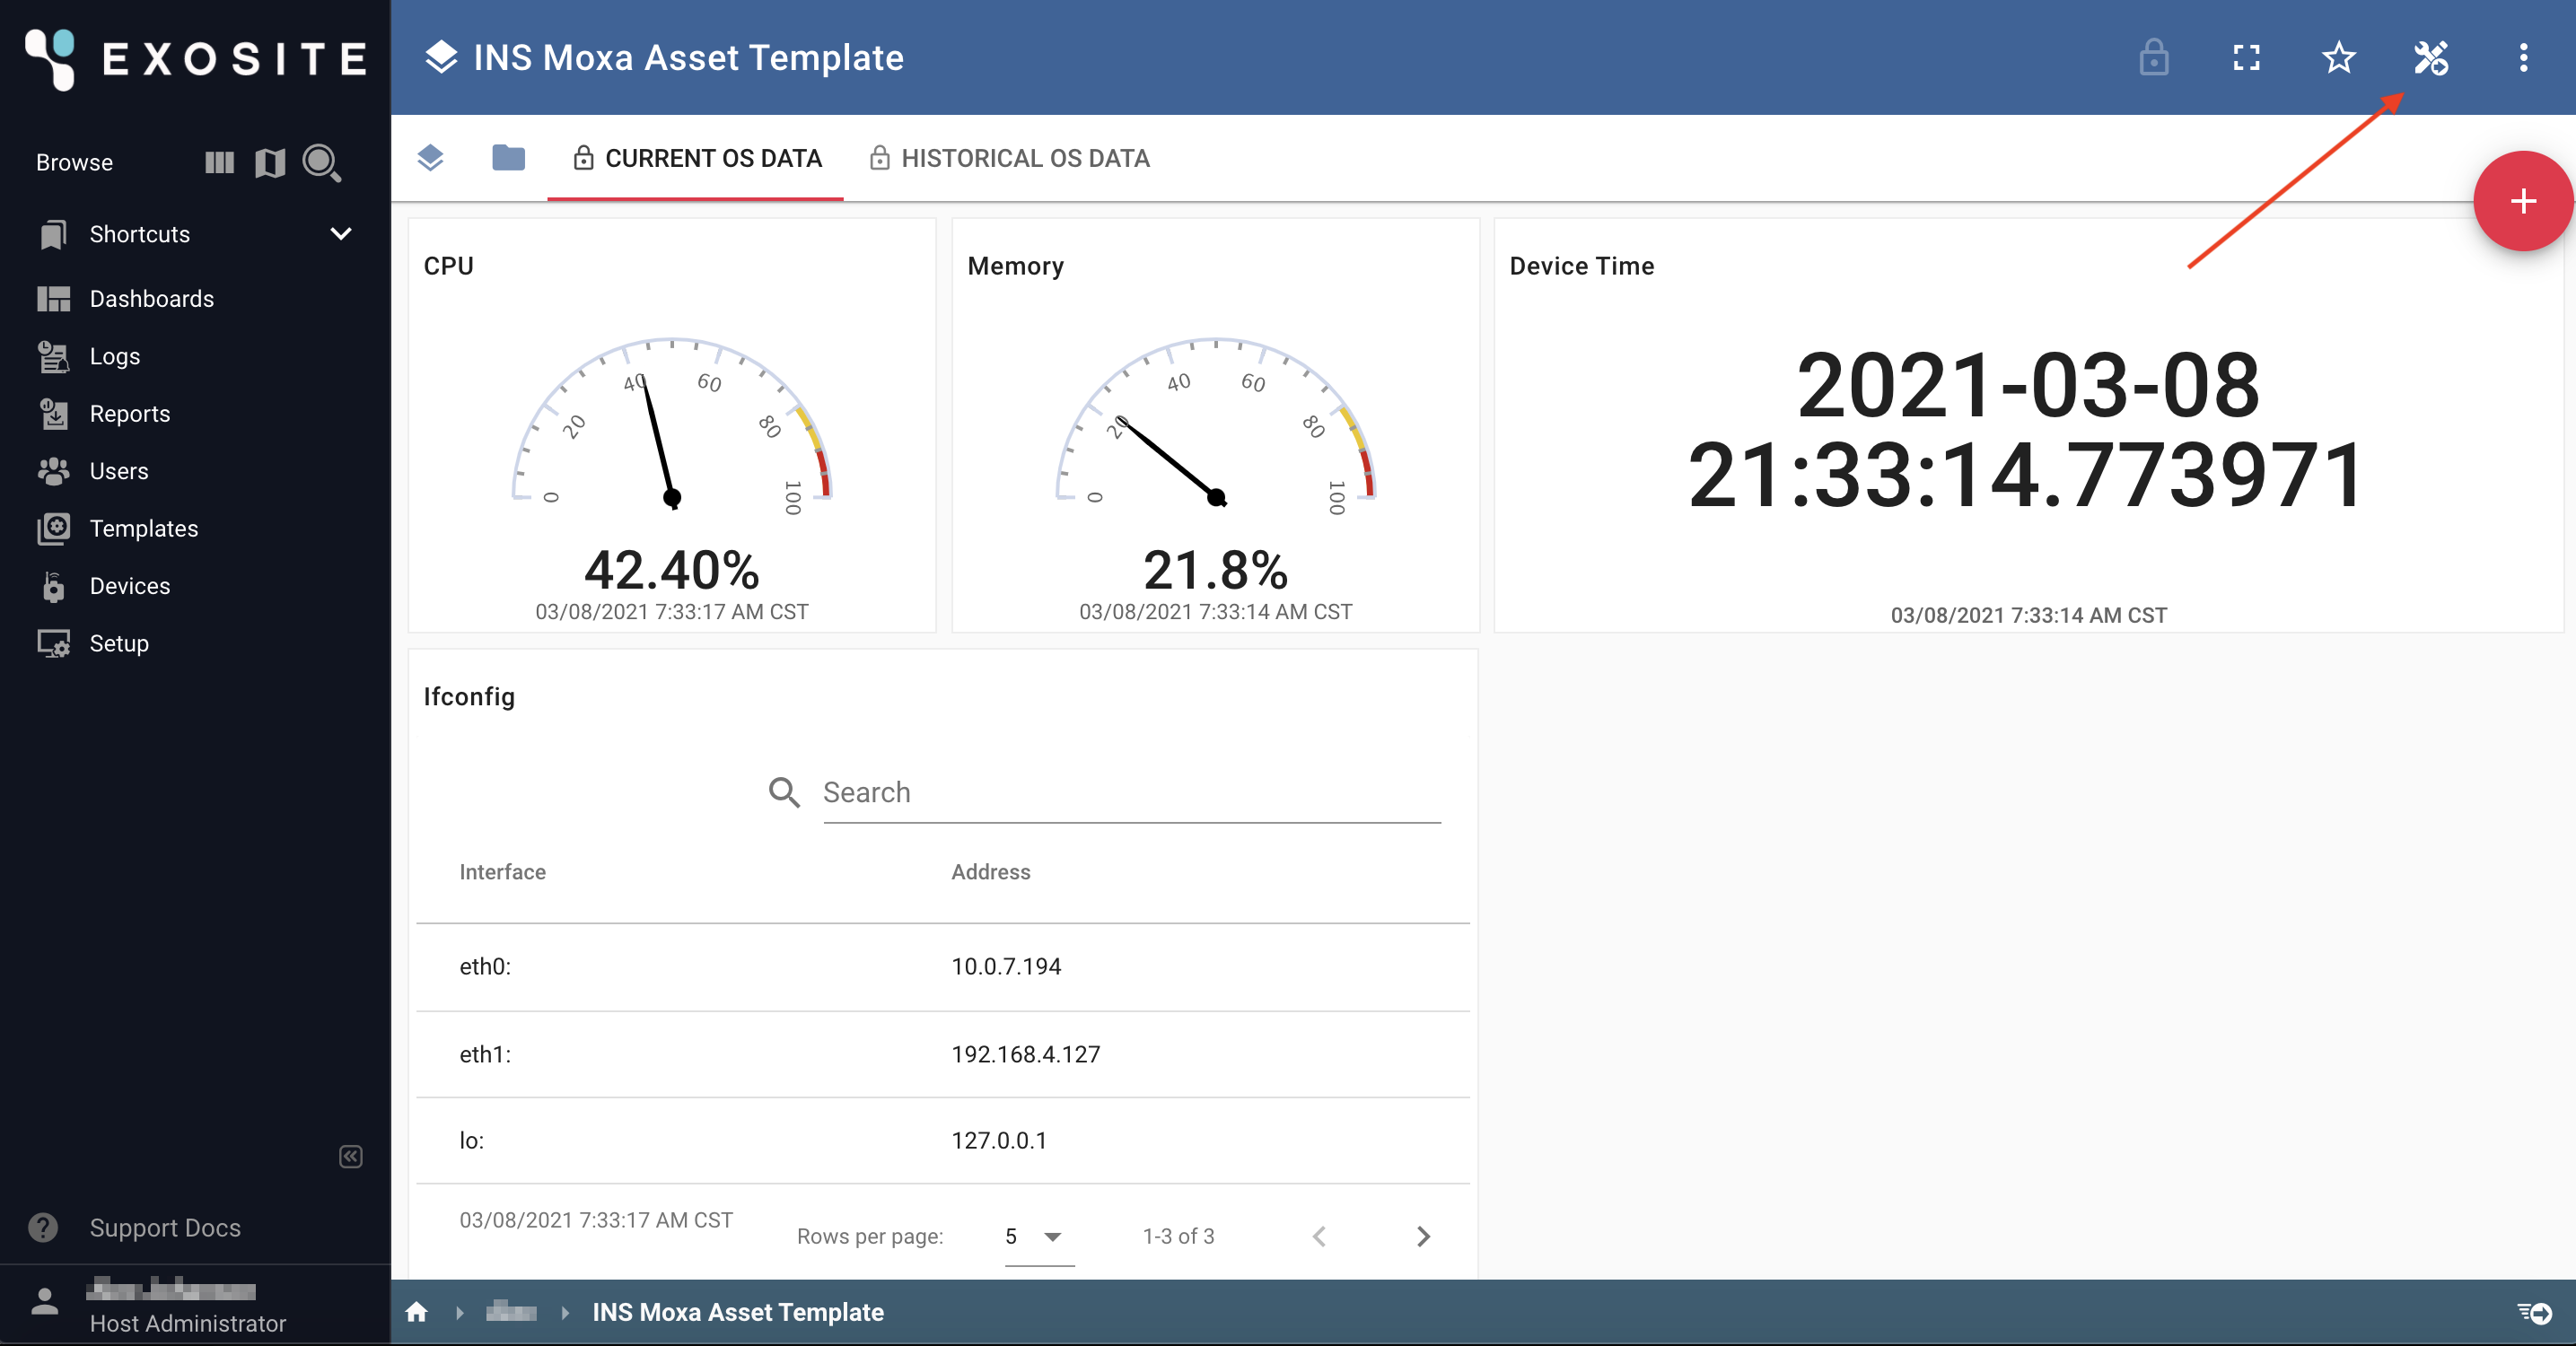
Visualize the newly added signal
To visualize your newly added signal, select "View Asset Dashboard".
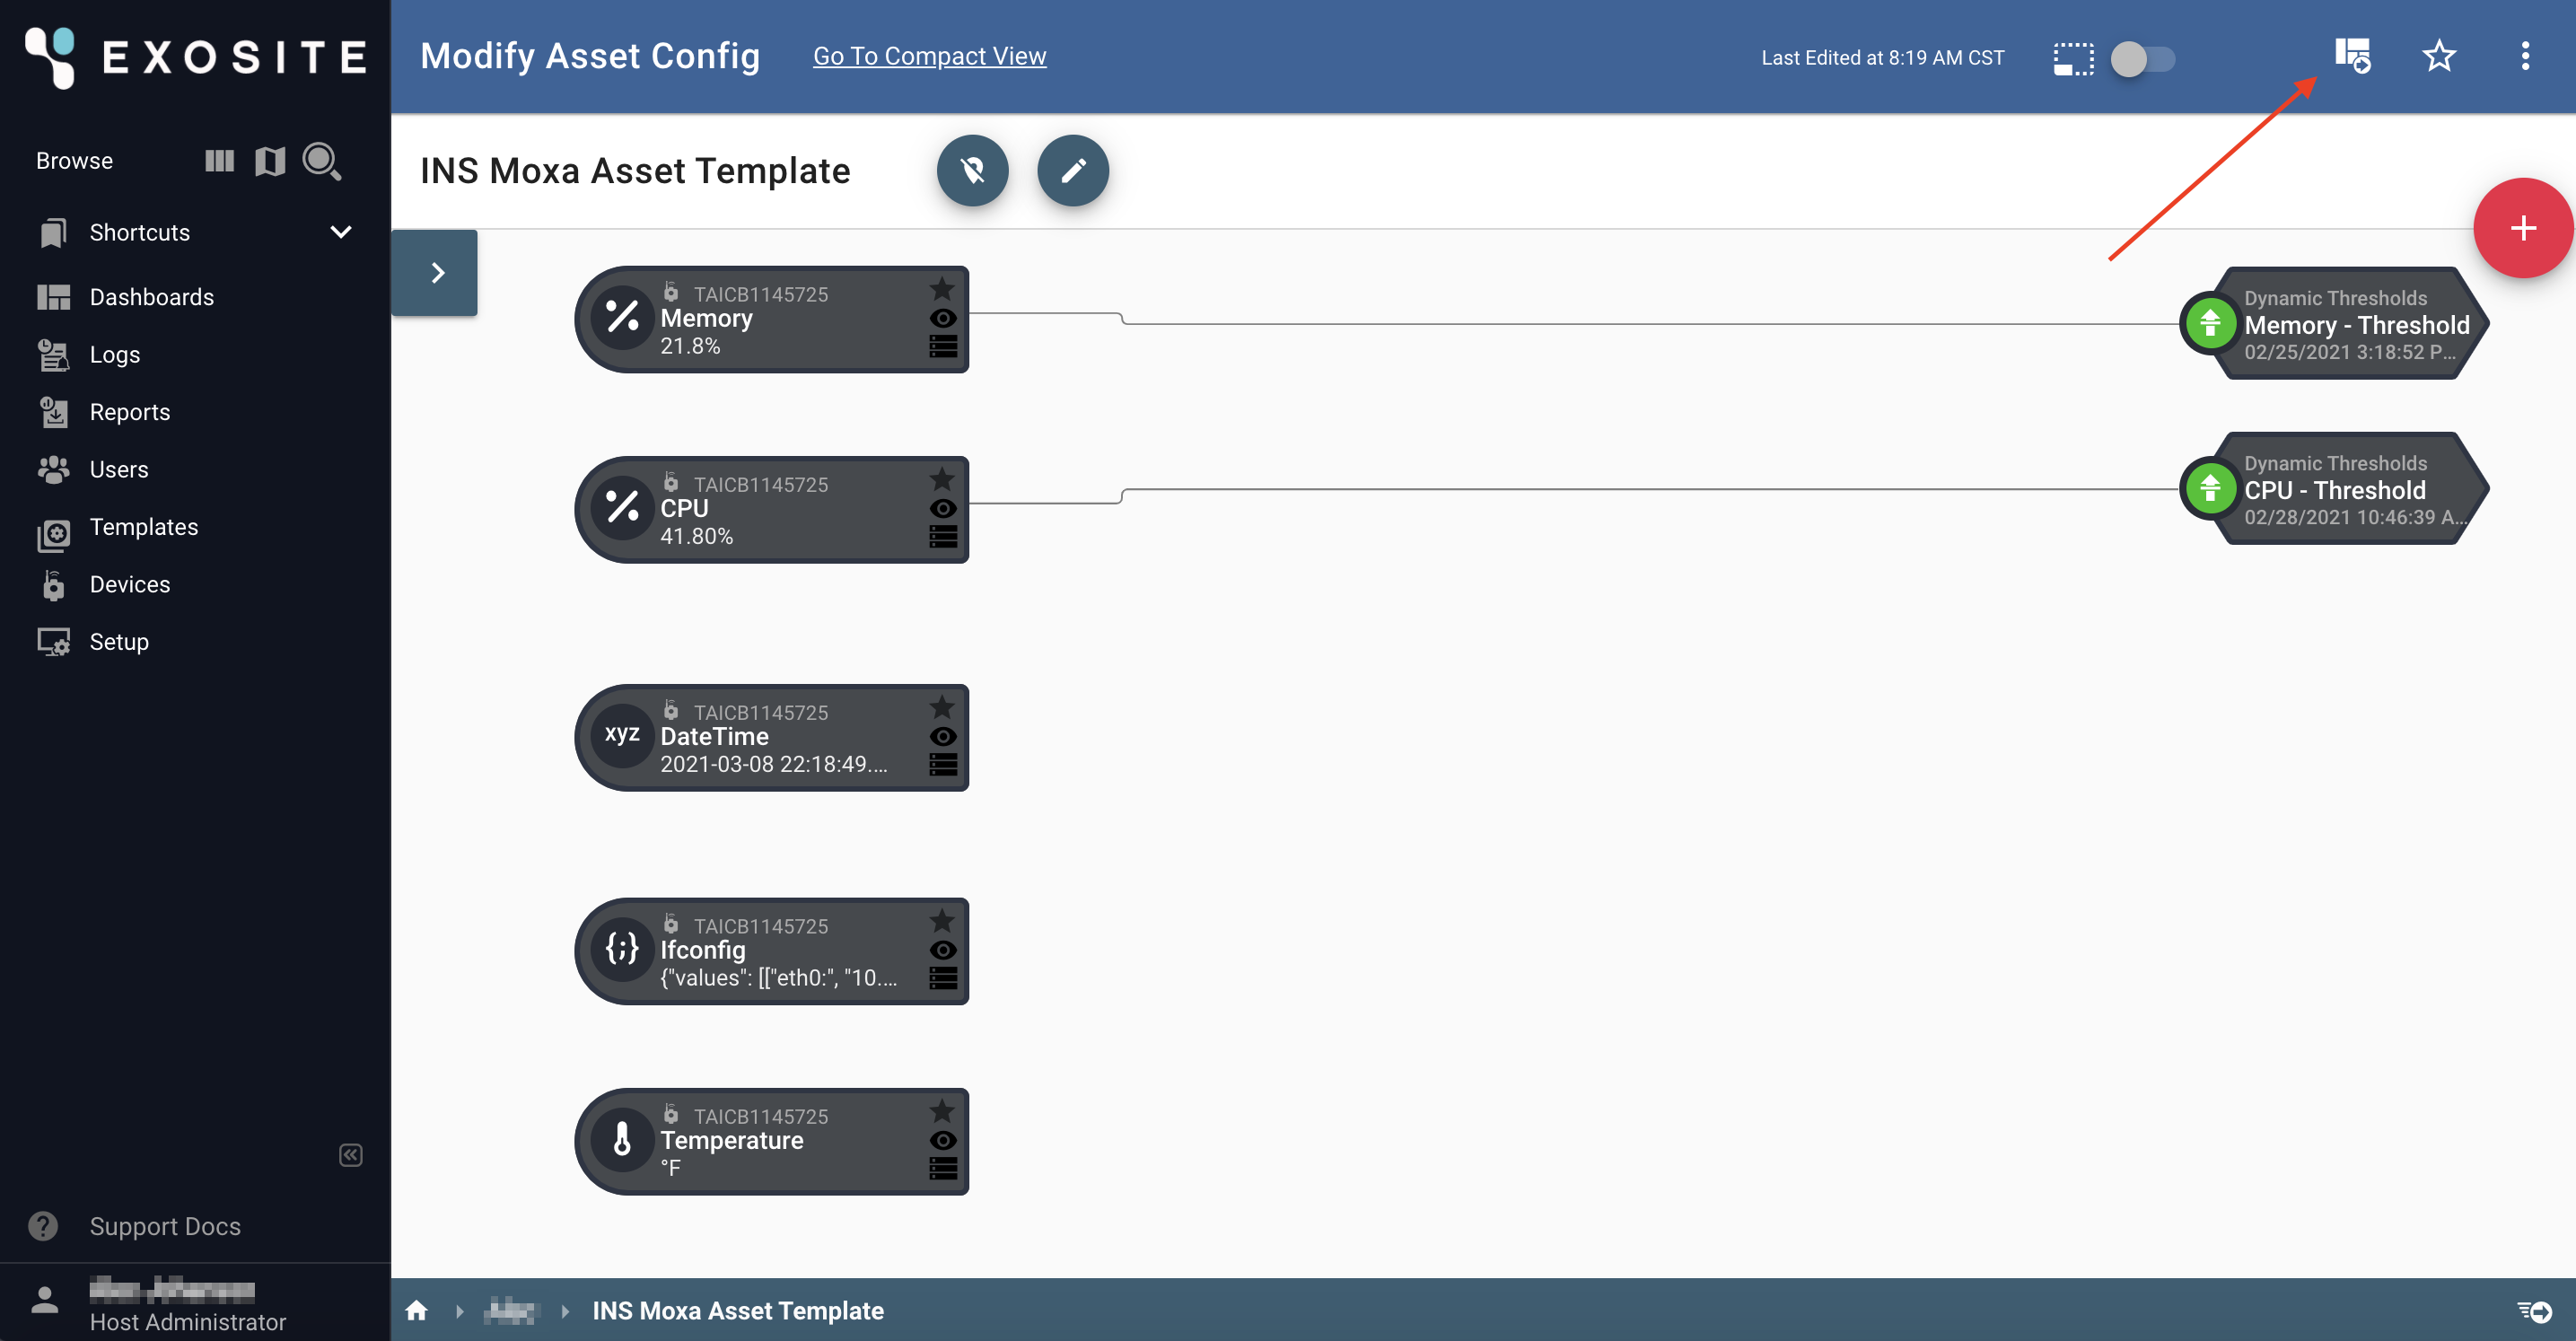
From the dashboard, select the '+' button, then "Add New Panel".
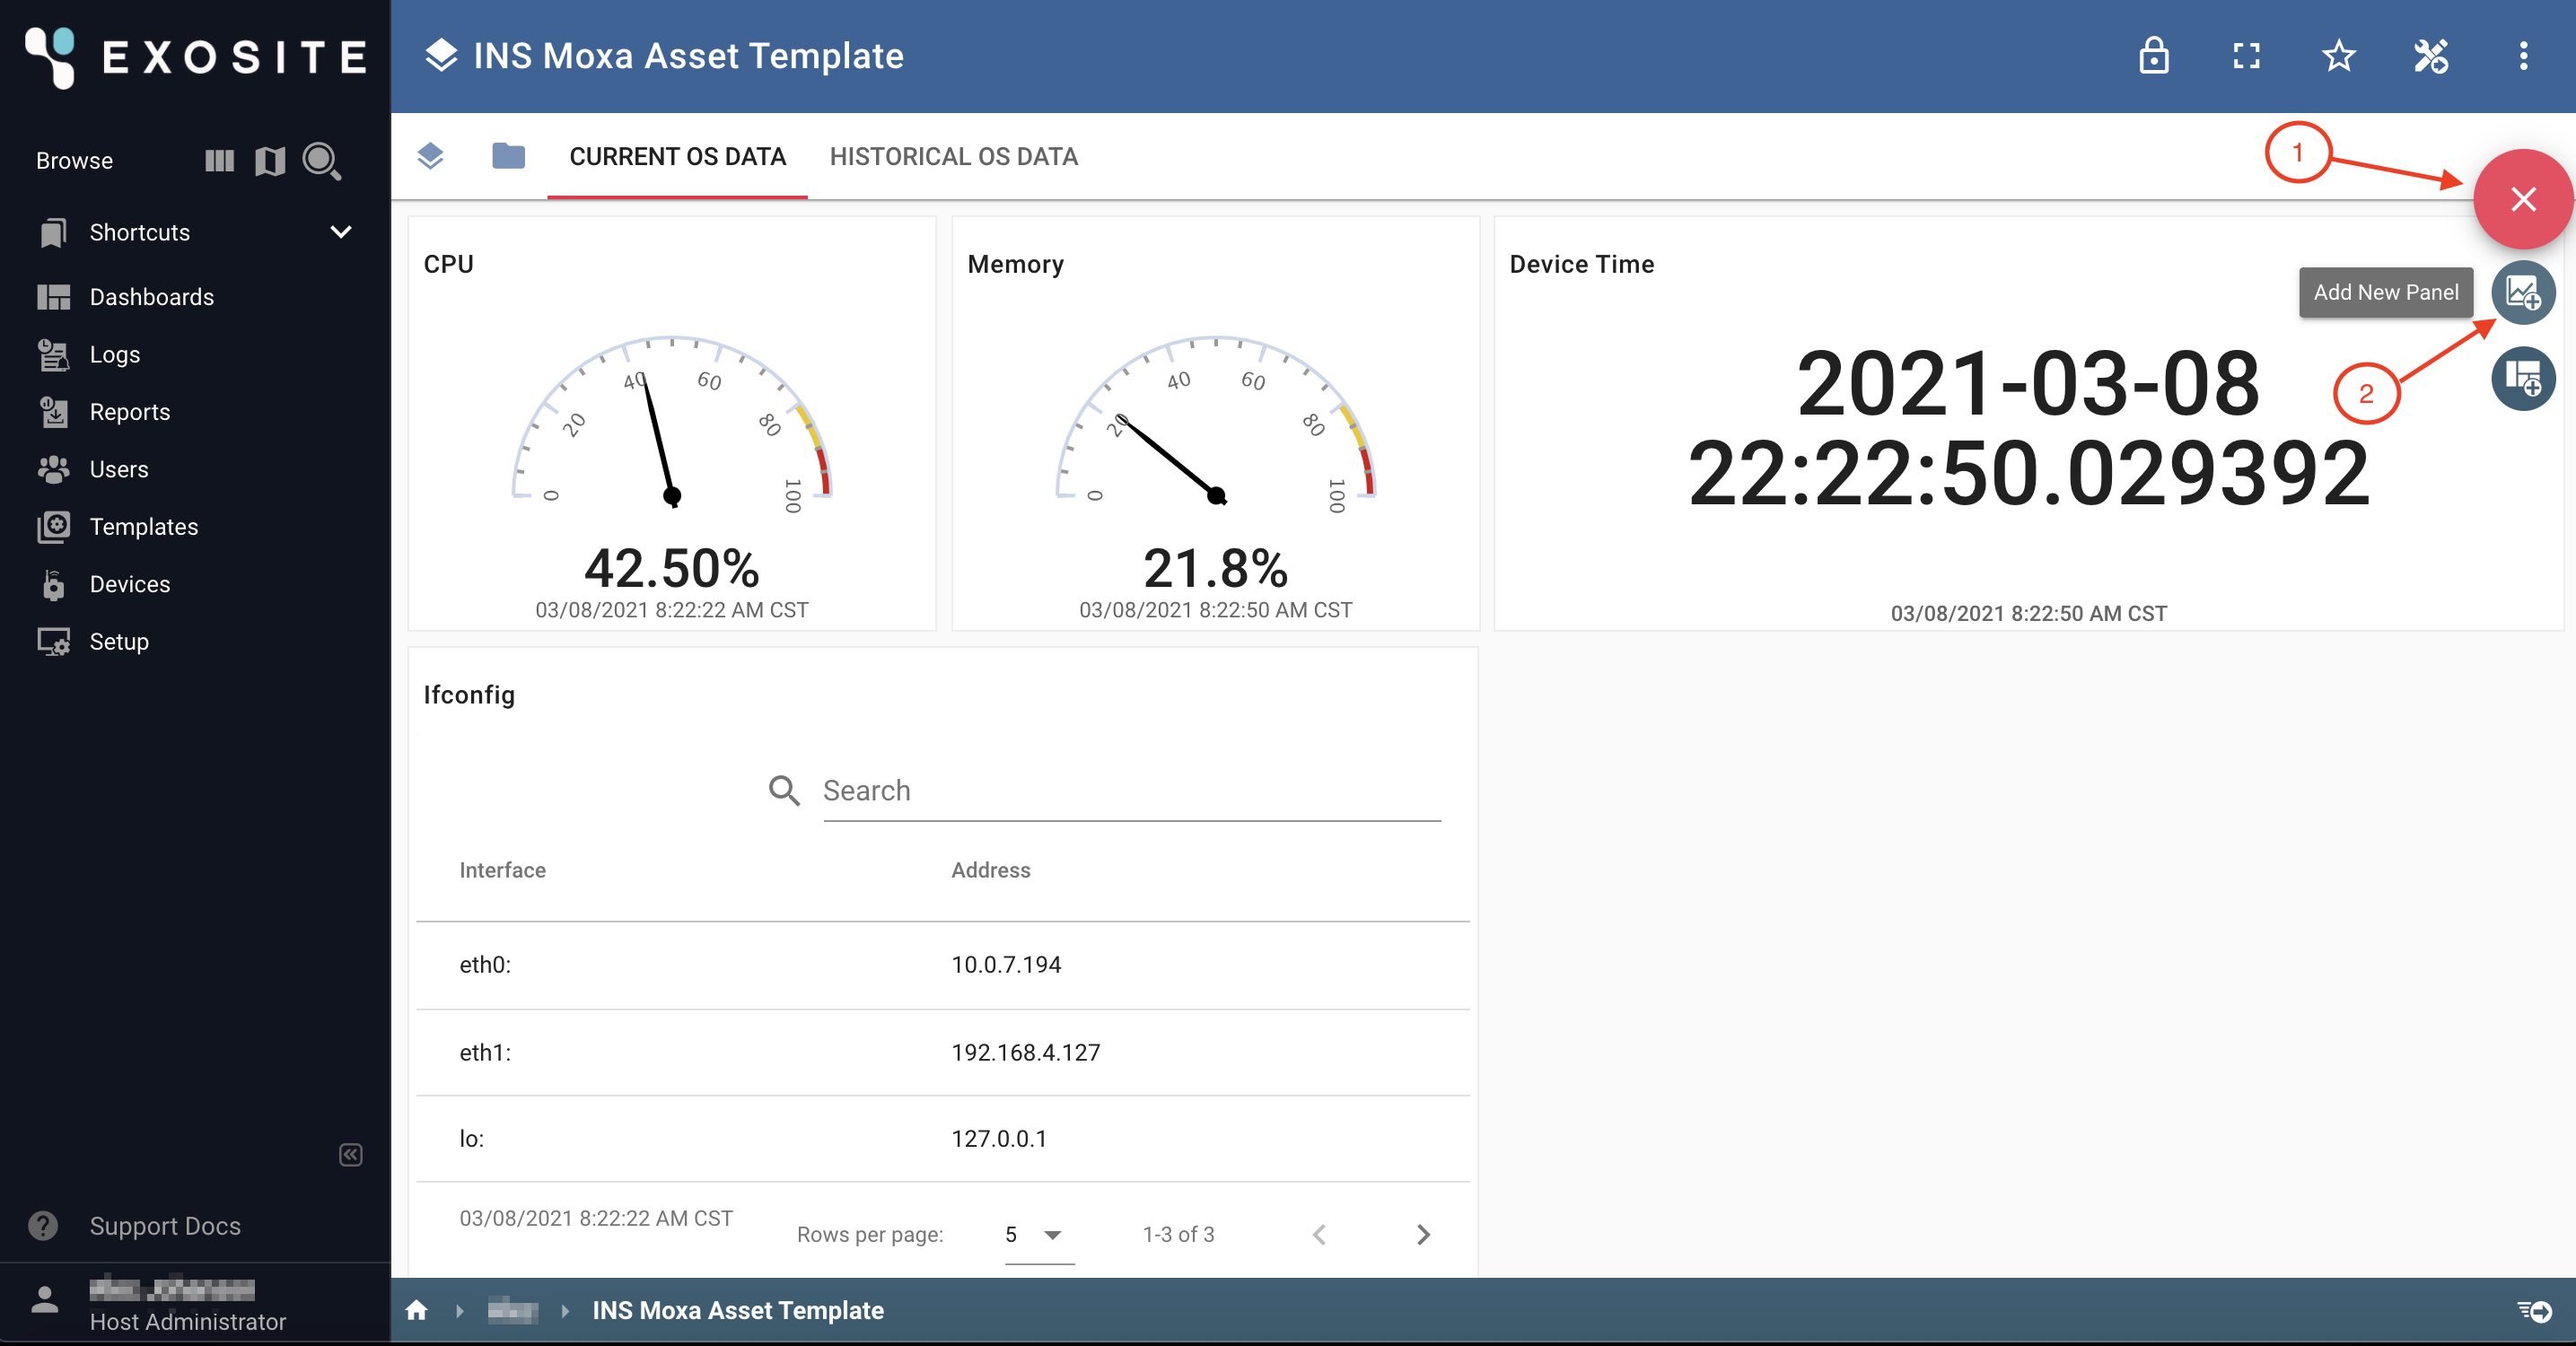
Follow the prompts in the Dialog, selecting a panel, signal\(s\), and configuration.
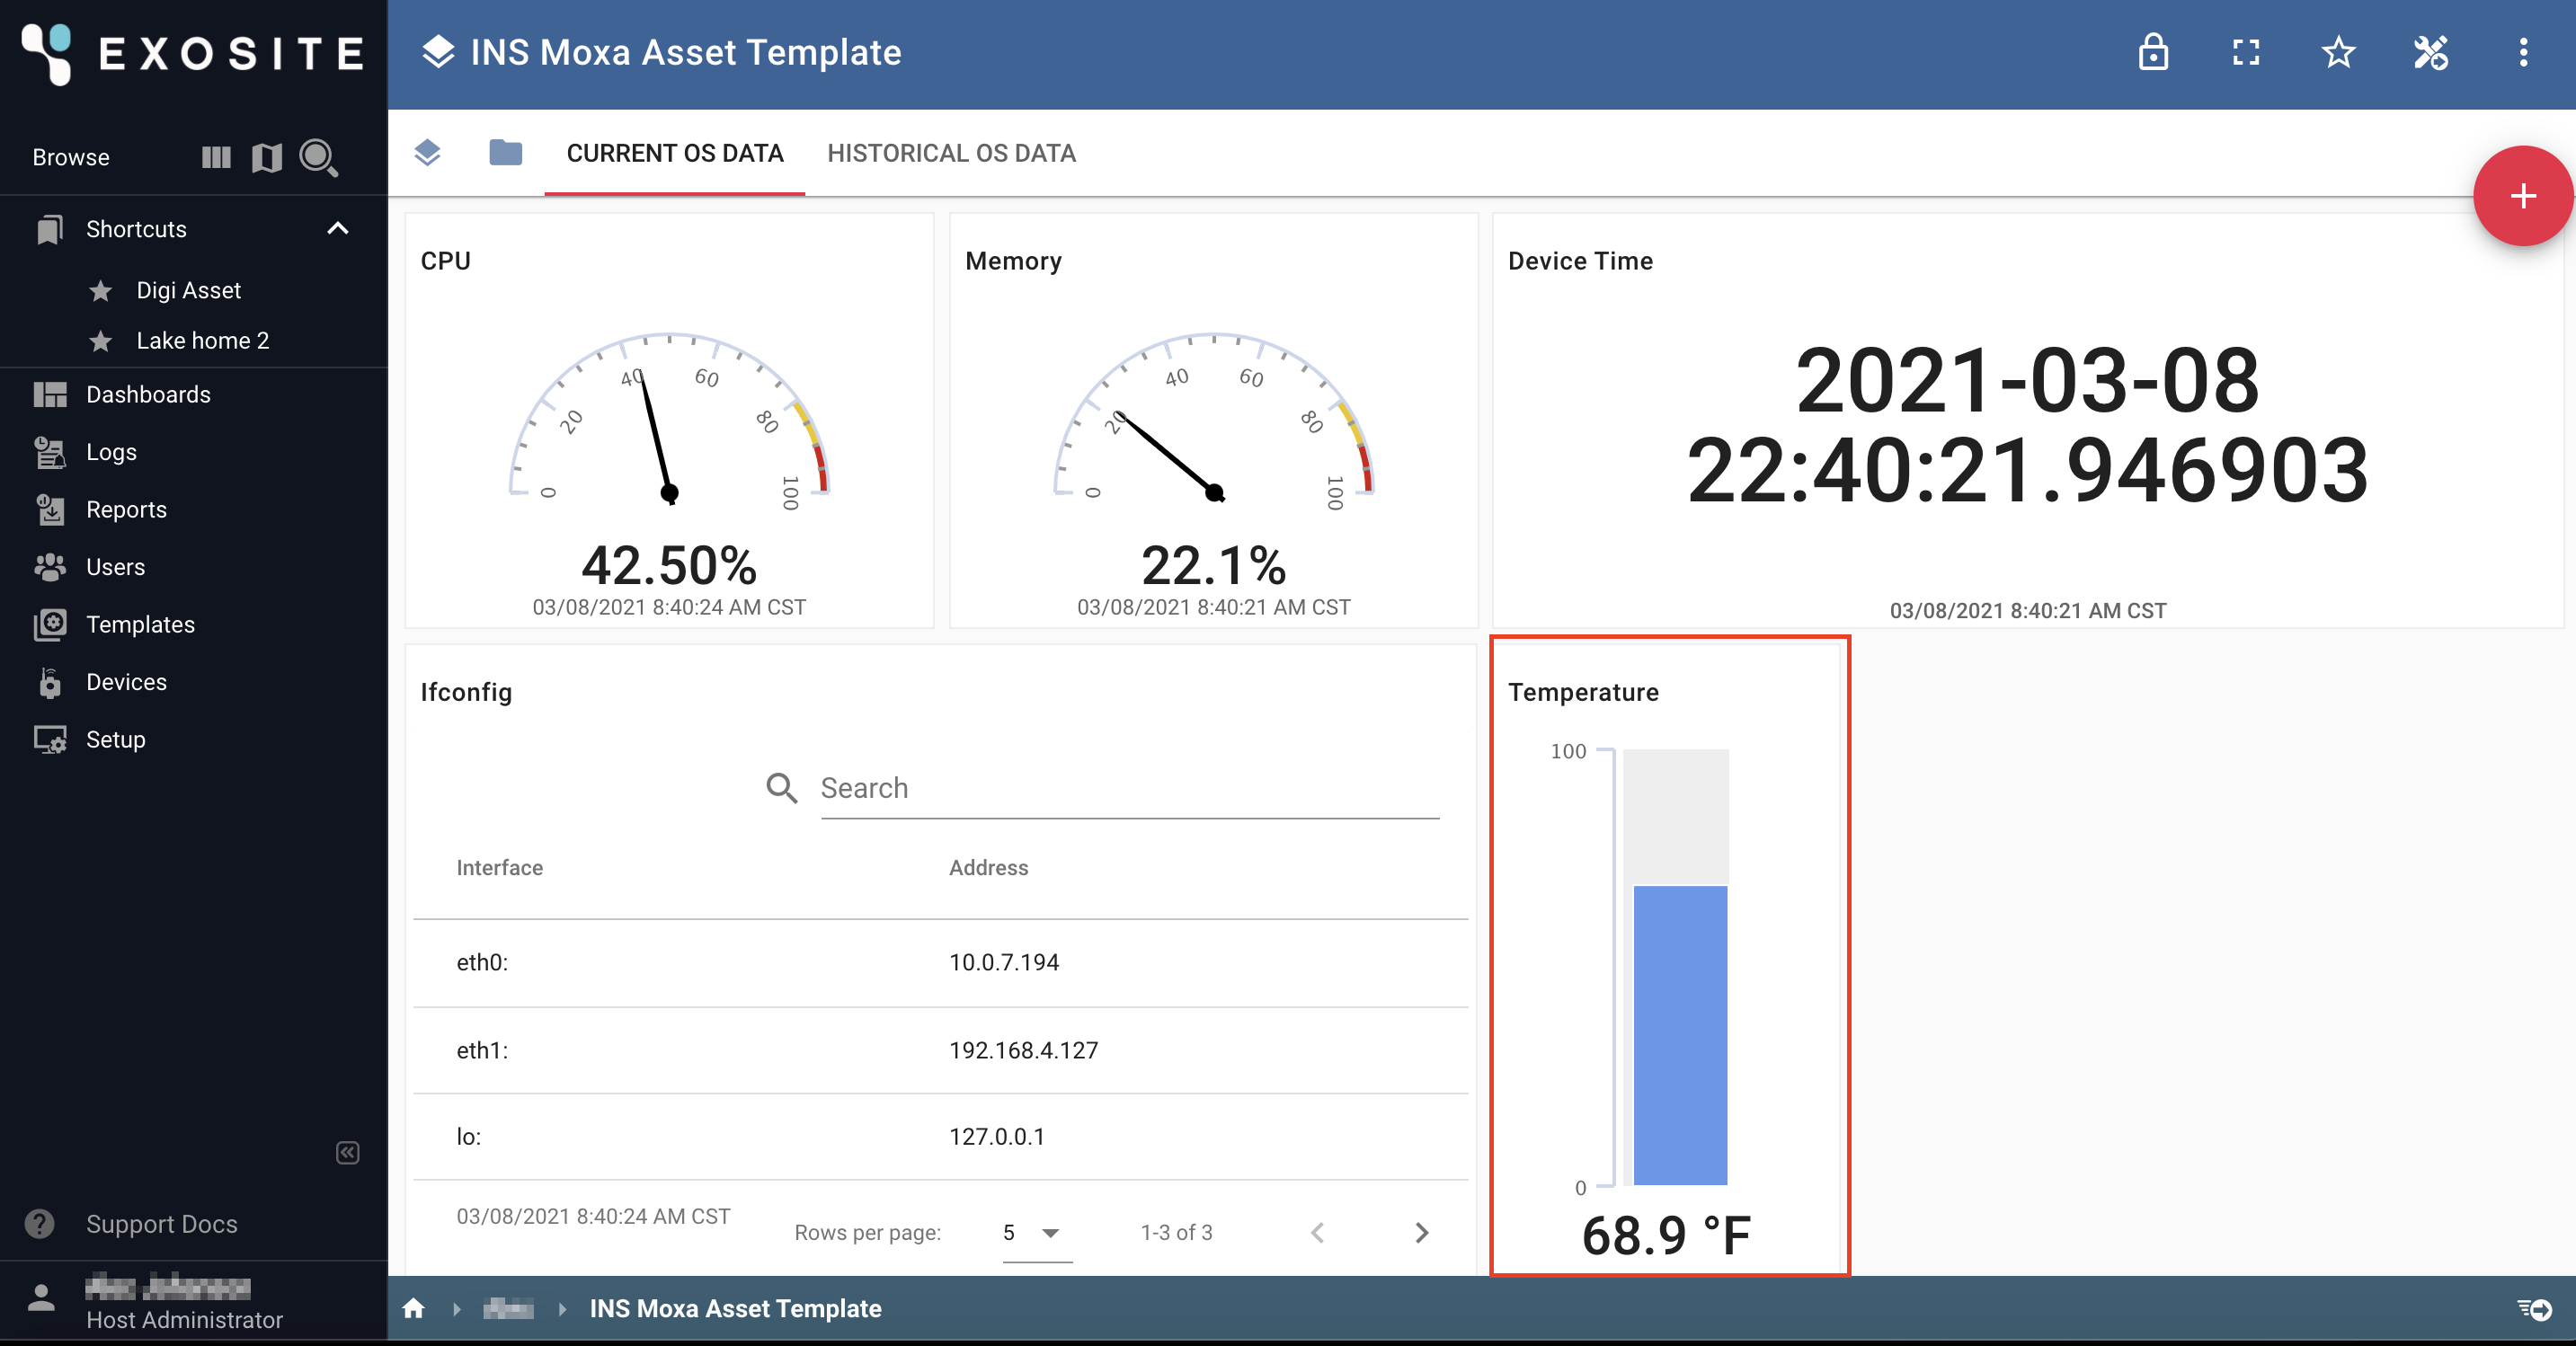
The new panel will now be on the dashboard. More on dashboards and panels here.
In this example, the "Vertical Gauge" was selected as the Panel Type, the "Temperature" signal was selected in Signal Selection, and the default configuration was kept.
Next Steps
Browse the ExoSense Documentation and explore the application more. Maybe add your own branding, setup notifications, or add a group hierarchy.