Connect Octave Devices To Exosite
This document will walk through connecting devices to Exosite that are already connected to the Sierra Wireless Octave Web Portal.
Sierra Wireless’ Ready to Connect devices give you the power you need for complex connectivity, with pre-provisioned SIM cards that connect these devices to cellular networks as soon as you power them on. They also include powerful edge device software that lets you rapidly scale from a prototype to a commercial deployment.
Octave lets you securely extract, orchestrate, and act on data from your industrial assets to the cloud.
Prerequisites
- Sierra Wireless Octave Account.
- Sierra Wireless Octave Edge Device.
- Deployed ExoSense Application.
Connect your Sierra Wireless Octave hardware to your ExoSense Instance
Configure Exosite Business
- Log into your Exosite Business Account.
Create IoT Connector
-
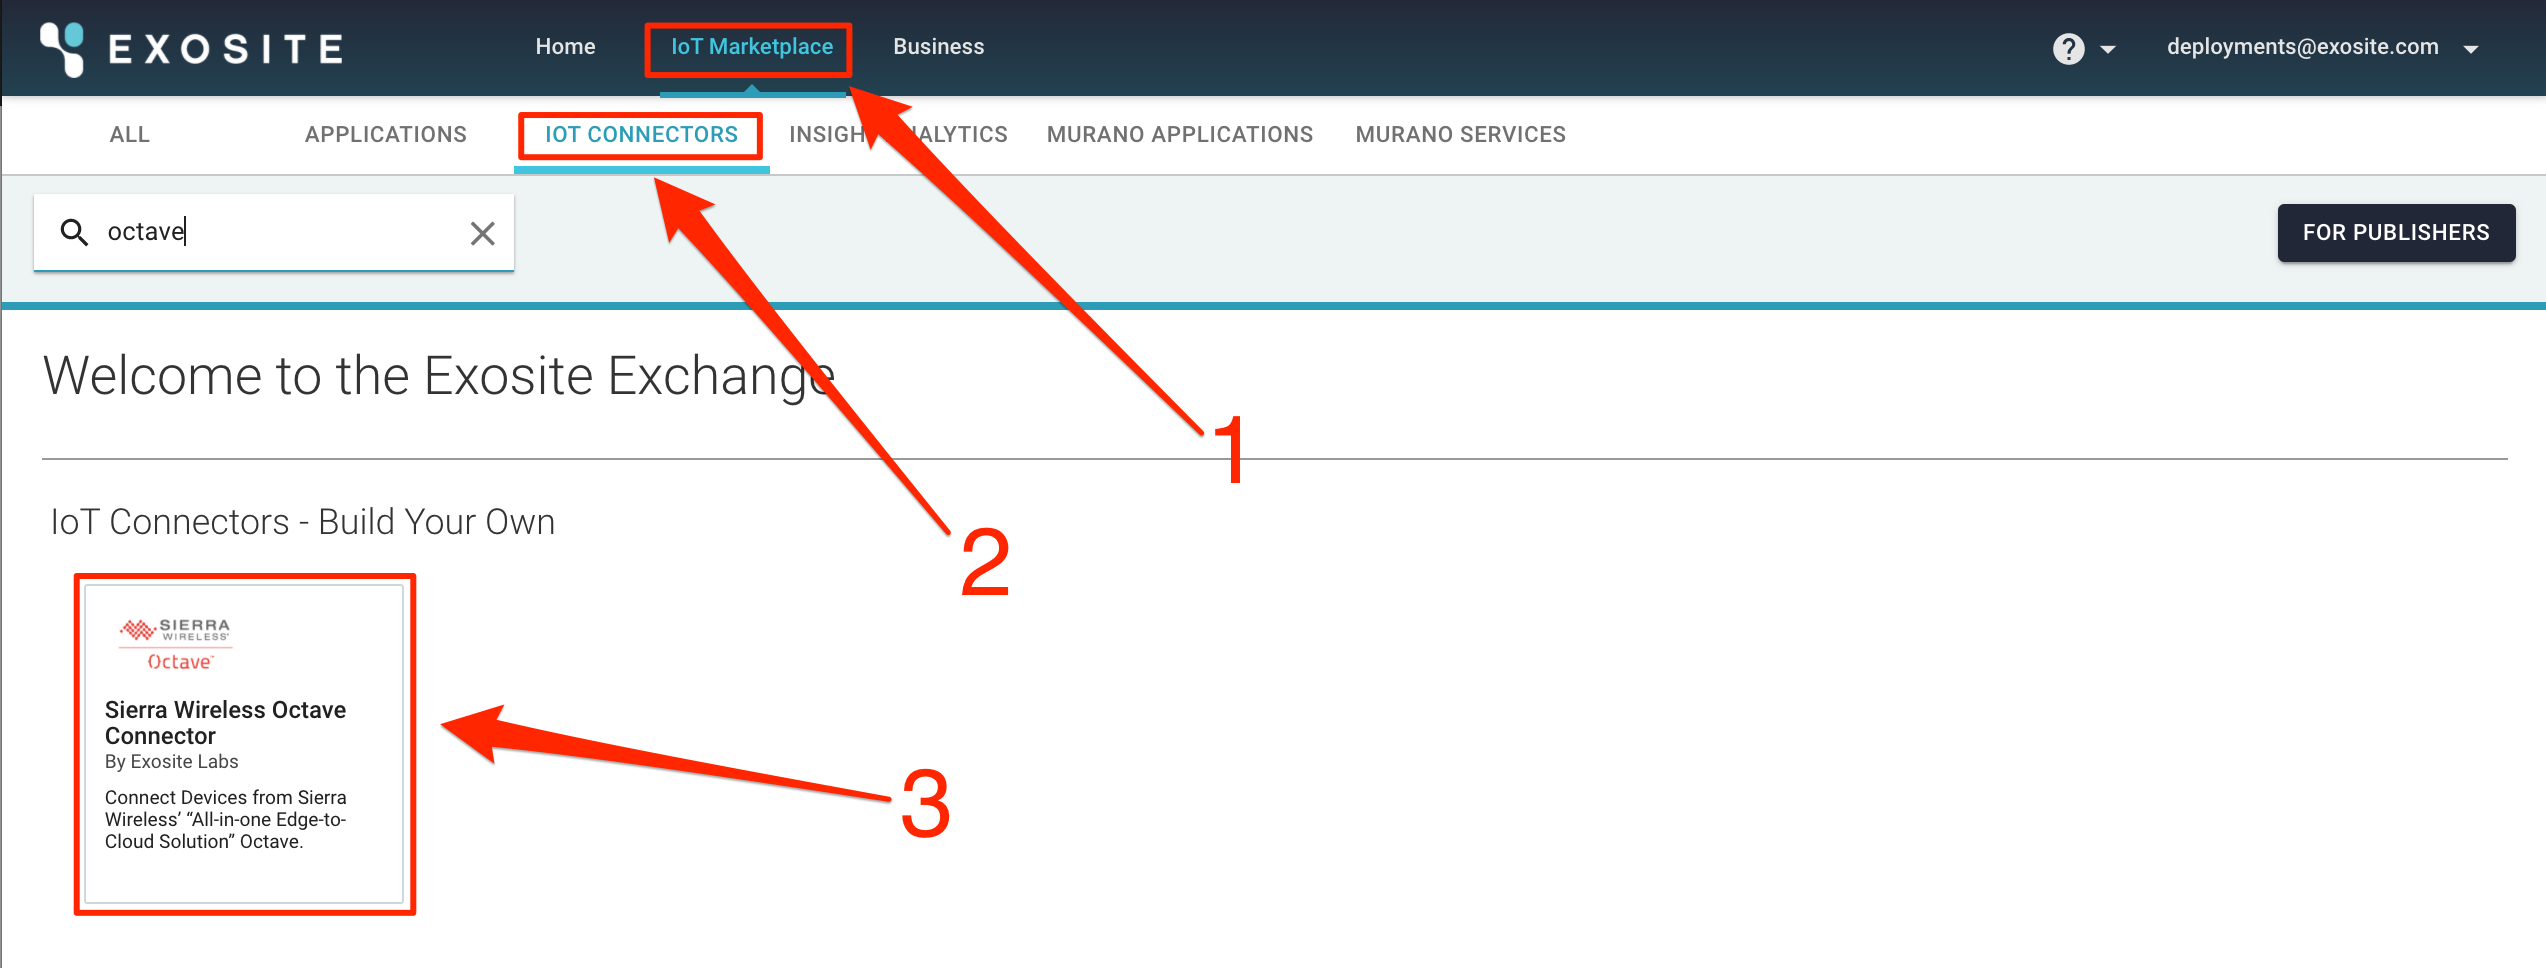
At the top of the window, click on IoT Marketplace.
-
Select the IOT CONNECTOR tab.
- In the top left search bar, type "Octave" to bring up the Octave IoT Connector card and click on it.
-
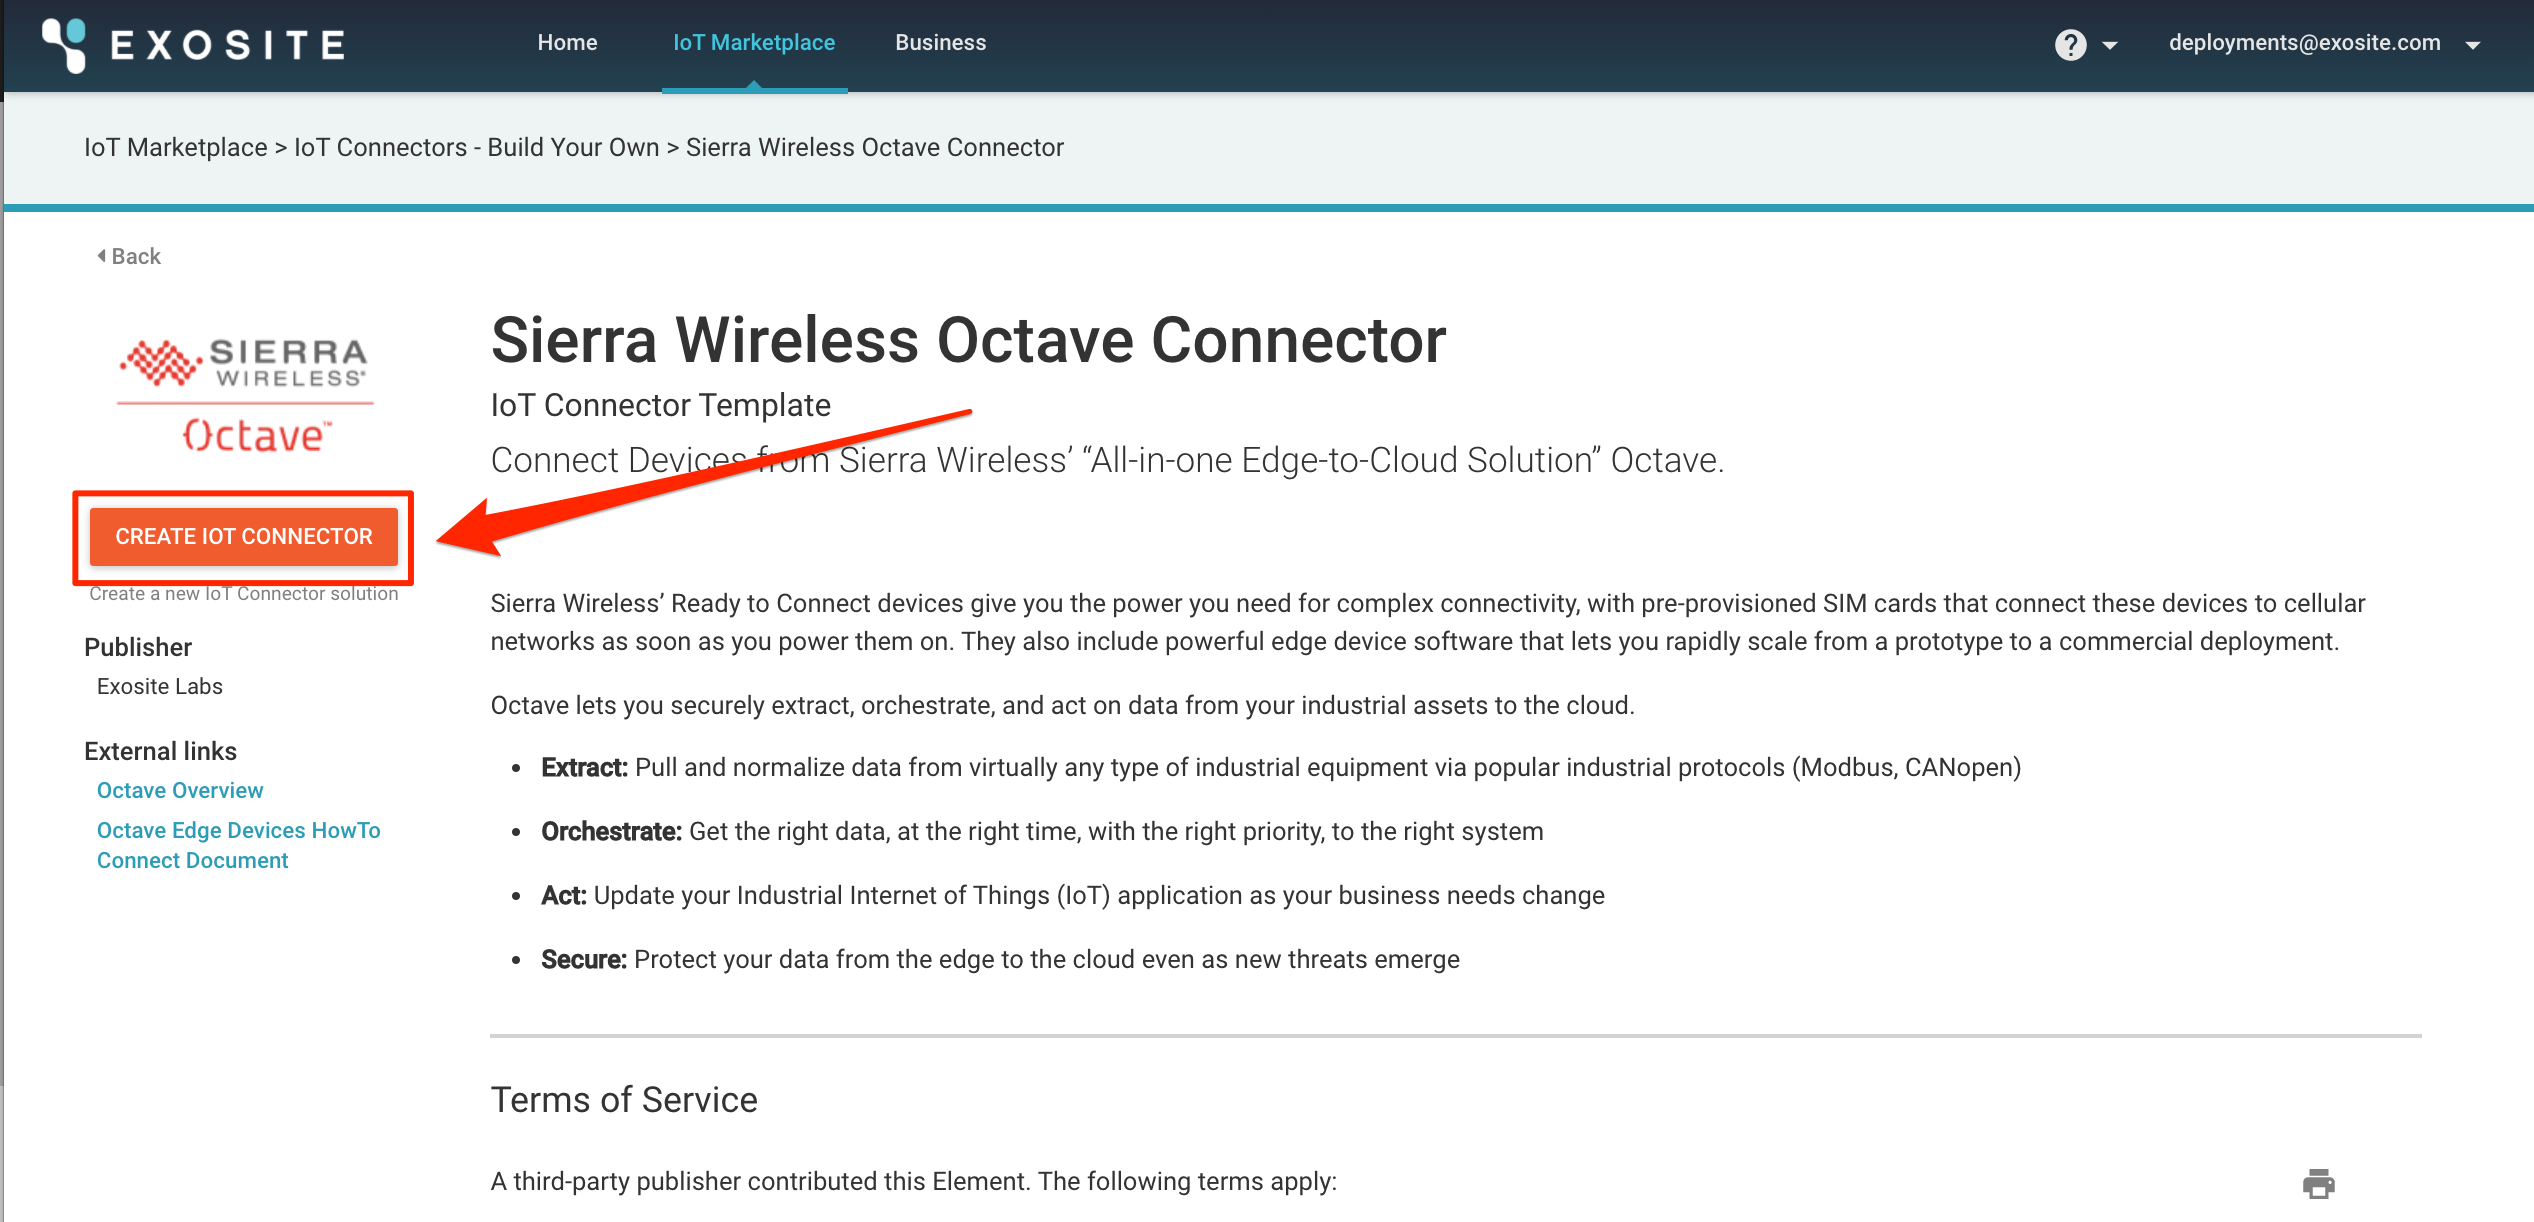
Click on Create IOT Connector, accept the Terms and Conditions, and give your IoT Connector a name.
Link your Octave IoT Connector to ExoSense
-
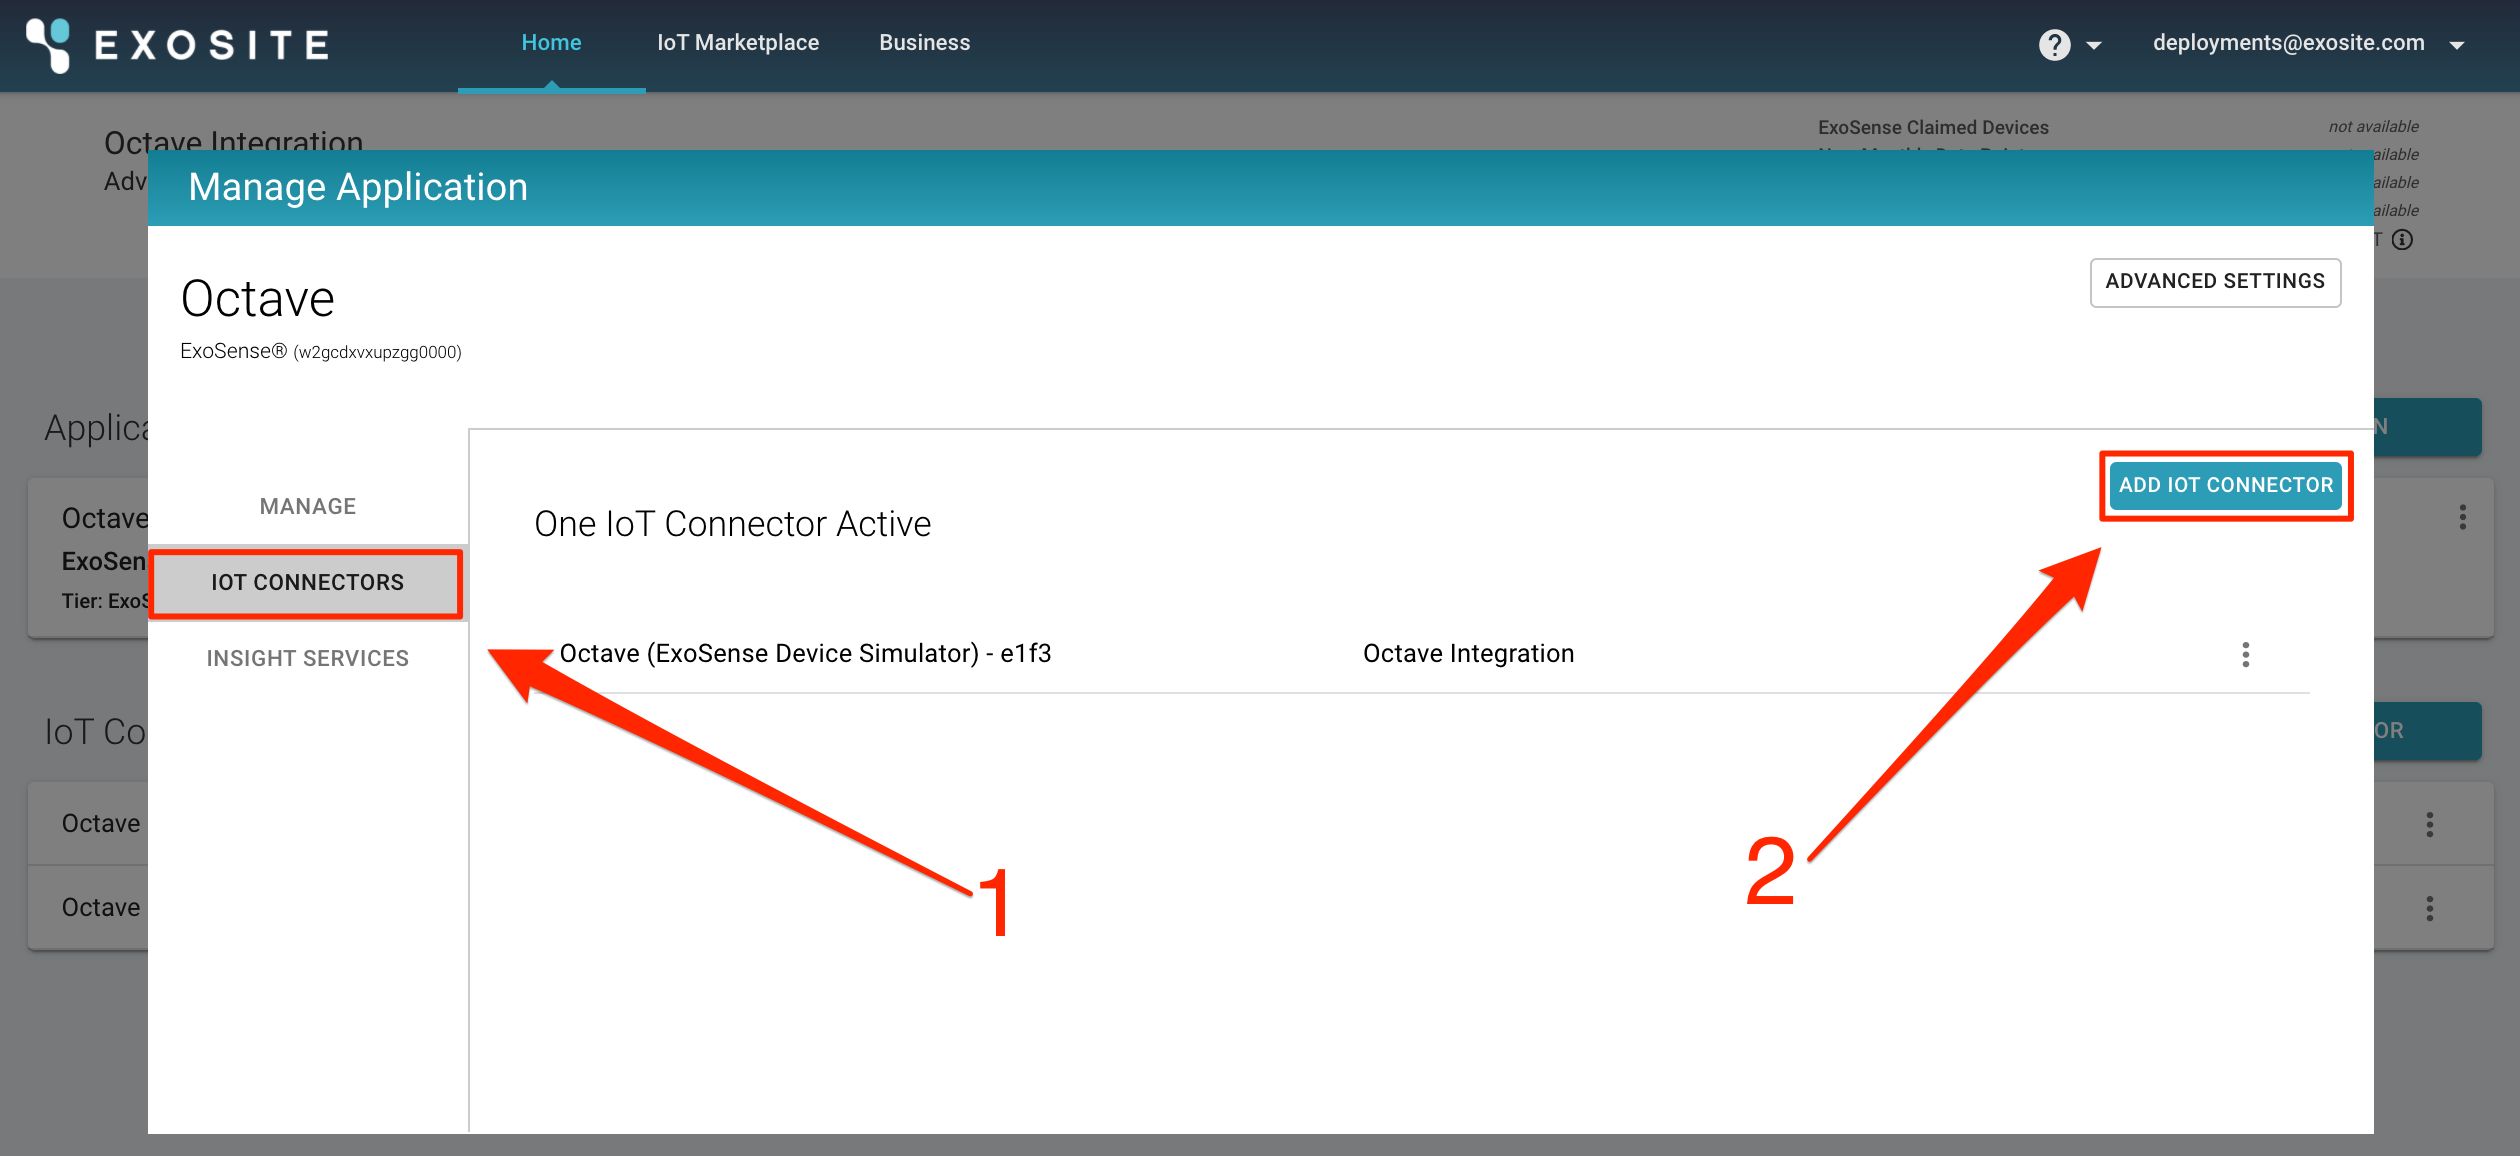
From the BUSINESS homepage, click on your ExoSense Application. From the left-hand menu, select IoT Connectors.
-
Click on Add IoT Connector.
-
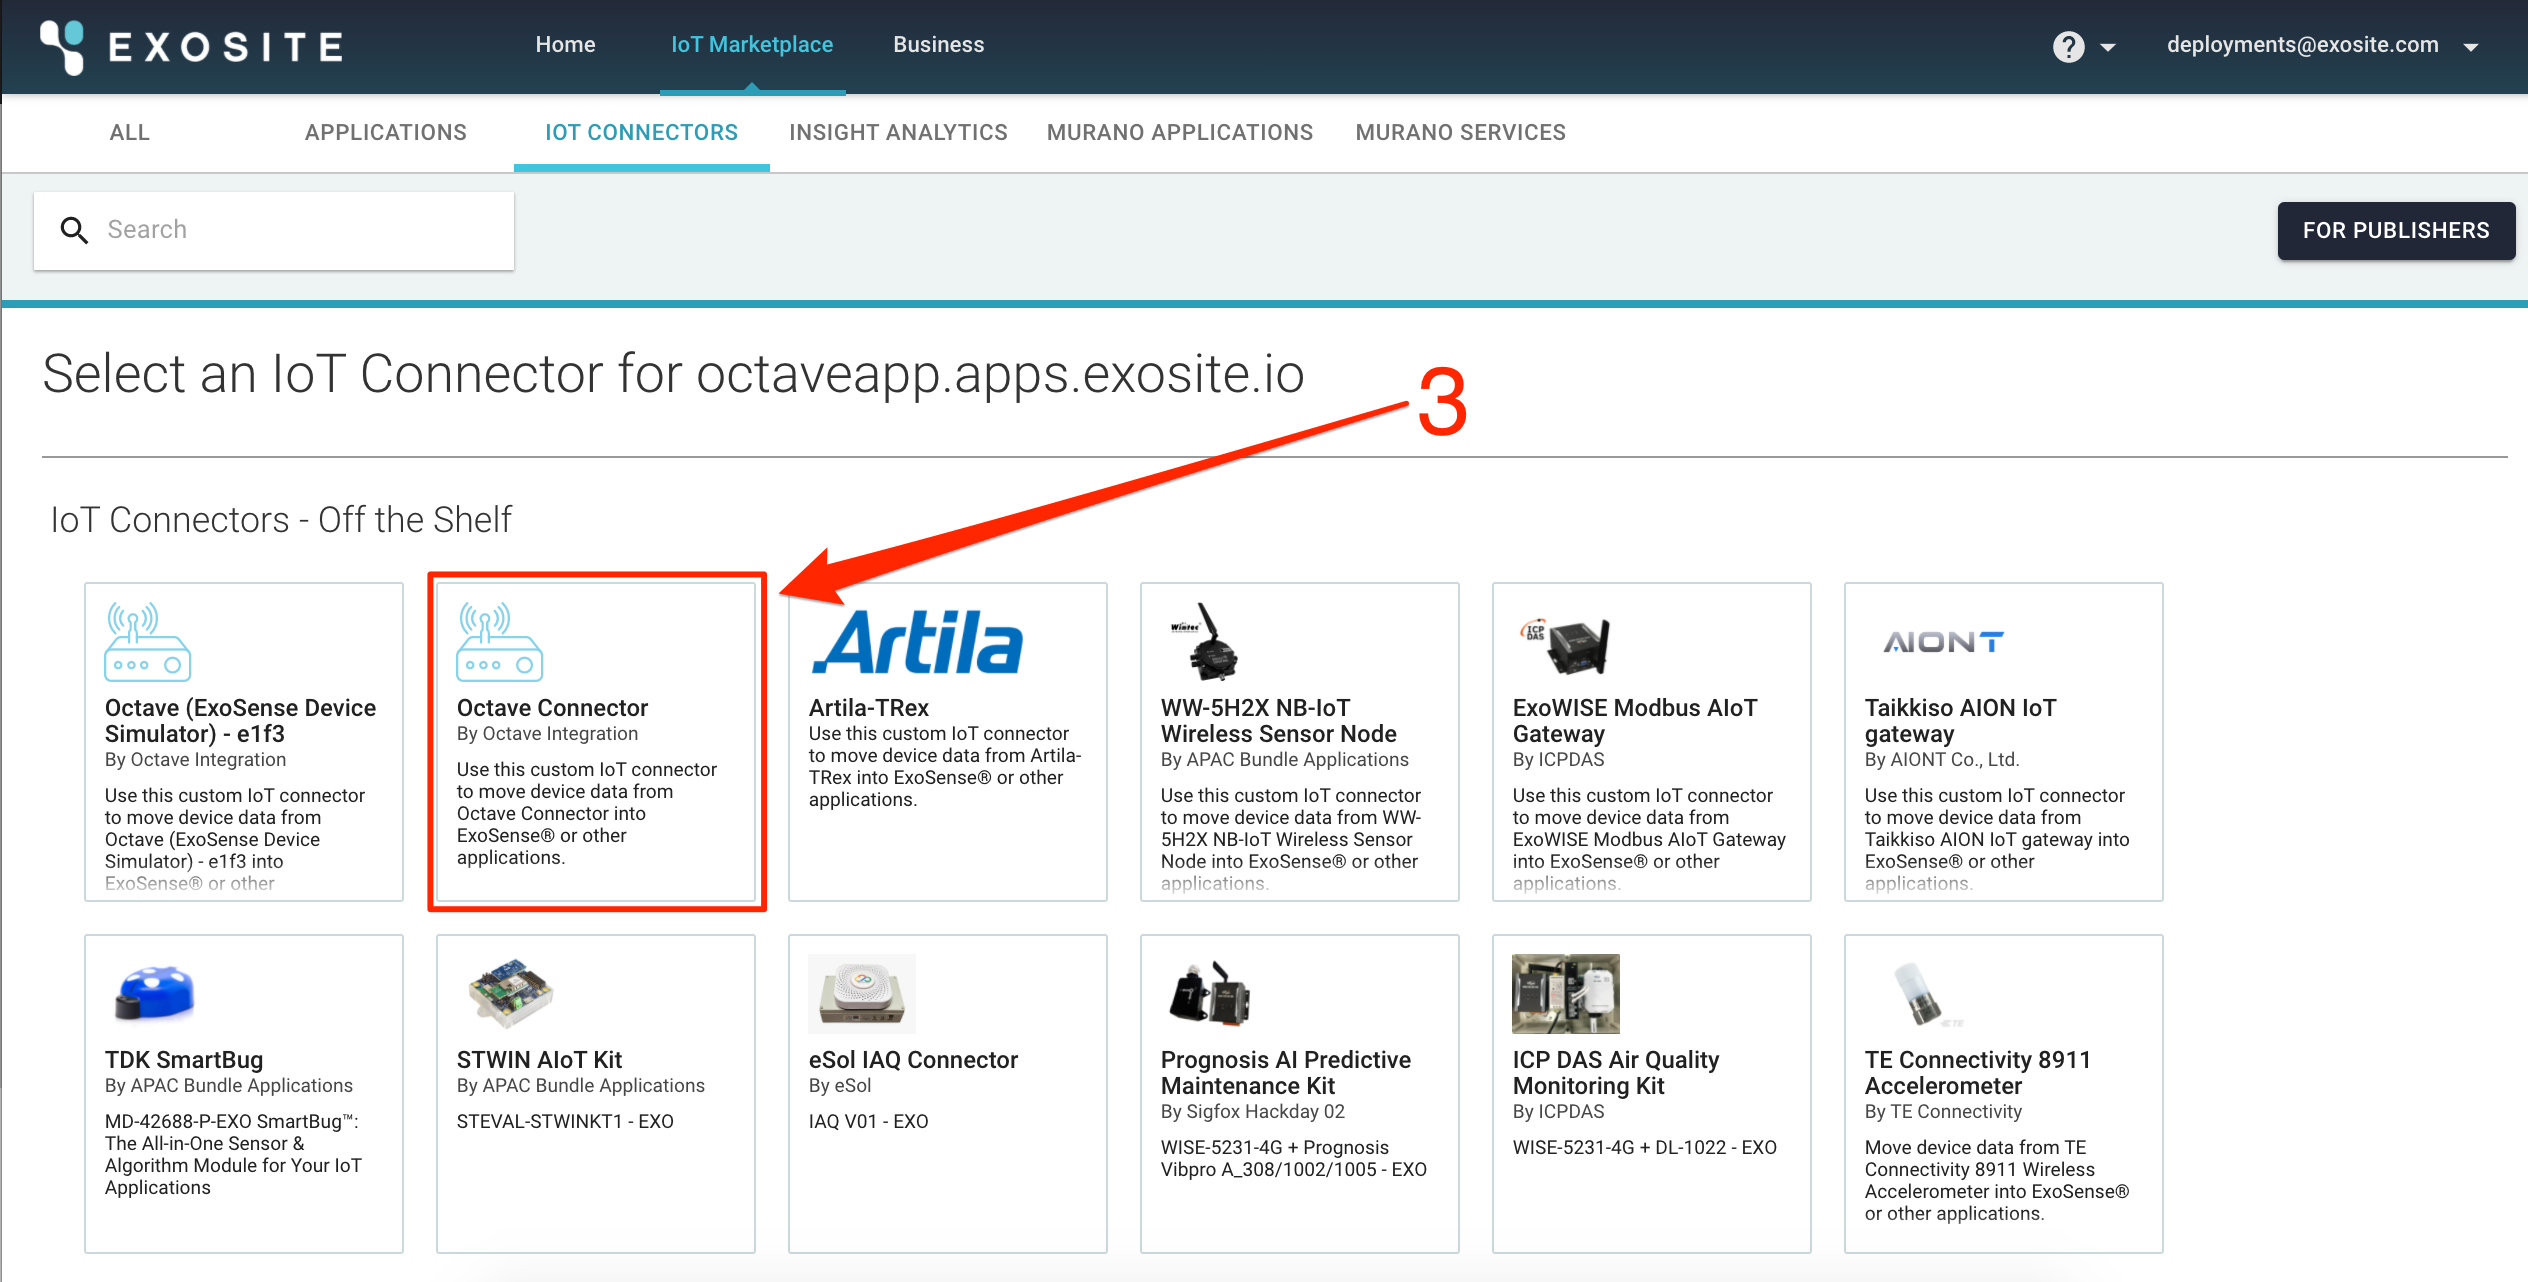
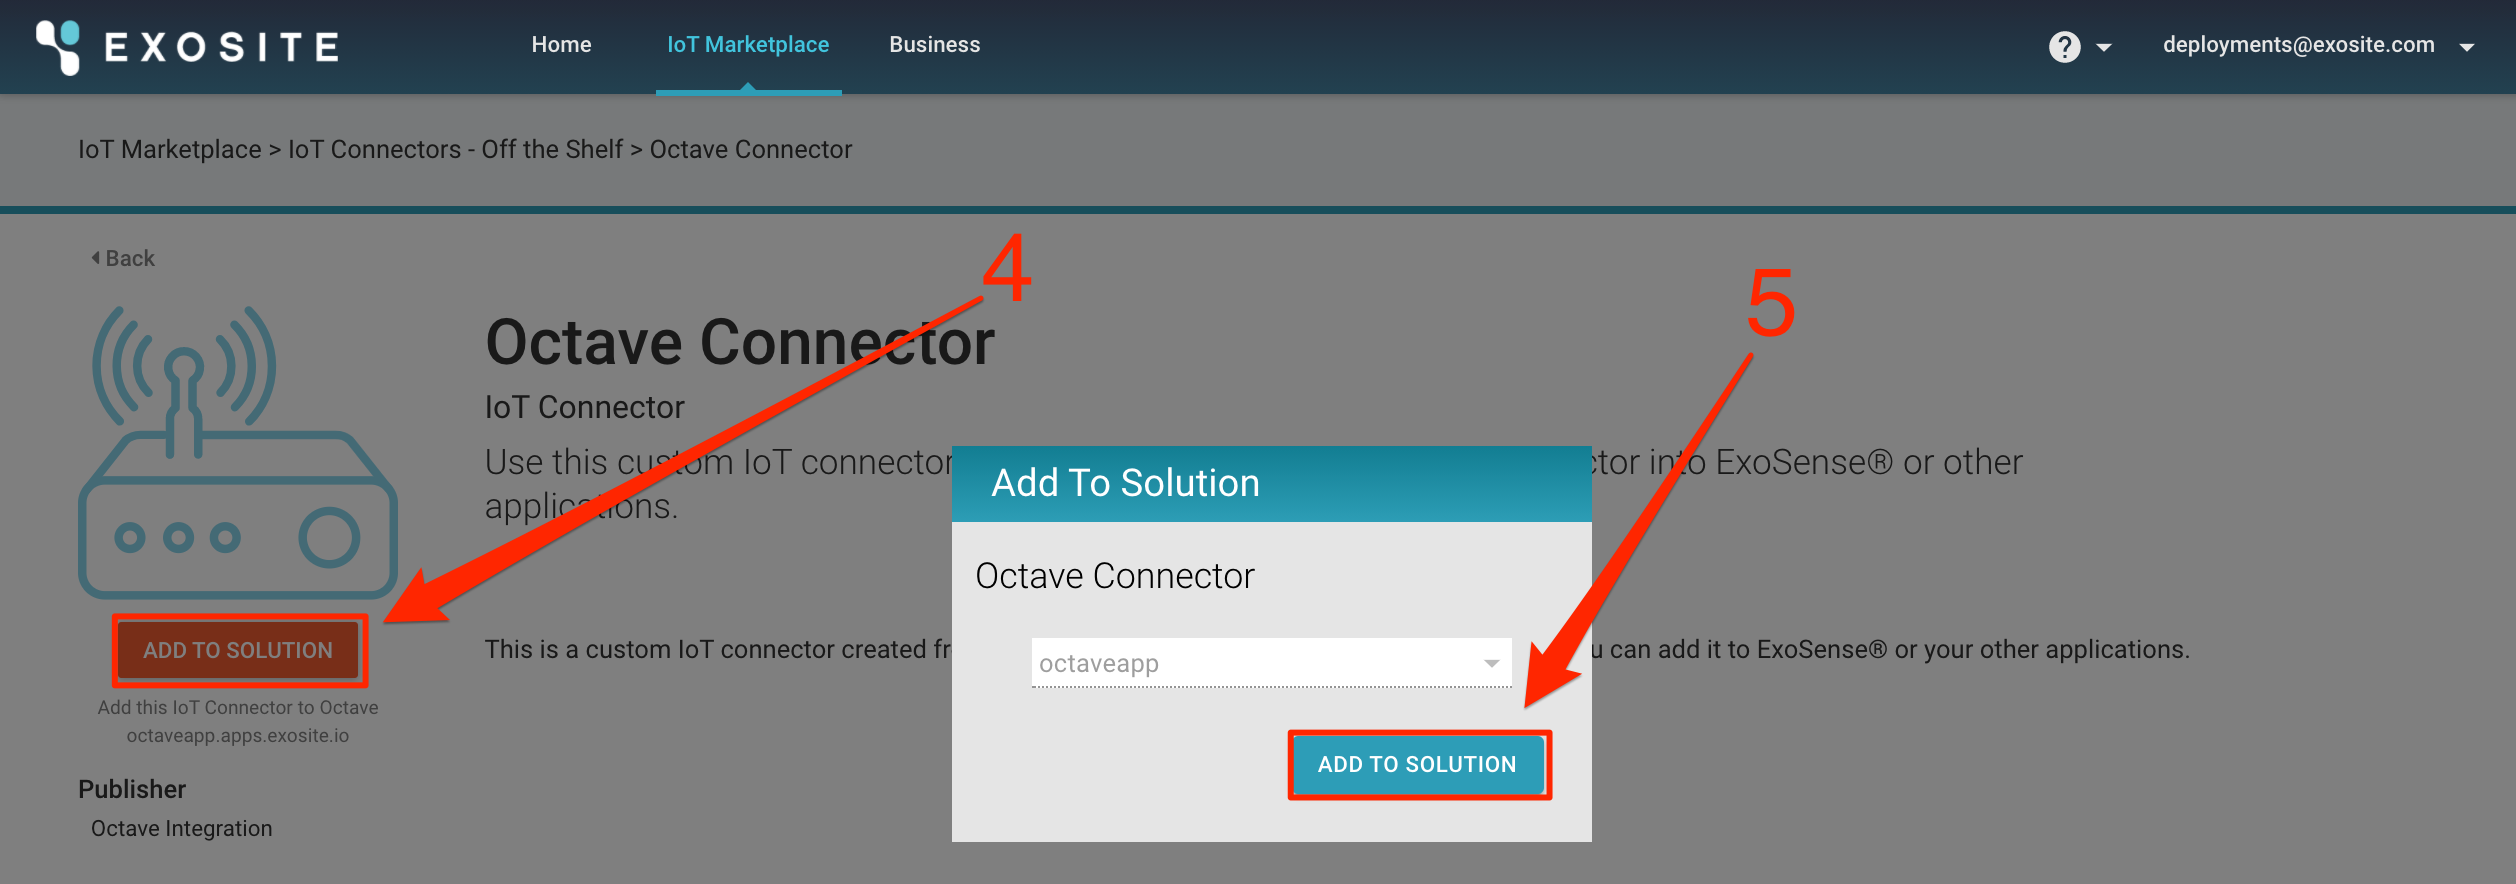
Select your Octave IoT Connector you named earlier in the "IoT Connectors" section.
-
Click on Add To Solution.
-
Make sure your ExoSense Application is selected, and click on Add To Solution in the pop-up window.
Get IoT Connector Endpoint
- From business homepage, click on your IoT Connector. Make sure you click the Sierra Wireless Octave Connector, and not the Device Simulator.
-
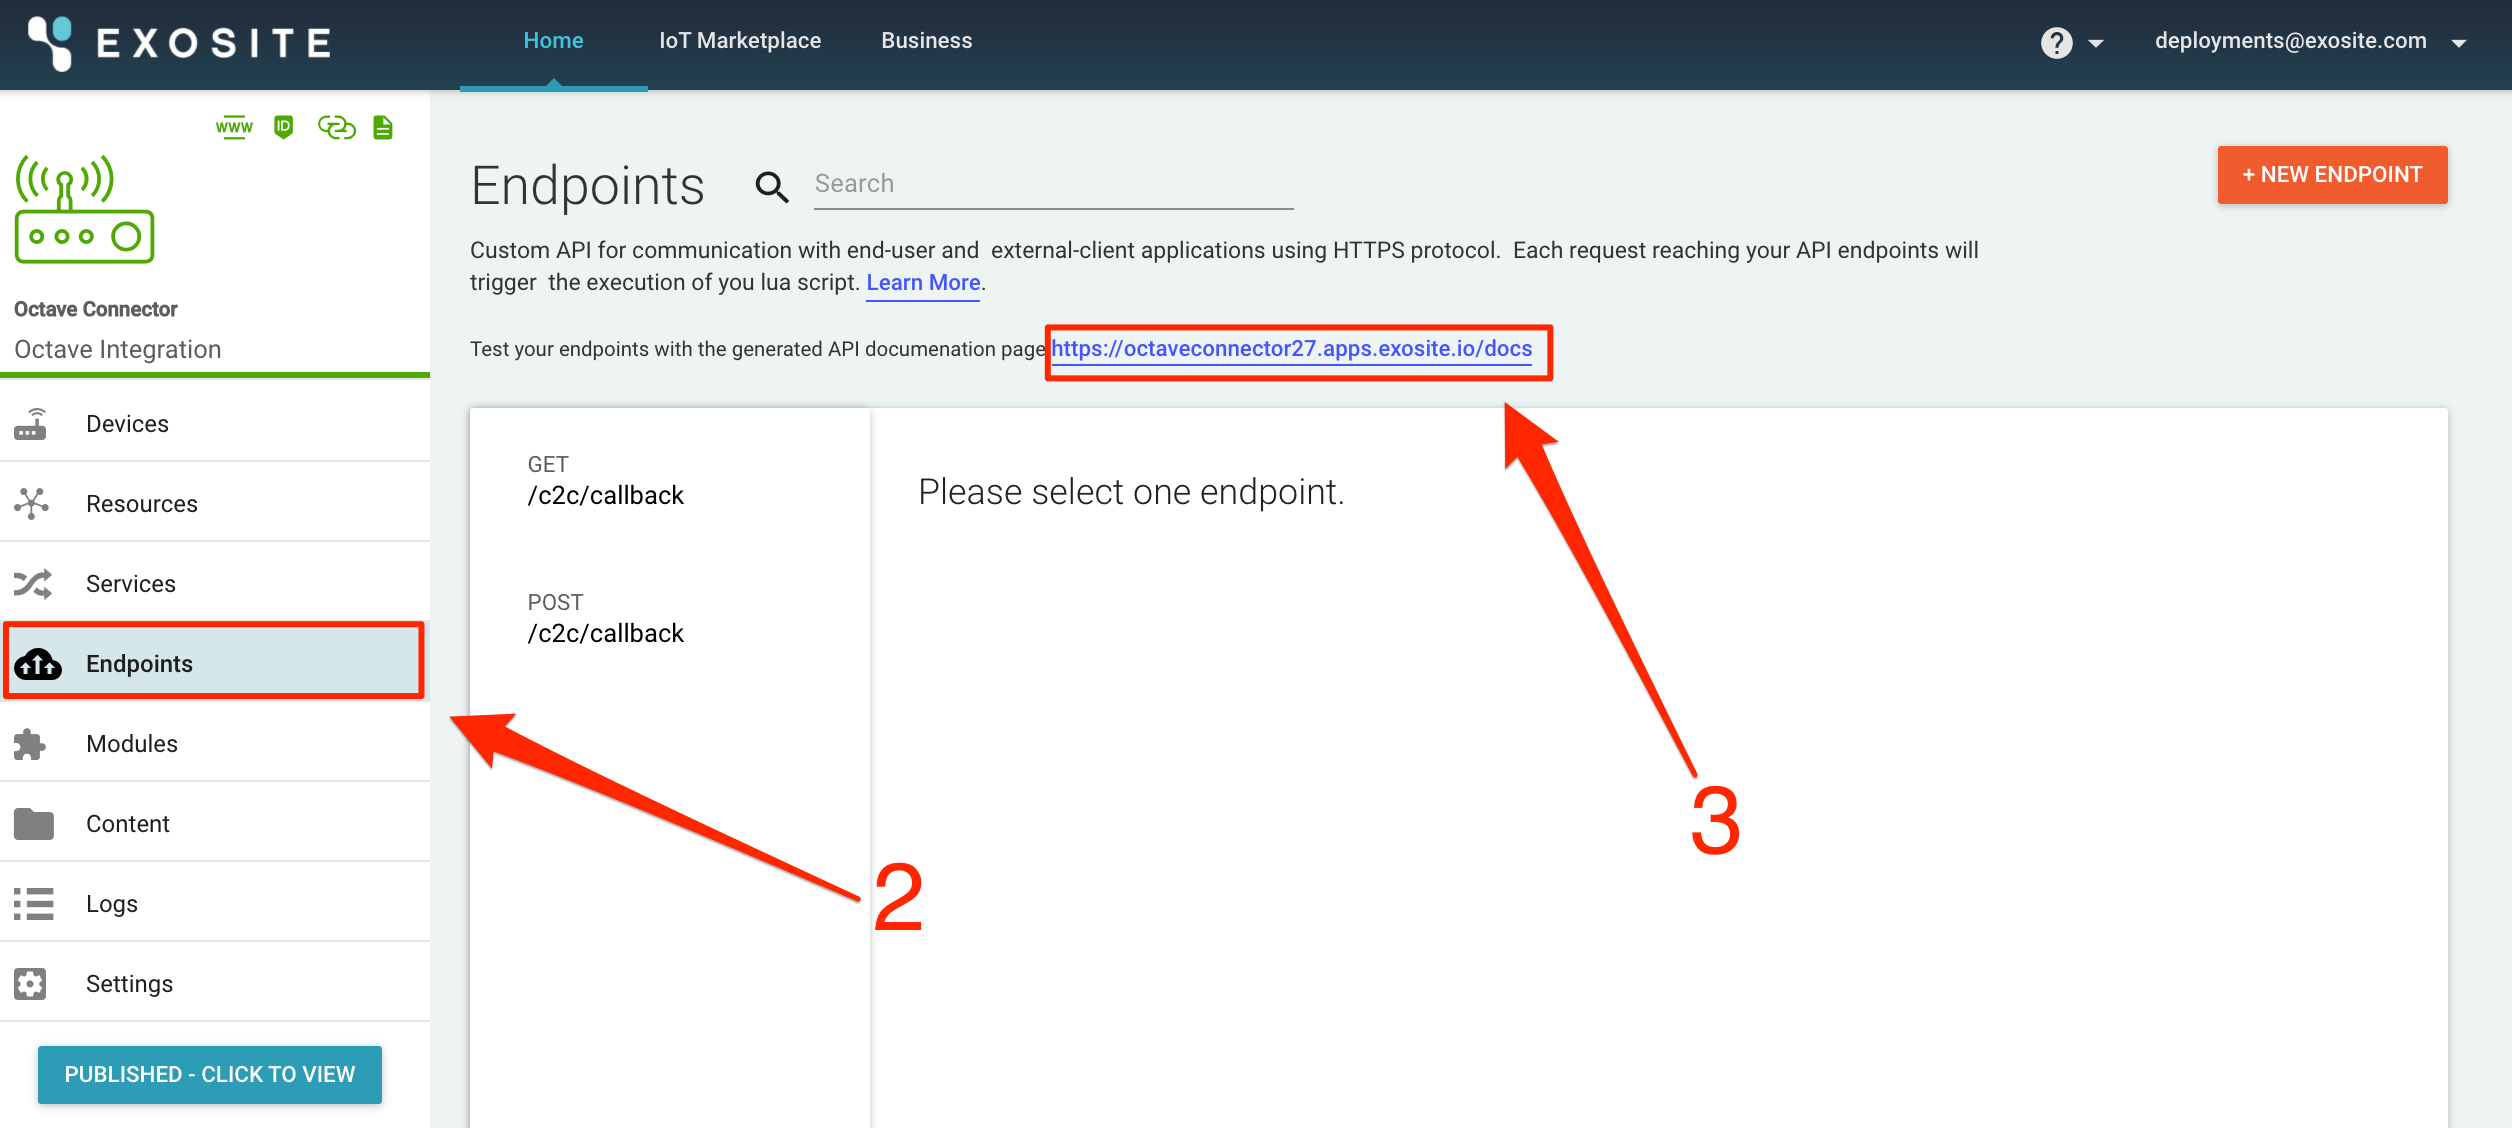
Click on Endpoints located on the left menu.
-
Near the top of the page, you will find the base of your endpoint located above the list 0f c2c/callback endpoints. Replace /data with /c2c/callback. It should look similar to the following:
https://octaveconnector81.apps.exosite.io/c2c/callback -
Copy down this endpoint for later use in your Octave Web Portal.
Configure the Octave Web Portal
Login to your Octave Web Portal by going to https://octave.sierrawireless.io.
Sierra Wireless hardware support
If you need additional help getting your Sierra Hardware connected to the Octave Web Portal, go to https://docs.octave.dev/docs/getting-started-with-the-fx30 to get started
Creating a new Connector
- Navigate to Build > Cloud > Connectors.
- Click Add Cloud Connector.
- Select the HTTP Cloud Connector type. The New cloud connector editing screen appears.
Configure Octave Cloud Connector
-
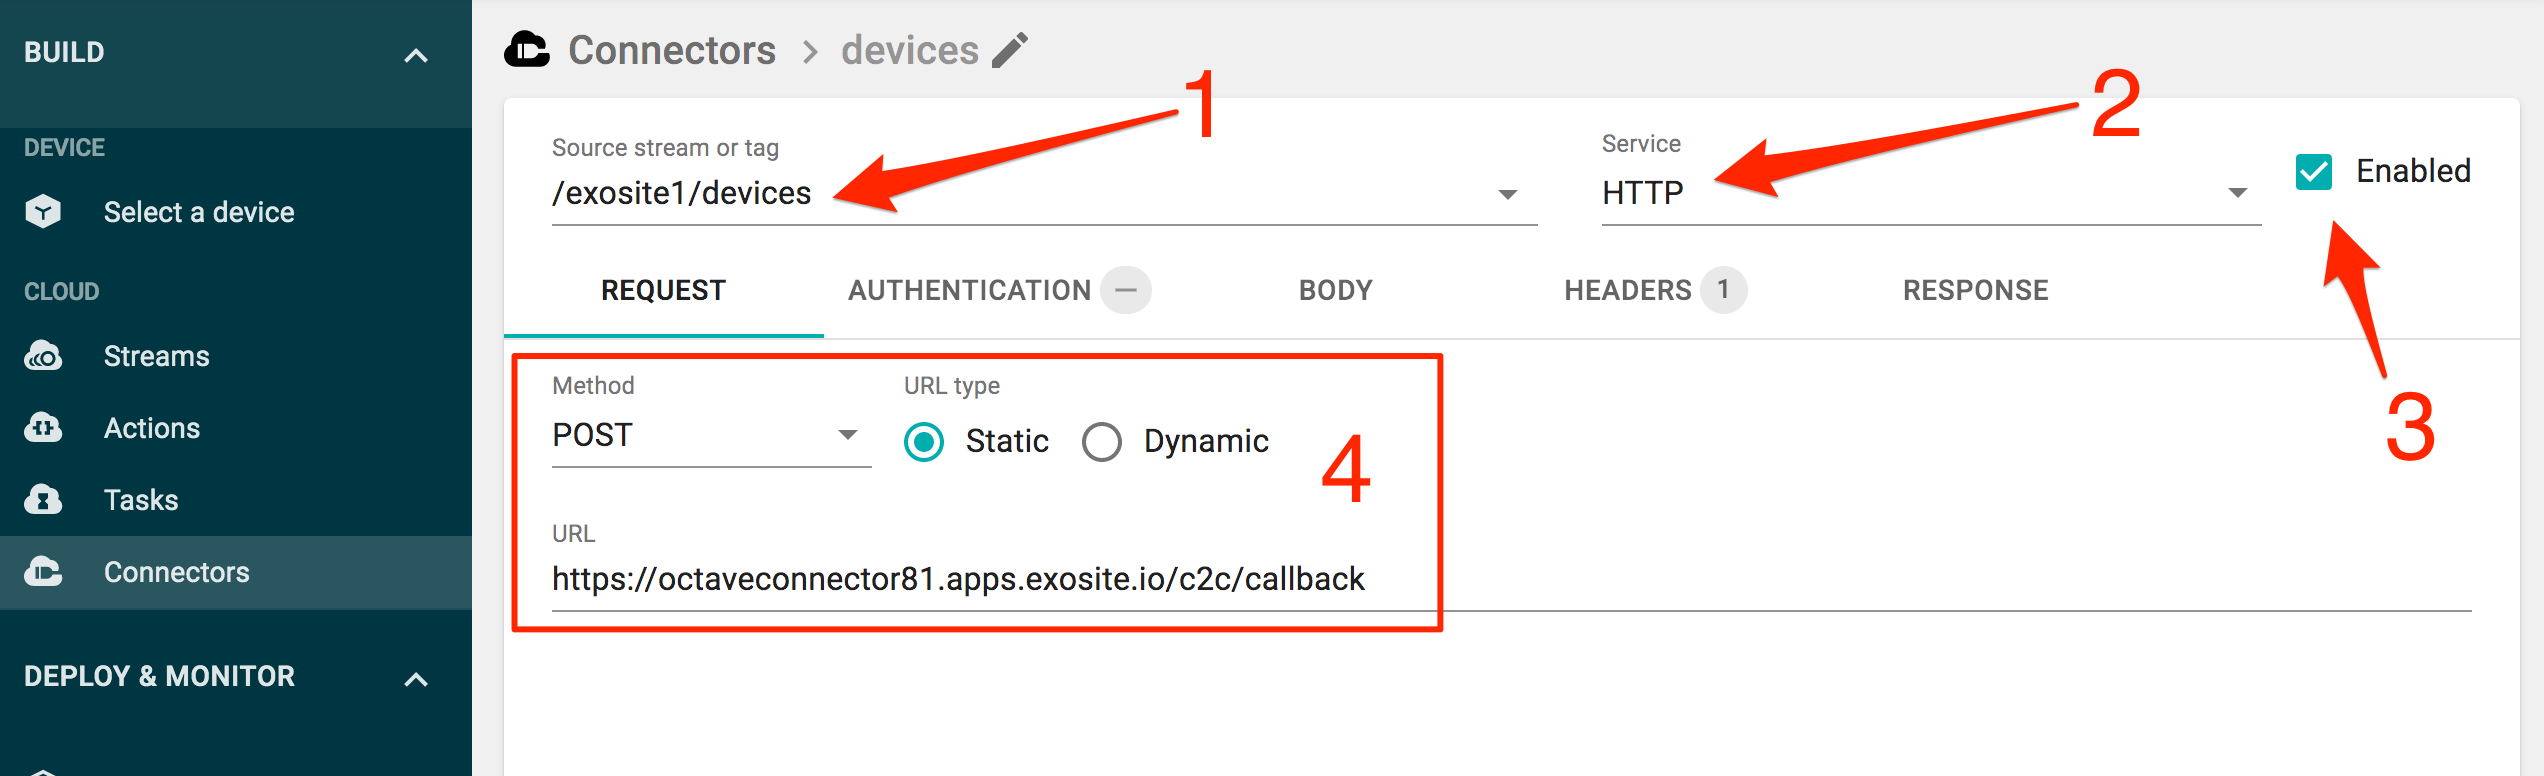
Select or start typing a name in the Source Stream or tag dropdown. This will be the source of Events. Set Source stream or tag to Stream to use the data values from a Stream in Octave.
-
Select HTTP under the Service dropdown menu.
- Check the Enabled box to make sure the Connector is active.
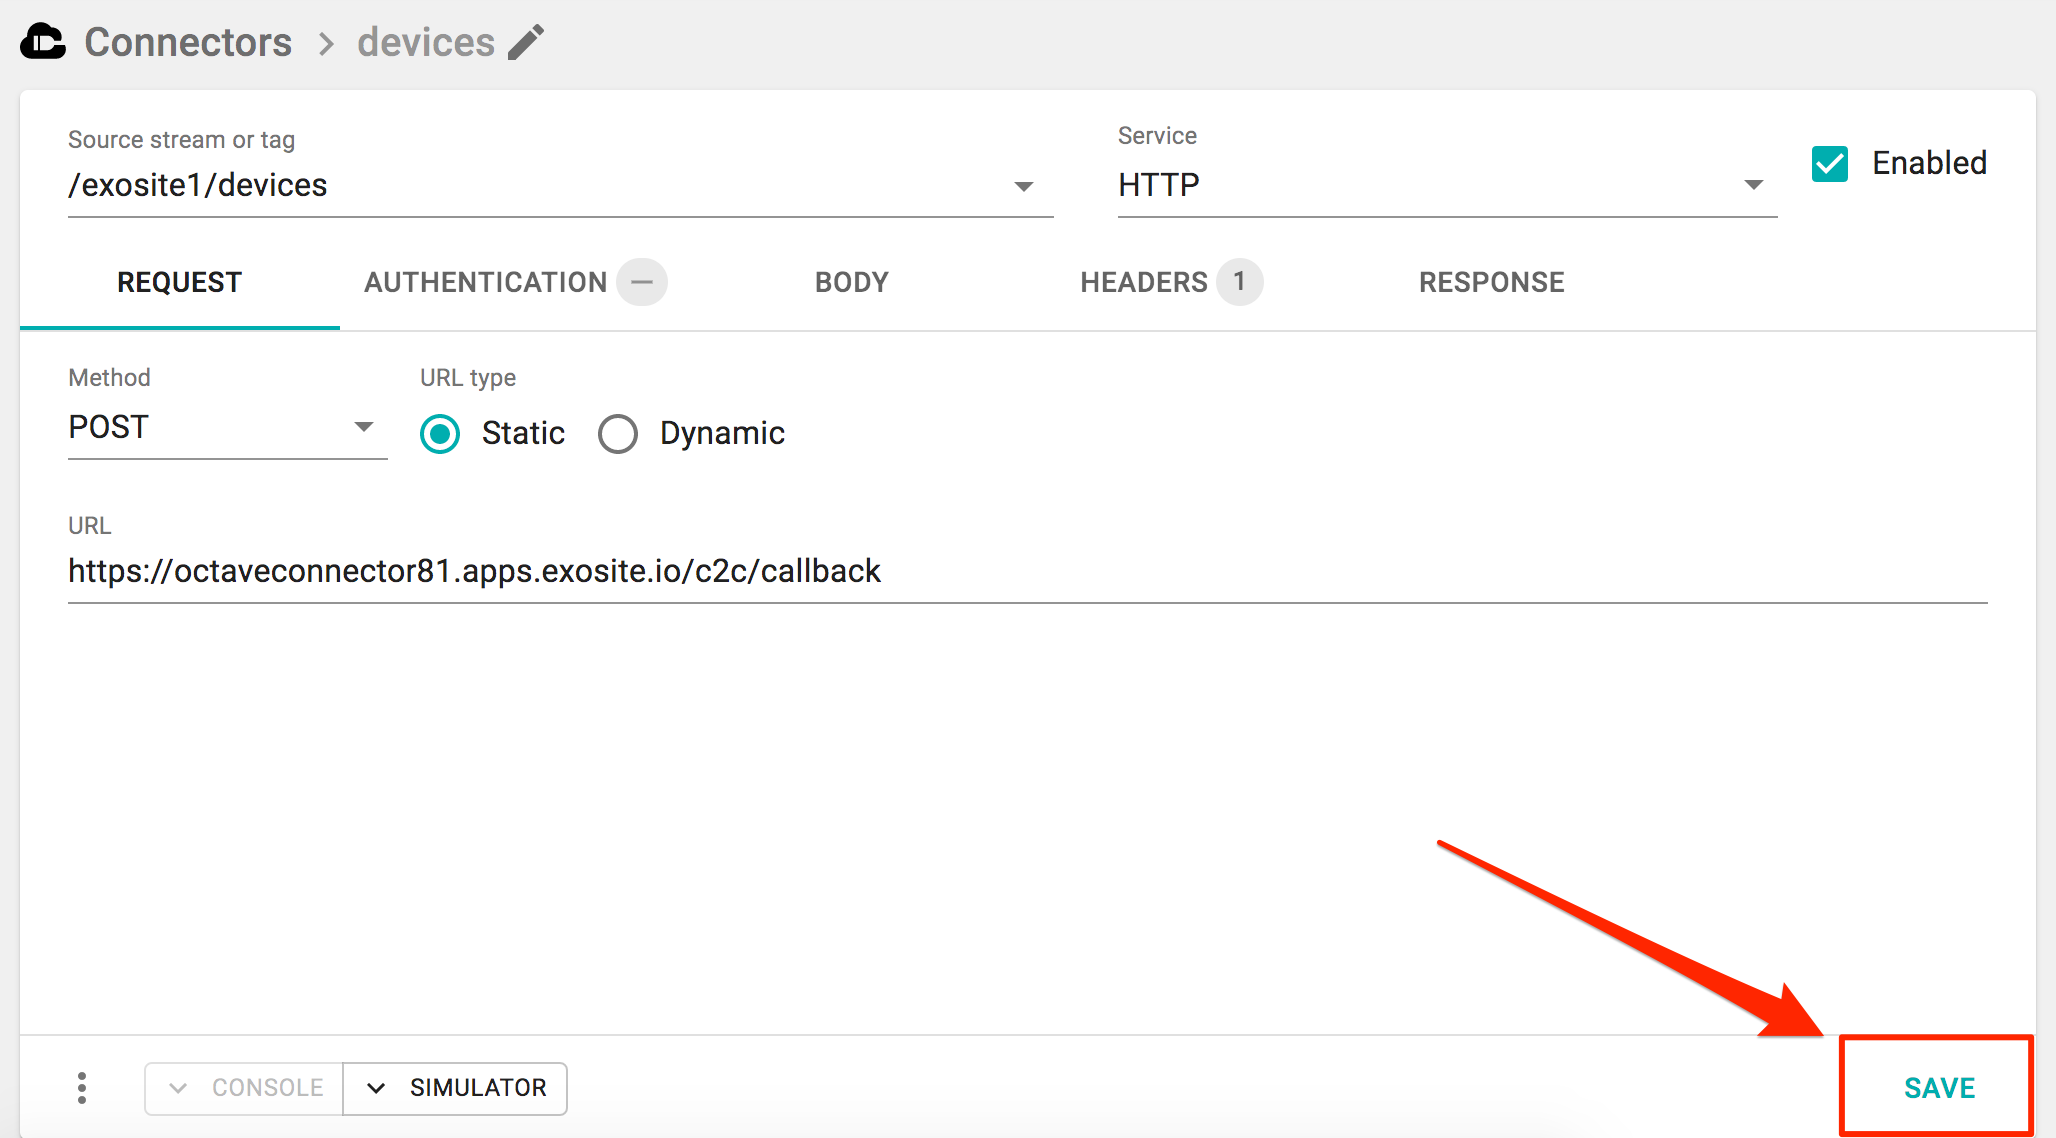
- Configure the type of REST request on the Request tab and enter the Exosite Endpoint in the URL field. Set the URL type to Static and the method to POST.
-
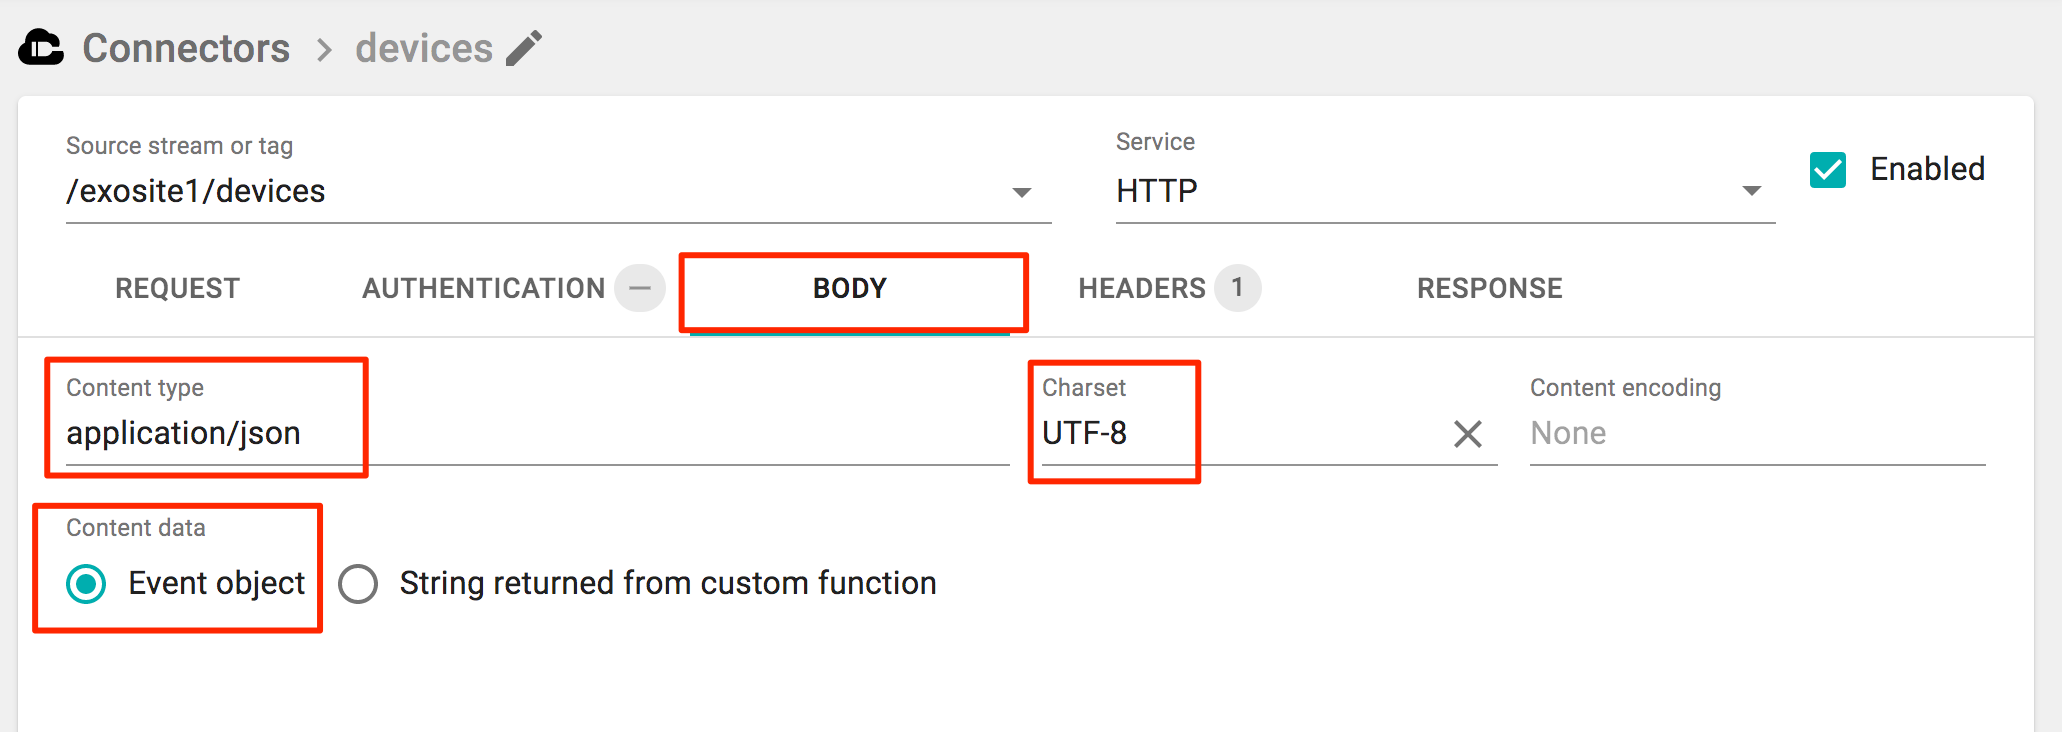
Click the Body tab and select Event object as the Content data. This will send the entire Event as a JSON object to the Exosite. Also set Content-Type to application/json and make sure that charset is set to UTF-8
-
Click SAVE to activate your Connector.
Expected Data Format
Currently, the Exosite platform is expecting data to be in the form of a set of key/value pairs under the elems tag within the outgoing payload. For example, the body should contain data in the following schema:
{"elems":
  {"sensor 1": 100,"sensor 2": 200}
}
Authentication
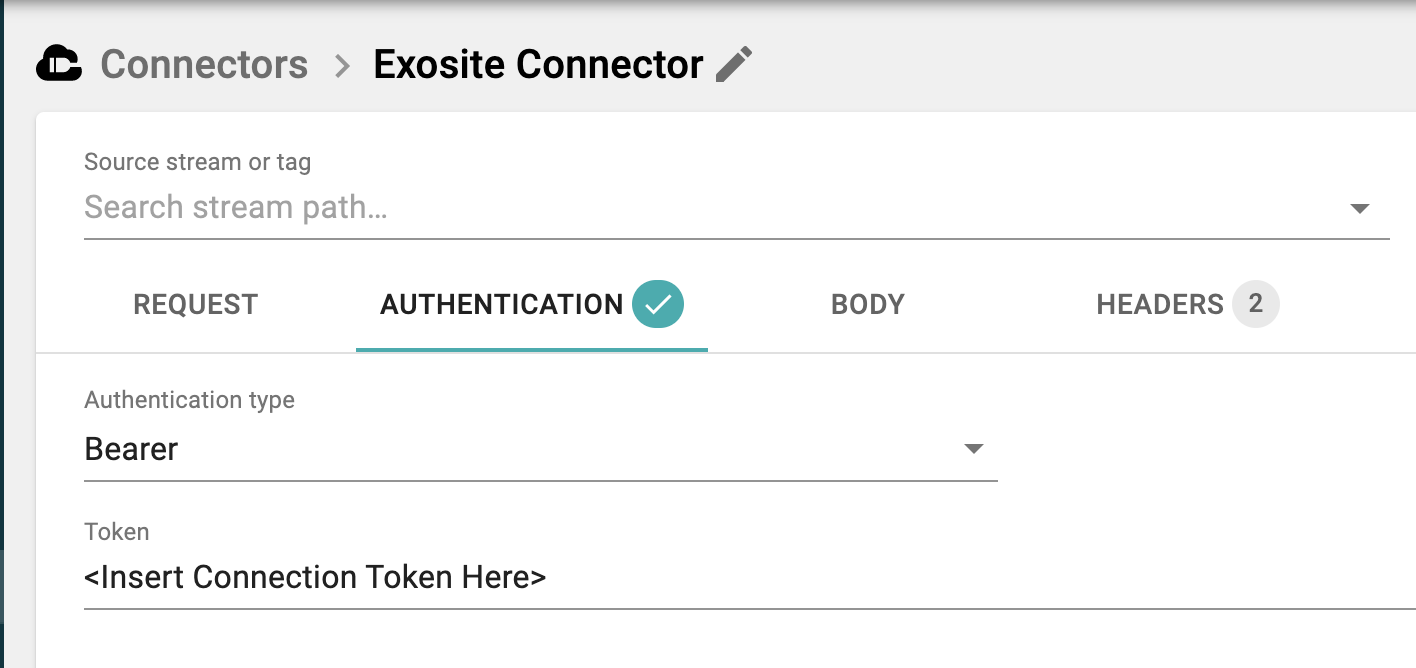
Authentication can be added to the connection.
To add Authentication, in Octave, select the "Authentication" tab and use the "Bearer" token type.
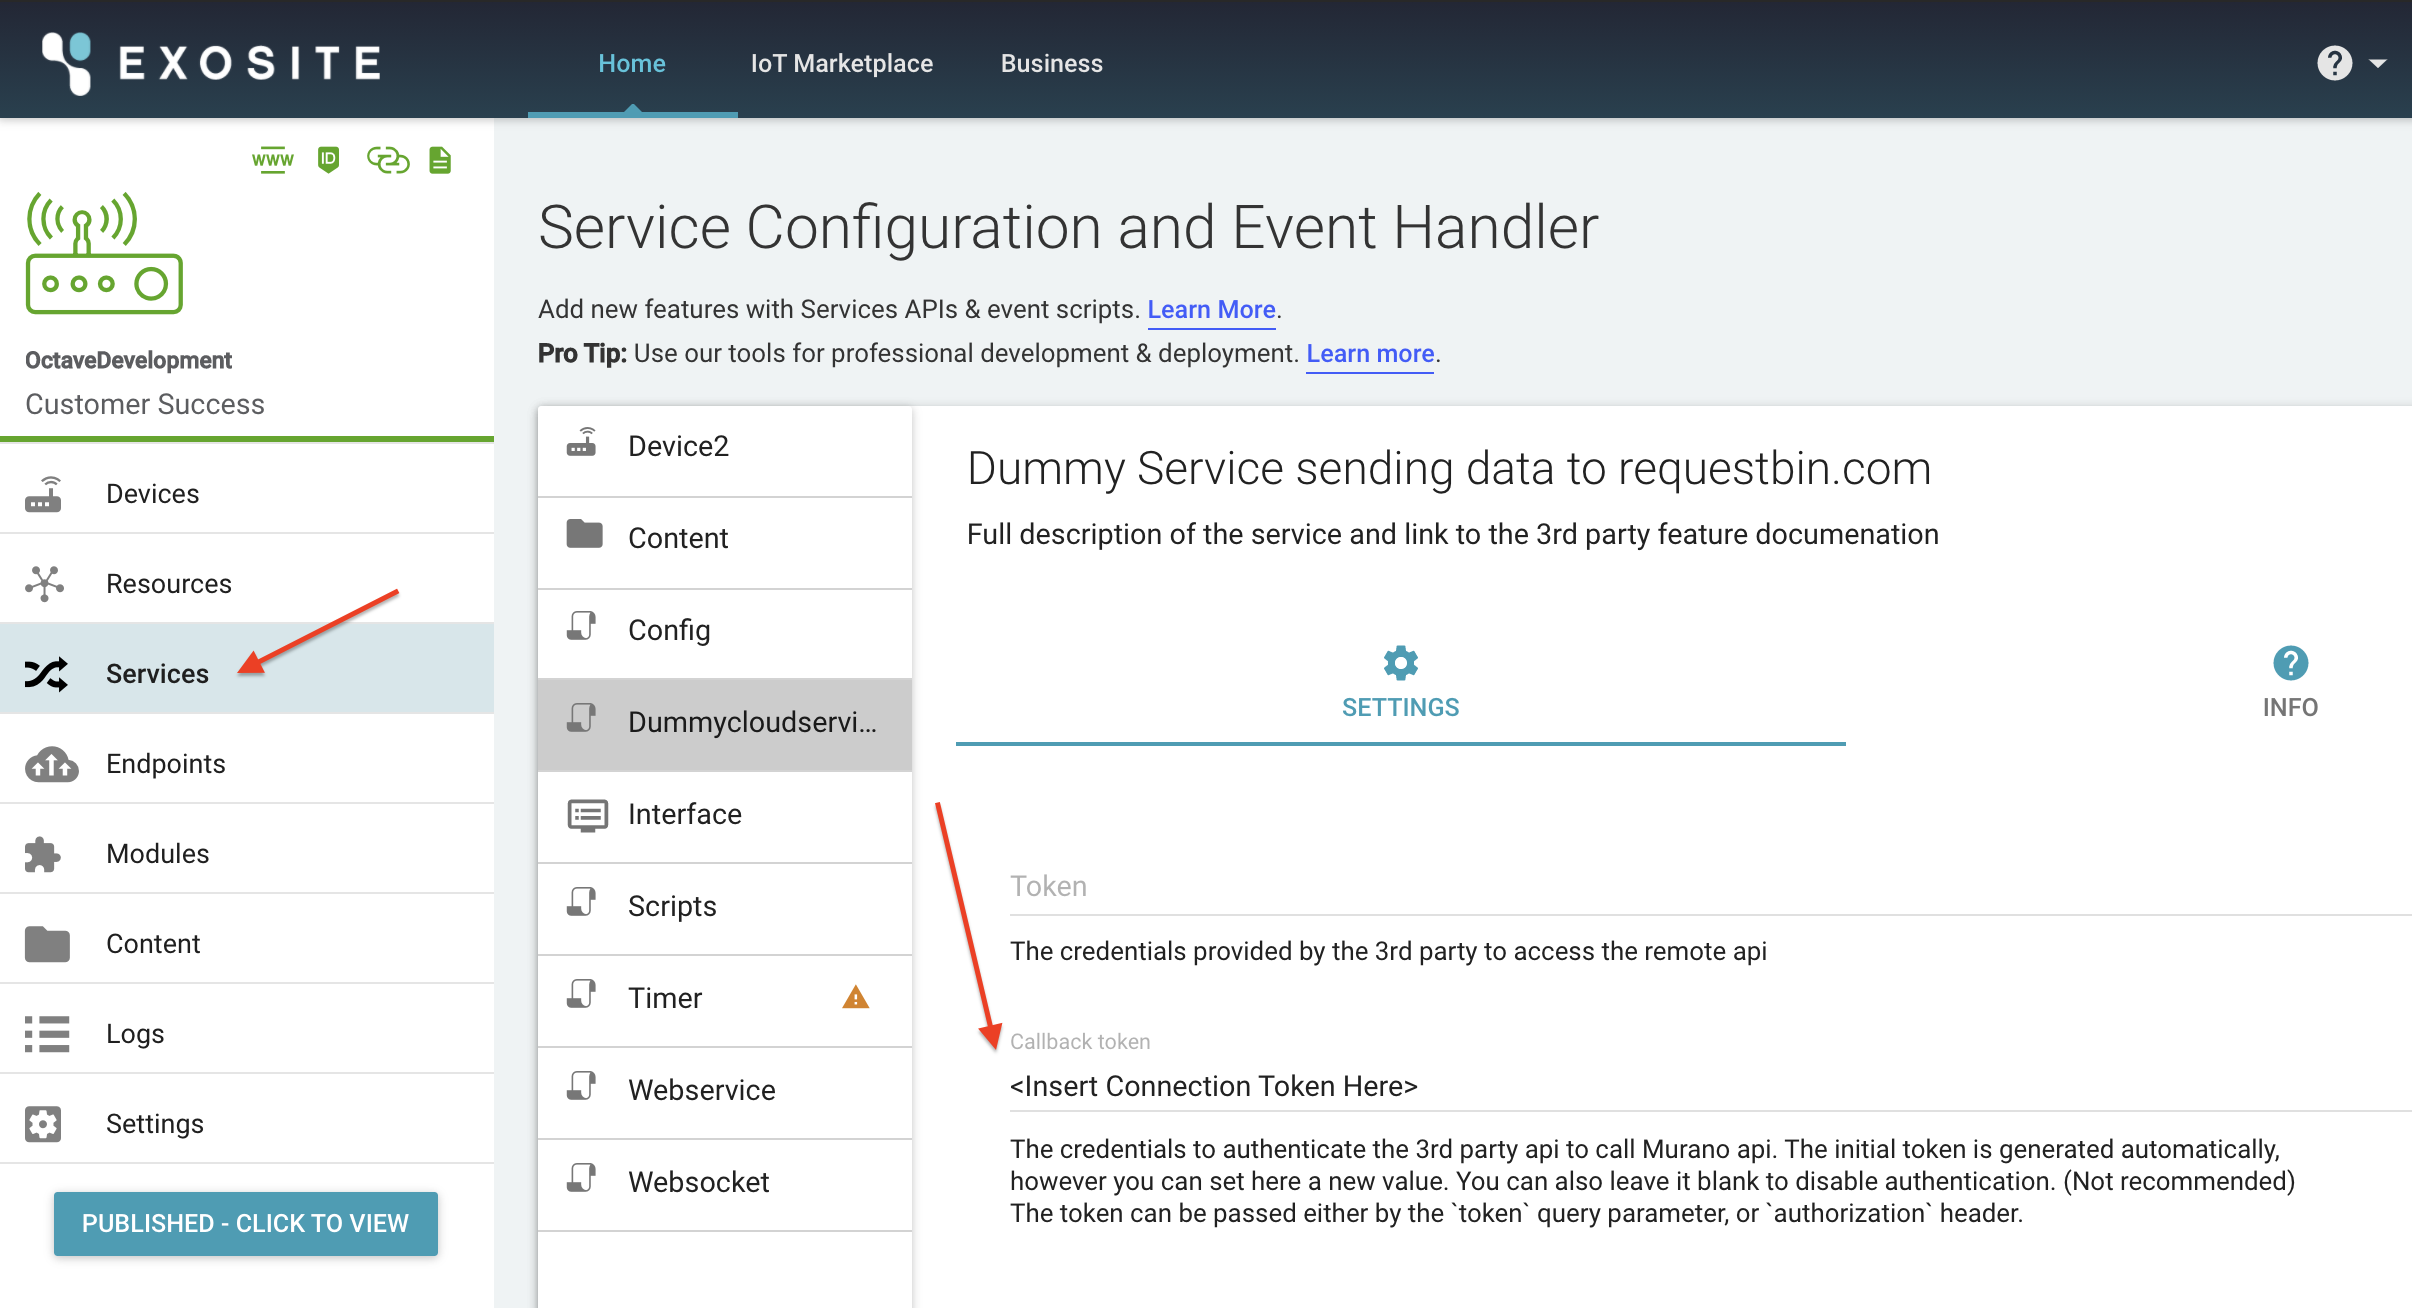
In the Exosite platform, navigate to your Octave IoT Connector. Navigate to the "Services" tab, select "Dummycloudservice", and input the same token into the "Callback token" field
Configure your Device in ExoSense
Claim your device
Now that your Octave device is streaming data to Exosite, you will need to build the config_io in order to inform the ExoSense Application about the type of data being reported. The first step is to claim your device in ExoSense.
Configure Channels (device config_io)
-
Once your device is claimed, click on the Devices tab.

-
Find your newly claimed device and click it's name to open up the Device page.
-
Click on the CHANNELS tab.
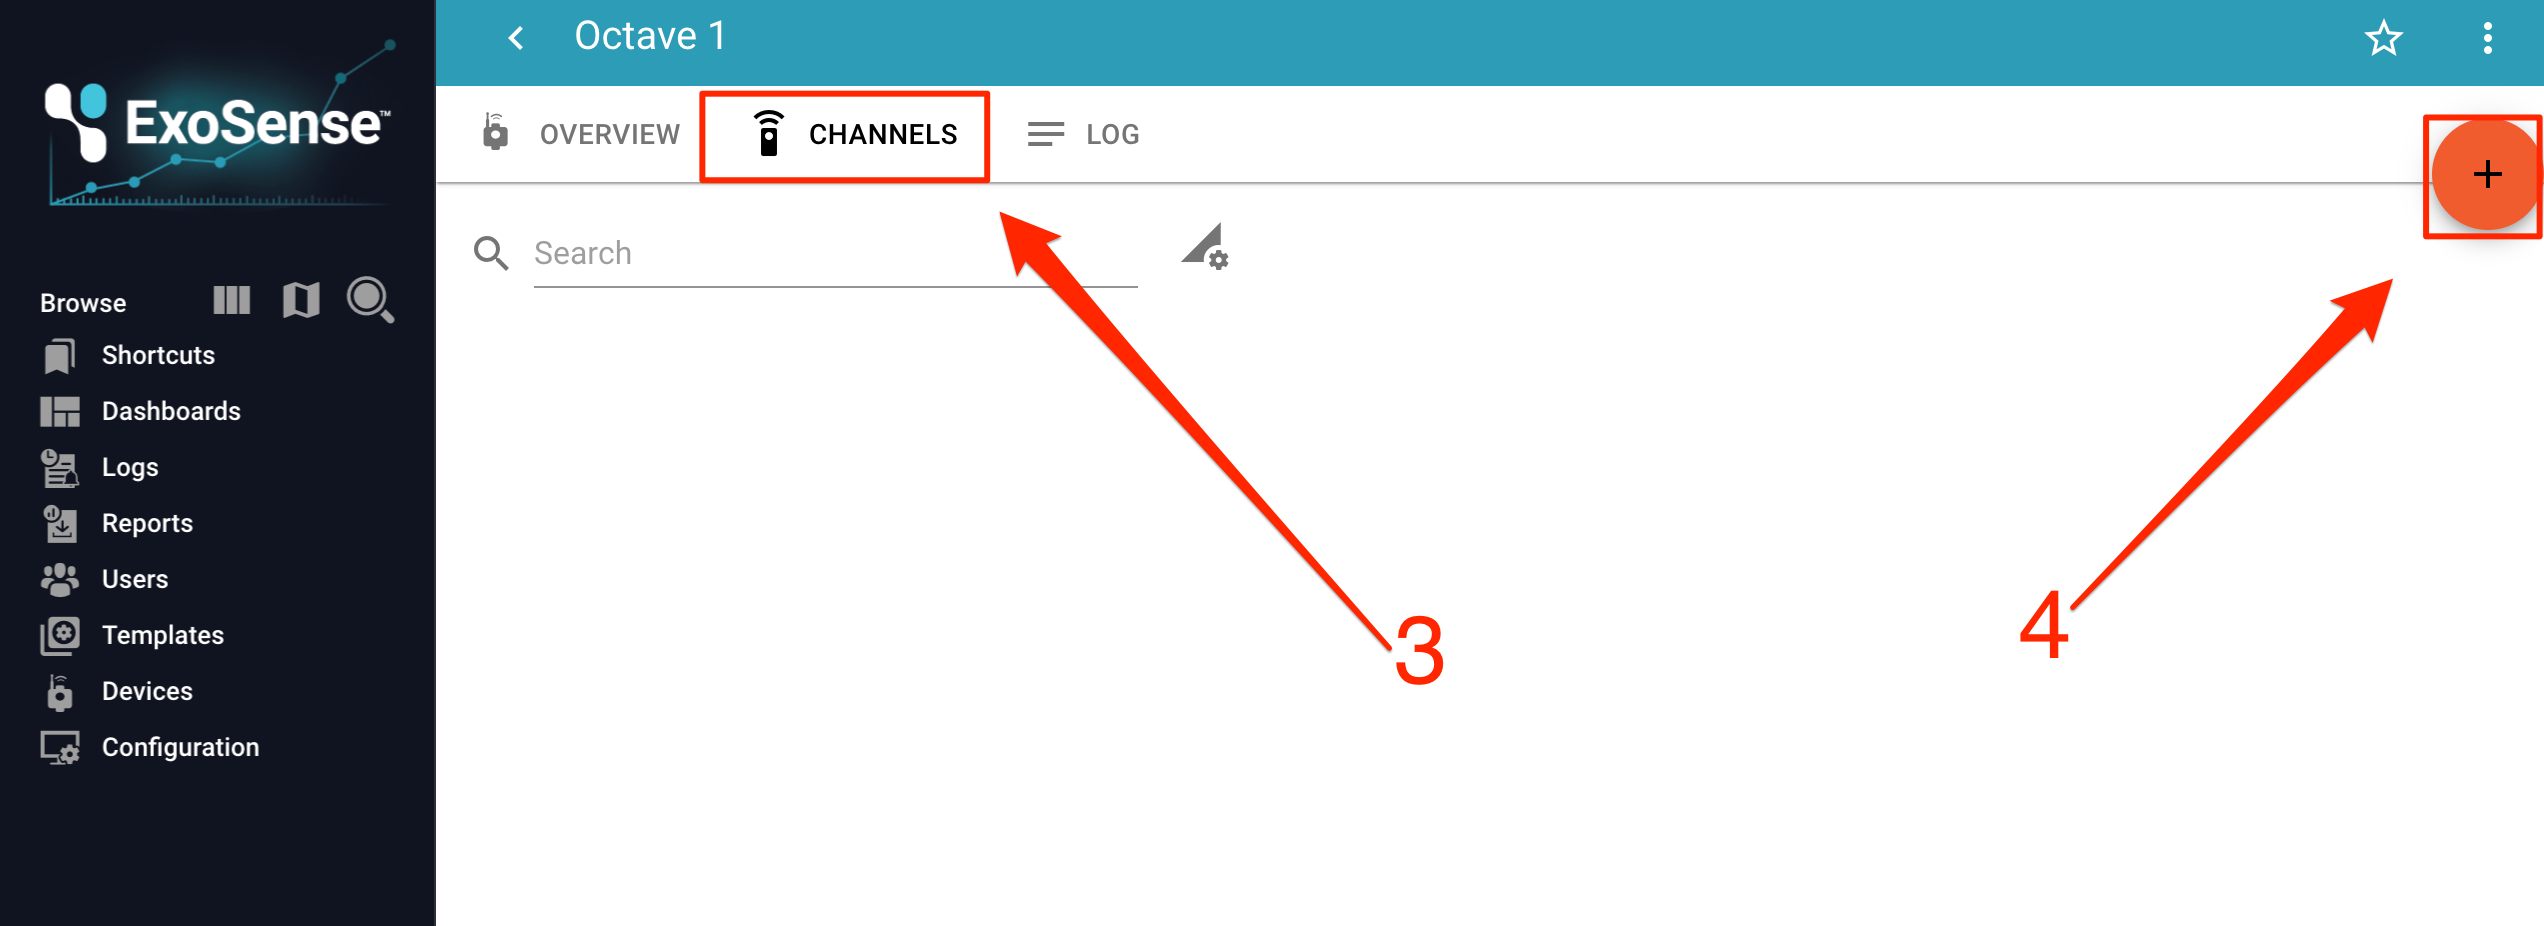
-
Right now, this page will be blank. So let's add a new Channel! Click on the sign located at the top right of the page.
- Each Sensor value being reported by your Octave device will need an individual channel. For the purposes of this example, we will use a Temperature value, though this can be anything.
-
For the first channel, set up your configuration as shown in the image below. Note that
Octaveis defined under Application. Also note the key/value pair under app_specific_config. You will want to replace my_tagname with the name of the resource being reported from Octave.
Example Channel Configuration
For example, if the contents of "elems" in the payload body from Octave is:
{"elems":
  {"sensor 1": 100,"sensor 2": 200}
}
You will create 2 Channels, and replace my_tagname with sensor 1 and sensor 2 respectively for each channel. Click ADD when your Channel has been configured.
# app_specific_config for one of the channels becomes
{"key":"sensor 1"}
# app_specific_config for the second of the channels becomes {"key":"sensor 2"} -
Once you have configured all of your Channels, click on SAVE in the top right corner.

Next Steps
Now that your device is configured, the next step is to create an Asset and start building out Dashboards! For information on this process, check out the Creating New Assets documentation.