TE Connectivity 8911 Wireless Accelerometer
Prerequisites
- Exosite Platform Account \([sign up here](https://info.exosite.com/platform-sign-up)\)
- TE Connectivity 8911 Wireless Accelerometer
- LoRa App Key, Dev EUI, and App EUI \(Provided with the 8911 sensor\)
Connect LoRa Network Server
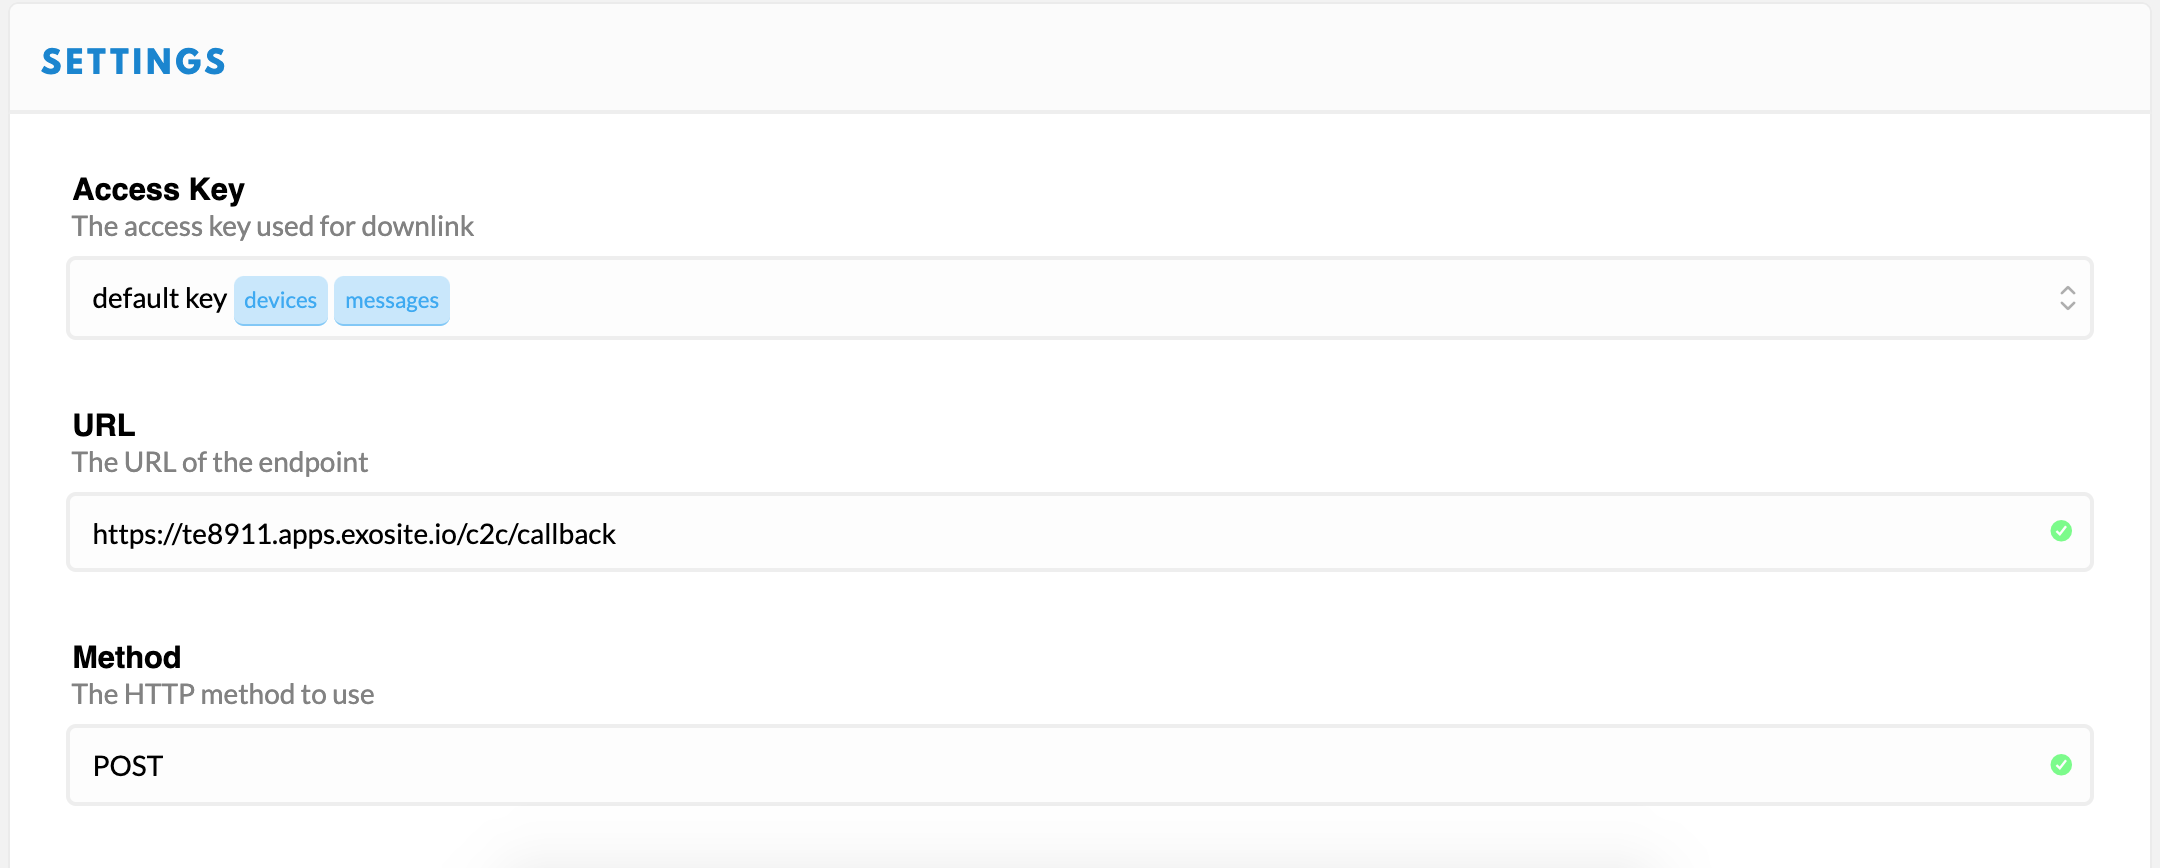
Connect the LoRa Network server by sending the lora packets to https://te8911.apps.exosite.io/vendor/data_in
Step-by-Step instructions for utilizing TheThingsNetwork and MachineQ are below.
Using TheThingsNetwork
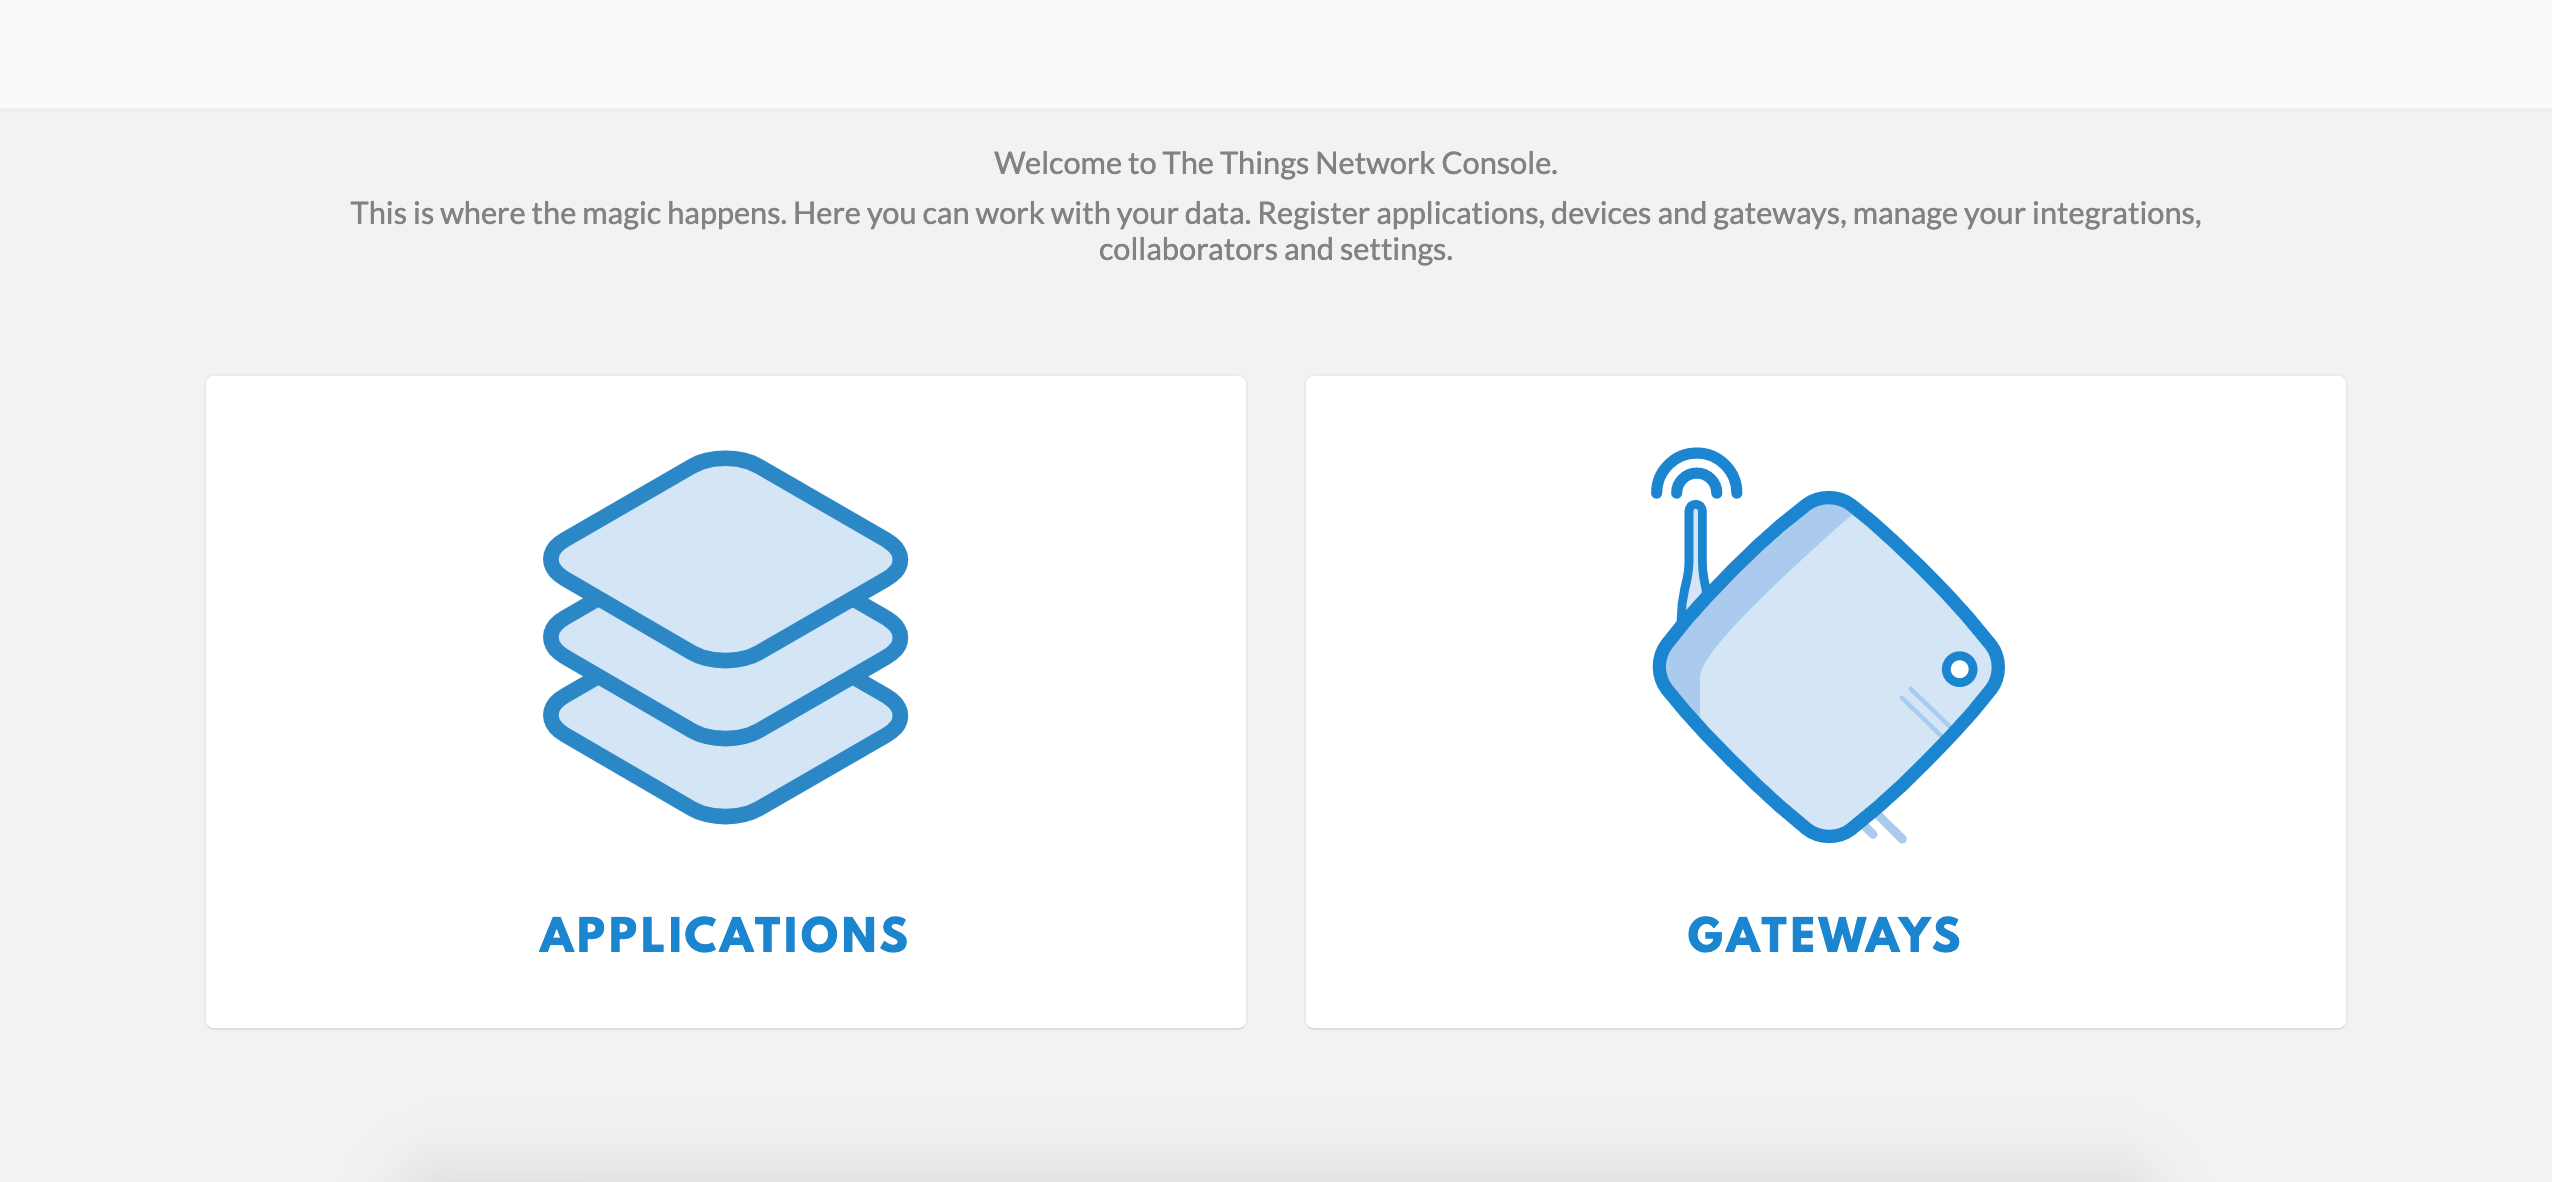
Access TheThingsNetwork at https://console.thethingsnetwork.org/
If your LoRa Gateway is not connected to TheThingsNetwork, documentation can be found here: https://www.thethingsnetwork.org/docs/gateways/
The Things Indoor Gateway is an affordable LoRa gateway good for proof of concept applications.
Adding ExoSense Integration
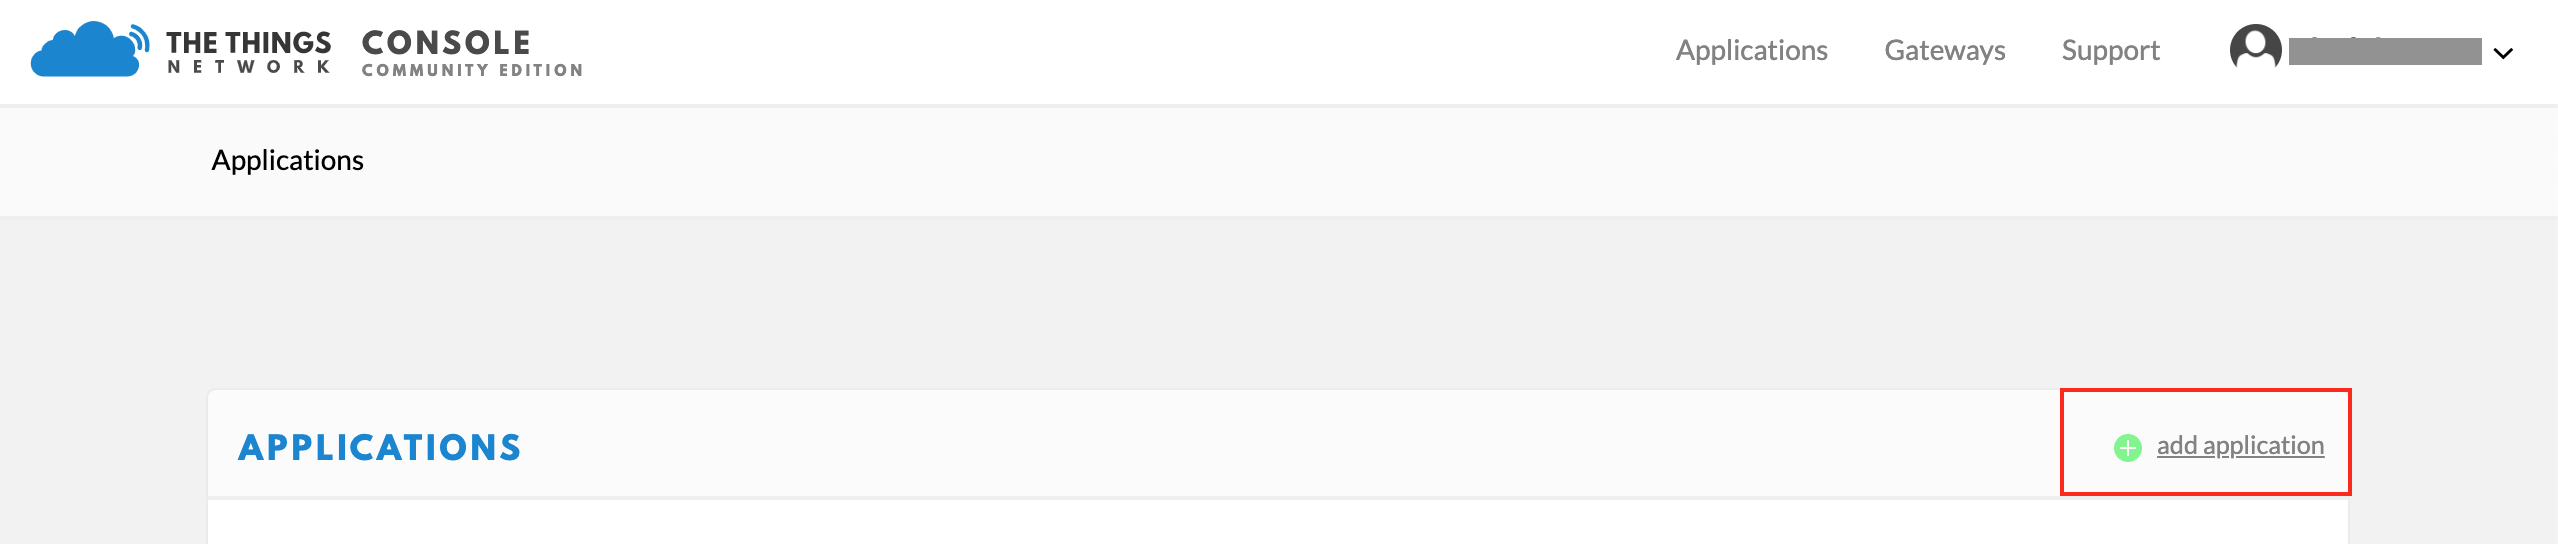
For the first IoT Mini Start kit, add an application in TheThingsNetwork console.
Select "Applications"
Select "add application"
For this example, the Application ID will be "8911"
This LoRa device is in the U.S, so "ttn-handler-us-west" is selected for the Handler Registration.
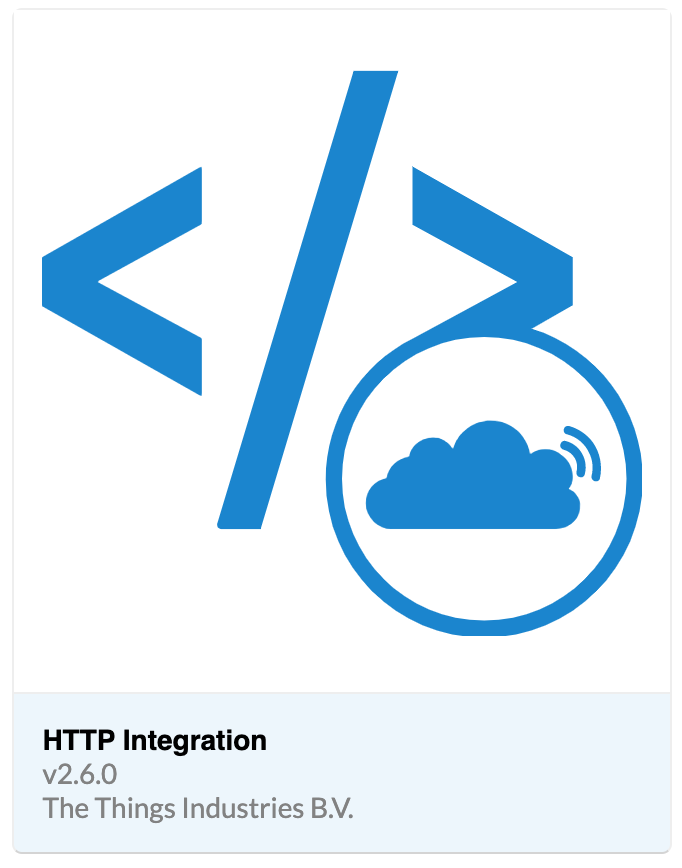
Select "Integrations" and "add integration" in the application.

Select "HTTP Integration"
Input the URL "https://te8911.apps.exosite.io/vendor/data_in" and select a unique Process ID.
Adding Device
Before adding a device, ensure the Application EUI provided by TE is included in the TTN application
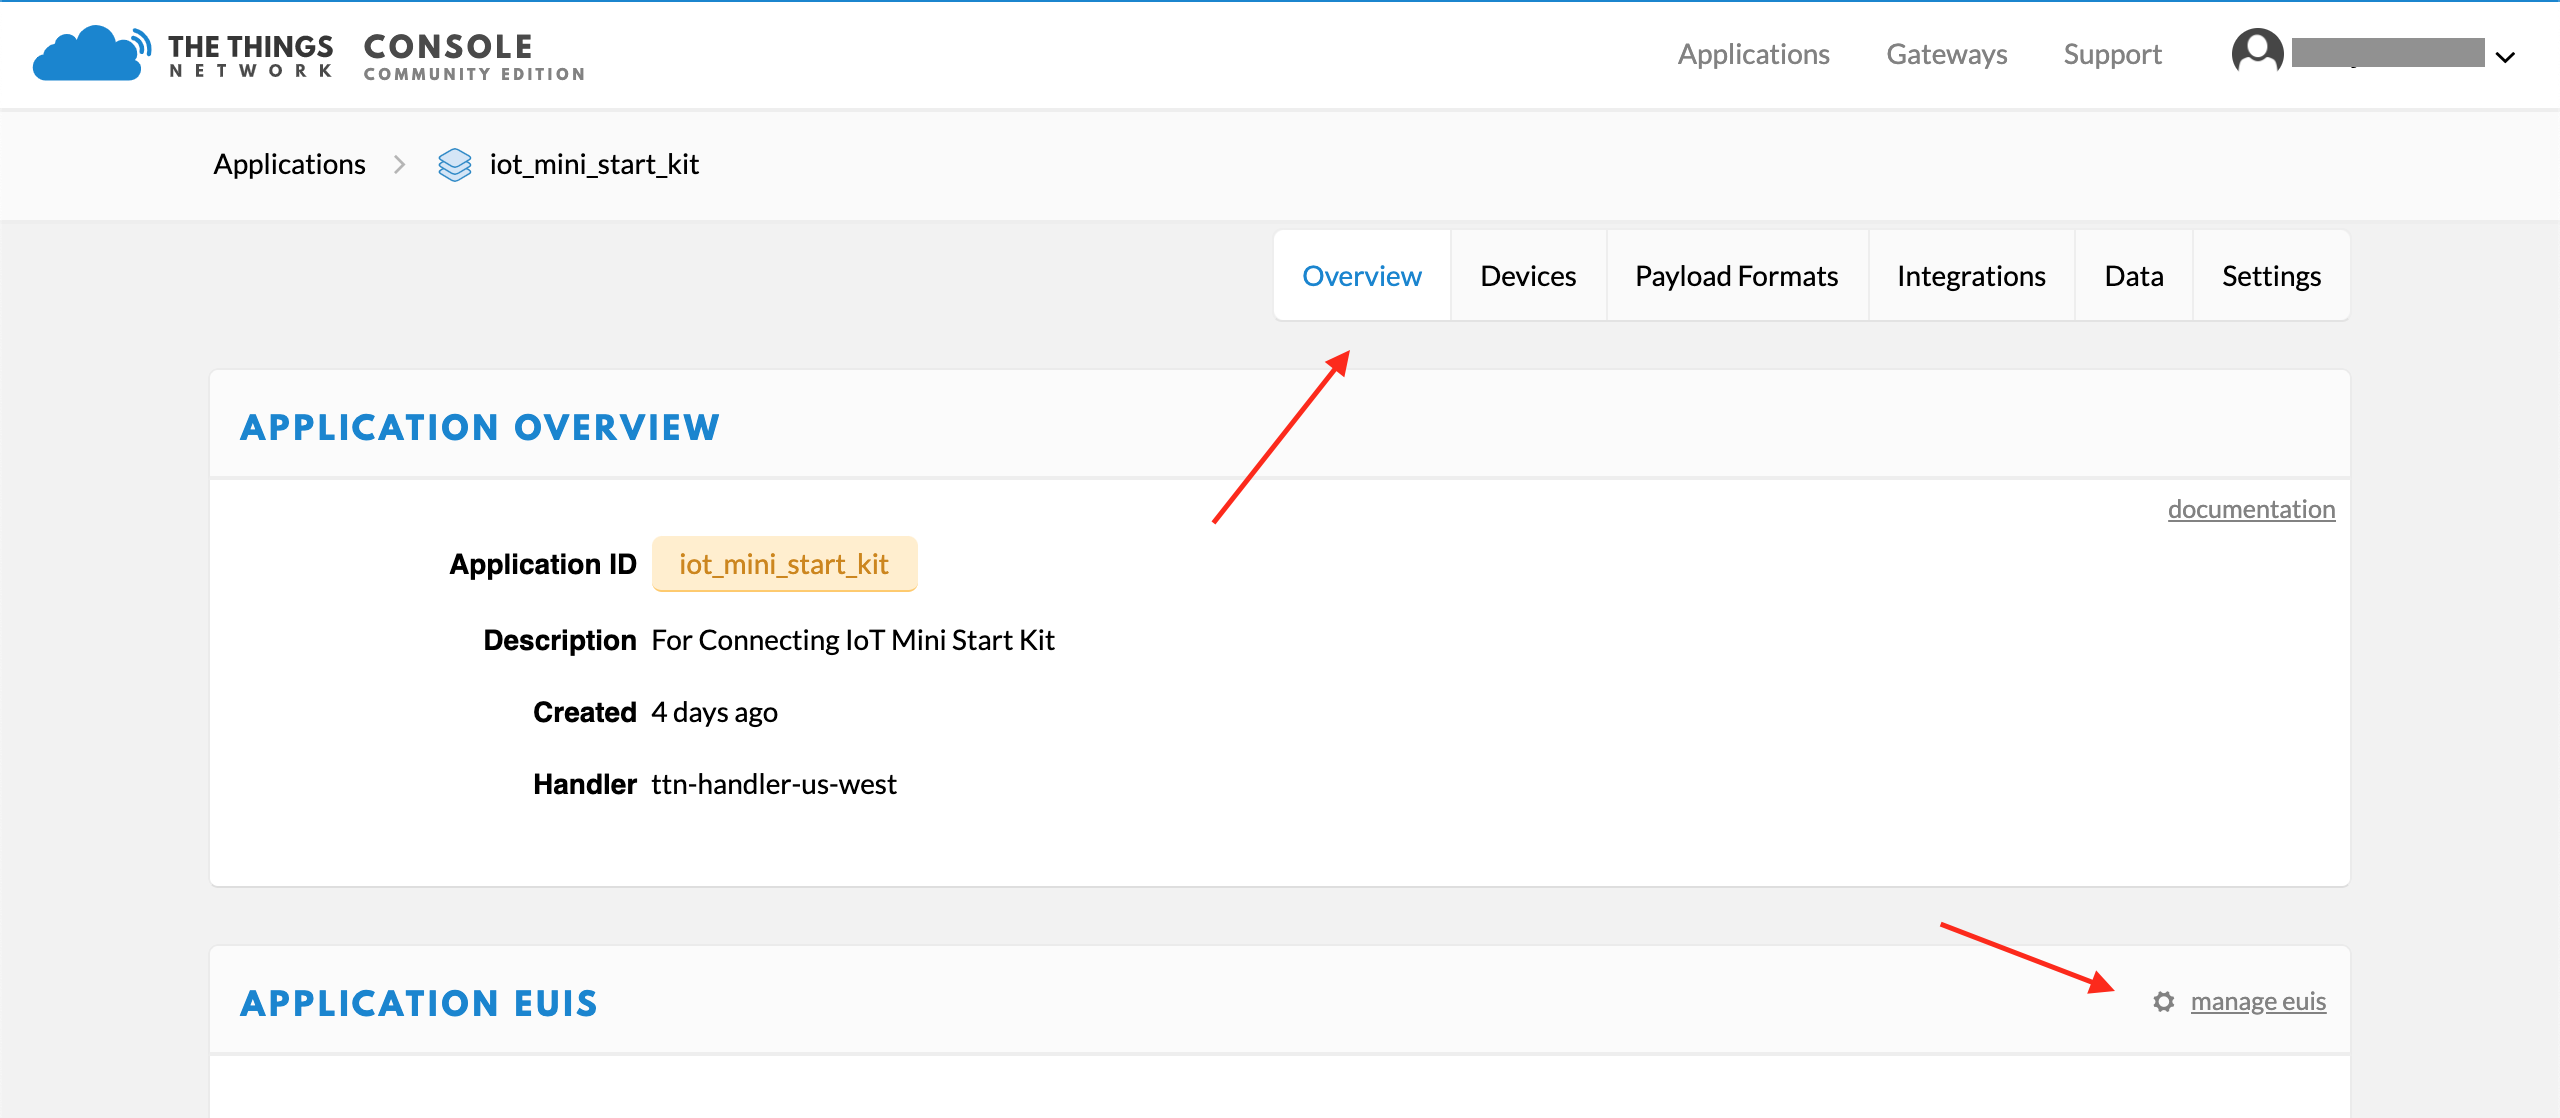
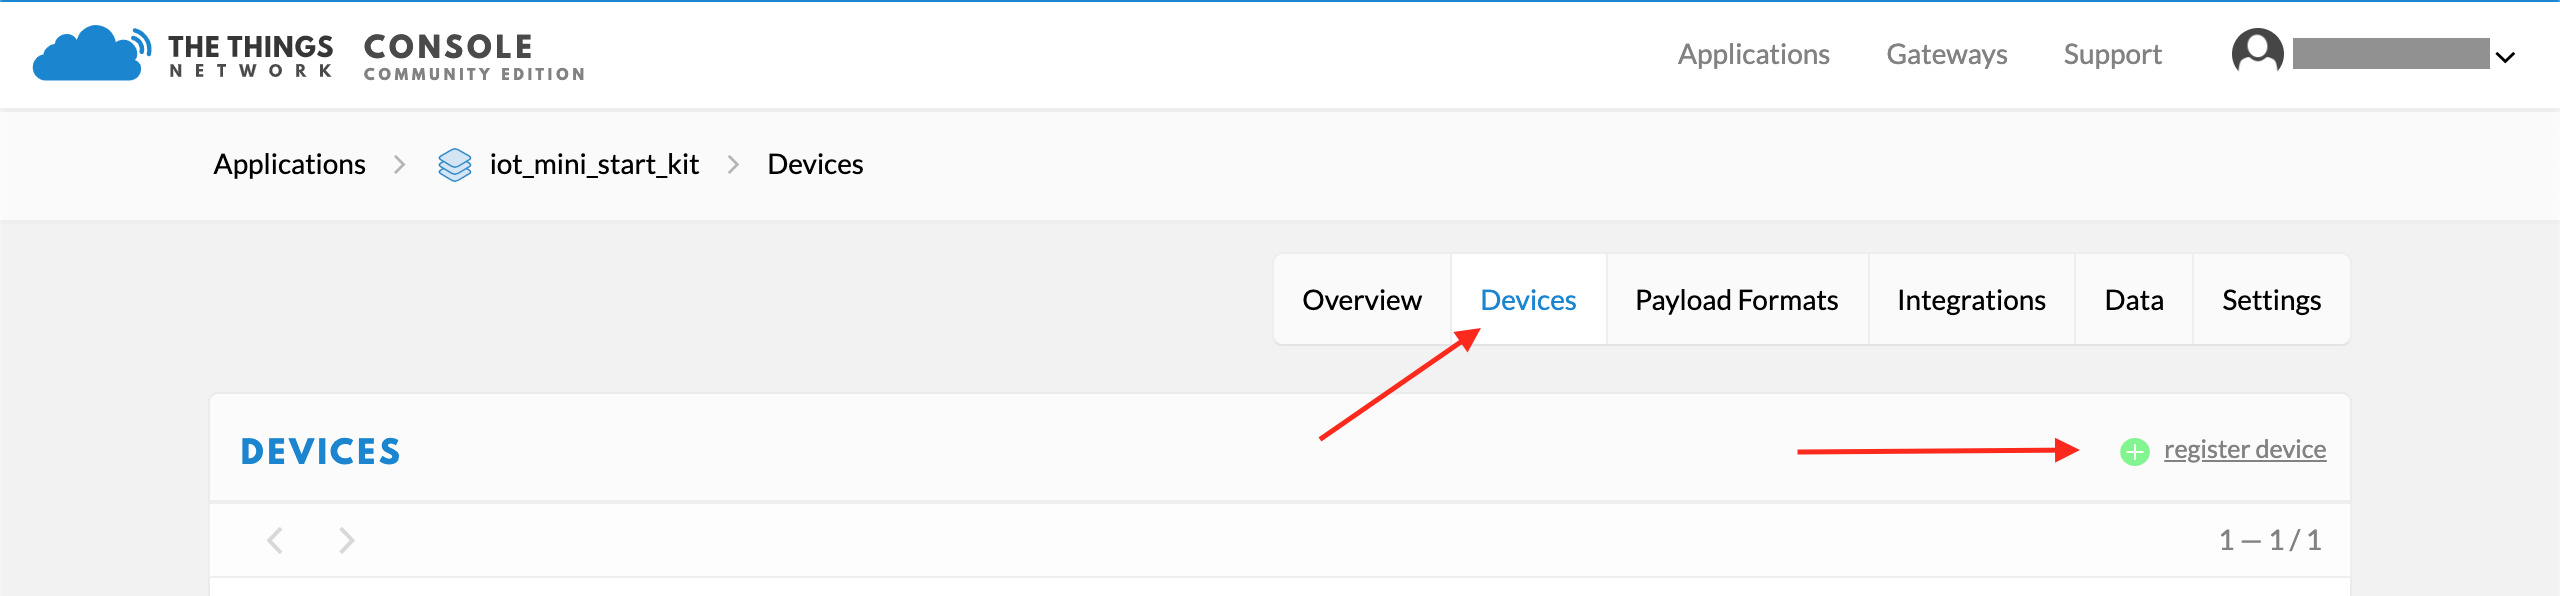
Navigate to the Devices tab after the Application EUI is added
Select "register device"
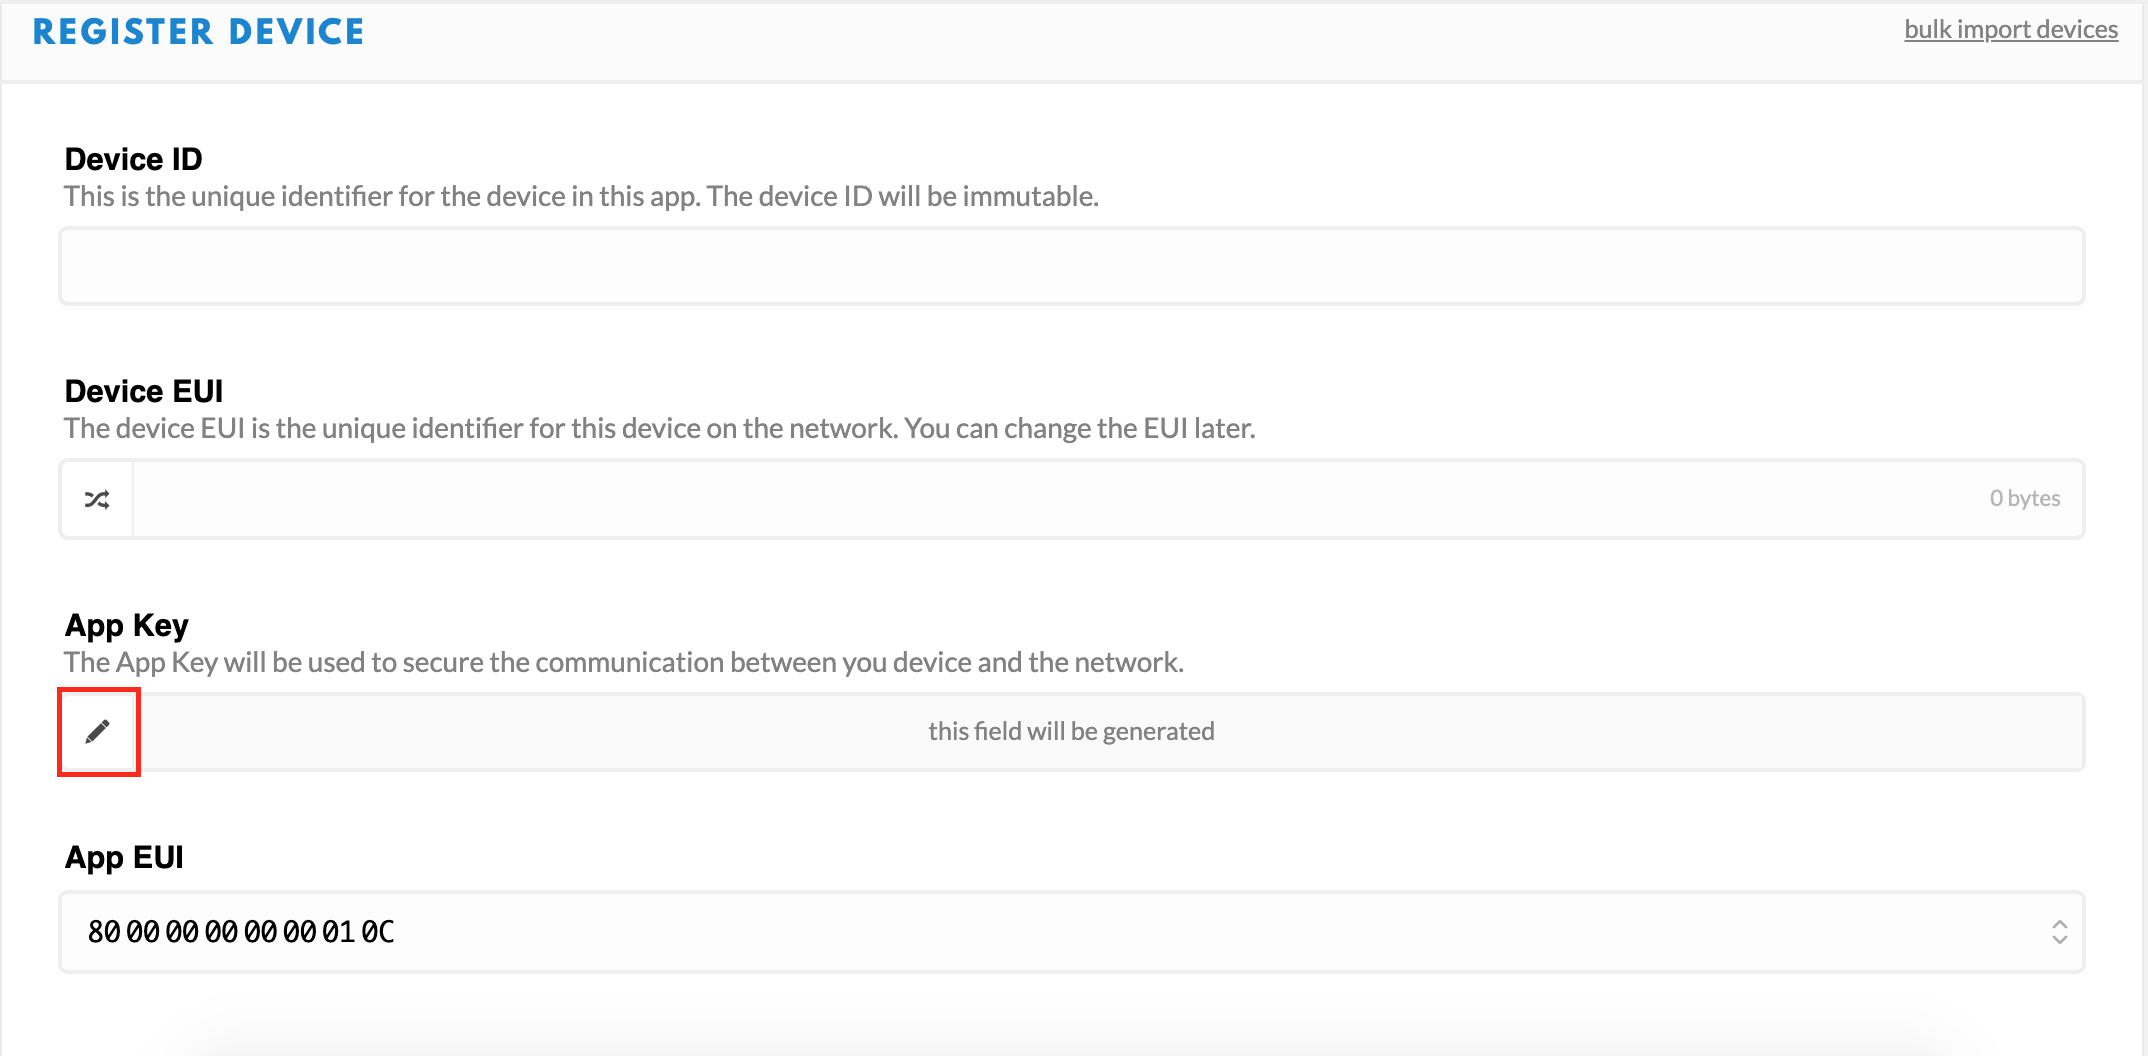
Enter the Device EUI, App Key, and App EUI provided with your IoT Mini Start Kit. Note, select the pencil icon to input an App Key manually.
Skip to "Adding Device to ExoSense"
Using MachineQ
To utilize a MachineQ gateway, login to MQcentral.
Connect your gateway using MachineQ's Documentation
Add Exosite as an integration
Select the "Integrations" tab
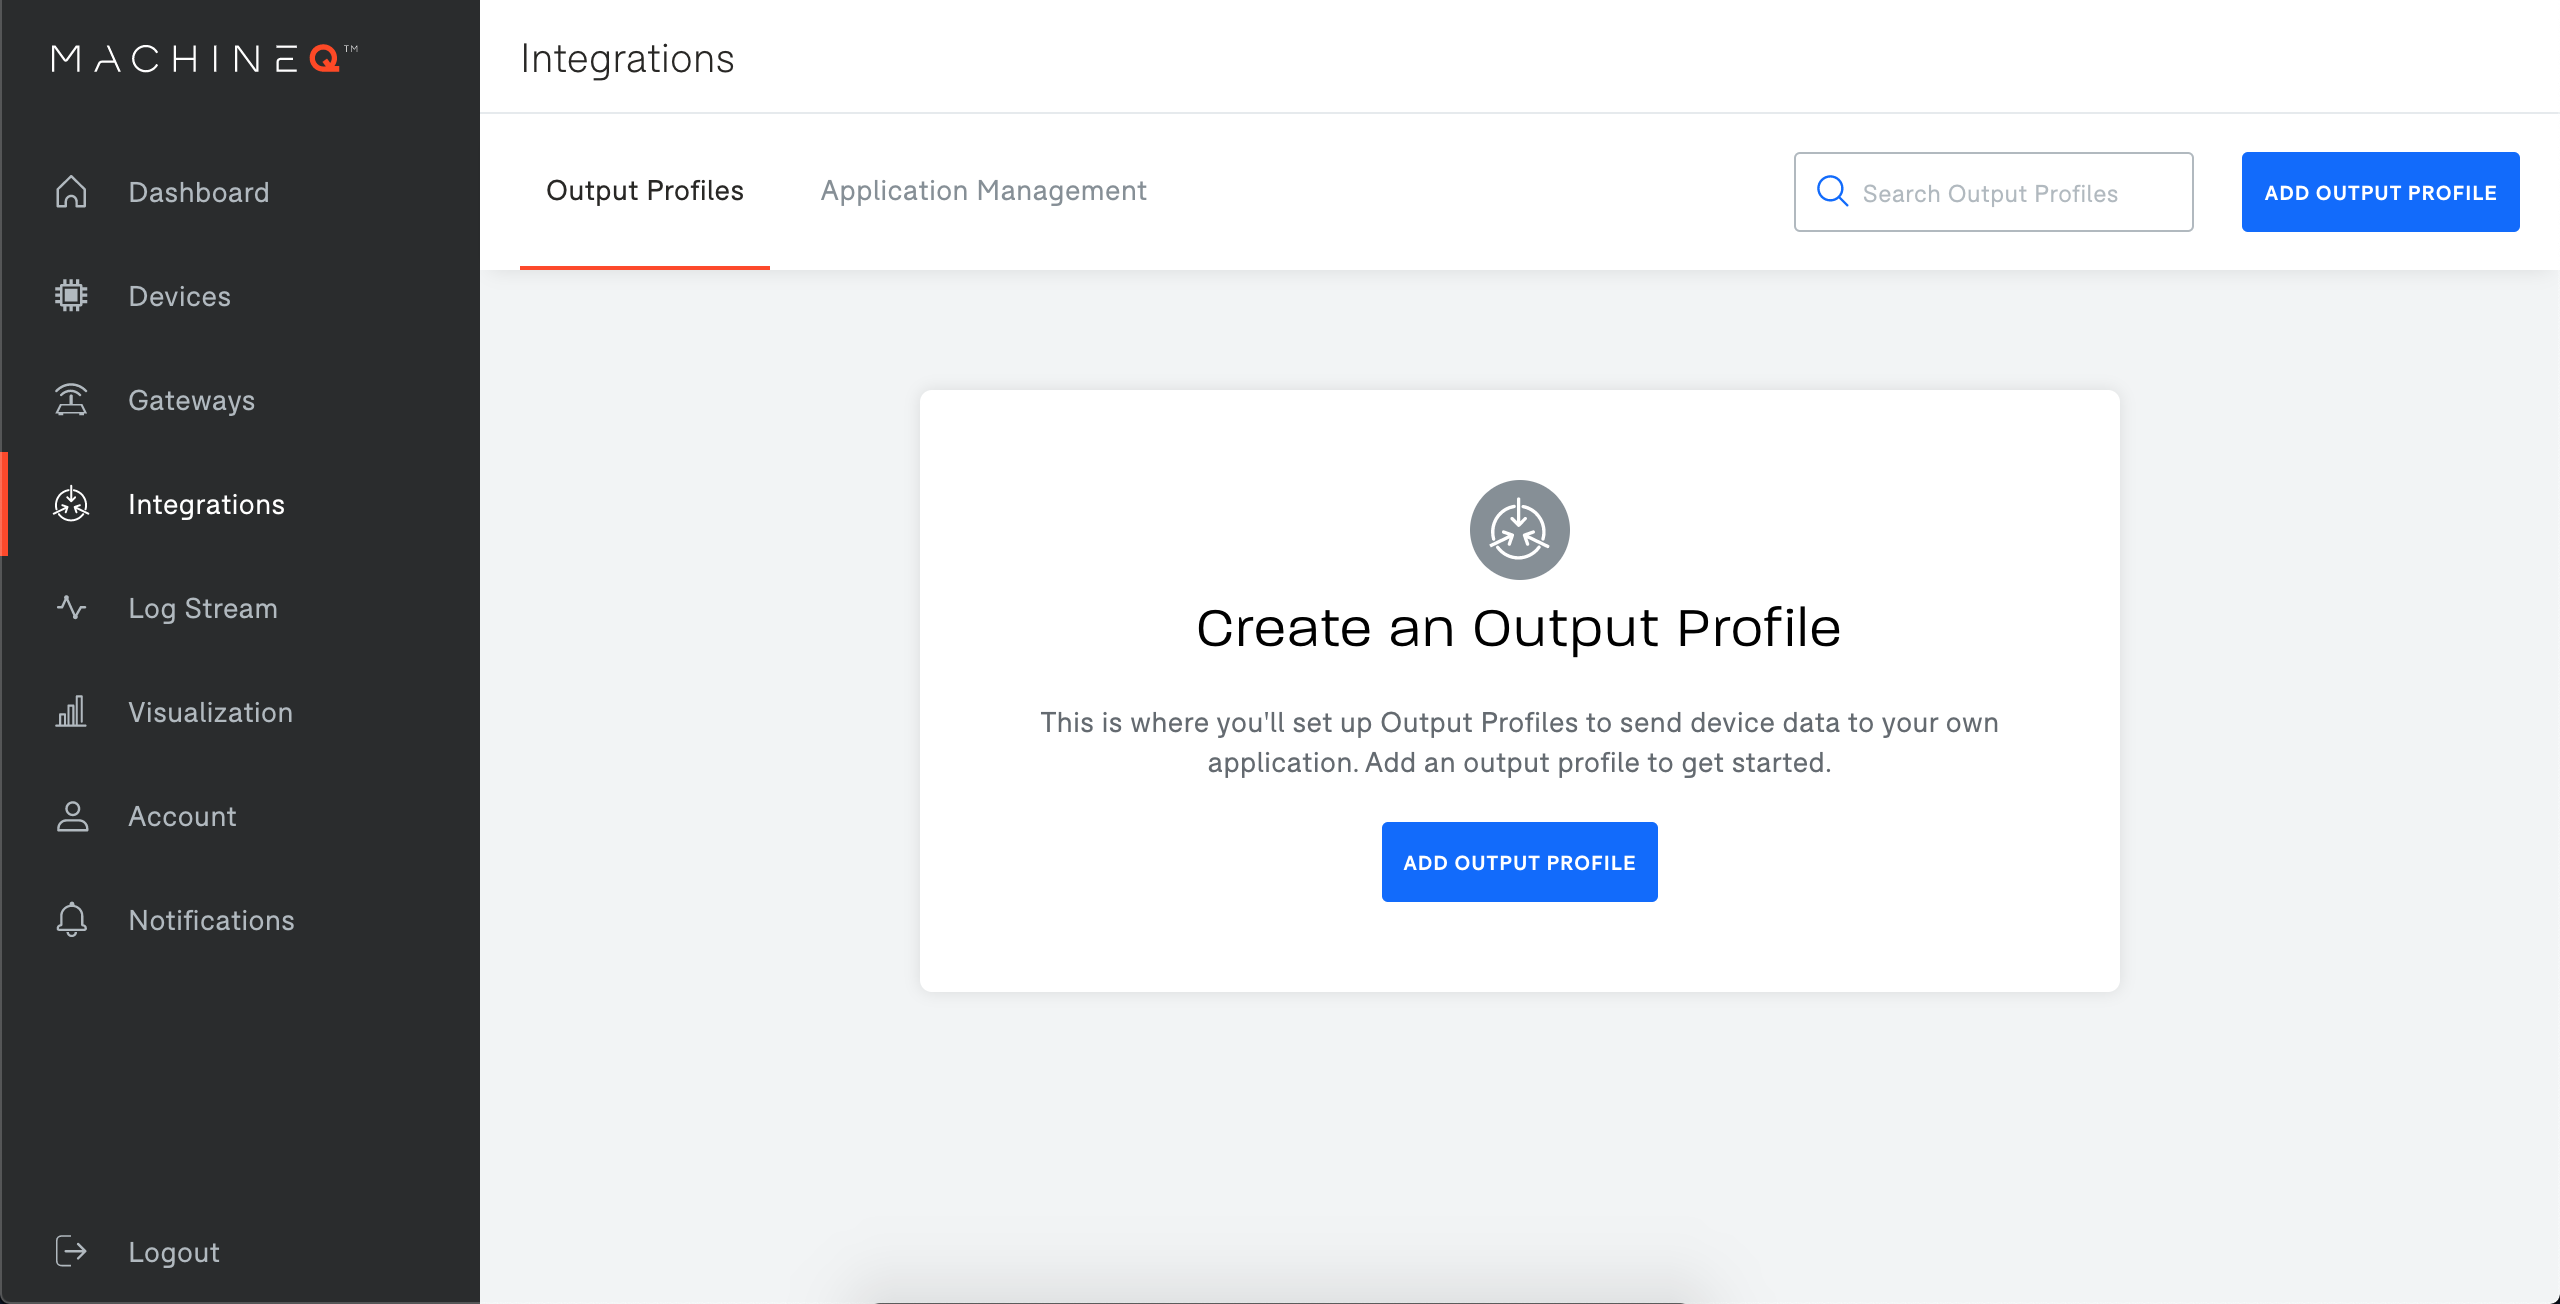
Add an Output Profile, in this example we will name ours "Exosite HTTPS"
Add a Webhook destination
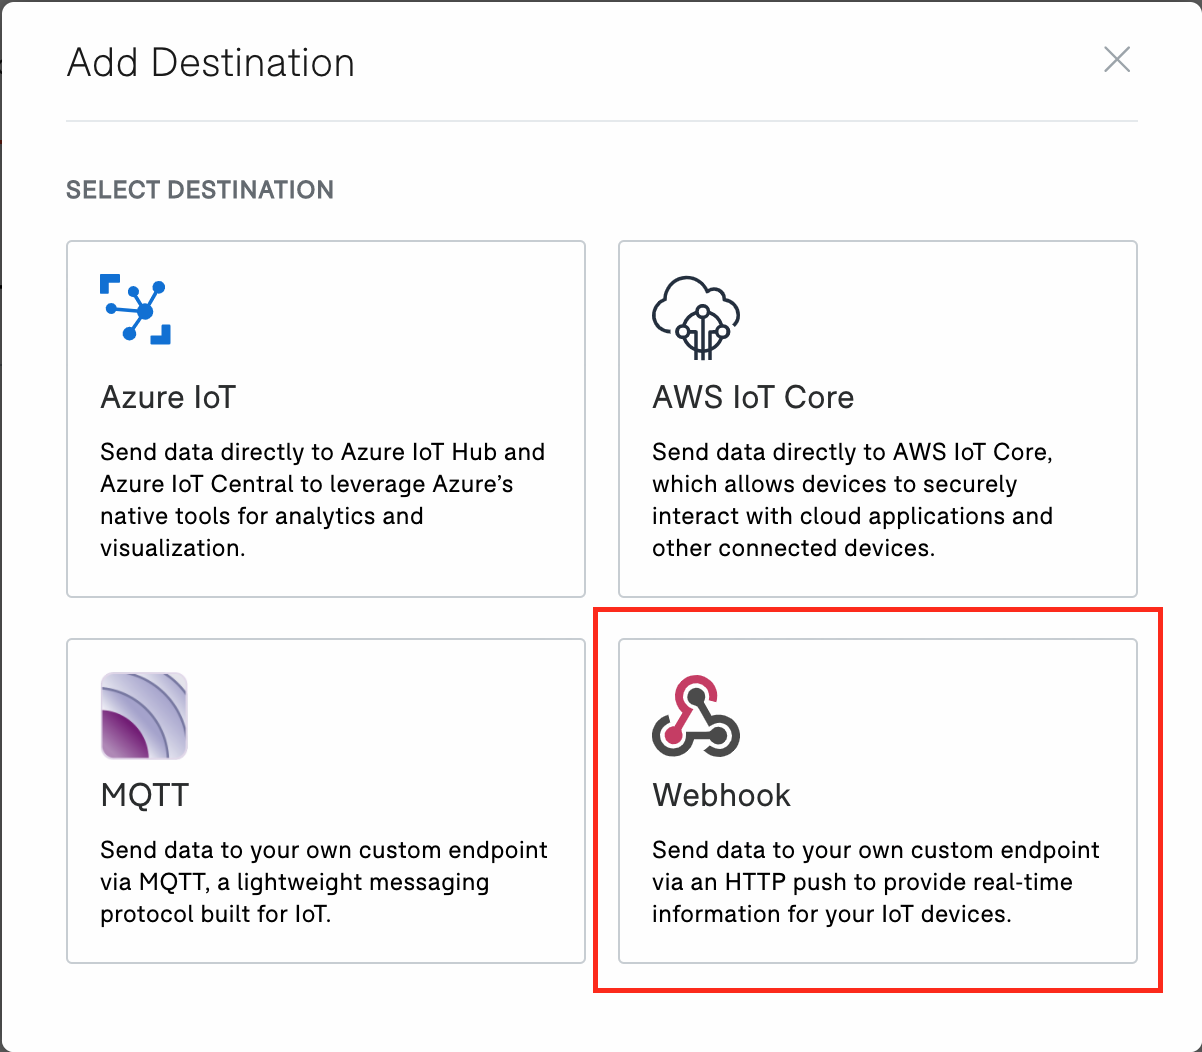
For the URL, enter "https://te8911.apps.exosite.io/vendor/data_in" and add the destination.
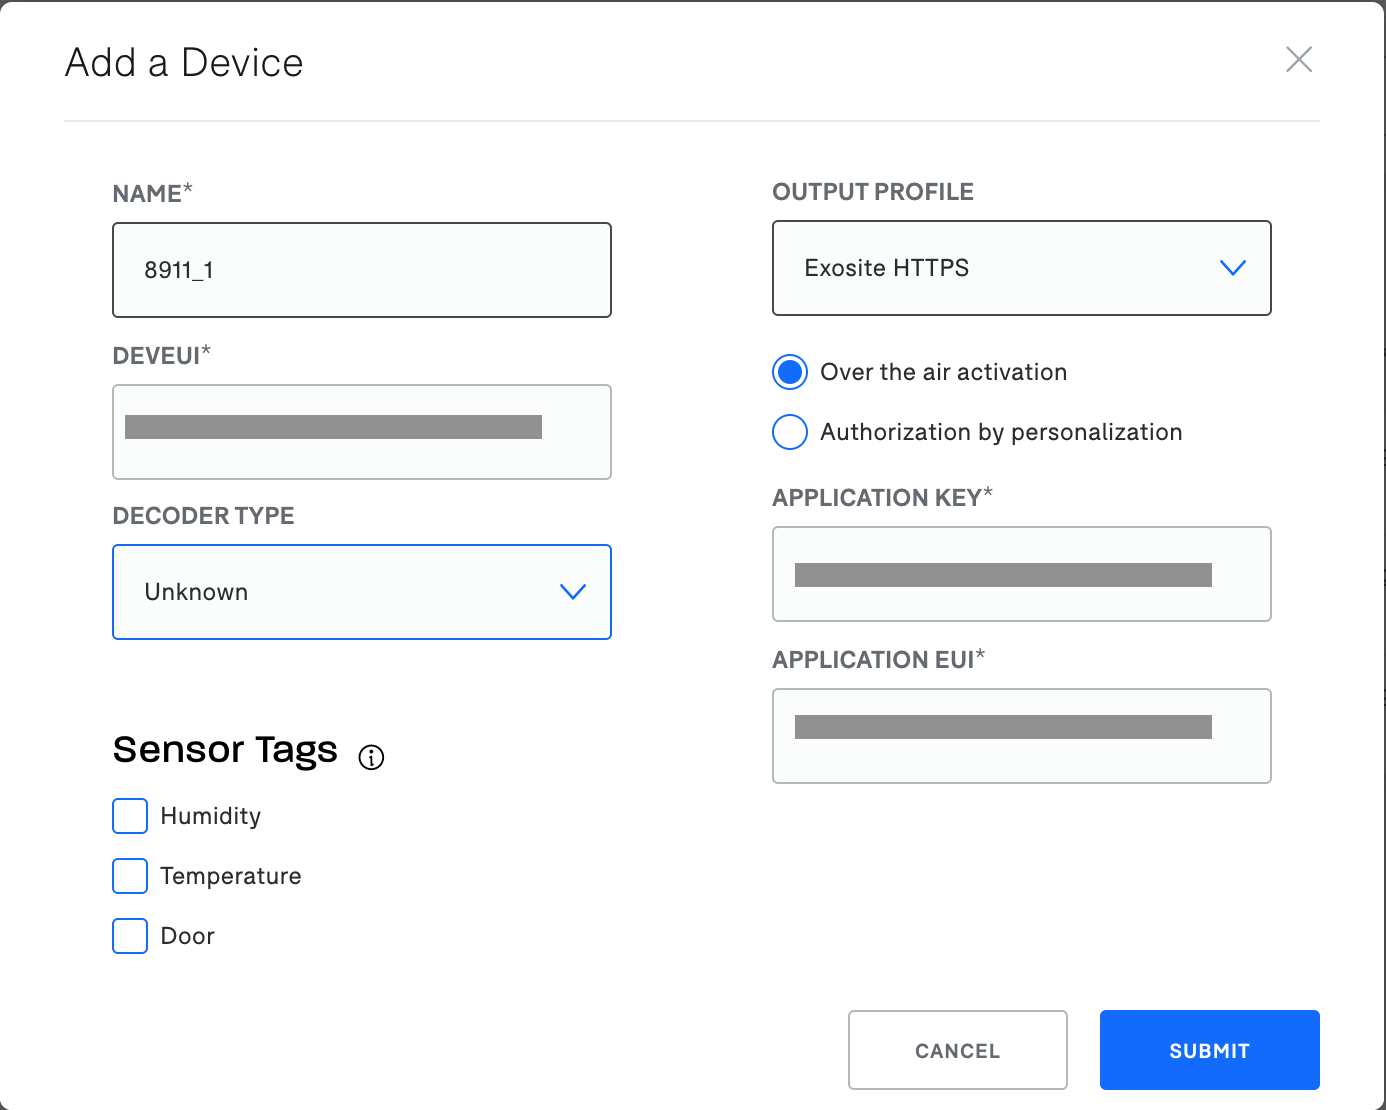
Add Device
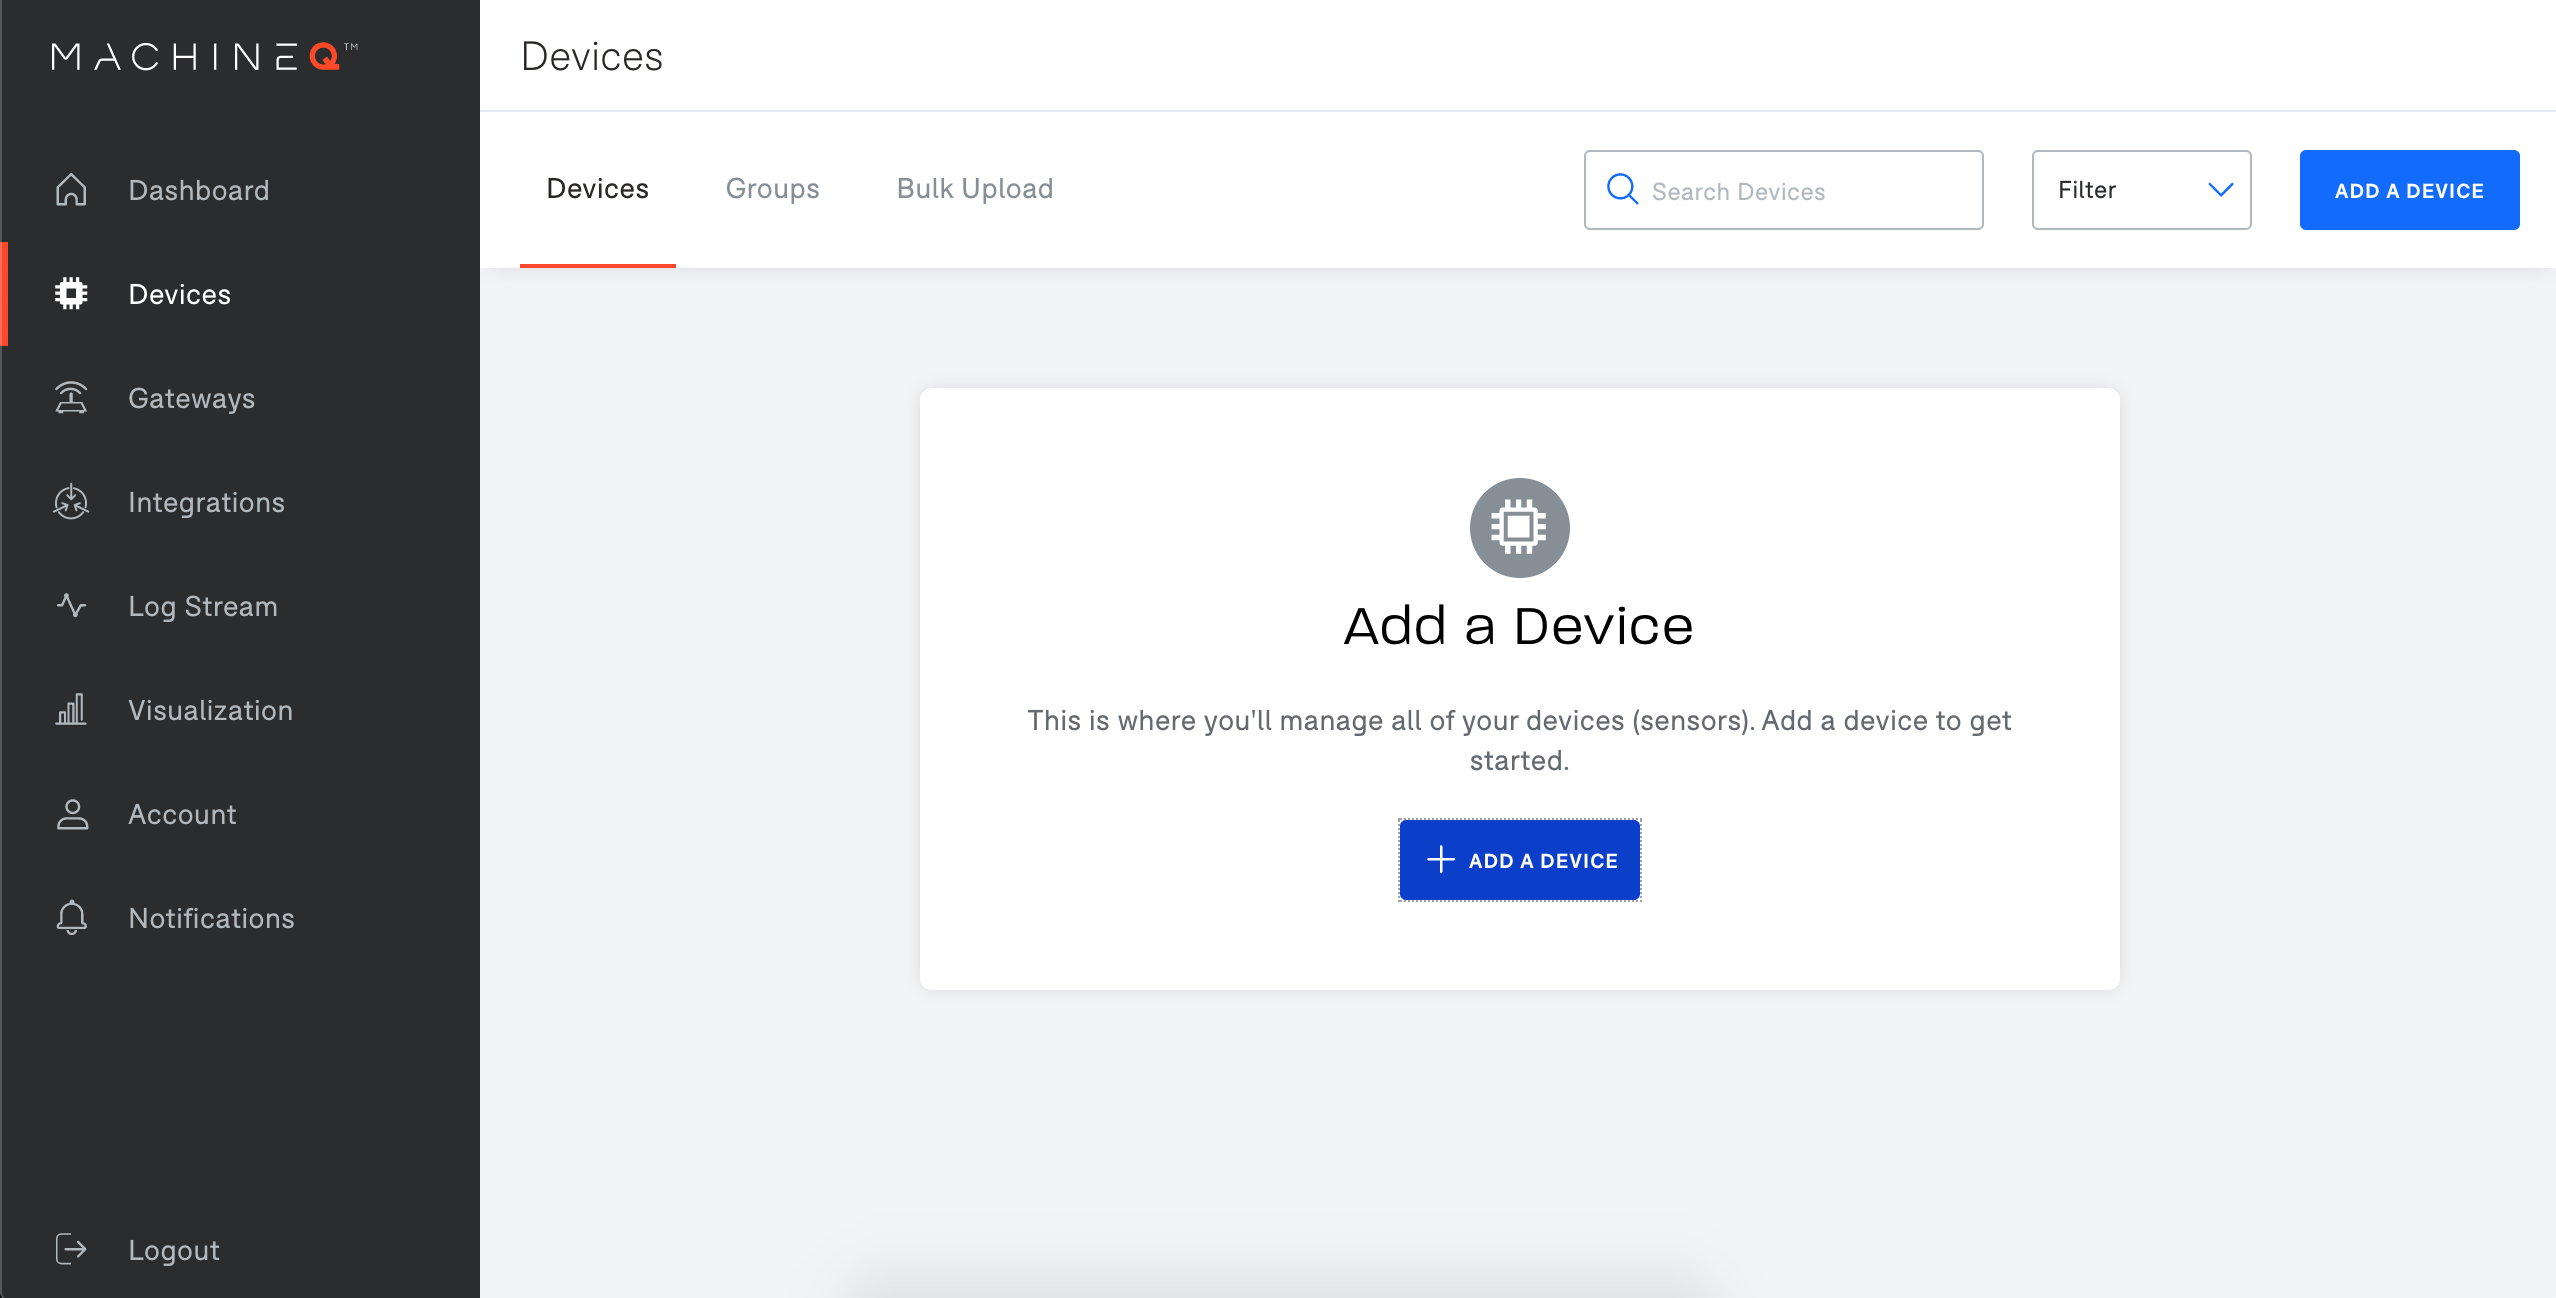
Add a new device with the DEVEUI, APPLICATION KEY, and APPLICATION EUI provided with your IoT Mini Start Kit.
Use the newly created output profile and "Over the air activation"
Once the device is sending data, you can claim it in ExoSense
Adding Device to ExoSense
Adding "IoT Mini Start" Service to ExoSense
Adding the service to ExoSense is only required when adding the first IoT Mini Start Kit to your application.
In the Exosite Platform, navigate to the IoT Marketplace and find the "TE Connectivity 8911 Accelerometer" Service.
Select "Add to Solution"
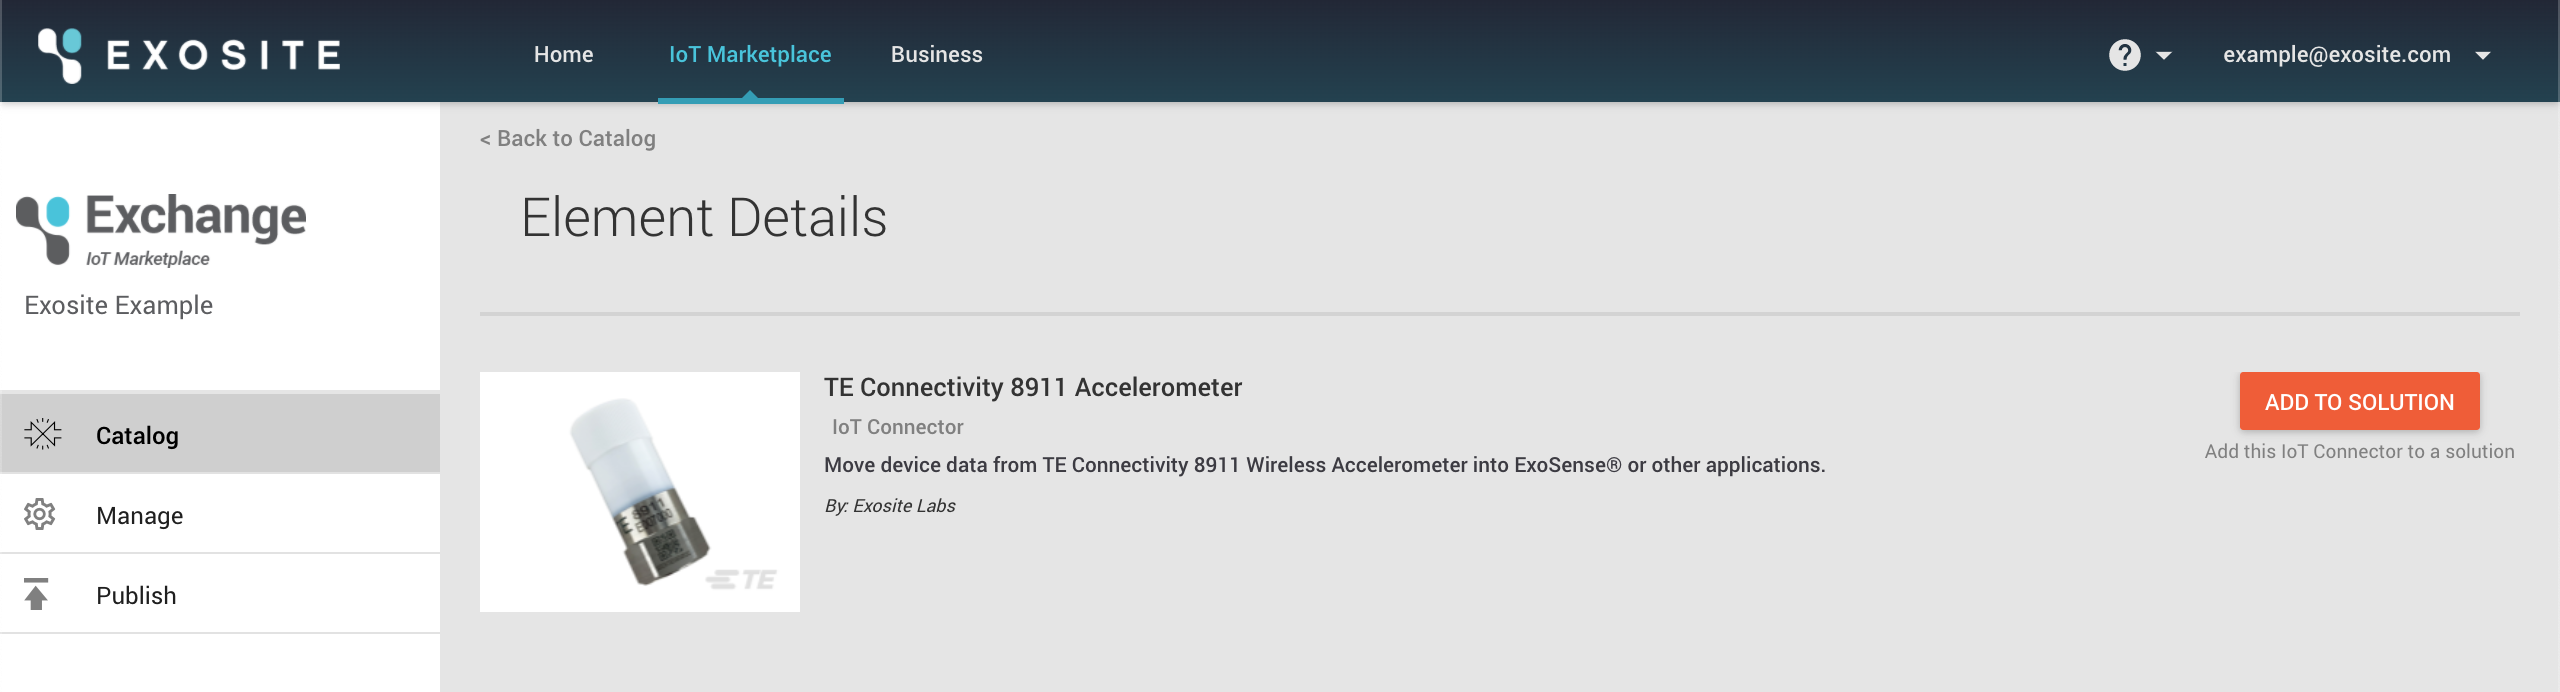
Select your ExoSense Application, and select "ADD TO SOLUTION".
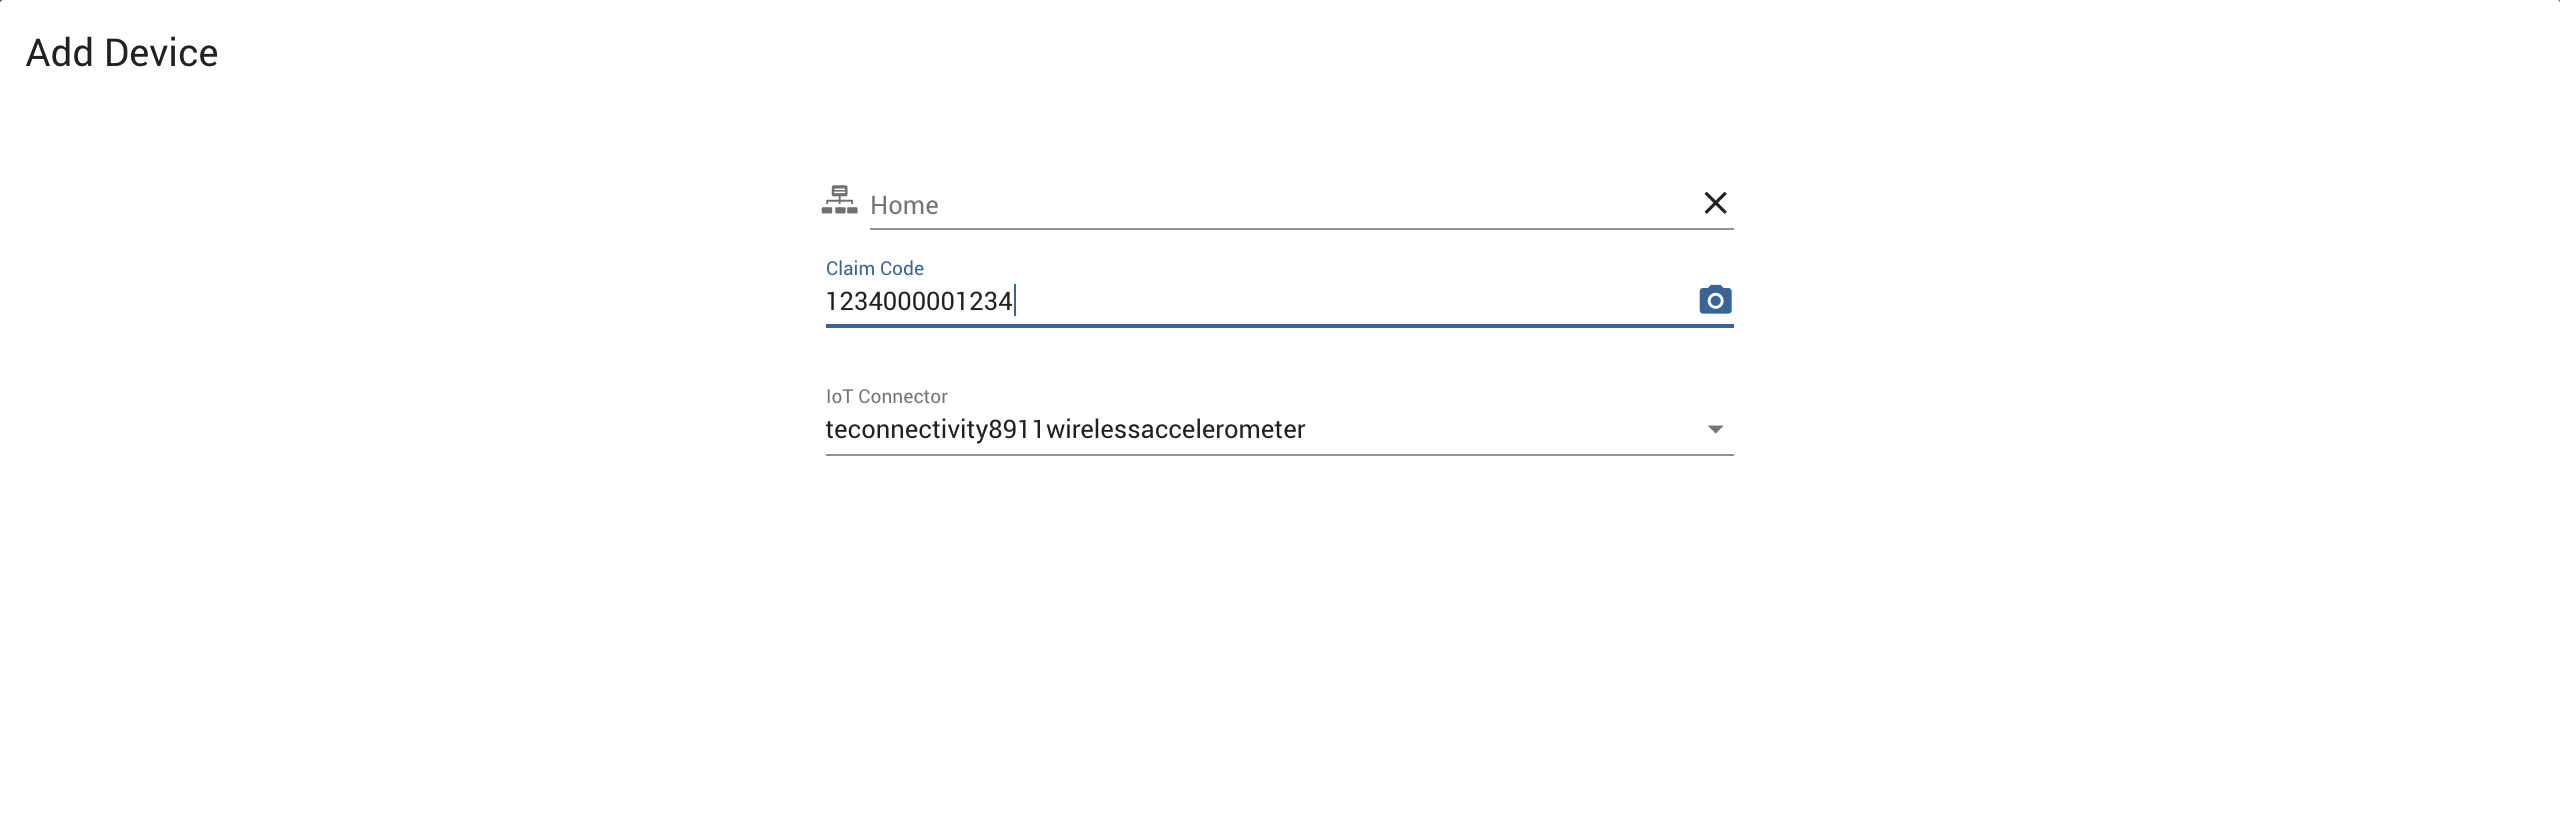
Claiming Device
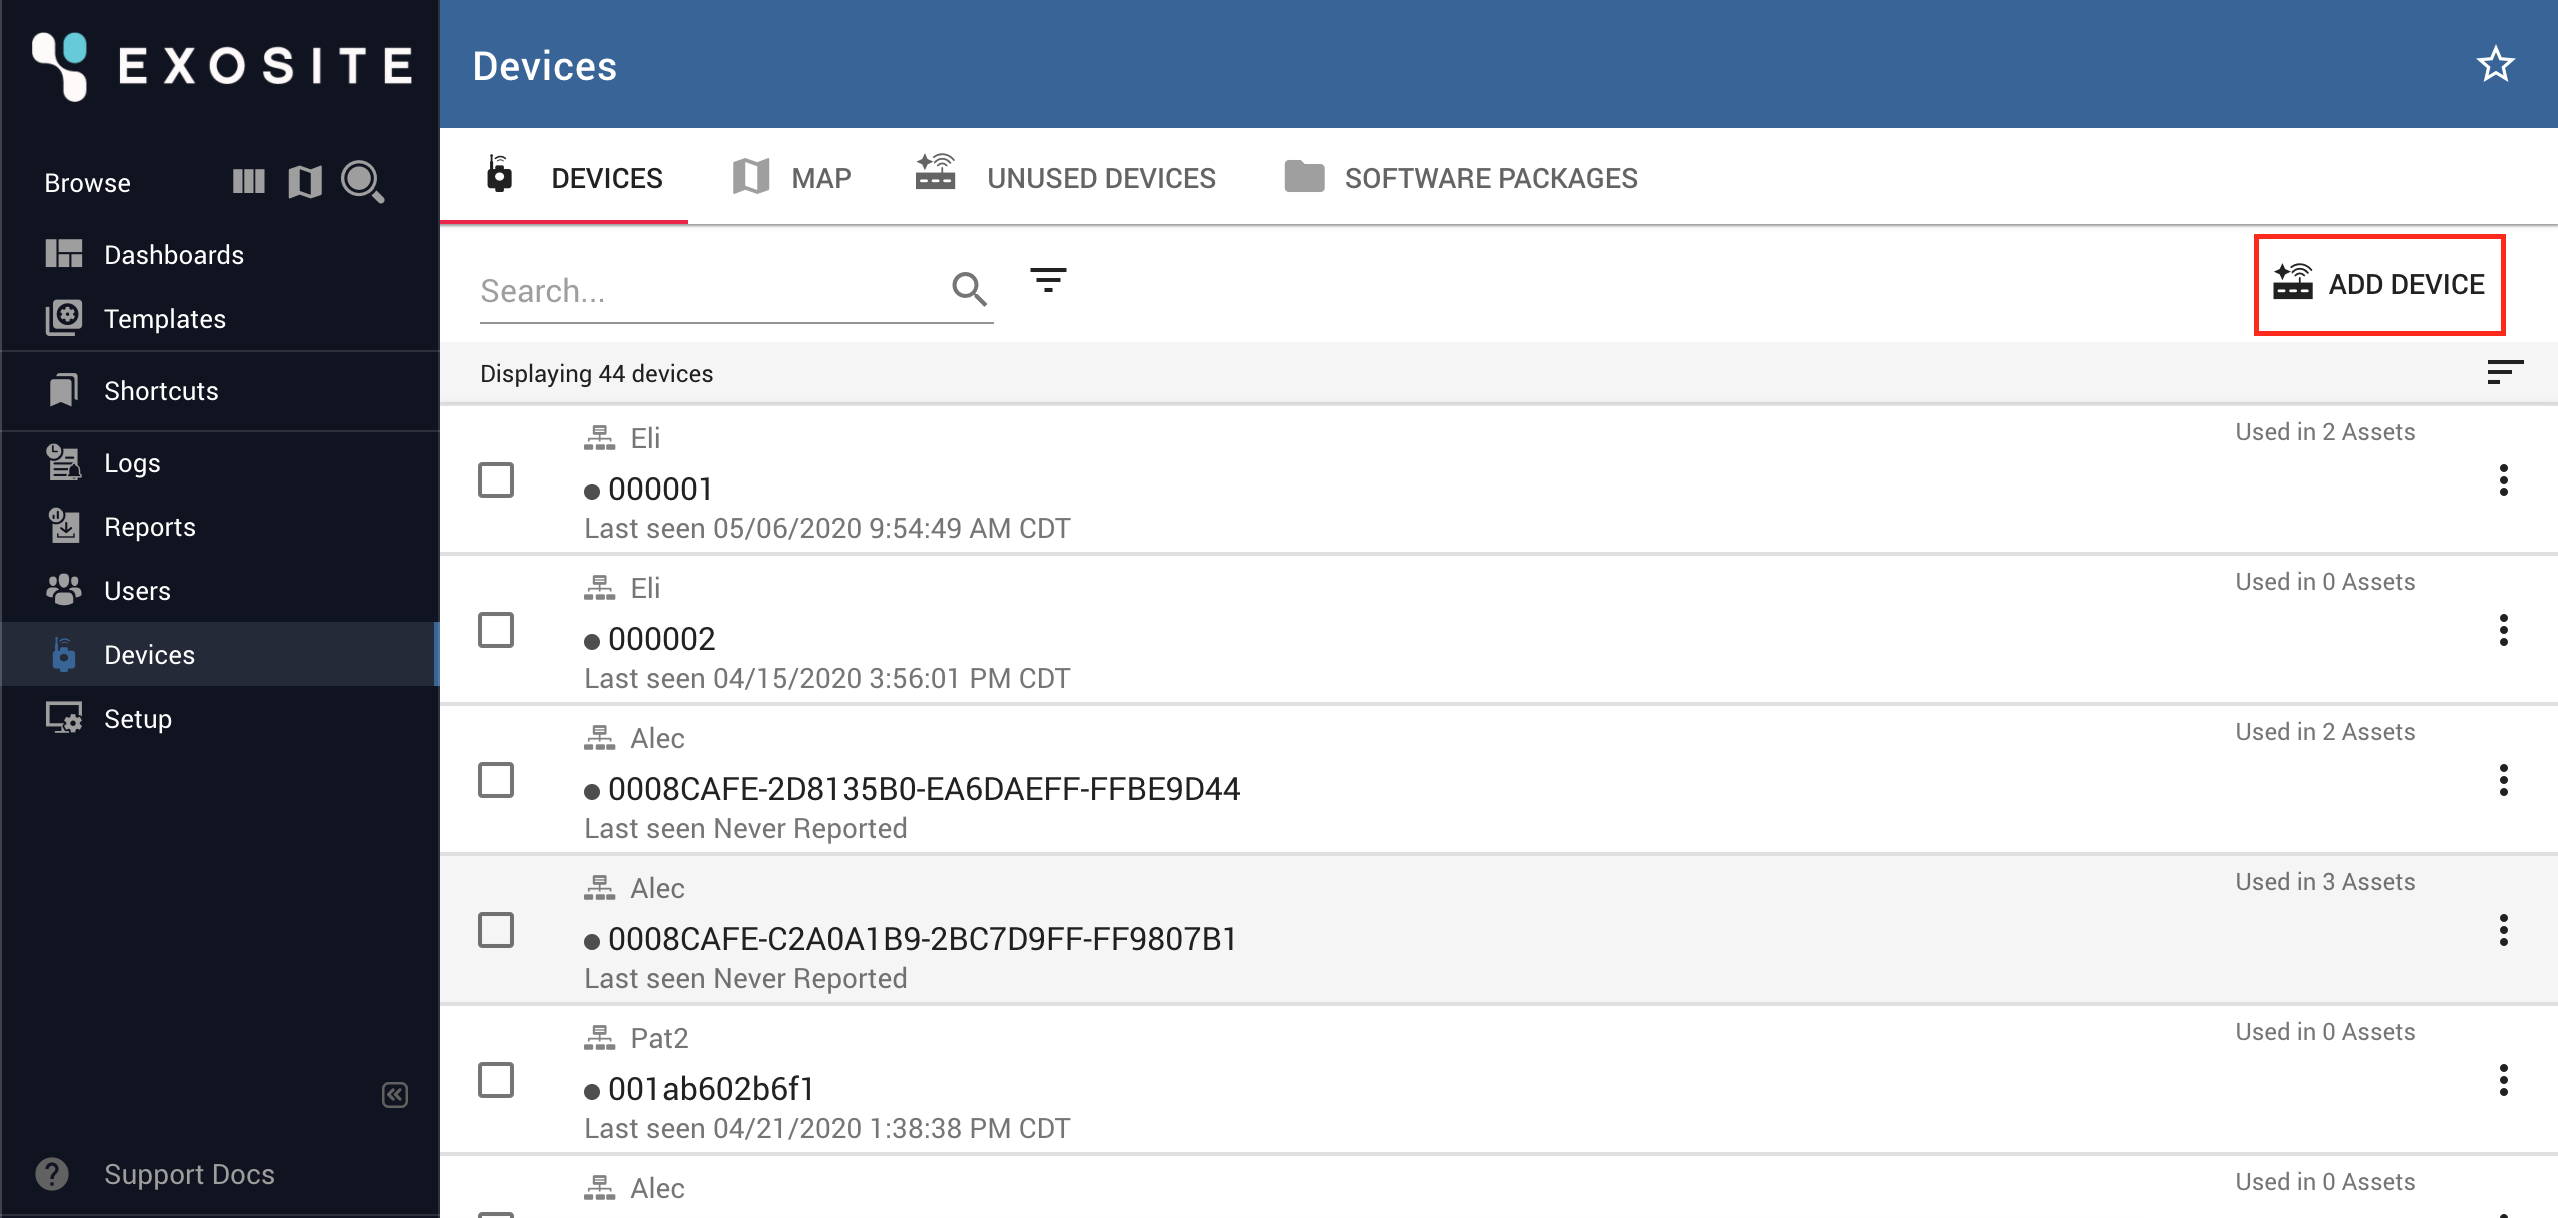
To claim a device, navigate to your ExoSense Application.
In the devices window, select "ADD DEVICE"
Select the group that you'd like to add the device to.
Enter the DeviceEUI for the claim code
Select iotiministart for the IoT Connector
Select "CLAIM"